Table of Contents
Advertisement
Quick Links
Advertisement
Table of Contents

Related Manuals for Philips NightBalance


Summary of Contents for Philips NightBalance
- Page 1 NightBalance Sleep position therapy Instructions for use...
-
Page 2: Table Of Contents
Content Introduction ..........3 Care and maintenance ......29 Charging the Sensor Device Intended use ..........4 Cleaning NightBalance products Traveling with NightBalance Intended use Disposal Indications for use Maintenance Contraindications for use Warnings and cautions ......5 Troubleshooting ........31 Getting started .......... -
Page 3: Introduction
Read all instructions for use before using NightBalance. Contact your physician if you have any questions as to whether NightBalance is right for you. You may also contact customer service if you have any questions about NightBalance, see page 43. -
Page 4: Intended Use
You should be able to switch sleeping positions independently. Contraindications for use • NightBalance should not be used by a patient using another medical aid that can be affected by mild vibrational stimuli - on the chest. • NightBalance is not recommended for the treatment of patients who are supposed to sleep in a supine position because of a medical condition (e.g. -
Page 5: Warnings And Cautions
NOTE • Do not exchange NightBalance with someone else. Use NightBalance only for your own therapy. • Note all warnings and cautions throughout these Instructions for Use and on labels on the components. Warnings & Cautions Warnings • NightBalance is only to be used for the purpose as specified in the ‘Intended Use’. - Page 6 NOTE Any serious incident that has occurred in relation to this device should be reported to Philips and the competent authority of the Member State in which the user and/or patient is established.
-
Page 7: Getting Started
Getting Started Step 1: Check packaging contents Upon receiving, make sure your packaging contains: Travel case Instructions for Use Chest Strap Docking Station Sensor Device Power Adapter WARNING Upon receipt, if any of these items are missing or damaged, contact your distributor or customer service (see page 43). -
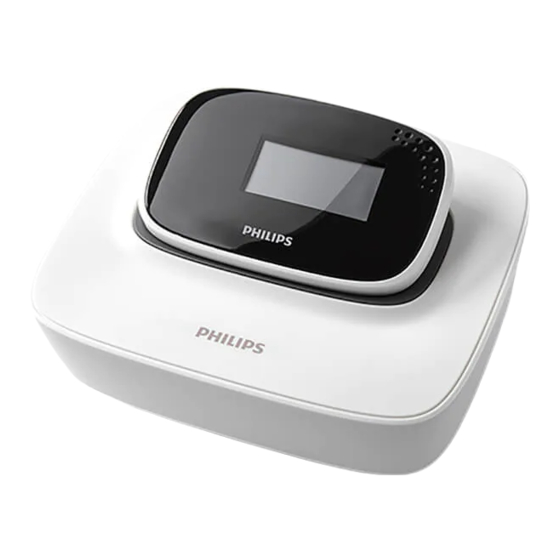
Page 8: Nightbalance Components
NightBalance Components Sensor Device Docking Station Navigation buttons ON/OFF switch Contact pins LED light Display Power port NightBalance Components... - Page 9 Chest Strap Buckle Device pocket Power Adapter Cable length: 1.5m (4’11”) NOTE The Power Adapter and wall outlet as visualized in the instructions are an example only, they might look different. NightBalance Components...
-
Page 10: Install The App And Register
Step 2: Install the App and Register Download the Philips NightBalance app on your smartphone from the Play Store (for Android) or App Store (for iPhone). Open the Philips NightBalance app. Select and confirm your region 07:42 (Country of residence). -
Page 11: Login And Pair Your Sensor Device
Step 3: Login and Pair your Sensor Device Press down Login to the Philips NightBalance app after activating your account. Follow Switch ON the instructions in the app to complete your account. Once indicated by the app, activate the pairing mode by switching the Sensor Device ON while pressing one of the navigation buttons. -
Page 12: Setting Up The Docking Station
CAUTION Only use the Power Adapter Connect the Power Adapter into a provided with NightBalance (100- standard wall outlet. 240 V, 50-60 Hz). Setting up the Docking Station... - Page 13 Place the Sensor Device on the Docking The display and LED of the Sensor Station with the buttons on top and Device should become active. This display towards you. indicates the correct placement. Once on the Docking Station, the The setup process is now complete. Please Sensor Device charges automatically.
-
Page 14: Getting To Sleep
Getting to sleep Step 1: Placing the Chest Strap CAUTION Wrap the Chest Strap around your chest. DO NOT place the Chest Strap on damaged skin. NOTE • If the Chest Strap is too loose, the Hook the buckle through the opening. sensor may stop collecting data and providing appropriate therapy. -
Page 15: Placing The Chest Strap
Adjust the tightness if needed by Make sure the Device pocket is placed adjusting the hook and loop position in the middle of your chest as shown in of the Chest Strap. The Chest Strap the image below. should fit tight enough to stay in place and feel comfortable to wear at the same time. - Page 16 Step 2: Placing the Sensor Device Power on the Sensor Device by sliding Confirm that the white LED light on the ON/OFF switch to the ON position. the Sensor Device starts blinking. This indicates it is switched on. NOTE If the white LED light does not start Ensure the Sensor Device is charged blinking, it may mean the battery is before using it during sleep.
-
Page 17: Placing The Sensor Device
Place the Sensor Device into the Device Close the zipper of the pocket of the pocket of the Chest Strap with the Chest Strap. Sensor Device buttons on top and the display facing away from your body. Check that the Device pocket is placed on the middle of your chest. - Page 18 3 to 9. The vibrations will build the Sensor Device’s vibrations during sleep. up gradually when laying on your back, You need to use NightBalance for nine nights allowing you to get used to therapy. before the device will provide full position therapy.
-
Page 19: Sleeping With The Sensor Device
NOTE NOTE • NightBalance regulates the intensity NightBalance allows you to fall asleep of the vibrations based on your in any position. 15 minutes after sleeping behavior. switching the Sensor Device ON, the •... - Page 20 Tip: Activating Pause Mode In pause mode, the Sensor Device will not give vibrations for 5 minutes. Pause mode can be activated if you get up during the night , or if you turn the Device pocket of the Chest Strap vertical for a second Activating Activating...
-
Page 21: Removing The Sensor Device
Step 4: Removing the Sensor Device Use the buckle to remove the Chest View last night’s sleep data on the Strap. Sensor Device’s display if desired. Take the Sensor Device out of the Chest NOTE Strap. Sleep data from short naps (<2 hours) is excluded from any data calculations and visualizations. - Page 22 Power off the Sensor Device by sliding Confirm that the white LED light on the ON/OFF switch to the OFF position. the Sensor Device stops blinking. This indicates it is switched OFF. NOTE It might take some time before the LED is switched OFF in case the Sensor Device is transmitting data.
-
Page 23: Charging The Sensor Device
Step 5: Charging the Sensor Device WARNING Place the Sensor Device on the powered Docking Station with the DO NOT touch the contact pins on the buttons on top and display towards Docking Station. This may result in an you. electrical shock and may damage the device. - Page 24 NOTE Upon correct placement onto the Docking Station, the Sensor Device When the Sensor Device first begins display becomes active and the LED to charge, the display shows a battery starts to blink. icon and the white LED blinks. After some time, the icon will disappear and the white LED blinking will stop.
- Page 25 Percentage of time you slept on your back last Battery level session NOTE Press the navigation Total time you used buttons on top of the Sensor Device the the Sensor Device to session before switch from one screen to the next. Your daily response to the vibrations of the Sensor Device...
-
Page 26: View Therapy Data
• The Sensor Device is designed to be establish a connection. Via this connection, used with Bluetooth version 4.2 or 5.0 therapy data can be sent to the Philips Compatibility with other Bluetooth NightBalance app. versions cannot be guaranteed. - Page 27 • Bluetooth is enabled on your seconds, and turn the Sensor Device smartphone OFF again. Synchronizing should start • You are logged into the Philips automatically. NightBalance app and your Sensor Device is paired to your smartphone • The app is opened or running in the background of your smartphone •...
-
Page 28: View Therapy Data In The App
Step 2: View therapy data in the app Viewing therapy data is possible on the Sensor Device and via a smartphone with Last night Last week the Philips NightBalance app. The following data views are available: Sensor Device: Last session Smartphone:... -
Page 29: Care And Maintenance
• DO NOT iron the Chest Strap. • It is the user’s responsibility to keep NightBalance equipment dust free. Turn the Sensor Device off and unplug the power adapter from the Docking Station and wall outlet. Wipe the Sensor Device and Docking Station with a clean cloth dampened with a mild detergent if they are visibly dirty. -
Page 30: Traveling With Nightbalance
The Sensor Device and Docking Station do not contain any parts that can be serviced. • After the service life (equivalent to in-use life on page 34 and 35) of NightBalance components has expired, replace the NightBalance components with a new component. -
Page 31: Troubleshooting
What to do I cannot pair the Bluetooth on your Enable Bluetooth on your Sensor Device smartphone is smartphone. with the Philips switched OFF NightBalance The Philips Follow the instructions in the app and the NightBalance app app. Initiate pairing on the Sensor Device is not ready to pair. - Page 32 Problem Why it happened What to do The Sensor An error occured in Do not use NightBalance. Contact Device shows the the Sensor Device your distributor, or customer following screen: service (see page 43), and mention the error number that your Sensor Device shows.
- Page 33 Why it happened What to do My sleep data is not visible in You used the Only data recorded after pairing the Philips NightBalance app. device prior to will appear. Ensure that you have pairing it with the paired with your smartphone.
-
Page 34: Technical Specifications
5.0V DC, 2.0A, 10W MAX Coin Cell: Lithium Rechargeable 3.0V, 5.5mAh Travel Case Frequency Bluetooth: Accessory of NightBalance characteristics: version 4.2, 5.0 Dimensions: 20.0 x 17.0 x 6.8 cm Band support: 2.4GHz (7.9 x 6.7 x 2.7 inch) Effective radiated Weight: 250 gr (8.8 oz) - Page 35 Chest Strap Dimensions: 149.0 x 7.0 x 0.3 cm (58.7 x 2.8 x 0.1 inch ) Weight: 62 gr (2.2 oz) Materials: Polyamide, Polyester, Lycra, Polyurethane, Silicone In-use life: 1 year • IEC 60601-1 Classifications: This device is Class II Equipment. The Sensor Device used in combination with the Chest Strap is Applied Part Type BF, Continuous Operation.
-
Page 36: Symbols
Symbols Ingress protection (see IP21/IP22 Warning/Caution Class II equipment Importer - Indicates pg 35 for details) the entity importing the medical device Note Direct Current into the locale. Non-ionizing electromagnetic radiation Polarity Medical Device - Indicates that the item is a medical Consult Instructions Machine wash, 86°F Manufacturer... -
Page 37: Environmental Conditions
Environmental Conditions Storage conditions Operating conditions NightBalance NightBalance components can components can be safely stored at be safely used at temperatures between temperatures between C (-4 F) and 45 C (50 F) and 40 (113 F), a relative (104 F), a relative... -
Page 38: Regulatory Information
Directive 2014/53/EU. The full text of the EU declaration of conformity is available at the following internet address: http://incenter.medical.philips.com/PMSPublic Data privacy & security Respironics offers its patients the use of a smartphone application which provides you with secure electronic access to your recorded data only you can access and, with your permission, your physician. -
Page 39: Electromagnetic Compatibility
Electromagnetic compatibility (EMC) NightBalance is intended for use in the electromagnetic environment specified in the coming sections. The customer or the user of NightBalance should assure that it is used in such an environment. NightBalance needs special precautions regarding EMC according to the EMC information provided in this chapter. - Page 40 WARNING NightBalance should not be used adjacent to or stacked with other equipment. If adjacent or stacked use is necessary, NightBalance should be observed to verify normal operation in the configuration in which it will be used. NightBalance does not have essential performance.
- Page 41 Electromagnetic immunity Immunity test IEC 60601 Test Level Compliance Level Electrostatic discharge (ESD) ±8 kV contact ±8 kV contact (IEC 61000-4-2) ±2 kV, ±4 kV, ±8 kV, ±15 kV air ±2 kV, ±4 kV, ±8 kV, ±15 kV air Electromagnetic Environment - Guidance Floors should be wood, concrete or ceramic tile.
- Page 42 Electromagnetic immunity Test Band Service Modulation Maximum Distance Immunity frequency (MHz) power test level (MHz) (V/m) 380-390 TETRA 400 Pulse modulation 18 Hz 430-470 GMRS 460, FRS 460 ± 5 kHz deviation 1kHz sine 704-787 LTE Band 13, 17 Pulse modulation 217 Hz 800-960 GSM 800/900, TETRA 800,...
-
Page 43: Contact Information
Contact your local distributor for assistance and support or visit https:/ /www.philips.com/c-cs/support-country-selector.html NOTE Store NightBalance components inside the Travel Case when sending it for repairs or returns. Accessories The following accessories are available for use with this device. Contact Philips or your healthcare provider for additional information. -
Page 44: Warranty
Product returned for service or the issue raised is not covered under this limited warranty, Philips Respironics may charge an evaluation fee and return shipping. What Philips Respironics will do: If a Product does not meet the warranty above in the first 90... - Page 45 Philips Respironics will replace the device with a new Product. Thereafter, if a Product fails to conform to the warranties set forth above during the applicable warranty period, Philips Respironics will repair or replace the Product or refund the original purchase price, in Philips Respironics sole discretion.
- Page 46 Docking Station and 90 days for the chest strap, all from the date of purchase from an authorized Philips Respironics dealer. 3 If the Product is found to contain a defect of workmanship or materials or fails to perform in accordance with the Product specifications during the applicable warranty period, Philips Respironics will repair or replace, at its option, the defective material or part.
- Page 47 Alternatively, you can make a claim under this warranty by contacting Philips Respironics directly at: Philips Electronics Australia Limited, 65 Epping Road, North Ryde NSW 2113, Australia. Tel: 1300 766 488, Email: repairs-src@philips-easyconnect.com. 8. The following statement is provided to a Buyer who is a “consumer” under the Australian Consumer Law: Our goods come with guarantees that cannot be excluded under the Australian Consumer Law.
- Page 48 1146045 R02 © Koninklijke Philips N.V., 2021. All rights reserved. DLK 01/21/2021...
Need help?
Do you have a question about the NightBalance and is the answer not in the manual?
Questions and answers