Table of Contents
Advertisement
Quick Links
ULtRA ChEf
Gas Grill
ULTRA CHEF
ULTRA CHEF
a c c e s s o r i e s
• IF A REPLACEMENT IS NECESSARY, PLEASE CONTACT EITHER OUR CUSTOMER SERVICE DEPARTMENT OR YOUR LOCAL DEALER.
• THE USE OF UNAUTHORIZED PARTS CAN CREATE UNSAFE CONDITIONS AND ENVIRONMENT.
• FOR OUTDOOR USE ONLY.
• READ THE MANUAL CAREFULLY BEFORE ASSEMBLING AND OPERATING THE APPLIANCE.
• ACCESSIBLE PARTS MAY BE VERY HOT. KEEP YOUNG CHILDREN AWAY.
• RETAIN THE MANUAL FOR FUTURE REFERENCE.
• REMOVE ANY TRANSIT PROTECTION BEFORE ASSEMBLING AND OPERATING THE APPLIANCE.
• THIS APPLIANCE MUST BE KEPT AWAY FROM INFLAMMABLE MATERIALS.
• PLEASE WEAR PROTECTIVE GLOVES WHEN HANDLING PARTICULARLY HOT COMPONENTS.
• PLEASE READ THE CARE AND WARRANTY INFORMATION CAREFULLY BEFORE USE.
• MOCHT VERVANGING NODIG ZIJN, NEEM a.u.b. ÓF CONTACT OP MET ONZE AFDELING KLANTENSERVICE ÓF MET UW PLAATSELIJKE DEALER.
• GEBRUIK VAN NIET-GEAUTORISEERDE ONDERDELEN KAN LEIDEN TOT ONVEILIGE SITUATIES EN OMGEVING.
• ALEEN VOOR GEBRUIK BUITENSHUIS.
• LEES VÓÓR MONTAGE EN GEBRUIK DE GEBRUIKSAANWIJZING NAUWKEURIG DOOR.
• VRIJ BEREIKBARE ONDERDELEN KUNNEN ERG HEET ZIJN. BUITEN BEREIK VAN JONGE KINDEREN HOUDEN.
• BEWAAR DE GEBRUIKSAANWIJZING OM LATER NA TE KUNNEN SLAAN.
• VERWIJDER ALLE TRANSPORTBESCHERMING VÓÓR MONTAGE EN GEBRUIK VAN DIT TOESTEL.
• DIT TOESTEL MOET UIT DE BUURT VAN ONTVLAMBARE MATERIALEN WORDEN GEHOUDEN.
• DRAAG a.u.b. BESCHERMENDE HANDSCHOENEN, IN HET BIJZONDER BIJ HET HANTEREN VAN HETE ONDERDELEN.
• LEES a.u.b. VÓÓR GEBRUIK DE GEBRUIKS- EN GARANTIE-INFORMATIE ZORGVULDIG DOOR.
• WENDEN SIE SICH AN UNSEREN KUNDENDIENST ODER IHREN LOKALEN HÄNDLER, UM INFORMATIONEN ZUR BESTELLUNG VON
ERSATZ TEILEN ZU ERHALTEN.
• DIE VERWENDUNG VON NICHT AUTORISIERTEN TEILEN KANN ZUR ENTSTEHUNG GEFÄHRLICHER BEDINGUNGEN UND UMGEBUNGEN FÜHREN.
• NUR FÜR DEN GEBRAUCH IM FREIEN.
• LESEN SIE DIESES HANDBUCH VOLLSTÄNDIG DURCH, BEVOR SIE DAS GERÄT MONTIEREN UND IN BETRIEB NEHMEN.
• ZUGÄNGLICHE TEILE KÖNNEN SEHR HEISS SEIN. KLEINE KINDER VOM GRILL FERNHALTEN.
• BEWAHREN SIE DIESES HANDBUCH ZUR WEITEREN REFERENZ AUF.
• ENTFERNEN SIE JEGLICHE TRANSPORTVERPACKUNG, BEVOR SIE DAS GERÄT MONTIEREN UND IN BETRIEB NEHMEN.
• DIESES GERÄT VON BRENNBAREN MATERIALIEN FERNHALTEN. BEIM UMGANG MIT BESONDERS HEISSEN KOMPONENTEN SOLLTEN
SCHUT ZHANDSCHUHE GETRAGEN WERDEN.
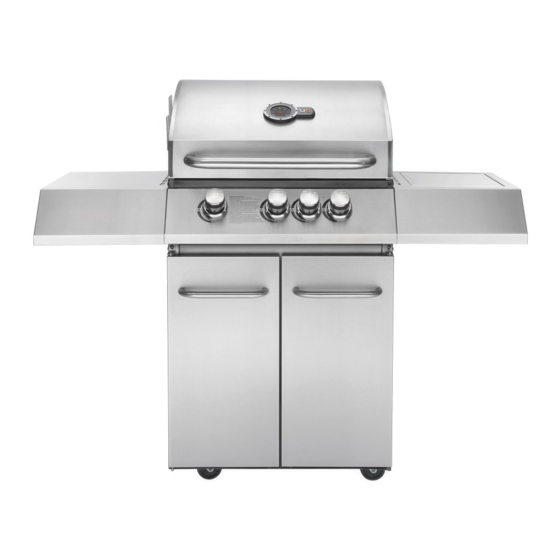
Model # UC430SB
OWNER'S MANUAL
ULTRA CHEF
ULTRA CHEF
a c c e s s o r i e s
Advertisement
Table of Contents

Subscribe to Our Youtube Channel
Related Manuals for Ultra chef UC430SB


Summary of Contents for Ultra chef UC430SB
- Page 1 ULTRA CHEF ULTRA CHEF a c c e s s o r i e s Model # UC430SB OWNER’S MANUAL • IF A REPLACEMENT IS NECESSARY, PLEASE CONTACT EITHER OUR CUSTOMER SERVICE DEPARTMENT OR YOUR LOCAL DEALER. • THE USE OF UNAUTHORIZED PARTS CAN CREATE UNSAFE CONDITIONS AND ENVIRONMENT.
- Page 2 Technical information Model UC430SBPSS Appliance Category I3+(28‐30/37) I3B/P(30) BE, CH, CY CZ, ES, FR, GB, GR, HU, IE, IT, LT, LU, BG, CY, CZ, DK, EE, FI, HR, HU, Countries LV, PT, SK, SI IS, IT, LT, LU, MT, NL, NO, RO, SE, SI, SK, TR Type of gas G30 G31 G30/G31 Gas Pressure 20‐30mbar 37mbar 30mbar Total Heat Input (Hs) 15kW 15kW 15kW ( 1086.60g/h) ...
-
Page 3: Clearance To Combustibles
CLEARANCE TO COMBUSTIBLES Always maintain 915mm minimum clearance to combustible materials at the rear and sides of the BBQ. Do not use this BBQ under overhead combustible surfaces ... - Page 4 Parts Diagram ...
- Page 5 Parts List ...
- Page 6 Attach locking casters (14) and unlocking caters (15) to feet of bottom panel (13). Unlocking casters in front side and locking casters in back side. Secure casters using four M6X10 screws (11) for each caster. Tighten using a spanner. Lift left cart panel (8) onto left side of bottom panel. Secure cart panel and bottom panel using three M6X10 screws (11). ...
- Page 7 Lift right cart panel (12) onto right side of bottom panel. Secure cart panel and bottom using three M6X10 screws (11). Put rear panel (10) between right cart panel and left cart panel from back of the cart. Secure rear panel using two M6X10 screws (11) on each side of legs. ...
- Page 8 Assemble door brace (9) on front top of cart. Secure brace and cart panels using two M6X10 screws (11) on each side of legs. Assemble left and right door (21, 22). ...
- Page 9 This step requires two people to lift and position head unit (6) onto cart. Carefully lower the head unit (6) onto the cart between the two braces. Align the two holes on each side of the grill head with the two holes on each brace using two M6X10 screws (11) on each side of cart brace. Attach the left front shelf panel(5) to the left shelf(4) with M6X10 screws (11) ...
- Page 10 Before assembling left side shelf (4) and right side burner shelf (7), loosen the screw on the left and right side plate of the head unit (6). Lift left side shelf and right side burner shelf and put down vertically. Side shelf and side burner shelf locked on the head unit. Tighten the loose screw and secure using four M6X10 screws (11) on each side shelf. Please note the side shelves may appear to be ‘warped’ before they are attached to the head unit. This is perfectly normal and will become rigid once they are attached. ...
- Page 11 Instruction for fixing cast iron burner (18)on the right side shelf. Open the lid on right side shelf and put the cast iron burner(19) in the hole. Connect the burner with the connector nearby. Secure the burner using two M4X 8 screws (17). Check and make sure the S/S gas flow tube of the cast iron burner is clear of debris before assembly! Connector 2xM4X6 Install electrode of right side burner. Igniter lead Ignition wire electrode ...
- Page 12 Place the flame tamers (3) over the burners. Place cooking grates (2) into grill bottom. Grates wire running front to back should be facing upward, side to side wires downward. ...
- Page 13 To assemble warming rack (1), insert leg wires into holes on left and right side panel of main body. Leg wire Hang oil box (19) right under hole of oil tray. Oil tray ...
- Page 14 Connect gas regulator and gas hose assembly to connector of left side of grill main body. Secure hose and connector using spanner. NOTE: always check leakage with soapy water! In the unlikely event of the piezo electric ignition not working, use the manual lighting function found in the inside of the door. Carefully place a match into the top of the lighting pole and light as shown. ...
-
Page 15: Connecting The Gas Cylinder To The Appliance
DO NOT use the rear back with all others burners at the same time. DO DO NOT Lean over appliance when lighting. Use spanner to tighten all gas fittings. Leave cooking food unattended. Check gas hose and line connection for damage, Store combustible material, gasoline or flammable cuts or cracks each time before using the liquids or vapours within vicinity of barbecue. appliance. Use appliance with any cover on. Always leak test with soapy water. Use plastic or glass utensils on the barbecue. Use the appliance in strong winds. Check main burners regularly for insect nests such as spiders, ants, etc. Nests are dangerous Dismantle control valves. and need to be fully cleaned. Test for gas leaks with a naked flame. Use the appliance in well ventilated areas. Store spare gas cylinders in the cabinet. Lay the gas cylinder down (always keep upright). Cool the appliance before replacing any lid or Use appliance indoors. cover. Modify the constructions of the appliance or the Accessible parts maybe very hot. Always keep size of any burner, injector orifice or any other children away from the appliance. components. Have the gas cylinder filled by an authorized ... -
Page 16: Regulator And Hose
Please consult your LPG dealer for information regarding a suitable regulator for the gas cylinder. Regulator and Hose Use only regulator and hose approved for LP Gas at the above pressures. The life expectancy of the regulator is estimated as 10 years. It is recommended that the regulator is changed within 10 years of the date of manufacture. The use of wrong regulator or hose is unsafe; always check that you have the correct items before operating the barbecue. The hose used must conform to the relevant standard for the country of use. The length of the hose must be 0.7 meters (minimum) and 1.5 meters (maximum). Worn or damaged hose must be replaced. Ensure that the hose is not obstructed, kinked, or in contact with any part of the barbecue other than at its connection. It is recommended that the hose is changed within 1 year of the date of manufacture. Storage of Appliance Storage of an appliance indoors is only permissible if the cylinder is disconnected and removed from the appliance. ... -
Page 17: Connection To Appliance
Connection to Appliance Before connection, ensure that there is no debris caught in the head of the gas cylinder, regulator, burner and burner parts. Spiders and insects can nest within and clog the burner tubes. A clogged burner can lead to a fire beneath the appliance. Clean burner holes with a heavy‐duty pipe cleaner. Fit the hose to the appliance using a spanner to tighten it onto the connection thread. If the hose is replaced it must be secured to the appliance and regulator connections with hose clips. Disconnect the regulator from the cylinder (according to the directions supplied with the regulator) when the barbecue is not in use. The Barbecue must be used in a well‐ventilated area. Do not obstruct the flow of combustion air to the burner when the barbecue is in use. ... -
Page 18: Lighting Your Barbecue
LIGHTING YOUR BARBECUE This barbecue is designed for use outdoors, away from any flammable materials. It is important that there are no overhead obstructions and that there is a minimum distance of 1 m from the side or rear of the appliance. It is important that the ventilation openings of the appliance are not obstructed. The barbecue must be used on a level, stable, non‐flammable surface. The appliance should be protected from direct draughts and shall be positioned or protected against direct penetration by any trickling water (e.g. rain). Parts ... -
Page 19: Lighting Instructions
Lighting Instructions Read instruction before lighting. Open the lid and make sure all the knobs are on the OFF position. Connect the regulator to the gas bottle. Turn the gas supply “ON” at the cylinder. Check with the use of soapy water for any gas leakage between the bottle and the regulator. Push down and turn the knob anticlockwise to HIGH position (a clicking sound is heard). Thus the burner could be lit. If the burner does not light, repeat this process. Adjust the heat by turning the knob to the High/Low position. To light up other burners, repeat the same process for the adjacent burner and continue in sequence until all the burners are lit. To turner the barbecue OFF turn the cylinder valve or regulator switch to the “OFF” position and then turn all of the control knobs on the appliance clockwise to the “OFF” position. 1. Never light or use the side burner with the side burner lid in the closed position. 2. Never attempt to the light the side burner with a pot over the burner. Light the burner first, and then place the pot over the burner. ... -
Page 20: Abnormal Operation
Abnormal Operation Any of the following are considered to be abnormal operation and may require servicing: ‐ Yellow tipping of the burner flame. ‐ Sooting up of grill plates. ‐ Burners not igniting properly. ‐ Burners failing to remain alight. ‐ Burners extinguished by trolley doors. ‐ Gas valves, which are difficult to turn. CLEANING AND CARE This appliance should be checked and serviced by an authorized service person every year to ensure the appliance remains in a safe operation condition. All cleaning and maintenance should be carried out when the barbecue is cool and with the fuel supply turned OFF at the gas cylinder. DO NOT remove the drip tray until the BBQ has cooled. General Grill Cleaning ● DO NOT mistake brown or black accumulation of grease and smoke for paint. Interiors of gas grills are not painted at the factory (and should NEVER be painted). Apply a strong solution of detergent and water or use a grill cleaner with scrub brush on insides of grill lid and bottom. Rinse and allow to completely air dry. DO NOT apply a caustic grill / oven cleaner to painted surfaces. ● Plastic parts: wash with warm soapy water and wipe dry. ● DO NOT use abrasive cleaners, degreasers or a concentrated grill cleaner on plastic parts. Damage to and failure of parts can result. ● Porcelain surfaces: because of glass‐like composition, most residue can be wiped away with backing soda / water solution or specially formulated cleaner. Use nonabrasive sourcing powder for stubborn stains. ● Painted surfaces: wash with mild detergent or nonabrasive cleaner and warm soapy water. Wipe dry with a soft nonabrasive cloth. ● Stainless steel surfaces: To maintain your grill’s high quality appearance, wash with mild detergent and warm soapy water and wipe dry with a soft nonabrasive cloth after each use. Backed‐on grease deposits ... - Page 21 INSECTS. FACT: sometimes spiders and other insects climb into the grill tubes attached to the burners. The spiders spin webs, build nests and lay eggs. The webs or nests can be very small, but they are very strong and can block the flow of gas. Clean burners prior to use after storing, at the beginning of the grilling season or after a period of one month of the unit not being used. Spider guards are on the air intakes in an effort to reduce this problem, but it will not eliminate it! An obstruction can result in a “flashback” (a fire in the burner tubes). The grill may still light, but the obstruction does not allow full gas flow to the burners. Cleaning the Burner Assembly Follow these instructions to clean and / or replace parts of burner assembly or if you have trouble igniting grill. 1. Turn gas off at control knobs and LP Tank. 2. Remove cooking grates, grease tray and grease cup. 3. Remove screw at end of burner using a screwdriver. 4. Carefully lift each burner up and away from valve openings. Inspect burner for any damage (cracks or holes). If damage is found, replace with a new burner. ...
-
Page 22: Outside Surface
6. Clean any blocked ports with a stiff wire such as an open paper clip. 7. Check burner for damage, due to normal wear and corrosion some holes may become enlarged. If any large cracks or holes are found replace burner. 8. Carefully refit burners. VERY IMPORTANT: Burner tubes must re‐engage valve openings. See instructions below. Notice for replacing burners The burners have already been assembled to a high specification. Please consult the supplier if burners need to be replaced. Outside Surface ... -
Page 23: Limited Warranty
ULTRA CHEF Series Grills Models UC430SB, UC500RSB Limited Warranty ANY DAMAGE RESULTING FROM SHIPPING PRODUCT TO CUSTOMER WOULD BE COVERED WITHIN A REASONABLE TIME PERIOD. SHIPPING ON ALL WARRANTY PARTS COVERED FOR THE FIRST SIX MONTHS ONLY. 5 Years Lid Castings – excluding paint Stainless Steel Burners –...
Need help?
Do you have a question about the UC430SB and is the answer not in the manual?
Questions and answers