
Related Manuals for Elmo PTC-201CIP


Summary of Contents for Elmo PTC-201CIP
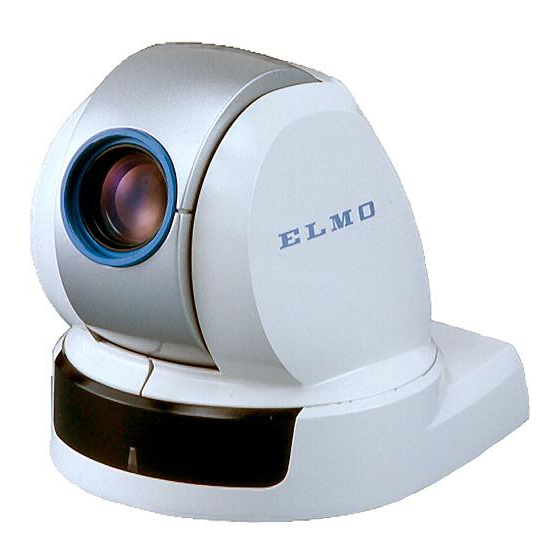
- Page 1 PAN • TILT • ZOOM COLOR CAMERA PTC - 201C IP INSTRUCTION MANUAL Please read this instruction manual carefully before using this PTC-201C IP and keep it for future reference.
-
Page 2: Important Safety Instructions
IMPORTANT SAFETY INSTRUCTIONS 1. Read these instructions. 2. Keep these instructions. 3. Heed all warnings. 4. Follow all instructions. 5. Do not use this apparatus outdoors. 6. Do not use this apparatus near water. 7. Clean only with dry cloth. 8. - Page 3 CAUTION RISK OF ELECTRIC SHOCK DO NOT OPEN CAUTION : TO REDUCE THE RISK OF ELECTRIC SHOCK. DO NOT REMOVE COVER (OR BACK). NO USER SERVICEABLE PARTS INSIDE. REFER SERVICING TO QUALIFIED SERVICE PERSONNEL. The lightning flash with arrowhead symbol, within an equilateral triangle, is intended to alert the user to the presence of uninsulated "dangerous voltage"...
-
Page 4: Handling Precautions
HANDLING PRECAUTIONS Be sure to use the provided AC adapter. Do not leave the Camera under direct sunlight or by heater, or the Camera may be discolored, or damaged. Do not place the Camera in any humid, dusty, windy or vibrating location. -
Page 5: Table Of Contents
CONTENTS IMPORTANT SAFETY INSTRUCTIONS ...1 HANDLING PRECAUTIONS ...3 1. PART NAMES AND FUNCTIONS...5 2. WIRELESS REMOTE CONTROLLER ... 7 3. SETTING UP ... 9 4. OPERATION PROCEDURES ... 14 [1] Power supply to the Camera ... 14 [2] Turning ON/OFF of the Camera power ... 14 [3] Operating PAN/TILT ... -
Page 6: Part Names And Functions
1. PART NAMES AND FUNCTIONS Overall View INFRARED SENSOR LENS CAMERA HEAD Back Panel ETHERNET TERMINAL (RJ45) Ethernet DC IN 12V DC IN INFRARED SENSOR COMPOSITE-VIDEO OUT (RCA pin jack) This camera is designed to mount on ceiling panels only. DIP Switch (4) RS-485 ID TERMINATE... -
Page 7: Wireless Remote Controller
Wireless Remote Controller POWER OPEN NEAR CLOSE AUTO AUTO TELE WIDE Button Name POWER To turn ON/OFF the Camera power. OPEN To open the iris manually. CLOSE To close the iris manually. AUTO To iris automatically. NEAR To move the focus near. To move the focus far. -
Page 8: Wireless Remote Controller
2. WIRELESS REMOTE CONTROLLER Point the infrared emitting window of the wireless remote controller at the infrared sensor of the Camera, located at the front, and the rear panel, and select the desired function. Receivable range Note: The infrared sensors may receive the infrared rays only within a narrower receivable range or may not receive them at all depending on the ambient environment, such as being placed under the sunlight or near an inverter fluorescent lamp. -
Page 9: When Multiple Cameras Are Operated Through The Wireless Remote Controller
Preparation Remove the battery case cover by pressing downward on the [ direction as indicated by the arrow. Install 2 pcs. of batteries (type R03,AAA) into the case in the direction as indicated there. Note: Install the batteries with the proper Note: For dry cells, be sure to use the size AAA. -
Page 10: Setting Up
3. SETTING UP [1] Installation Note: When carrying the Camera, be sure to hold the base. Note: Do not turn the Camera head in the PAN-TILT direction by hand, or the Camera head may be broken. (1) Mounting the Fixing Plate •... - Page 11 (2) Making mounting holes to the Ceiling Tile • Make 4 holes of 8mm (5/16 in.) to the Ceiling Tile as shown. - 10 -...
- Page 12 (3) Fixing the Main Unit • Put the Ceiling Tile between the Main Unit and the Ceiling Plate, and fix the Main Unit by fastening 4 wing Nuts. - 11 -...
- Page 13 (4) Mounting the Safety Wires • Loop up one end of the Safety Wires through the respective safety wire looping holes made on the Ceiling Plate, and then loop up the other end of the same around the beams or anything that is used to mount ceiling tile channel for structure safety.
-
Page 14: Connection Examples For The Camera
Connection examples for the Camera - 13 -... -
Page 15: Operation Procedures
4. OPERATION PROCEDURES [1] Power supply to the Camera The Camera has no POWER switch. Power is supplied to the Camera when the AC adapter is connected to the wall socket and the Camera. When power is supplied to the Camera, the Camera turns to the right and then to the center automatically (viewed from the front), returning the Camera position to the default home position. -
Page 16: Operating Pan/Tilt
[3] Operating PAN/TILT speed manually. (Refer to the settings in the OSD Menu screen.) • When HOME button is pressed, the Camera turns to the front (and the lens moves to the WIDE side). • If the Camera direction is changed manually by mistake, press button. -
Page 17: Lens Operation
[4] Lens operation the FULL AUTO FOCUS status is established. (However, focusing may be difficult for such objects as listed below.) Objects with no contrast between light and shade, such as white walls and night views Objects reflecting an intensive light Objects moving fast Objects with many horizontal stripes, such as blinds... -
Page 18: Blc (Back Light Control)
[5] BLC (Back Light Control) [6] Preset operation sec). To cancel this, press • Then, press one of the 1 through 6 buttons. Now, the registration is over, and the LED on the Camera goes out. (The preset contents, if already registered, are overwritten.) (2) Execution of preset •... -
Page 19: The Id Number Setting
5. THE ID NUMBER SETTING When more than one Cameras are laid out adjacently and operated via the wireless remote controller, the Cameras received the infrared rays operates in unison in the same way. When each Camera is allocated with a different ID No., the Camera can be operated selectively when its ID No. -
Page 20: Osd (On-Screen Display)
6. OSD (On-Screen Display) OSD Display menu <<MAIN MENU>> (1) MAIN CONTROL (2) CAMERA SETUP (3) TITLE SET (4) PAN TILT MOTOR (1) MAIN CONTROL <1> TITLE <2> SELECT <3> SET INDICATE <4> REMOTE ID <5> OFF TIMER MENU button is used to turn ON/OFF the OSD display. - Page 21 <6> ALARM IN <7> ALARM OUT (2) CAMERA SETUP <1> BLC <2> AGC <3> AP GAIN <4> FL <5> NEXT PAGE <6> MEMORY <7> CLEAR <8> WB 1. ATW change the White 2. AWC Balance mode. 3. INDOOR 4. OUTDOOR 5.
- Page 22 *1: <9> "R SHIFT" and <10> "B SHIFT" are available in 2 types, respectively: one for the ATW and AWC functions, and the other for the INDOOR, OUTDOOR and LIGHT functions. For example, it is possible to set "R SHIFT" to +10 in the ATW mode and to ±...
-
Page 23: Alarm In/Out Terminals
7. ALARM IN/OUT TERMINALS [1] Alarm input By short-circuiting the ALARM 1 IN or ALARM 2 IN Terminal Block to the GND terminal on the Terminal Block, the Camera moves to the allocated preset position. • When short-circuiting the ALARM 1 IN terminal to the GND terminal, the Camera moves to the preset position 1. -
Page 24: Initialization Of The Camera Settings
8. INITIALIZATION OF THE CAMERA SETTINGS The camera settings can be initialized with the DIP switch (4) located on the back panel. • In the power supply OFF state (the AC adapter is not connected), turn ON the RESET switch. •... -
Page 25: Rs-485
9. RS-485 This system can be controlled from the controller by connecting the RS-485 terminal on the Terminal Block to the controller via an RS-485 converter. Make the connection as shown below. Each camera can be set for the ID address via the DIP Switch (8) located on the bottom so that a selected camera can be controlled. -
Page 26: Terminating Resistance And Id Address Settings
10. TERMINATING RESISTANCE AND ID ADDRESS SETTINGS [1] Setting the terminating resistance The terminating resistance is built in each Camera, and it can be turned ON/OFF by using TEMINATE switch of the DIP Switch (4) of each Camera. To prevent the attenuation of the signal, turn ON the terminating resistances of the Camera located at end of the longest route, of all cameras to be connected to the RS-485 interface, and turn OFF the terminating resistances of the other Cameras. - Page 27 Setting the ID address - 26 -...
- Page 28 - 27 -...
-
Page 29: Network Function
192.168.0.0 must be configured with this Camera and the host for setting up this Camera. Prepare a host having the IP address 192.168.0.X (X: 1~254, excluding 100) and the subnet mask 255.255.255.0, and connect such host to the Camera. consult your dealer or an authorized ELMO service center - 28 -... -
Page 30: Connection To The Network
Connection to the network • Connection using HUB Connect the Ethernet terminal (RJ-45) of the Camera to the HUB port with an Ethernet straight cable (UTP Category 5). For the HUB port, use a port other than the MDI port. •... - Page 31 • When [Network Configuration] is displayed, change the set values according to the environment of the network to be used. To reset the changed set values to the original set values, click the clear button [CLEAR]. • When all items have been set, click the submit button [SUBMIT]. When the message “The saving of the setup was completed.
-
Page 32: Web Server Functions
Initialization of the network settings If the connection from the network is disabled due to destruction of the network settings or disremembering of the set value, reset the settings to the factory settings by using the following procedure and then redo the settings: •... - Page 33 Display of moving images (LIVE page) By clicking the link [QVGA] next to *LIVE on the “PTC-201C IP” page or the link [QVGA] next to MONITOR SIZE on the LIVE page, the QVGA (320X240) moving live image page can be displayed. Moreover, by clicking the link [VGA] next to *LIVE or the link [VGA] next to MONITOR SIZE on the LIVE page, the VGA (640X480) moving...
- Page 34 Operation of remote control When on the LIVE page the mark CONTROL is displayed above the [HOME] button, remote control is enabled. For display/non-display of the mark CONTROL , refer to the next paragraph “About control”. - 33 -...
- Page 35 (1) Zoom operation Clicking the buttons effects zoom operation. Clicking the TELE (T-) buttons and the WIDE (-W) buttons provides zoom-in and zoom-out operation, respectively. The buttons or coarse control buttons enable the zoom position to change by a large amount, and the buttons change by a small amount.
- Page 36 About control Remote control of the Camera can be accomplished by only one client. Control is given to the client who satisfies the following conditions. • Client who has been authenticated by the [root] or [operator] account in the case where the password is specified for [operator] or [user] on [Network Configuration] page.
- Page 37 • Connecting to the Camera from the host on the network through telnet. Here, the setup procedure using the Web browser is described. For the setup procedure using telnet, consult your dealer or an authorized ELMO service center. (1) Setting •...
- Page 38 (2) Operation • The cameras specified on the [Setting for quad display] page are displayed. (The upper-left screen segment always displays moving images provided by the Camera.) • When the mouse’s left button is clicked on a screen segment, the static image of that clicked image is displayed in another window.
-
Page 39: Alarm Function
Camera • Connecting to the Here, the setup procedure using the Web browser is described. For the setup procedure using telnet, consult your dealer or an authorized ELMO service center. Setting • Enter the IP address or host name (if allocated) of the followed by [/config.htm], in the Address bar’s text box of the Web browser. - Page 40 changed set values to the original set values, click the clear button [CLEAR]. • When all items have been set, click the submit button [SUBMIT]. When the message “The saving of the setup was completed.” is displayed, the setting of file transfer is completed.
-
Page 41: Ip Address Filtering Functions
Camera • Connecting to the Here, the setup procedure using the Web browser is described. For the setup procedure using telnet, consult your dealer or an authorized ELMO service center. Setting • Enter the IP address or host name (if allocated) of the followed by [/config.htm], in the Address bar’s text box of the Web browser. - Page 42 about to change the IP address for the administrator.” or other message is displayed. Confirm the changed IP address for the administrator. If it checks OK, click the [Yes] button.When the message “The saving of the setup was completed.” is displayed, the setting of the IP address filtering function is completed.
-
Page 43: Live Connection List
This Camera can be remotely controlled and its status can be acquired through telnet. For the information of the command, etc., consult your dealer or an authorized ELMO service center. , the authenticated clients, and the duration of connection. -
Page 44: Configurations
[7] Configurations Network Configurations Item The IP address of the Camera. IP Address Specifies the value allocated by the administrator of the network in use. Factory set to 192.168.0.100. The mask value for separating the network address from the host address. Subnet mask Used in combination with the IP address to specify the network to which this Camera belongs.Specifies the value allocated by the administrator of the network in use. - Page 45 File transfer Configurations Item IP address of Specifies the IP address of the destination host to save. Factory set to 0.0.0.0. image receiving server Specifies the port number used by the FTP server in operation at the destination host to save. Port number of Normally, no need to be changed.
- Page 46 Settings for quad display Item Specifies whether to enable or disable the display of moving images on the Quad Display Display page. Factory set to Disabled. However, this item is set to Enabled for the upper-left screen segment only (this setting cannot be changed.) Registers the IP address of the camera that images are sent from.
-
Page 47: Troubleshooting Hints
12. TROUBLESHOOTING HINTS Symptom No images on TV • Cable is not properly connected to the video-in terminal monitor of monitor. • The power plug is disconnected from the wall outlet. • The AC adapter output plug is disconnected from the DC jack of the Camera. - Page 48 • When the hub is used between, the Ethernet cross cable • The setting of the network is incorrect. (See P.29.) If the problem still remains after checking the above, consult your nearest dealer or an authorized ELMO service center. Possible cause/remedy terminal.
-
Page 49: Specifications
13. SPECIFICATIONS General Item Power source 12V DC Current consumption 1.5A Outside dimensions 124mm(W) X 153mm(D) X 160mm(H) (4.9 X 6.0 X 6.3 in.) Weight /Mass mainbody only:1,200g (2.6 lb), with plates:1,500g (3.3 lb) Television system NTSC compatible Output terminal Composite-video output Control terminal RS-485... - Page 50 Network Item Physical interface 10Base-T/100Base-TX Ethrnet X 1 Compatible protocol TCP/IP,ARP,UDP,ICMP,HTTP,FTP,telnet Compatible browser Internet Explorer 4.0 or newer, Netscape Navigator 6.0 or newer Image compression format JPEG Display of moving image Resolution 640 X 480, 320 X 240 Frame rate: Max. 30 frames/sec.(320 X 240) Connection count during Max.
-
Page 51: Supplied Accessories
*Weight and dimensions are approximate. *Design and specification are subject to change without prior notice. Trademark Acknowledgements ,ELMO are registered trademarks of ELMO CO.,Ltd. Netscape is a trademark or a registered trademark of Netscape Communications Corporation in the U.S. and other countries. - Page 52 U.S.A Elmo Mfg. Corp. 1478 Old Country Road, Plainview, NY 11803-5034 Tel:(516)501-1400 E-mail:elmo@elmousa.com Web : http://www.elmousa.com Canada Elmo Canada Mfg. Corp. 44 West Drive, Brampton, Ontario L6T 3T6 Tel:(905)453-7880 E-mail : info@elmocanada.com Web : http://www.elmocanada.com Germany Elmo (Europe) G.m.b.H Neanderstr. 18, 40233 Düsseldorf Tel:(0211)376051 E-mail : elmoeurope@AOL.com...
Need help?
Do you have a question about the PTC-201CIP and is the answer not in the manual?
Questions and answers