
Related Manuals for AEG BP5013021M


Summary of Contents for AEG BP5013021M
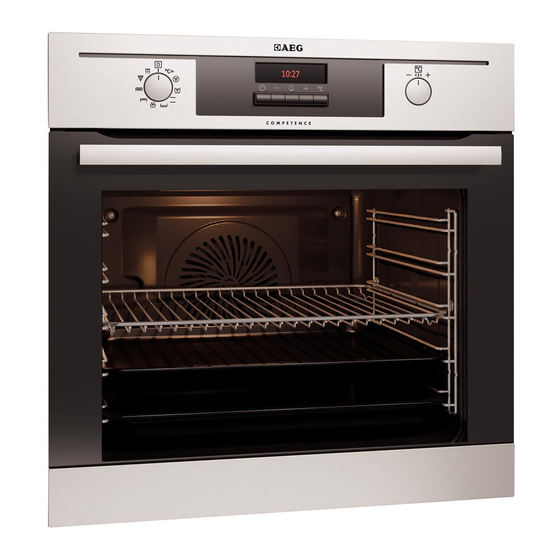
- Page 1 User Manual BP5013021M Oven BP501302WM BP531302WM BP531310WB BP531310WM BP531310WW...
-
Page 2: Table Of Contents
12. ENERGY EFFICIENCY..................... 32 FOR PERFECT RESULTS Thank you for choosing this AEG product. We have created it to give you impeccable performance for many years, with innovative technologies that help make life simpler features you might not find on ordinary appliances. Please spend a few minutes reading to get the very best from it. - Page 3 ENGLISH damages that are the result of incorrect installation or usage. Always keep the instructions in a safe and accessible location for future reference. 1.1 Children and vulnerable people safety This appliance can be used by children aged from 8 •...
-
Page 4: Safety Instructions
Ensure that the appliance is switched off before • replacing the lamp to avoid the possibility of electric shock. Do not use a steam cleaner to clean the appliance. • Do not use harsh abrasive cleaners or sharp metal •... - Page 5 ENGLISH such a way that it cannot be removed • Do not let sparks or open flames to without tools. come in contact with the appliance • Connect the mains plug to the mains when you open the door. socket only at the end of the •...
- Page 6 • Before maintenance, deactivate the – provide good ventilation during appliance and disconnect the mains and after each Pyrolytic cleaning. plug from the mains socket. – provide good ventilation during • Make sure the appliance is cold. and after the first use at maximum There is the risk that the glass panels temperature operation.
-
Page 7: Product Description
ENGLISH 2.8 Service • Cut off the mains electrical cable close to the appliance and dispose of • To repair the appliance contact an Authorised Service Centre. • Remove the door catch to prevent • Use original spare parts only. children or pets from becoming trapped in the appliance. -
Page 8: Before First Use
4. BEFORE FIRST USE WARNING! Refer to "Care and Refer to Safety chapters. cleaning" chapter. Clean the appliance and the accessories To set the Time of day refer before first use. to "Clock functions" Put the accessories and the removable chapter. - Page 9 ENGLISH Oven function Application True Fan Cook- To bake on up to three shelf positions at the same time and to dry food. Set the temperature 20 - 40 °C lower than for Top / Bottom Heat. Pizza Setting To bake food on one shelf position for a more intensive browning and a crispy bottom.
-
Page 10: Clock Functions
5.5 Display A. Timer B. Heat-up and residual heat indicator C. Water drawer (selected models only) D. Core temperature sensor (selected models only) E. Door lock (selected models only) F. Hours / minutes G. Clock functions 5.6 Buttons Button... - Page 11 ENGLISH Clock function Application MINUTE MINDER Use to set a countdown time. This function has no ef- fect on the operation of the appliance. You can set the MINUTE MINDER at any time, also if the appliance is off. 00:00 COUNT UP TIMER If you do not set any other clock function the COUNT UP TIMER automatically monitor how long the appli-...
-
Page 12: Using The Accessories
2 When the time you set is longer than minutes. and time setting flash in the 60 minutes, flash in the display. 3. Set the hours. display. The appliance deactivates. 5. Press any button or open the oven 4. -
Page 13: Additional Functions
ENGLISH Deep pan: Small indentation at the top Put the deep pan on the telescopic increase safety. The runners. indentations are also anti-tip devices. The high rim around the shelf prevents cookware from slipping of the shelf. 7.2 Telescopic runners - inserting the accessories With the telescopic runners you can put in and remove the shelves more easily. -
Page 14: Hints And Tips
The door is locked , symbols When you deactivate the appliance while the Function SAFE and come on the Lock is on, the Function Lock display also when Pyrolysis switches automatically to the function operates. It can be Child Lock. Refer to "Using checked on the knob. - Page 15 ENGLISH such as temperature, cooking time The temperature and baking and shelf position to the values in the times in the tables are tables. guidelines only. They • Use the lower temperature the first depend on the recipes and time. the quality and quantity of •...
- Page 16 Baking results Possible cause Remedy The cake is not ready in the The oven temperature is too The next time you bake, set baking time given. low. a slightly higher oven tem- perature. 9.4 Baking on one level: Baking in tins...
- Page 17 ENGLISH Food Function Tempera- Time Shelf posi- ture (°C) (min) tion Fruit flans (made with yeast True Fan Cooking 35 - 55 dough / sponge mixture) Fruit flans (made with yeast Top / Bottom Heat 170 35 - 55 dough / sponge mixture) Fruit flans made with short True Fan Cooking 160 - 170...
- Page 18 9.5 Bakes and gratins Food Function Temperature Time (min) Shelf position (°C) Pasta bake Top / Bottom 180 - 200 45 - 60 Heat Lasagne Top / Bottom 180 - 200 25 - 40 Heat Vegetables au Turbo Grilling...
- Page 19 ENGLISH 9.7 Multilevel Baking Use the function True Fan Cooking. Cakes / pastries / breads on baking trays Food Temperature Time (min) Shelf position (°C) 2 positions 3 positions Cream puffs / 25 - 45 1 / 4 160 - 180 Eclairs Dry streusel 150 - 160...
- Page 20 Food Temperature (°C) Time (min) Shelf position Quiche Lorraine 170 - 190 45 - 55 Swiss Flan 170 - 190 45 - 55 Cheesecake 140 - 160 60 - 90 Apple cake, covered 150 - 170 50 - 60...
- Page 21 ENGLISH Food Quantity Function Tempera- Time (min) Shelf posi- ture (°C) tion Roast beef or fil- per cm of Turbo Grill- 8 - 10 170 - 180 let: well done thickness 1) Preheat the oven. Pork Food Quantity Function Tempera- Time (min) Shelf posi- (kg)
- Page 22 Food Quantity Function Temperature Time (min) Shelf posi- (kg) (°C) tion Haunch of 1.5 - 2 Top / Bottom 180 - 200 60 - 90 venison Heat 1) Preheat the oven. Poultry Food Quantity Function Temperature Time (min) Shelf posi- (kg) (°C)
- Page 23 ENGLISH Food Temperature Time (min) Shelf position (°C) 1st side 2nd side Filet of beef 20 - 30 20 - 30 Back of pork 210 - 230 30 - 40 30 - 40 Back of veal 210 - 230 30 - 40 30 - 40 Back of lamb 210 - 230...
- Page 24 Food Quantity Defrosting Further de- Comments (kg) time (min) frosting time (min) Chicken 100 - 140 20 - 30 Put the chicken on an upturned saucer in a big plate. Turn halfway through. Meat 100 - 140 20 - 30 Turn halfway through.
- Page 25 ENGLISH Vegetables Food Temperature (°C) Cooking time until Continue to cook at simmering (min) 100 °C (min) 160 - 170 50 - 60 5 - 10 Carrots Cucumbers 160 - 170 50 - 60 Mixed pickles 160 - 170 50 - 60 5 - 10 Kohlrabi / Peas / As- 160 - 170...
- Page 26 Baking on one level. Baking in tins. Food Function Temperature Time Shelf posi- (°C) (min) tion Fatless sponge cake / True Fan Cooking 140 - 150 35 - 50 Fatless sponge cake Fatless sponge cake / Top / Bottom Heat 160...
-
Page 27: Care And Cleaning
ENGLISH Food Function Temperature Time (min) Shelf position (°C) Beef Steak / Beef Grilling 1)2) 24 - 30 Steak 1) Preheat the oven for 5 minutes. 2) Turn halfway through. 10. CARE AND CLEANING 2. Pull the rear end of the shelf support WARNING! away from the side wall and remove Refer to Safety chapters. - Page 28 1. Remove the worst dirt manually. The cleaning reminder 2. Clean the inner side of the door with goes out: hot water, so that the residues do not • after the end of the burn from the hot air.
- Page 29 ENGLISH 7. Pull the door trim to the front to remove it. A B C 8. Hold the door glass panels on their top edge one by one and pull them up out of the guide. 9. Clean the glass panel with water and soap.
-
Page 30: Troubleshooting
11. TROUBLESHOOTING WARNING! Refer to Safety chapters. 11.1 What to do if... Problem Possible cause Remedy You cannot activate or oper- The oven is not connected Check if the oven is correctly ate the oven. to an electrical supply or it is connected to the electrical connected incorrectly. - Page 31 ENGLISH Problem Possible cause Remedy The display shows "F102". • You did not fully close • Fully close the door. the door. • Deactivate the oven with • The door lock is defec- the house fuse or the tive. safety switch in the fuse box and activate it again.
-
Page 32: Energy Efficiency
Model (MOD.) ......... Product number (PNC) ......... Serial number (S.N.) ......... 12. ENERGY EFFICIENCY 12.1 Product Fiche and information according to EU 65-66/2014 Supplier's name BP5013021M BP501302WM BP531302WM Model identification BP531310WB BP531310WM BP531310WW Energy Efficiency Index 81.2 Energy efficiency class Energy consumption with a standard load, conven- 1.09 kWh/cycle... - Page 33 ENGLISH General hints the heating elements automatically Make sure that the oven door is closed deactivate earlier in some oven properly when the appliance operates functions. and keep it closed as much as possible The fan and lamp continue to operate. during the cooking.
- Page 34 www.aeg.com...
- Page 35 ENGLISH...
- Page 36 www.aeg.com/shop...
Need help?
Do you have a question about the BP5013021M and is the answer not in the manual?
Questions and answers