Table of Contents

Subscribe to Our Youtube Channel
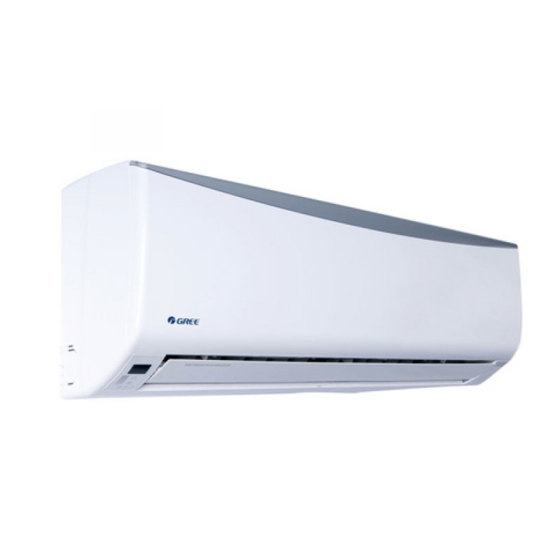
Related Manuals for Gree GWH07QA-K3DNA2C


Summary of Contents for Gree GWH07QA-K3DNA2C
- Page 1 Change for Life Service Manual Models: GWH07QA-K3DNA2C GWH07QA-K3DNA5C GWH07QA-K3DNA6C GWH07QA-K3DNB2C GWH07QA-K3DNB4C GWH07QA-K3DNB6C GWH07QA-K3DNB8C GWH07QA-K3DNC4C (Refrigerant:R410A) GREE ELECTRIC APPLIANCES,INC.OF ZHUHAI...
-
Page 2: Table Of Contents
Service Manual Table of Contents Part Ⅰ : Technical Information ...............1 1. Summary ........................1 2. Specifications ......................2 2.1 Specification Sheet ......................2 2.2 Operation Characteristic Curve ..................4 2.3 Capacity Variation Ratio According to Temperature ............4 2.4 Cooling and Heating Data Sheet in Rated Frequency .............5 2.5 Noise Curve ........................5 3. - Page 3 Service Manual 9. Maintenance ......................30 9.1 Malfunction Analysis .......................30 9.2 Flashing LED of Indoor/Outdoor Unit and Primary Judgement ........34 9.3 How to Check Simply the Main Part ................43 10. Exploded View and Parts List ..............56 10.1 Indoor Unit ........................56 10.2 Outdoor Unit .........................62 11.
-
Page 4: Part Ⅰ : Technical Information
Service Manual Part Ⅰ : Technical Information 1. Summary Indoor Unit: A2 Panel A5 Panel A6 Panel B2 Panel B6 Panel B4 Panel B8 Panel C4 Panel Outdoor Unit: GWH07QA-K3DNA5C/O Remote Controller: YX1F T-ON T-OFF AUTO SWING COOL SLEEP LOCK SPEED HEAT ON/OFF... -
Page 5: Specifications
Service Manual 2. Specifications 2.1 Specification Sheet 1.GWH07QA-K3DNA2C 2.GWH07QA-K3DNA5C 3.GWH07QA-K3DNA6C 4.GWH07QA-K3DNB2C Model 5.GWH07QA-K3DNB4C 6.GWH07QA-K3DNB6C 7.GWH07QA-K3DNB8C 8.GWH07QA-K3DNC4C 1.CB426004500 2.CB425005400 /CB425005401 3.CB427006600 4.CB432006200 Product Code 5.CB434004700 6.CB435005500 7.CB438004200 8.CB444003000 Rated Voltage 220-240 Power Rated Frequency Supply Phases Power Supply Mode Outdoor Cooling Capacity... - Page 6 Service Manual Model of Outdoor Unit GWH07QA-K3DNA5C/O Product Code of Outdoor Unit CB425W05400 Compressor Manufacturer/Trademark Shanghai Hitachi Electrical Appliances Co.,Ltd Compressor Model ASA725SPMA6JK Compressor Oil Α68HES-H or equivaquent 260±20ml Compressor Type Rotary L.R.A. 14.50 Compressor RLA 2.71 Compressor Power Input Overload Protector Throttling Method Capillary...
-
Page 7: Operation Characteristic Curve
Service Manual 2.2 Operation Characteristic Curve Cooling Heating 220V Conditions 220V Indoor:DB27°C/WB19°C Outdoor:DB35°C/WB24°C Indoor air flow:Super High 230V Pipe length:5m 230V 240V Conditions Indoor:DB20°C/WB15°C 240V Outdoor:DB7°C/WB6°C Indoor air flow:Super High Pipe length:5m 10 20 30 40 50 60 70 80 90 100 Compressor speed (rps) Compressor speed (rps) 2.3 Capacity Variation Ratio According to Temperature... -
Page 8: Cooling And Heating Data Sheet In Rated Frequency
Service Manual 2.4 Cooling and Heating Data Sheet in Rated Frequency Cooling: Pressure of gas pipe Inlet and outlet pipe Rated cooling Fan speed Fan speed connecting indoor temperature of heat condition( C) (DB/WB) Model of indoor of outdoor and outdoor unit exchanger unit unit... -
Page 9: Outline Dimension Diagram
Service Manual 3. Outline Dimension Diagram 3.1 Indoor Unit 168.5 159.5 Φ55 Φ55 Unit:mm Models Φ55 Φ55 Technical Information... -
Page 10: Outdoor Unit
Service Manual 3.2 Outdoor Unit Unit:mm Technical Information... -
Page 11: Refrigerant System Diagram
Service Manual 4. Refrigerant System Diagram Cooling and heating model Outdoor unit Indoor unit Gas pipe side Valve 4-Way valve Di s charge Heat Accumlator Suction exchanger Compressor (evaporator) Heat exchanger Liquid pipe (condenser) side Valve Strainer Capillary Strainer COOLING HEATING Connection pipe specification: Liquid pipe:1/4"... -
Page 12: Electrical Part
YEGN Yellow/Green Black Violet Orange Note: Jumper cap is used to determine fan speed and the swing angle of horizontal lover for this model. ● Indoor Unit GWH07QA-K3DNA2C/I GWH07QA-K3DNA5C/I(CB425N05400) GWH07QA-K3DNB2C/I GWH07QA-K3DNB4C/I GWH07QA-K3DNB6C/I GWH07QA-K3DNC4C/I ROOM TUBE RECEIVER AND TEMP. TEMP. DISPLAY BOARD... - Page 13 Service Manual GWH07QA-K3DNA5C/I(CB425N05401) GWH07QA-K3DNA6C/I 63632220 ● Outdoor Unit GWH07QA-K3DNA5C/O 600007000298 These wiring diagrams are subject to change without notice; please refer to the one supplied with the unit. Technical Information...
-
Page 14: Pcb Printed Diagram
Service Manual 5.2 PCB Printed Diagram Indoor Unit Top view Name Live wire Terminal with indoor unit communication wire Fuse Interface of health function neutral wire(only for the mode with this function) Neutral wire Interface of indoor fan Live wire interface of cold plasma (only for the mode with this function) Auto button Interface of up &... - Page 15 Service Manual Outdoor Unit ● Top view Name Interface of main programme Terminal of electronic expansion valve Monitor terminal for neutral wire and live wire Terminal of outdoor unit temperature sensor Module terminal of fan Interface of 4-way valve Communication wire Live wire Neutral wire 10 Grounding wire...
-
Page 16: Function And Control
Service Manual 6. Function and Control 6.1 Remote Controller Introduction Buttons on Remote Controller ON/OFF button T-ON T-OFF MODE button AUTO SWING COOL SLEEP LOCK SPEED HEAT +/- botton MODE ON/OFF FAN button SWING button SWING SLEEP TIMER SLEEP button TIMER button Icon Display on Remote Controller Timer on Timer off... - Page 17 Service Manual When selecting auto mode, air conditioner will operate automatically according to ex-factory setting. Set temperature can't be adjusted and won't be displayed either. Press FAN button to adjust fan speed. (This function is not available in this air conditioner.) When selecting cool mode, air conditioner will operate under cool mode.
- Page 18 Service Manual Replacement of Batteries in Remote Controller battery 1. Press the back side of remote controller on the spot marked with , and then push out the cover of battery box along the arrow direction. 2. Replace two No.7 (AAA 1.5V) dry batteries and make sure the positions of + and -- polar are correct.
-
Page 19: Brief Description Of Modes And Functions
Service Manual 6.2 Brief Description of Modes and Functions 1. Temperature Parameters Indoor preset temperature (Tpreset) ◆ Indoor ambient temperature (Tamb.) ◆ 2. Basic Functions Once energized, in no case should the compressor be restarted within less than 3 minutes. In the situation that memory function is available, for the first energization, if the compressor is at stop before de-energization, the compressor will be started without a 3-minute lag;... - Page 20 Service Manual ① Working conditions and process of heating If Tamb.≤Tpreset +2 C, the unit enters heating mode, in which case the four-way valve, the compressor and the outdoor fan will operate simultaneously, and the indoor fan will run at preset speed in the condition of preset cold air prevention. If T amb.≥Tpreset +5 C, the compressor will stop, the outdoor fan will stop with a time lag of 30s, and the indoor fan will stop after 60-second blow at low speed...
- Page 21 Service Manual ② Protection a. In cooling operation, protection is the same as that under the cooling mode; b. In heating operation, protection is the same as that under the heating mode; c. When ambient temperature changes, operation mode will be converted preferentially. Once started, the compressor will remain unchanged for at least 6 minutes.
- Page 22 Service Manual Indoor Units (1) ON/OFF Press the remote button ON/OFF: the on-off state will be changed once each time you press the button. (2) Mode Selection Press the remote button MODE, then select and show in the following ways: AUTO, COOL, DRY, FAN, HEAT, AUTO. (3) Temperature Setting Option Button Each time you press the remote button TEMP+ or TEMP-, the setting temperature will be up or down by 1 C.
- Page 23 Service Manual Cooling, heating and dehumidify). If you close the light key, all the display patterns will close. ② Double-8 display According to the different setting of remote control, the nixie light may display the current temperature (the temperature scope is from 16 C to 30 C) and indoor ambient temperature.
-
Page 24: Part Ⅱ : Installation And Maintenance
Service Manual Part Ⅱ : Installation and Maintenance 7. Notes for Installation and Maintenance Safety Precautions: 10. If the power cord or connection wire is not long enough, please get the specialized power cord or connection wire Important! from the manufacture or distributor. Prohibit prolong the wire by yourself. - Page 25 Service Manual Main Tools for Installation and Maintenance 1. Level meter, measuring tape 2. Screw driver 3. Impact drill, drill head, electric drill 4. Electroprobe 5. Universal meter 6. Torque wrench, open-end wrench, inner hexagon spanner 7. Electronic leakage detector 8.
-
Page 26: Installation
Service Manual 8. Installation 8.1 Installation Dimension Diagram Space to the wall Space to the wall At least 15cm At least 15cm Drainage pipe Installation and Maintenance... - Page 27 Service Manual Installation procedures Start installation Preparation before installation Read the requirements select installation Prepare tools for electric connection location Select indoor unit Select outdoor unit installation location installation location Install the support of outdoor unit Install wall-mounting (select it according to the actual situation) frame, drill wall holes Connect pipes of indoor Fix outdoor unit...
-
Page 28: Installation Parts-Checking
Service Manual 8.2 Installation Parts-checking 8.4 Electric Connection Requirement Name Name 1. Safety Precaution Indoor unit Sealing gum (1) Must follow the electric safety regulations when installing Outdoor unit Wrapping tape the unit. Support of outdoor (2) According to the local safety regulations, use qualified Connection pipe unit power supply circuit and air switch. - Page 29 Service Manual in the holes. 5. Connect the Pipe of Indoor Unit (3) Fix the wall-mounting frame on the wall with tapping screws (1) Aim the pipe joint at the corresponding bellmouth.(As show (ST4.2X25TA) and then check if the frame is firmly installed by in Fig.5) pulling the frame.
- Page 30 Service Manual 7. Connect Wire of Indoor Unit 8. Bind up Pipe (1) Open the panel, remove the screw on the wiring cover and (1) Bind up the connection pipe, power cord and drain hose then take down the cover.(As show in Fig.11) with the band.(As show in Fig.14) (2) Reserve a certain length of drain hose and power cord Panel...
-
Page 31: Installation Of Outdoor Unit
Service Manual 8.6 Installation of Outdoor Unit Refer to the following table for wrench moment of force: Tightening torque(N . m) Hex nut diameter(mm) 1. Fix the Support of Outdoor Unit(Select it According to Φ6 15~20 the Actual Installation Situation) Φ9.52 30~40 (1) Select installation location according to the house structure. -
Page 32: Vacuum Pumping And Leak Detection
Service Manual (3) The water outlet can't be placed in water in order to drain 8.8 Check after Installation and Test smoothly.(As show in Fig.27) Operation 1. Check after Installation Check according to the following requirement after finishing installation. The drain hose can't be fluctuant Items to be checked Possible malfunction Has the unit been... -
Page 33: Maintenance
Service Manual 9. Maintenance 9.1 Malfunction Analysis Note: When replacing the controller, be sure to insert the wire jumper into the new controller, otherwise the unit will display C5 Measure insulation resistance The breaker trips at once when it to ground to see if there is any is set to “ON”. - Page 34 Service Manual Improper set of temperature Adjust set temperature If cooling (heating) load is Check the forecasted load of cooling (heating) proper Check and fill the leakage, then The refrigerant has leakage or is vacuumize it and supplement the re- insufficient frigerant as required Leakage between the high pres-...
- Page 35 Service Manual Improper set of temperature Adjust set temperature If cooling (heating) load is Check the forecasted load of cooling (heating) proper Check and fill the leakage, then The refrigerant has leakage or is vacuumize it and supplement the re- insufficient frigerant as required Leakage between the high pres-...
- Page 36 Service Manual The torque of the swing motor is not enough First, check whether the connection is Wrong connection The swing fan wrong. If no, replace the parts does not run. The controller is damaged(IC2003 is damaged, the swing relay can not close, etc) C o n t r o l l e r m a l f u n c t i o n ( I C 2 0 0 3 Change controller...
-
Page 37: Flashing Led Of Indoor/Outdoor Unit And Primary Judgement
Service Manual 9.2 Flashing LED of Indoor/Outdoor Unit and Primary Judgement Display Method of Outdoor Display Method of Indoor Unit Unit Indicator has 3 kinds of Indicator Display (during display status and during Malfunction blinking, ON 0.5s and OFF Dual-8 A/C status Possible Causes blinking, ON 0.5s and OFF... - Page 38 Service Manual Display Method of Outdoor Display Method of Indoor Unit Unit Indicator has 3 kinds of Indicator Display (during display status and during Malfunction blinking, ON 0.5s and OFF Dual-8 A/C status Possible Causes blinking, ON 0.5s and OFF Name 0.5s) Code...
- Page 39 Service Manual Display Method of Outdoor Display Method of Indoor Unit Unit Indicator has 3 kinds of Indicator Display (during display status and during Malfunction blinking, ON 0.5s and OFF Dual-8 A/C status Possible Causes blinking, ON 0.5s and OFF Name 0.5s) Code...
- Page 40 Service Manual Display Method of Outdoor Display Method of Indoor Unit Unit Indicator has 3 kinds of Indicator Display (during display status and during Malfunction blinking, ON 0.5s and OFF Dual-8 A/C status Possible Causes blinking, ON 0.5s and OFF Name 0.5s) Code...
-
Page 41: Indoor Unit
Service Manual Display Method of Outdoor Display Method of Indoor Unit Unit Indicator has 3 kinds of Indicator Display (during display status and during Malfunction blinking, ON 0.5s and OFF Dual-8 A/C status Possible Causes blinking, ON 0.5s and OFF Name 0.5s) Code... -
Page 42: Outdoor Unit
Service Manual Display Method of Outdoor Display Method of Indoor Unit Unit Indicator has 3 kinds of Indicator Display (during display status and during Malfunction blinking, ON 0.5s and OFF Dual-8 A/C status Possible Causes blinking, ON 0.5s and OFF Name 0.5s) Code...
Need help?
Do you have a question about the GWH07QA-K3DNA2C and is the answer not in the manual?
Questions and answers