Advertisement
Quick Links
10+
10+
SOL-EXPERT
SOL-EXPERT
group
group
group
group
Item no. 50040
How you can help the
environment: Please return the
parts to a certified provider at
the end of their useful life!
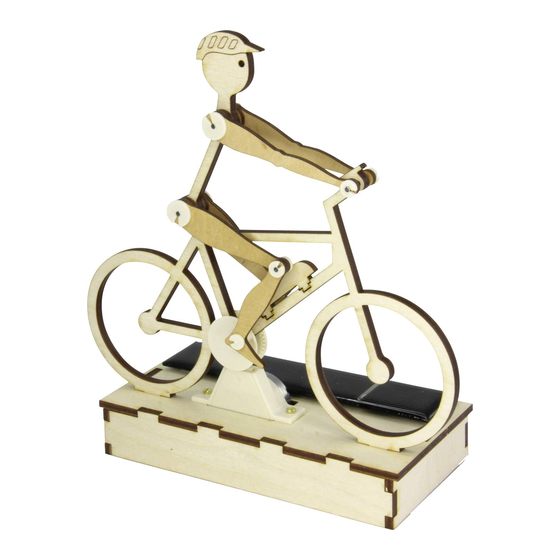
Solar cyclist / e-biker
Wooden building kit with gearbox,
runs on "solar fuel"
SOLAR
Advertisement

Related Manuals for Sol-Expert 50040


Summary of Contents for Sol-Expert 50040
- Page 1 How you can help the environment: Please return the parts to a certified provider at Wooden building kit with gearbox, the end of their useful life! runs on "solar fuel“ SOL-EXPERT SOL-EXPERT group group group group Item no. 50040 SOLAR...
- Page 2 ASSEMBLY INSTRUCTIONS BUILDING THE GEARBOX, parts: Motor Small gear Spacing template Twin gear Gearbox casing Gearbox cover Carefully slide Place the small Then use the spacing template to carefully push the The gear is the motor now correctly gear on the table. small gear all the way down.
- Page 3 Then one by one place the two twin gears Push the gearbox Place the motor on on the pins. the table with the casing all the way over the motor, motor cable toward you. applying pressure. The pins are facing away from you.
- Page 4 If the gearbox is now easy to turn with Applying light pressure, Then carefully turn over the gearbox, push the cover into the place it on the table and firmly press your finger, you can move to the next page to continue assembly. gearbox casing until it on the strips.
- Page 5 ATTACHING THE BASE Set the base in front of you in the correct direction: Attention: Make sure the correct side is up! ü 60 mm 40 mm 60 mm 40 mm Now attach the sides Apply a little glue in the to the base: areas on the sides with the red mark:...
- Page 6 Attach the long wooden piece, applying some pressure Apply a little glue in Apply a little glue the six locations with in the six locations the red mark. with the red mark. Attach the long wooden The base is now complete! piece, applying some pressure.
- Page 7 Attach the air pump or battery pack DECISIONS, DECISIONS... After deciding if you want to install the battery or the air pump, apply a small dot of glue in the notches on the bike frame and attach your option flush with the bike frame, applying some pressure. Either: Cyclist Apply glue...
- Page 8 ... and secure from the back with the nuts. Insert the gearbox in the base, insert the 2 screws into the holes... Gearbox unit...
-
Page 9: Sprocket Assembly
SPROCKET ASSEMBLY Slide pedal holder 2 Attach the gear to pedal Important: into the shaft opening holder 1, then slide this unit Turn the two pedal on the cyclist. into pedal holder 2. holders so the pedals are 180 ° from each other! Gear Pedal holder 1... - Page 10 ATTACHING THE CYCLIST TO THE BASE The cyclist is easiest to attach and align when the gearbox is turning. If you have enough light, you can use the solar cell. If you do not have enough light, use a standard 1.5 Volt battery to power the gearbox. Attaching the cyclist powered by solar cell Now position the solar cell, but do not attach Attach the motor cables to the terminals,...
- Page 11 Attaching the solar cyclist with light Shine a torch Carefully adjust the cyclist along onto the middle the arrows until the model runs of the solar cell: smoothly: Apply glue to the areas with the marking, insert the cyclist in the base and align so the gears can easily engage with the gearbox turning and the cog in the cyclist can easily move along.
- Page 12 Assembly with 1.5 Volt battery Alkaline Tape the end of the black cable to the + terminal of the battery with adhesive tape or packing tape. AA-LR6 - 1.5 V Standard 1.5 Volt battery (not included) Tape the end of the red cable to the - terminal of the battery with adhesive tape or packing tape.
- Page 13 Attaching the cyclist with battery Allow the glue to dry approx. Carefully adjust 10 minutes. Do not move the the cyclist along cyclist during this time. the arrows until the model runs smoothly: Allow glue to dry for 10 minutes. After 10 minutes you can remove the battery and install the solar cell Apply glue to the areas with the...
- Page 14 ATTACHING THE CYCLIST'S ARMS AND LEGS (1) Insert 3 pins (2) Slide 4 wooden (3) Attach arms spacers onto the pins 17 x 2.5 mm 17 x 2.5 mm 18 x 2 mm 18 x 2 mm Spacer...
- Page 15 (4) Attach 4 caps, 2 large Attention: Postion and attach parts exactly as shown: and 2 small. Left leg: foot faces left, right leg: foot faces right (6) Slide the thighs onto the (5) Inser the pins in the two small caps small pins...
- Page 16 Attaching the left leg Attaching the right leg (9) Now attach the right leg to the Thigh position on the left leg: right of the cyclist and the left leg Thigh position on the right leg: "inside", toward the cyclist, lower "inside", toward the cyclist, lower the left side.
- Page 17 Now secure the pins with the caps. Only push the (10) Congratulations - your cyclist is now ready to go, in caps far enough onto the pedal so it does not crush the sunlight or bright LED light! foot and still has a little play on the sides. ü...
- Page 18 Other great kits from A solar module requires sunlight to generate maximum power. SOL-EXPERT group: Without sunlight, it's like a wind turbine trying to generate power without wind. Solar Windmill "Holland“ ü If the solar module has good sun exposure, the blades on the windmill turn tirelessly.
- Page 19 Other great kits from SOL-EXPERT group: Solar Runner, Wooden Building Kit Solar House "Sunshine Villa“ Solar mobility made easy! Set the solar house in a sunny Running solar car as a kit! Quiet and location and the solar cells charge Solar Wind Turbine "Sylt",...
- Page 20 Radler::1346.html?language fietser::1346.html?language=nl SOL-EXPERT kits keep you wanting more: detailed instructions, accurately fitting parts, high quality standard! SOL-EXPERT group, C.Repky Mehlisstrasse 19 - D-88255 Baindt Tel.: +49 (0)7502 - 94115-0 - Fax: +49 (0)7502 - 94115-99 Save company address.
Need help?
Do you have a question about the 50040 and is the answer not in the manual?
Questions and answers