Table of Contents
Advertisement
Quick Links
Advertisement
Table of Contents

Subscribe to Our Youtube Channel
Related Manuals for Tally Dascom DL-310


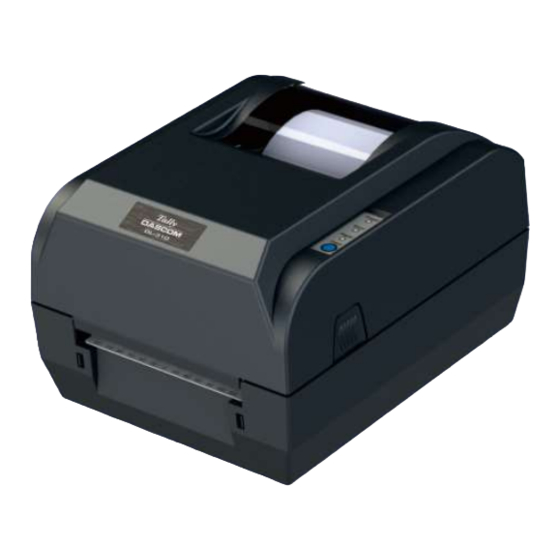
Summary of Contents for Tally Dascom DL-310
- Page 1 User Manual DL-310 Label & Barcode Printer...
- Page 2 Tally Dascom DL-310 User Guide V1.0 Important Safety Instructions (English) Read the following instructions thoroughly before starting up your printer. • The device and mains-socket must all times be easily accessible. • Never carry out maintenance or repair work yourself. Always contact a qualified service technician.
- Page 3 Tally Dascom DL-310 User Guide V1.0 Wichtige Sicherheitshinweise (German) Lesen Sie bitte diese Sicherheitshinweise durch, bevor Sie den Drucker in Betrieb nehmen. Das Gerät und die Netzsteckdose müssen jeder Zeit leicht zugänglich sein. Führen Sie Wartungsarbeiten und Reparaturen keinesfalls selbst aus, sondern verständigen Sie immer einen qualifizierten Servicetechniker.
- Page 4 Tally Dascom DL-310 User Guide V1.0 Consignes importantes de sécurité (French) Lire attentivement les instructions suivantes avant de mettre l’imprimante en service. Le dispositif et la prise principale doivent toujours être accessibles facilement. Ne jamais effectuer soi-même les travaux d’entretien et de réparations. Contacter toujours un dépanneur qualifié.
- Page 5 Tally Dascom DL-310 User Guide V1.0 Indicazioni di sicurezza importanti (Italian) Prima di mettere in funzione la stampante, leggere attentamente le seguenti indicazioni. Il dispositivo e la presa di corrente devono essere sempre facilmente accessibili. Non eseguire mai da sé gli interventi di manutenzione e riparazione, ma rivolgersi sempre a un tecnico di assistenza qualificato.
- Page 6 Tally Dascom DL-310 User Guide V1.0 Instrucciones de seguridad importantes (Spanish) Lea las siguientes instrucciones con esmero antes de poner la impresora en servicio. El dispositivo y la toma de corriente deben estar ubicados de forma que sea fácil acceder a ellos.
- Page 7 Tally Dascom DL-310 User Guide V1.0 Правила по технике безопасности. (Russian) Прочитайте, пожалуйста, инструкцию по технике безопасности перед включением в работу принтера. Устройство и розетка должны быть всегда легко доступна. Не выполняйте технические работы и ремонт техники самостоятельно, но сообщайте о...
- Page 8 Tally Dascom DL-310 User Guide V1.0 Instruções Importantes sobre Segurança (Portuguese) Leia as instruções de segurança antes de usar a impressora. A impressora e a tomada devem ser facilmente em todos os momentos acessí veis. Consulte sempre um técnico qualificado para executar uma reparação .
- Page 9 Tally Dascom DL-310 User Guide V1.0 Önemli Güvenlik Talimatları (Turkish) Lütfen, yazıcıyı işletime geçirmeden önce bu güvenlik talimatlarını bütünüyle dikkatle okuyun. Cihaz ve elektrik prizinin her zaman kolayca erişilebilir olması gerekir. Bakım ve tamir çalışmalarını kesinlikle ve hiçbir surette kendi başınıza yapmayın; her zaman kalifiye bir uzman servis-teknisyenine haber verin.
- Page 10 Tally Dascom DL-310 User Guide V1.0 TRADEMARK ACKNOWLEDGEMENTS “IBM” is a trademark of International Business Machines Corporation. “EPSON” is a trademark of Epson America I ncorporated. “DEC” is a trademark of Digital Equipment Corporation. “Centronics” is a trademark of Centronics Data Computer Corporation.
-
Page 11: About This Manual
Tally Dascom DL-310 User Guide V1.0 About This Manual This manual provides information to operators of the DL-310 to describe basic operations to enable safe and correct use of the printer. Symbols Description The symbols in this manual are identified by their level of importance, as defined below. Read the following carefully before handling the product. -
Page 12: Table Of Contents
Tally Dascom DL-310 User Guide V1.0 TABLE OF CONTENTS About This Manual ..........................X 1 INTRODUCTION ..........................1 Features ............................1 Printer specifications........................2 Print Media Types ........................3 External Dimension and Weight ....................5 Unpacking ........................... 6 Product Configuration ........................ 8 Printer Components ........................ - Page 13 Tally Dascom DL-310 User Guide V1.0 5 TROUBLESHOOTING AND MAINTENANCE ..................8 5.1 Common Issues ..........................8 5.2 Resetting the Factory Default Values ....................9 5.3 Removing Jammed Label ........................ 9 5.4 Cleaning Thermal Print Head ......................10 5.5 Maintenance ..........................10 6 COMMUNICATION INTERFACES SPECIFICATIONS ................
-
Page 14: Introduction
User Guide V1.0 1 INTRODUCTION The Dascom® DL-310 model is the best value in a desktop thermal printer. The DL-310 printer provides thermal transfer and direct thermal printing at speeds up to 6 ips (inches per second) at a 203 dpi (dots per inch) print density. -
Page 15: Printer Specifications
Tally Dascom DL-310 User Guide V1.0 Printer specifications Direct thermal/Thermal transfer printing Print method Print 106mm Print width Parameter 102mm/s (300DPI) Print speed Dot pitch: 0.084mm Print head 300DPIx300DPI Resolution GB18030 24×24 (Simplified/Traditional Chinese) Chinese Resident single byte (ZPL): Font A, Font B, Font D, Font E, Font F, Font G,... -
Page 16: Print Media Types
Tally Dascom DL-310 User Guide V1.0 Wi-Fi (802.11b/g/n) Bluetooth: SPP Software Driver (Windows 32bit/64bit), Bartender, SDK system 230(W)×290(D)×176(H)mm Dimensions Black Casing Color Approx 3kg Physical Spec. Weight Operating condition 5~40℃/20~95%RH (non-condensing) Storage condition -20~60℃/≤95%RH (non-condensing) CE (LVD/CB and EMC) and FCC/UL... - Page 17 Tally Dascom DL-310 User Guide V1.0 Media Type How it looks Description Non-Continuous Roll media is wound on a core that can be 1 to 1.5 Roll Media in. (25.4 to 38.1 mm) in diameter. Labels have adhesive backing that sticks them to a liner, and they are separated by gaps, holes, notches, or black marks.
-
Page 18: External Dimension And Weight
Tally Dascom DL-310 User Guide V1.0 External Dimension and Weight Width: Approximately 230 mm Depth: Approximately 290 mm Height: Approximately 179.5 mm Mass: Approx. 3 kg (excluding power adapter) Front View Back view Side view... -
Page 19: Unpacking
If you discover shipping damage upon inspection: Immediately notify the shipping company and file a damage report. Keep all packaging material for shipping company inspection. Notify your authorized Tally Dascom reseller. DL-310 printer Ribbon Power cord Media CD-ROM... - Page 20 Tally Dascom DL-310 User Guide V1.0 Package Contents: Printer 1 unit Ribbon rewind paper core 1 piece Ribbon sample 1 piece Ribbon spindle 2 pieces Media sample 1 piece Thermal transfer Media fixer 2 pieces Standard Media spindle 1 piece...
-
Page 21: Product Configuration
Tally Dascom DL-310 User Guide V1.0 Product Configuration Interface Types Optional Interface (Serial/ Parallel/ Ethernet/ Wi-Fi/ Bluetooth) USB interface USB interface (USB2.0, Full speed) Serial interface: Serial port (RS-232, DB25) Parallel interface: Bidirectional parallel port (IEEE1284) ... -
Page 22: Printer Components
Tally Dascom DL-310 User Guide V1.0 Printer Components Printer components and their functions are shown as below: Media Window Top Cover Control Panel Optional Interface (Serial/ Parallel/ Ethernet/ Power Switch Wi-Fi/ Bluetooth) Power Socket USB interface Component Name Function Media window... - Page 23 Tally Dascom DL-310 User Guide V1.0 Ribbon Pick-up Holder Print Head Mechanism Ribbon Holder Media Holder Print Head Locking Button Print Head Locking Button Print Head Ribbon Pick-up Holder Tear Bar Rotatable Board Component Name Function Ribbon Holder For placing ribbon, lower seat for new ribbon, top seat for used ribbon.
- Page 24 Tally Dascom DL-310 User Guide V1.0 Media Guide Media Guide Adjuster Black Mark Sensor Platen Roller Component Name Function Media Guide Align the media in the center of media path Media Guide Adjustor Adjust the space between the two media guides For detecting black mark.
-
Page 25: Control Panel
Tally Dascom DL-310 User Guide V1.0 Control Panel 1.8.1 LEDs Behavior LEDs LEDs’ behavior Status On ○ Power on. Power Off ● Error or power off. On ○ Paper end. Off ● Normal. Status Label remains in peeler. Fast blink ○●○●○●○... -
Page 26: Setup
Tally Dascom DL-310 User Guide V1.0 2 SETUP Flow of Setup This chapter consists of the following sections along with the setup flow of the product and peripherals. Placing the Printer (page 13) Adjusting Sensor (page 15) Loading Paper Roll... -
Page 27: Attaching Power
Tally Dascom DL-310 User Guide V1.0 2.2 Attaching Power Checking the voltage of the power adapter Before you connect the power adapter to the power socket check if the voltage is correct. If you connect the power adapter to power with incorrect voltage this may result in electrical damage to adapter and printer. -
Page 28: Calibrate Sensor
Tally Dascom DL-310 User Guide V1.0 2.3 Calibrate Sensor ap sensor and reflective sensor should be calibrated separately. First of all, please open the setup tool, enter “Printer Setup”, choose paper sensor: gap sensor by default. You could switch to reflective sensor according to your need. -
Page 29: Loading Roll Media
Tally Dascom DL-310 User Guide V1.0 Label Black Mark Sign liner Lower Sensor (4) Put the media between the media compartment and the tear bar. And then close the mechanism and the top cover. 2.4 Loading Roll Media Must use thermal media in case of no ribbon in the printer. If using ribbon, you have to use thermal transfer media. - Page 30 Tally Dascom DL-310 User Guide V1.0 (5) Unlatch the print head mechanism by pushing the two blue locking buttons on the sides toward the rear. (6) Lead the media under the print head mechanism through the media guides. (7) Control the blue media guide adjustor so as to align the media in the central path.
-
Page 31: Loading Transfer Ribbon
Tally Dascom DL-310 User Guide V1.0 2.5 Loading Transfer Ribbon Transfer ribbons come in several varieties and in some cases colors to match your application needs. The media and ribbon types should be matched to provide you with optimal print results. Always use ribbon that is wider than the media to protect the printhead from wear. - Page 32 Tally Dascom DL-310 User Guide V1.0 (6) Open the sensor support. (7) Insert the ribbon roll into the ribbon holder (lower seat of the print head mechanism): Insert the hexagon end onto the ribbon adjustor (blue gear), then insert the other end into the slot of the ribbon holder.
- Page 33 Tally Dascom DL-310 User Guide V1.0 (9) Turn the wheel of the print head mechanism to ensure the ribbon is tightly wound. (10) Close the sensor support. (11) Press down the print head mechanism on both sides firmly until you hear a snap.
-
Page 34: Connecting To Computer
Tally Dascom DL-310 User Guide V1.0 2.6 Connecting to Computer NOTE! Be sure to install the driver before connecting the printer to the host computer. Before installing, disconnect the Power Unit from the printer (as well as turning the power switch off). -
Page 35: Connecting Usb Interface
Tally Dascom DL-310 User Guide V1.0 2.7.1 Connecting USB interface 2.7.2 Connecting serial interface WARNING! Be sure to turn off the power supply for both the printer and host computer before connecting the cables. Insert the interface cable connector firmly into the interface connector on the connector panel. -
Page 36: Connecting Parallel Interface
Tally Dascom DL-310 User Guide V1.0 When using interface cables equipped with a grounding line, attach the ground line to the screw hole marked “FG” on the printer. Connect the other end of the interface cable to the host computer. -
Page 37: Connecting Wlan Interface
Tally Dascom DL-310 User Guide V1.0 Never attempt to connect the customer display cable, drawer kick-out cable, or the standard telephone line cable to the 10/100BASE-T LAN connector. Connect the printer to a network by a LAN cable via a switch. -
Page 38: Network Setup And Configuration
Tally Dascom DL-310 User Guide V1.0 3 NETWORK SETUP AND CONFIGURATION 3.1 Installing Driver Switch off the printer before running the printer driver setup. Your printer CD-ROM comes with Windows Driver. Go to the Driver folder and run the installer. - Page 39 Tally Dascom DL-310 User Guide V1.0 (3) Select the installation path to the Driver. (3) Click “Finish”.
- Page 40 Tally Dascom DL-310 User Guide V1.0 (4) Click “Yes”. (5) Click “Next”.
- Page 41 Tally Dascom DL-310 User Guide V1.0 (6) Choose interface. (7) Choose printer model “Tally Dascom DL-310Z” or “Tally Dascom DL-310E”, and the installation path. Then click “Next”.
- Page 42 Tally Dascom DL-310 User Guide V1.0 (8) Click “Next”. (9) Enter printer name. Click “Next”.
- Page 43 Tally Dascom DL-310 User Guide V1.0 (10) Click “Finish”. (11)Then the driver is installed successfully.
-
Page 44: Installing Setup Tool
Tally Dascom DL-310 User Guide V1.0 3.2 Installing Setup Tool Your printer CD-ROM comes with Tally Dascom Setup Tool. Go to the folder and run the installer. Please check the website www.dascom.com for the latest version of setup tool. (1) Choose setup language. - Page 45 Tally Dascom DL-310 User Guide V1.0 (3) Select the installation path to the tool. (4) Click “Finish”.
- Page 46 Tally Dascom DL-310 User Guide V1.0 (5) Click “Install”. (6) Click “Install”.
- Page 47 Tally Dascom DL-310 User Guide V1.0 (7) Installation complete. Click “Finish”.
-
Page 48: Setup Tool Application
Tally Dascom DL-310 User Guide V1.0 3.3 Setup Tool Application A CD comes along with printer. The CD contains POS & label printer setup tool for configuring printer. Or, please find the latest setup tool on Dascom website: www.dascom.com Read the help file carefully before using the setup tool. Please click “Help” button below for more information. -
Page 49: Configuring Printer
Tally Dascom DL-310 User Guide V1.0 3.3.2 Configuring Printer After model and interface setting, select “Printer Setup” tab for configurations. Setup Items Explanation Setup Items Options Default Description Use un-continuous paper set to on; Use continuous Page Mode On, Off paper set to off. - Page 50 Tally Dascom DL-310 User Guide V1.0 On: It will auto calibrate the label when you use a Auto Calibrate On, Off different size/format of label. Label Off: Disable auto calibrate label Before the printer begins to detect the label length,...
-
Page 51: Lan Interface Setup
Tally Dascom DL-310 User Guide V1.0 3.4 LAN Interface Setup (1) Select Network interface in the setup tool. And then click “Setting”. (2) Click “Setup Printer”. - Page 52 Tally Dascom DL-310 User Guide V1.0 (3) You could change DHCP, IP address or other settings. And then enter OK. (4) At the end, click OK to implement the change.
-
Page 53: Wlan Interface Setup
Tally Dascom DL-310 User Guide V1.0 3.5 WLAN Interface Setup If your printer connected to the computer with Wireless Ethernet, there are two kinds of modes: AP mode and STA mode. AP means Access Point (AdHoc Mode). When the printer is working under AP mode, it works as an access point to the cable network for the user. -
Page 54: Install Bluetooth Adapter Driver
Tally Dascom DL-310 User Guide V1.0 (2) You could change the working mode, SSID, DHCP, IP address or other settings. And then enter Confirm to save the new setting. 3.6 Install Bluetooth Adapter Driver (1) Install Bluetooth adapter (V2.0 or above version) that prepared by yourself in the PC via USB interface. - Page 55 Tally Dascom DL-310 User Guide V1.0 (4) Click the model name and enter Next to continue.
- Page 56 Tally Dascom DL-310 User Guide V1.0 (5) Then the Bluetooth adapter has been installed in the computer. (6) Enter the Properties of the printer.
- Page 57 Tally Dascom DL-310 User Guide V1.0 (7) Check the port type, in this case, it is COM4.
- Page 58 Tally Dascom DL-310 User Guide V1.0 (8) Right click the printer, select Properties →Ports, and select the output port that you have put down (in the case COM4) then click “Apply”.
- Page 59 Tally Dascom DL-310 User Guide V1.0 (9) Then COM4 for the printer is checked.
- Page 60 Tally Dascom DL-310 User Guide V1.0 (10) Select “General” and click “Print test page” for checking Bluetooth performance. Setting pages vary depending on the different types of Bluetooth adapter.
-
Page 61: Bluetooth Setup
Tally Dascom DL-310 User Guide V1.0 3.7 Bluetooth Setup (1) Select Network interface in the setup tool. And then click “Bluetooth Settings”. (2) Click Get Bluetooth Settings. - Page 62 Tally Dascom DL-310 User Guide V1.0 (3) You could change the Bluetooth Name and Password, and then click “Send Settings”. Click “Ok” to quit the setup.
-
Page 63: Update Firmware
If power is switched off during the process, the printer may be damaged afterwards. (1) Preparation USB cable, 24V power adapter, DL-310 setup tool, firmware file. (2) Connection Connect printer and host with USB cable firmly. Check the Device Manager, if connection is successful, “USB printing support”... - Page 64 Tally Dascom DL-310 User Guide V1.0 ② Hold down Feed Key and switch on printer simultaneously. Release Feed Key once powering on, the printer will beep once. ③ Status LED on, printer enter upgrade mode. (4) Upgrade Firmware ① Run Dascom setup tool, select model Label Printer and USB interface.
-
Page 65: Setting/Checking Modes
Tally Dascom DL-310 User Guide V1.0 4 SETTING/CHECKING MODES Besides the ordinary print mode, the printer has the following modes to set or to check settings of the printer. Self-test Mode Hexadecimal Dumping Mode 4.1 Print a Parameter Setting Page (Self-test Page) Before you connect the printer to the computer, make sure that the printer is in proper working order. - Page 66 Tally Dascom DL-310 User Guide V1.0 Here is the self-test status page and its explanation. The printout is an example. It may differ depending of installed options or interfaces: Parameter settings Model Model DL-310 Serial Number SN NO XXXXXXXXXXXX ID Number ID NO 28.904.XX...
-
Page 67: Hexadecimal Dumping Mode
Tally Dascom DL-310 User Guide V1.0 4.2 Hexadecimal Dumping Mode Hold down Feed Key and switch on printer till Power LED blinks three times, buzzer beeps three times. When self-test is OK but on-line printing error occurs, you can check the communication between PC and program via Hexadecimal Dump mode. -
Page 68: Auto Calibrate Label
Tally Dascom DL-310 User Guide V1.0 4.3 Auto Calibrate Label DL-310 can calibrate label automatically. Hold down Feed Key and switch on printer till Power LED blinks twice, buzzer beeps twice. Label calibration should be executed in the following situations: ... -
Page 69: Troubleshooting And Maintenance
Tally Dascom DL-310 User Guide V1.0 5 TROUBLESHOOTING AND MAINTENANCE Your printer is extremely reliable, but occasionally problems may occur. This chapter provides information on some of the common problems you may encounter and how you may solve them. If you encounter problems that you cannot resolve, please contact your dealer for assistance. -
Page 70: Resetting The Factory Default Values
Tally Dascom DL-310 User Guide V1.0 Printing Error Condition Possible Cause What to do? Incorrect media roll installation Check media roll and re-load it properly Media is out of specification Use recommended media Dirty thermal print head or platen... -
Page 71: Cleaning Thermal Print Head
5.5 Maintenance DL-310 is designed for a long and reliable lifetime. But periodic maintenance is recommended in order to assure error free working. This also would guarantee the good print quality over the life time. It is recommended to clean the printer once every six months or after 300 hours duty. -
Page 72: Communication Interfaces Specifications
Tally Dascom DL-310 User Guide V1.0 6 COMMUNICATION INTERFACES SPECIFICATIONS 6.1 USB interface USB interface pin assignment PIN No. Description Classic wire color VBUS White Green Black USB interface connector diagram 6.2 Wi-Fi interface Wi-Fi interface supports 2.4 GHz, IEEE Std. 802.11b/g standard. -
Page 73: Serial Interface
Tally Dascom DL-310 User Guide V1.0 Ethernet interface connector diagram 6.5 Serial interface Serial interface pin assignment Serial interface compatible with RS-232 standard, with 25 pin (D hole type) socket. PIN No. Description PIN 1 Frame Ground PIN 2... -
Page 74: Parallel Interface
Tally Dascom DL-310 User Guide V1.0 6.6 Parallel interface Parallel interface pin assignment Parallel interface with 36 pin CENTRONICS socket. Pin No. Signal From Description Strobe Signal; Data latch pulse, latch the data to the printer at the rising edge of the negative pulse. -
Page 75: Power Supply
Tally Dascom DL-310 User Guide V1.0 6.7 Power Supply (1) Power adapter Input: AC 100V-240V~ 1.5A 50-60Hz Output: DC 24V±5%, 2.1A, A-1009-3P interface (2) Power Supply connector diagram (3) Power Socket pin assignment Pin Number Signal Name +24 V SHELL F.G. -
Page 76: Character Code
Tally Dascom DL-310 User Guide V1.0 7 CHARACTER CODE PAGES The character code tables show only character configurations. They do not show the actual print pattern. “SP” in the table shows a space. 7.1 Common to all pages (International Character Set: USA) “... -
Page 77: International Character Sets
Tally Dascom DL-310 User Guide V1.0 7.2 International Character Sets ASCII code (Hex) Country France à ° ç § é ù è ¨ β Germany § Ä Ö Ü ä ö ü U.K. £ Denmark I Æ Ø Å æ... -
Page 78: User-Defined Page]
Tally Dascom DL-310 User Guide V1.0 7.3 [User-defined page]... -
Page 79: Pc437: Usa, Standard Europe]
Tally Dascom DL-310 User Guide V1.0 7.4 [PC437: USA, Standard Europe] ░ └ ╨ α ≡ Ç É á í ▒ ╤ ü æ ┴ β ± ▓ ┬ ≥ Γ é Æ ó ╥ │ ├ π â ô... -
Page 80: Pc850: Multilingual]
Tally Dascom DL-310 User Guide V1.0 7.5 [PC850: Multilingual] ░ └ Ç É á ð Ó í ▒ ü æ ┴ β Ð ± ▓ ┬ é Æ ó Ê Ô │ ├ â ô ú Ë Ò ¾ ┤... -
Page 81: Pc852: Latin2]
Tally Dascom DL-310 User Guide V1.0 7.6 [PC852: Latin2] ░ └ đ Ç É á Ó í Ĺ ▒ ┴ β ˝ ü Ð ĺ ▓ ┬ Ď ˛ é ó Ô │ ├ Ń ˇ â ô ú Ë... -
Page 82: Pc858: Euro]
Tally Dascom DL-310 User Guide V1.0 7.7 [PC858: Euro] ░ └ Ç É á ð Ó í ▒ ü æ ┴ β Ð ± ▓ ┬ é Æ ó Ê Ô │ ├ â ô ú Ë Ò ¾ ┤... -
Page 83: Pc860: Portuguese]
Tally Dascom DL-310 User Guide V1.0 7.8 [PC860: Portuguese] ░ └ ╨ α ≡ Ç É á í ▒ ╤ ü À ┴ β ± ▓ ┬ ≥ Γ é È ó ╥ │ ├ π â ô ú ╙... -
Page 84: Pc863: Canadian-French]
Tally Dascom DL-310 User Guide V1.0 7.9 [PC863: Canadian-French] ░ └ ╨ α ≡ Ç É ¦ ▒ ╤ ´ ü È ┴ β ± ▓ ┬ ≥ Γ é ó ╥ Ê │ ├ π â ú ╙ ≤... -
Page 85: Pc865: Nordic]
Tally Dascom DL-310 User Guide V1.0 7.10 [PC865: Nordic] ░ └ ╨ α ≡ Ç É á ▒ ╤ ü æ í ┴ β ± Γ ▓ é Æ ó ┬ ╥ ≥ │ â ô ú ├ ╙ π... -
Page 86: Pc866: Cyrillic #2]
Tally Dascom DL-310 User Guide V1.0 7.11 [PC866: Cyrillic #2] А Р а ░ └ ╨ р Ё Б С б ▒ ┴ ╤ с ё В Т в ▓ ┬ ╥ т Є Г г У │ ├ ╙... -
Page 87: Pc720: Arabic]
Tally Dascom DL-310 User Guide V1.0 7.12 [PC720: Arabic] ب ░ └ ╨ ض ≡ ة ▒ ┴ ╤ ط ت ▓ ┬ ظ é ╥ ث │ ├ ع ô ╙ ج ┤ ─ ╘ غ ¤ ح ╡... -
Page 88: Command Sets
Tally Dascom DL-310 User Guide V1.0 8 COMMAND SETS 8.1 ZPL Command Sets Commands Function Scalable/Bitmapped Font Use Font Name to Call Font Aztec Bar Code Parameters Code 11 Bar Code Interleaved 2 of 5 Bar Code Code 39 Bar Code... - Page 89 Tally Dascom DL-310 User Guide V1.0 Commands Function ^CC ~CC Change Caret POSTAL Bar Code ~CD Change Delimiter Change Alphanumeric Default Font Change International Font/Encoding Change Memory Letter Designation Cache On Remove Label Code Validation Font Identifier Download Bitmap Font...
- Page 90 Tally Dascom DL-310 User Guide V1.0 Commands Function Comment Graphic Box Graphic Circle Graphic Diagonal Line Graphic Ellipse Graphic Field Graphic Symbol Battery Status Head Diagnostic Host Format Host Graphic Configuration Label Return Host Identification Host RAM Status Host Query...
- Page 91 Tally Dascom DL-310 User Guide V1.0 Commands Function Graphing Sensor Calibration Early Warning Settings Start ZBI (Zebra BASIC Interpreter) Start ZBI (Zebra BASIC Interpreter) Set Auxiliary Port Set Label Length Set Dots per Millimeter Head Test Fatal Head Test Non-Fatal...
- Page 92 Tally Dascom DL-310 User Guide V1.0 Commands Function Maximum Label Length Print Mode Media Tracking Mode Protection Media Type Set Units of Measurement Modify Head Cold Warning Select the Primary Network Device Network Connect Change Network Settings Network ID Number...
- Page 93 Tally Dascom DL-310 User Guide V1.0 Commands Function Start Print Halt ZebraNet Alert Set Print head Resistance Set Media Sensors Set ZPL Text Blocks Transfer Object Print Configuration Label Print Directory Label Write Query Examples Start Format Suppress Backfeed Recall Format...
-
Page 94: Epl Command Sets
Tally Dascom DL-310 User Guide V1.0 8.2 EPL Command Sets Commands Function ASCII text Bar Code (EAN-8 / EAN-13 / UPC-A / Interleaved 25 / Codabar / UPC-E / Code39 / Code 128) MaxCode (Data Matrix / PDF417 / QR Code) -
Page 95: Tspl Command Sets
Tally Dascom DL-310 User Guide V1.0 8.3 TSPL Command Sets Commands Function SIZE This command defines the label width and length This command sets the height of the black line and the user-defined extra label feeding BLINE length each form feed takes. -
Page 96: Appendix I: Installing The Cutter
Tally Dascom DL-310 User Guide V1.0 Appendix I: Installing the Cutter Removing the Tear Bar (1) Turn off the printer power and open the top cover and the print head mechanism, and then pull the tear bar to your side. -
Page 97: Installing The Auto Cutter
Tally Dascom DL-310 User Guide V1.0 (3) The tear bar is removed. Note: Do it in reverse steps so as to install the tear bar. Installing the Auto Cutter (1) Power down the printer before installing the cutter. Plug in the cutter connector to the printer. - Page 98 Tally Dascom DL-310 User Guide V1.0 (2) Put the auto cutter onto the slot of the low casing. (3) Move the auto cutter gently to the reverse board till you hear the click sound.
- Page 99 Tally Dascom DL-310 User Guide V1.0 (4) After installation, you can use the auto cutter. (5) Enable the cutter in the setup tool.
-
Page 100: Appendix Ii: Fcc Statement
Tally Dascom DL-310 User Guide V1.0 Appendix II: FCC STATEMENT 1. This device complies with Part 15 of the FCC Rules. Operation is subject to the following two conditions: 1) This device may not cause harmful interference. 2) This device must accept any interference received, including interference that may cause undesired operation. -
Page 101: Appendix Iii: Dascom Representatives
Appendix III: DASCOM REPRESENTATIVES GERMANY SINGAPORE (ASIA PACIFIC) DASCOM Europe GmbH DASCOM AP Pte Ltd Heuweg 3 21 Bukit Batok Crescent D-89079 Ulm #29-81, WCEGA Tower Deutschland Singapore 658065 Tel.: +49 (0) 731 2075 0 Phone: +65 6760 8833 Fax: +49 (0) 731 2075 100 Fax: +65 6760 1066 www.dascom.com www.dascom.com...
Need help?
Do you have a question about the DL-310 and is the answer not in the manual?
Questions and answers