Subscribe to Our Youtube Channel
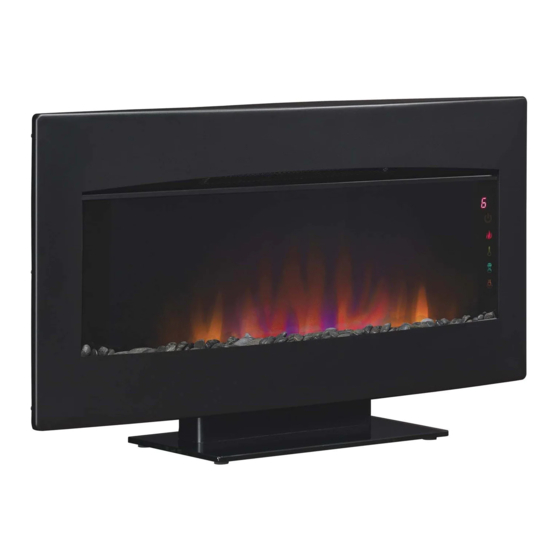
Summary of Contents for Twin-Star International 34HF600GRA
- Page 1 MODEL : 34HF600GRA www.tsicustomerservice.com Twin-Star International, Inc; Delray Beach, FL 33445 Made in China • Printed in China • Fabricado en China • Impreso en China • Fabriqué en China • Imprimé en Chine REV-1 www.tsicustomerservice.com...
- Page 2 www.tsicustomerservice.com REV-1...
-
Page 3: Getting Started
GETTING STARTED 1. Remove the product identification sticker from the front of the fireplace. Product Identification Sticker 2. Attach the Product Identification Sticker to the Manual below for future reference. This information is used for product registration and also is necessary for customer service. Attach Product Identification Sticker Here 3. -
Page 4: Important Instructions
IMPORTANT INSTRUCTIONS When using electrical appliances, basic precautions should always be followed to reduce the risk of fire, electrical shock, and injury to persons including the following: 1. Read all instructions before using this appliance. 2. DANGER – High temperatures may be generated under certain abnormal conditions. Do not partially or fully cover or obstruct the front of this heater. -
Page 5: Package Contents
PACKAGE CONTENTS Part Description Quantity Mounting Bracket Fireplace Base Bracket Base Remote Control Rocks Varies HARDWARE CONTENTS Description Quantity Picture Part Screw 0.2 in. x 1.5 in. 0.5 cm x 3.8 cm Wall Anchors 0.3 in. x 1.5 in. 0.7 cm x 3.8 cm Screw 0.25 in. -
Page 6: Installation Instructions
INSTALLATION INSTRUCTIONS Tools Required for Assembly (not included): Phillips screwdriver, Drill, Hammer, Level Drill Phillips Head Screwdriver Level Hammer INSTALLING YOUR ELECTRIC FIREPLACE Your new electric fireplace may be installed virtually anywhere in your home. However, when choosing a location be sure to follow the general instructions included. - Page 7 INSTALLATION INSTRUCTIONS Fig. 1 1. Remove mounting bracket (A) from back of Fireplace (B) by removing the two screws at the top back of the unit (Fig.1). Fig. 2 2. Choose a wall location to attach the mounting bracket (A). Position the mounting bracket (A) in the desired location.
- Page 8 INSTALLATION INSTRUCTIONS 4. Attach the mounting bracket (A) to the wall Fig. 4 fastening the 4 screws (AA) into the wall anchors (Fig. 4). Hardware Used Screw 0.2 in / 0.5 cm x 1.5 in / 3.8 cm Fig. 5 5.
- Page 9 INSTALLATION INSTRUCTIONS Fig. 7 2. Mount the fireplace to the base bracket (D) by hooking the clips into position (Fig.7). Fig. 8 3. Fasten the base bracket (D) to the fireplace with the provided screw (DD) (Fig 8). Hardware Used Screw 0.25 in / 0.6 cm x 0.5 in / 1.2 cm...
- Page 10 OPERATION INSTRUCTIONS Indicators Touch Panel The fireplace can be operated by either the remote control or the control panel. www.tsicustomerservice.com REV-1...
- Page 11 OPERATION INSTRUCTIONS FUNCTION ICON DESCRIPTION There are 6 brightness levels that can be selected. FLAME Settings 6 - 2 decrease in brightness Setting 1 has no blue glow and is full brightness HEATER To set the thermostat use the HEATER button on the touch control panel to select the desired temperature.
-
Page 12: Troubleshooting
TROUBLESHOOTING Problem Root Cause Corrective Action Check that unit is plugged into a standard 120V outlet. Press power button No power. No power to the unit. several times, make sure power is set at “ON”position. Check your heater cord and plug connections. Faulty wall outlet connections or loose plugs can cause the outlet or plug to overheat. -
Page 13: Exploded View
EXPLODED VIEW Part Part Name Control Panel 5 Buttons Spinner Motor Right Backlight PCBA Thermostat Sensor Left Backlight PCBA Blower/Heater Assembly Flame PCBA Flame Generator/ Spinner Remote Control - 5 Buttons Main Circuit Board CARE AND MAINTENANCE • The motors used on the fan and the flame generator assembly are pre-lubricated for extended bearing life and require no further lubrication. -
Page 14: Fcc/Ic Information
FCC/IC INFORMATION NOTE: This equipment has been tested and found to comply with the limits for Class B digital device, pursuant to part 15 of the FCC Rules. These limits are designed to provide reasonable protection against harmful interference in a residential installation. -
Page 15: Year Limited Warranty
1-YEAR LIMITED WARRANTY The manufacturer warrants that your new Electric Fireplace is free from manufacturing and material defects for a period of one year from date of puchase, subject to the following conditions and limitations. 1. Install and operate this appliance in accordance with the installation and operating instructions furnished with the product at all times.


Need help?
Do you have a question about the 34HF600GRA and is the answer not in the manual?
Questions and answers
How do I disable the heater
To disable the heater on the Twin-Star International model 34HF600GRA, press and hold the POWER button on the control panel for 10 seconds. The flame effect will flash multiple times, indicating that the heater has been disabled.
This answer is automatically generated
@Mr. Anderson
Thank you it worked!!!!! Can I ask if it would’ve become disabled by itself after it was working just fine or does that have to be manually done
The Twin-Star International 34HF600GRA can become automatically disabled. If the heater function stops and the flame effect flashes, it indicates that the overheat protection was triggered. The unit automatically shuts off and should be unplugged for 5 minutes before resuming operation.
This answer is automatically generated