Table of Contents
Advertisement
Quick Links
Advertisement
Table of Contents

Subscribe to Our Youtube Channel
Related Manuals for Merlin G740A


Summary of Contents for Merlin G740A
- Page 1 fingertips G740A residential heavy gate opener for sliding gates Toll free helpline Please have your serial number and model name available before calling. Australia 1800 638 234 New Zealand 0800 653 667 United Kingdom 0800 073 0112...
- Page 2 Install any fixed control, wired or wireless, within sight of the gate but away from moving parts and at a height of more than 1.5 m. Fit non-contact safety beams Where they are not already explicitly required to comply with regulations, Merlin strongly recommends fitting non-contact safety beam sensors. Locate the entrapment warning sign correctly After installing the drive, the included entrapment warning sign must be fitted within sight...
-
Page 3: Table Of Contents
Testing the gate operation Deleting all wireless controls Deleting selected wireless controls Warranty Site requirements Troubleshooting Board setup Specifications Connections Service Centres Quick setup guide Learn a remote control Set the limits of travel Commissioning check sheet Template for G740A foundation plate 14... -
Page 4: Manually Opening The Gate
Manually opening the gate Insert the key provided into the lever on the side of the base of the drive. Turn the key and pull the lever outwards until it stops. Maintenance In an area where ant or insect infestation is likely, regularly spray around the opener and any electrical installation with insecticide. -
Page 5: Learning Wireless Controls
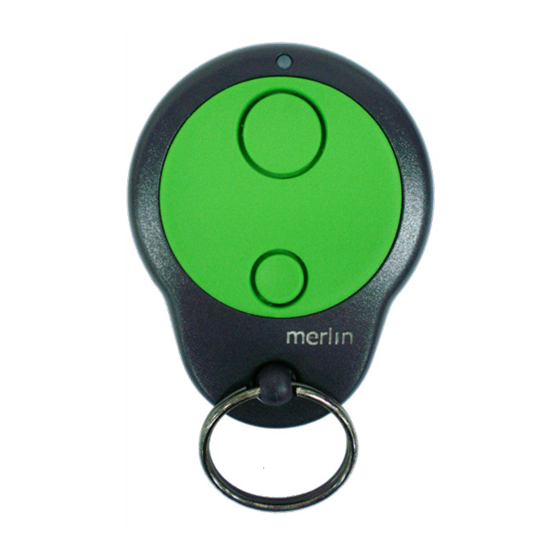
Press and hold the P2/RADIO button until the red LED blinks rapidly. Release the P2/RADIO button. Within 6 seconds, press the P2/RADIO button again to confirm. Deletion is indicated by the red LED blinking faster. Deleting selected wireless controls The optional accessory GT/SYSTEM hand-held controller is required. Contact Merlin for details. -
Page 6: Site Requirements
Site requirements Check that the temperature range marked on the drive is suitable for the location. Do not install the drive where ambient temperatures will exceed the ratings. Gate This opener is designed for residential sliding gates of any length, but weighing less than 800 kg. - Page 7 NOTE The Merlin M122 wired and M128 wireless pushbuttons are not waterproof, and are only rated for interior use. The Merlin KWF1 keyed switch is not intended for use fully exposed to weather in gate installations. Merlin does not warranty any items used outside their published ratings or intended use.
- Page 8 gate gate 133 min 0 min Position the drive on the foundation plate Remove the cover from the drive and gate and foundation plate must place it on the foundation plate. plate must be parallel be level Centre the mounting bolts in the drive’s mounting slots.
-
Page 9: Board Setup
Board setup It is strongly recommended to follow the procedures in the order below: Make all Connections Learn a remote control Set the limits of travel Run Easy Setup Adjust Controls Run Professional or Easy Setup again Learn wireless remote controls Connections NOTE When powering any accessories from the board, (for example: gate latches, additional receivers, keypads, PE beams) ensure the total combined load on the VA and... - Page 10 230-240 V ac mains input (L, N) Connect the neutral wire to N; connect the live wire to L. An earth terminal is not provided. flashing warning lamp output (LAMP) The outputs are set up for a 24 V dc, 2 W flashing warning light. The board supplies power to the lamp, but it is a continuous supply, so the lamp must have a flashing circuit built in.
- Page 11 start signal input (STR) This input is NO (Normally Open). When it is momentarily closed to ground the opener will start. If the gate is already moving then momentarily closing the start input to ground will stop the movement. Connect a keyed switch or exit request button to this input. While this input is closed to ground, any auto-closing function is disabled.
-
Page 12: Learn A Remote Control
Learn a remote control A remote control is useful for operating the controller during setup. Press and hold P2/RADIO until the red LED is lit. Press the main button on the remote control. Wait 10 seconds to exit learning mode. Install the CH-RADIO jumper. -
Page 14: Template For G740A Foundation Plate
Template for G740A foundation plate NOTE The positions of the holes, and the plate itself, are symmetrical. The total length of the plate is 300 mm, so it extends 5 mm past the left hand edge of this page. NOTE Ensure cables and conduit are pulled through the cable entry holes when the plate is bolted to the ground. - Page 15 Ø8 hole hole Ø8...
-
Page 17: Easy Setup
Easy setup Easy setup must be performed to set the opening and closing travel times. NOTE Easy setup only sets the limits and force/speed, and is fully automated; professional setup also offers slow-stopping and pedestrian access, but is not fully automated. It is an automated procedure that sets the gate leaf travel times based on the detection of the limits of travel. -
Page 18: Controls
Controls IMPORTANT If the force/speed/voltage setting (FOR) is adjusted then it is necessary to perform either Easy Setup or Professional Setup again because the travel times will vary. Failure to do this risks causing damage to the gates or gate stops. After every trimmer adjustment press P1/SET to confirm the change. - Page 19 learn wireless control button (P2/RADIO) Press and hold P2/RADIO, until the red LED is lit, to begin learning wireless remote controls. The red LED will be lit. Press a button for 3 seconds on each wireless control to be learned. Either wait 10 seconds, or press P2/RADIO again to exit learning. If the CH- RADIO jumper is fitted, the wireless controls will operate the pedestrian Access mode;...
- Page 20 NOTE If a photocell is connected to the PHO terminal then the response to interruptions of the beam will vary depending on the setting of the PAU control, and depending on the choice of option in professional setup: • PAU full anti-clockwise: Gate opening - nothing happens if the beam is interrupted Gate paused open for 15 seconds - if beam is interrupted nothing happens until the interruption is removed;...
-
Page 21: Professional Setup
Professional setup Professional setup is a semi-automated procedure, similar to Easy Setup, but with the following differences: • Initiate by pressing P2/RADIO instead of P1/SET • The installer must intervene to manually operate the gate • The installer may set a desired slow-down position, if not there will be no slow- down •... -
Page 22: Testing The Gate Operation
obstruction is removed The gate will close fully, slowing down at the time previously chosen Only perform step 11 if pedestrian access is required: Press P1/SET or P2/RADIO. The gate will begin opening. Press P1/SET at the time where the gate is at the desired open position for pedestrian access. The gate will close fully and the unit will exit Professional Setup. -
Page 23: Warranty
Distributor to the Reseller. NOTE Merlin requests that you attach your sales docket or invoice to this manual to enable you to establish the date of purchase in the unlikely event of service being required. -
Page 24: Troubleshooting
Troubleshooting Gate will not open or close The gate should operate smoothly, opening and closing without sticking or requiring undue force. Release the gate from the opener and check that it is possible to move the gate freely by hand through the full range of the opening. May be a power failure. -
Page 25: Specifications
No. of Users 40 transmitters max Memory EEPROM, access via GT/SYSTEM Compatible transmitters All Merlin 433 MHz keyring or wall mounted transmitters, wireless wall-switches, wireless keypad NOTE Any additions or alterations outside of these specifications may void the product’s warranty. -
Page 26: Service Centres
Service Centres If an Authorised Installer installed your unit then call them for prompt on-site service. See your yellow pages or phone Merlin toll free. New Zealand Auckland phone 09 415 4393 Phone toll free 0800 653 667 or 0800 MERLIN... -
Page 27: Quick Setup Guide
Quick setup guide WARNING Read the manual! Follow all installation and safety instructions in the manual. Learn remote controls CH-RADIO full access P2/RADIO P2/RADIO CH-RADIO pedestrian access Adjust trimmers and set jumpers 100% step-by-step quick close 2.5 sec 0.1 sec delay all 0.2 sec motor motor... -
Page 28: Commissioning Check Sheet
Commissioning check sheet Opener model............Serial numbers .
Need help?
Do you have a question about the G740A and is the answer not in the manual?
Questions and answers