Noritz NRCB180DV Installation Manual
Condensing gas combi boiler
Hide thumbs
Also See for NRCB180DV:
- Owner's manual (40 pages) ,
- Installation manual (67 pages) ,
- Instructional manual (23 pages)
Table of Contents
Advertisement
CONDENSING GAS COMBI BOILER
Installation Manual
Models : NRCB199DV (GHQ-C3201WX-FF US)
NRCB180DV (GHQ-C2801WX-FF US)
WARNING
If the information in these instructions is not
followed exactly, a fire or explosion may result
causing property damage, personal injury or
death.
• Do not store or use gasoline or other
flammable vapors and liquids in the vicinity of
this or any other appliance.
• WHAT TO DO IF YOU SMELL GAS
- Do not try to light any appliance.
- Do not touch any electrical switch; do not use
any phone in your building.
- Immediately call your gas supplier from a
neighbor's phone. Follow the gas supplier's
instructions.
- If you cannot reach your gas supplier, call the
fire department.
• Installation and service must be performed by
a qualified installer, service agency or the gas
supplier.
FOR USE IN RESIDENTIAL OR MANUFACTURED HOME APPLICATIONS.
Installation must conform with local codes, or in the absence of local codes, the National Fuel Gas Code, ANSI Z223.1 / NFPA
54 - latest edition and/or the Natural Gas and Propane Installation Code CSA B149.1 - latest edition.
Where required by the authority having jurisdiction, the installation must conform to the Standard for Controls and Safety
Devices for Automatically Fired Boilers, ANSI/ASME CSD-1.
Noritz America reserves the right to discontinue, or change at any time, the designs and/or specifications of its products
without notice.
Contact Noritz America at 1-866-766-7489, if you have any questions or concerns.
NORITZ America Corporation
CAUTION
Requests to Installers
• In order to use the Combi Boiler safely, read
this installation manual carefully, and follow the
installation instructions.
• Failures and damage caused by erroneous
work or work not as instructed in this manual
are not covered by the Noritz America Limited
Warranty.
• Check that the installation was done properly in
accordance with this Installation Manual upon
completion.
• After completing installation, either place this
Installation Manual in a plastic pouch and attach
it to the side of the Combi Boiler (or the inside
of the pipe cover or recess box if applicable),
or hand it to the customer to retain for future
reference.
LOW-LEAD
I
A P
M O
R
& T
TM
Low NOx Approved by SCAQMD
SBB80UB-4
Rev. 10/18
14 ng/J or 20 ppm
(Natural Gas Only)
Advertisement
Table of Contents

Related Manuals for Noritz NRCB180DV


Summary of Contents for Noritz NRCB180DV
- Page 1 Where required by the authority having jurisdiction, the installation must conform to the Standard for Controls and Safety Devices for Automatically Fired Boilers, ANSI/ASME CSD-1. Noritz America reserves the right to discontinue, or change at any time, the designs and/or specifications of its products without notice.
-
Page 2: Table Of Contents
Contents Before Installation 9.2 Low Water Cutoff (LWCO) ..... 44 9.3 Pressure Relief Valve ......45 9.4 Auto Feeder Connection ....... 46 About the Combi Boiler 9.5 Freeze Prevention ......... 47 2.1 Included Accessories ......5 2.2 Optional Accessories ......5 10 Connecting the Condensate Drain 48 2.3 Field Purchased Accessories .... -
Page 3: Before Installation
: NRCB199DV (GHQ-C3201WX-FF US) is already installed, check for punctures, cracks, 180,000 Btu/h or blockages and consult with the vent pipe : NRCB180DV (GHQ-C2801WX-FF US) manufacturer before reusing. Improper venting may result in fires, property e.g. NRCB199DV (GHQ-C3201WX-FF US) damage or exposure to Carbon Monoxide. - Page 4 Please read if installing in Massachusetts Massachusetts requires manufacturers of Side Wall Vented products to provide the following information from the Massachusetts code: • A hard wired carbon monoxide detector with an alarm and battery back-up must be installed on the floor level where the gas equipment is to be installed AND on each additional level of the dwelling, building or structure served by the side wall horizontal vented gas fueled equipment.
-
Page 5: About The Combi Boiler
2 About the Combi Boiler 2.1 Included Accessories 2.2 Optional Accessories The following accessories are included with the The accessories listed below are not included Combi Boiler. with the Combi Boiler, but may be necessary for Check for any missing items before starting installation. -
Page 6: Field Purchased Accessories
Universal Concentric Vent Kit [PVC-UCVK] Low Profile Termination Kit 2 in.: [PVC-2LPT] 3 in.: [PVC-3LPT] ULC S636 / UL 1738 certified for use in both Canada and USA Plastic Rain Cap [PRC-1] Not approved for use in Canada. Neutralizer (× 1) [NC-1S] Manifold Kit (×... -
Page 7: Specifications
• Specifications may be changed without prior notice. • The capacity may differ slightly, depending on the water pressure, water supply, piping conditions, and water temperature. Item Specification Model Name NRCB199DV NRCB180DV (GHQ-C3201WX-FF US) (GHQ-C2801WX-FF US) Installation Indoor / Outdoor Wall mounted Type Air Supply / Exhaust... - Page 8 ** The Net AHRI water ratings shown are based on a piping and pickup allowance of 1.15. Consult Noritz before selecting a boiler for installations having unusual piping and pickup quirements, such as intermittent system operation, extensive piping system, etc.
- Page 9 Memo About the Combi Boiler...
-
Page 10: Dimensions
2.5 Dimensions Outdoor Temperature Sensor 1.3” [34] 3.6” [92] 12.8” [325] 0.2” [5.0] WALL MOUNTING BRACKET (INCLUDED ACCESSORY) 3.5” [88] 16” [406] 10.2” [260] 1.3” [34] 5.1” [130] 1.1” [28] 2.6” [66] 0.4” [10] 3.9” [100] 5.5” [140] 6.7” [170] 4 x 0.24”... - Page 11 <inch [mm]> 17.7” [450] 2.8” [71] PRESSURE RELIEF VALVE FOR HEATING (3/4”) 18.5” [471] 17.8” [451] 5.1” [130] 10.1” [256] Ø2.4” [Ø61] Ø2.4” [Ø61] FLUE COLLAR AIR INLET (VIEW FROM BOTTOM) WATER DRAIN VALVE (WATER FILTER) WIRING THROUGHWAY GAS INLET (3/4”) WATER DRAIN VALVE WATER DRAIN VALVE (WATER FILTER)
-
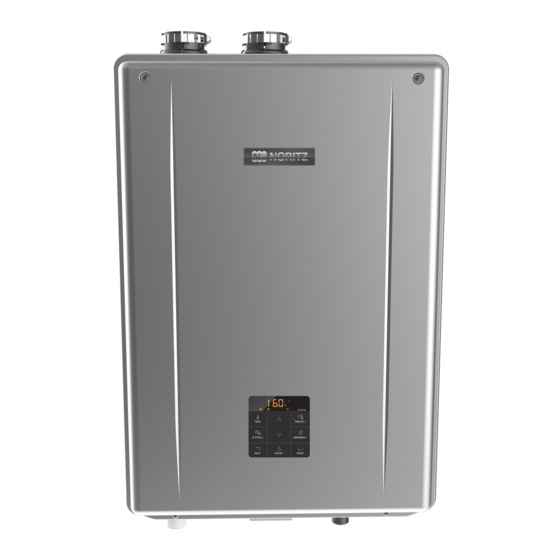
Page 12: External View
2.6 External View Indoor Installation Intake Pipe Pressure Relief Valve Exhaust Pipe (Heating) Drain Pipe Operation Display Water Drain Valve Water Drain Valve (with Water Filter) Water Drain Valve (with Water Filter) Water Supply Valve Water Drain Valve Water Drain Valve (with Water Filter) Gas Supply Valve Auto Feeder Shutoff Valve... -
Page 13: Choosing An Installation Location
• The Combi Boiler is designed for either indoor exhaust to accumulate or be obstructed. or outdoor installation. For information about Do not enclose the termination with corrugated outdoor installation, contact Noritz America metal or other materials. at 1-866-766-7489. Carbon monoxide poisoning or fire may occur Never install it in a bathroom, it may be as a result. - Page 14 Perform suggested treatment and maintenance measures in reference to “8.2 Water Treatment”. Damage to the Combi Boiler as a result of the below is not covered by the Noritz America Limited Warranty. - Water in excess of 12 gpg (200 mg/L) of hardness...
- Page 15 State of California: The Combi Boiler must be braced, anchored or strapped to avoid moving during an earthquake. Contact local utilities for code requirements in your area or call 1-866-766-7489 and request instructions. For Venting Manufacturers Requirements, see the Noritz America website (www.noritz.com). Choosing an Installation Location...
-
Page 16: Installation Clearances
4 Installation Clearances Cooking Equipment WARNING When utilizing an indoor air supply, if the Combi Before installing, check for the following: Boiler will be installed in the vicinity of a permanent Install in accordance with relevant building and kitchen range or stove that has the possibility of mechanical codes, as well as any local, state or generating steam that contains fats or oils, use a national regulations, or in the absence of local... -
Page 17: Installation Of The Combi Boiler
Wall Mounting Bracket 5 Installation of the Combi Boiler 5.1 Mounting the Combi Boiler to the 2. Hang the Combi Boiler on the Wall Mounting Bracket. wall WARNING Mounting Bracket (Upper) Do not drop or apply unnecessary force to the appliance when installing. -
Page 18: Elevation Adjustment Above 2,000 Ft
5.2 Elevation Adjustment Above 2,000 ft 5.3 Filling the condensate container with water • Adjust the DIP switches as illustrated in the table below, if this Combi Boiler is installed at an DANGER altitude of 2,000 ft (610 m) or higher. •... -
Page 19: Venting The Combi Boiler
Exhaust Air Intake Exhaust Air Intake • The Combi Boiler is designed for either indoor Schedule 40 ANSI/ASTM D1785 or outdoor installation. For information about B137.3 ULC S636 outdoor installation, contact Noritz America at Certified PVC-DWV ANSI/ASTM D2665 Materials B181.2 1-866-766-7489. - Page 20 [Pipe Cement / Primer] - Centrotherm - lnnoFlue® PP Material United States Canada Exhaust Chimney Kit (3 in.): IFCK03xx, Flexible Pipe PP (3 in.): IFVL03xxx ULC S636 ANSI/ASTM D2564 Certified Materials Intake Termination**: ISELL0387UV, ISTT0320, CPVC ANSI/ASTM F493 Only Bird Screen: IASPP03 Single Wall Pipe (3 in.): ISVL03xx(UV), Exhaust ISEP03xx...
- Page 21 For flexible pipe for chimney • Ensure at least 3 ft (0.9 m) or more distance between the near edge of the air • Every venting system must be properly planned intake pipe or exhaust and installed for optimum performance and Vertical pipe to the inside corner safety.
- Page 22 6.2.3 Termination Considerations 6.2.4 Maximum Vent Length • Do not store hazardous or flammable substances • This Combi Boiler has been designed to be near the vent termination and check that the vented with either 2 in. (50 mm) or 3 in. (75 mm) termination is not blocked in any way.
- Page 23 [DIP Switch Adjustment] Maximum Vent Length Configurations (For flexible ● ○ ON = / OFF = pipe for chimney) DIP switches Vent length condition [DuraVent® - Flex Through Chimney w/ Air Intake ○ ○ Less than 33 ft using 2 in. (50 mm) pipe ①...
- Page 24 [Centrotherm® - Flex Through Chimney w/ Air Intake (Only 3 in.)] The vent length condition setting depends on the flexible pipe length, the rigid pipe length and number of elbows. Calculate an each ventilation system equivalent length, then adjust the DIP switch.
-
Page 25: Select A Vent Type
6.3 Select a Vent Type Direct Vent Exhaust Combustion air is Combustion supplied from the Slope the Vents outdoors. Combustion Upward air and exhaust are seperate vent pipes. Slope the Vents Upward Non-Direct Vent (with SV Conversion Kit) Increasers are required when using 3 in. flexible pipe. Combustion air is Exhaust supplied from the... -
Page 26: Vent Pipe Installation (Direct Vent)
6.4 Vent Pipe Installation (Direct Vent) 6.4.1 Clearance Requirements from Vent Terminations to Building Openings [When supplying combustion air from the outdoors] • All clearance requirements are in accordance with ANSI Z21.10.3 and the National Fuel Gas Code, ANSI Z223.1 and in Canada, in accordance with the Natural Gas and Propane Installation Code CSA B149.1. [ D ] Vent Terminal Ven lated soffit... - Page 27 6.4.2 Horizontal Vent Termination For Horizontal Vent Termination - PVC/CPVC Material Only • Use a condensation drain if necessary. • In the Commonwealth of Massachusetts a carbon monoxide detector is required for all side wall horizontally vented gas fuel equipment. Refer to the page 4 for more detail information. Ceiling Hanger Straps Exhaust...
- Page 28 Alternate Horizontal Vent Termination- PVC, CPVC or PP Material (When 3 ft (0.9 m) distance between Intake and Exhaust cannot be ensured.) WARNING • If the distance between the air inlet and exhaust vent terminations is too short, the Combi Boiler will draw in the exhaust gases through the intake.
- Page 29 For Horizontal PVC Concentric Termination - PVC/CPVC Material Only • The concentric termination may be shortened, but not lengthened from its original factory supplied length. • 2 in. (50 mm) or 3 in. (75 mm) PVC or CPVC pipe may be used with the concentric termination. Maintain the same vent pipe diameter from the Combi Boiler flue to the termination.
- Page 30 6.4.3 Vertical Vent Termination For Vertical Vent Termination - PVC, CPVC or PP Material About the termination • When choosing intake and exhaust terminations, you must use the same type of elbow (i.e. both 90° elbows). This will help with proper combustion by putting both terminations in the same pressure zone. •...
- Page 31 For Vertical PVC Concentric Termination - PVC/CPVC Material Only • The concentric termination may be shortened, but not lengthened from its original factory supplied length. • 2 in. (50 mm) or 3 in. (75 mm) PVC or CPVC pipe may be used with the concentric termination. Maintain the same vent pipe diameter from the Combi Boiler flue to the termination.
-
Page 32: Vent Pipe Installation (Non-Direct Vent)
6.5 Vent Pipe Installation (Non-Direct Vent) 6.5.1 Clearance Requirements from Vent Terminations to Building Openings [Other than Direct Vent] • All clearance requirements are in accordance with ANSI Z21.10.3 and the National Fuel Gas Code, ANSI Z223.1 and in Canada, in accordance with the Natural Gas and Propane Installation Code CSA B149.1. [ D ] Vent Terminal Ventilated soffit... - Page 33 - NRCB199DV (GHQ-C3201WX-FF US): is not allowed. 70 ft of fresh air per minute - NRCB180DV (GQ-C2801WX-FF US): 63 ft of fresh air per minute Venting the Combi Boiler...
- Page 34 6.5.4 Horizontal Vent Termination • Use a condensation drain if necessary. • In the Commonwealth of Massachusetts a carbon monoxide detector is required for all side wall horizontally vented gas fuel equipment. Refer to the page 4 for more detail information. Either a tee or the Hood Termination may be used for the vent termination.
- Page 35 6.5.5 Vertical Vent Termination For SV Conversion Kit About the termination • Insert Bird Screen in End of 90° Elbow. Bird Screen is not supplied with Combi Boiler, order separately. • To prevent excessive condensation formation, only the vent termination should be located on the exterior of the building. •...
-
Page 36: Connecting The Gas Supply
• If test pressures are in excess of 1/2 psi (3.5 kPa), Improper installation of this kit will void the Noritz the appliance and its individual shut off valve America Limited Warranty. - Page 37 Pipe Sizing [Calculation Example] A partial set of sizing tables are printed on page 39. • A gas shut off valve must be installed on the In cases where these tables are not appropriate, supply line. refer to the NFPA. •...
- Page 38 Final Check 4. • Enter the demand is the amount of gas flowing through a section of pipe in the table below. 1. Turn on and operate all gas appliances including - For natural gas, use total Btu/h rating/1000 the Combi Boiler. /h).
- Page 39 [Gas pipe sizing tables] • These tables are for reference only. Consult gas pipe manufacturer for actual pipe capacities. • It is an example of Schedule 40 Metallic Pipe. • (Only Table 1 - 4) Values in Table are in ft3 of Gas per Hour. Contact your gas supplier for Btu/ft3 ratings. For simplification of your calculations, 1 ft3 of Gas is approximately equivalent to 1,000 Btu.
-
Page 40: Connecting The Dhw Pipe
8 Connecting the DHW pipe • Installation and service must be performed by a Valves and Automatic Shutoff Devices for Hot qualified plumber. Water Supply Systems, ANSI Z21.22, or The ANSI/ • In the Commonwealth of Massachusetts, this ASME Boiler and Pressure Vessel Code, Section IV product must be installed by a licensed plumber (Heating Boilers). - Page 41 • Use shower heads with low pressure loss. • For information about outdoor installation, NOTE Do not use lead, PVC, iron or any contact Noritz America at 1-866-766-7489. piping which has been treated with chromates, boiler seal or other Both Indoor and Outdoor Installation chemicals.
-
Page 42: Water Treatment
> 12 gpg Extremely Hard (> 200 mg/L) NOTE Damage to the Combi Boiler as a result of the items below is not covered by the Noritz America Limited Warranty. • Water in excess of 12 gpg (200 mg/L) of hardness •... - Page 43 • The Plate Heat Exchanger regularly needs to be flushed to prevent damage from Scale Build-up. Refer to the “Procedure for flushing the Plate Heat Exchanger” on page 82 or contact Noritz America at http://support.noritz.com/ or 1-866- 766-7489. Connecting the DHW pipe...
-
Page 44: Connecting The Heating Pipe
9 Connecting the Heating Pipe proper sizing. WARNING • For diaphragm expansion tanks, always install an automatic air vent on the top side of the air Immediately repair any leaks in the system separator to remove residual air from the system. plumbing to avoid the addition of make-up water, make-up water provides a source of Oxygen Elimination... -
Page 45: Pressure Relief Valve
LWCO 9.3 Pressure Relief Valve LWCO needs • External pressure relief valve must be installed. to be installed above the top Observe the following. Failure to comply with the of casing. guidelines on installing the pressure relief valve and discharge piping can result in personal injury, death or substantial property damage. -
Page 46: Auto Feeder Connection
9.4 Auto Feeder Connection • The Combi Boiler is equipped with an auto feeder valve. Therefore, installation of additional system water fill connection is not necessary in most cases. See the following figure for an example of a water fill installation using the built-in connection. Air Separator Isolation Valve... -
Page 47: Freeze Prevention
Connection and set “Auto Feeder Activation” OFF. For information about outdoor installation, contact * Refer to page 62 for changing “Auto Noritz America at 1-866-766-7489. Feeder Activation” Setting. Both Indoor and Outdoor Installation • The freeze prevention will not prevent freezing in the external plumbing of the unit. -
Page 48: Connecting The Condensate Drain
[Condensate drain piping to floor drain] NOTE Damage caused by improperly handled condensate is not covered by the Noritz America Limited Warranty. DO NOT ADD ANY VALVES 1/2 in. PVC pipe Location of the condensate drain piping... - Page 49 [If an external neutralizer is installed] Periodic replacement of the neutralizing agent will be required. Refer to the instructions supplied with the neutralizer for suggested replacement intervals. Floor drain After installing the condensate drain piping • Make sure that there are no obstructions blocking the condensate drain line from discharging condensate.
-
Page 50: Connecting Electricity
11 Connecting Electricity Ground Consult a qualified electrician for the electrical work. To prevent electrical shock, provide a ground with resistance less than 100 Ω. 11.1 Combi Boiler An electrician should do this work. NOTE • Do not connect the ground to the This appliance must be electrically grounded in city water or gas piping. -
Page 51: Quick Connect Cord
Wiring Diagram for External Options 11.2 Quick Connect Cord NOTE The Quick Connect Multi System allows the installation of two units together utilizing only the Quick Connect Cord (QC-2). For Quick Connect Multi-System installation only use the Quick Connect Cord (QC-2), sold separately (See the optional accessory list on page 5). - Page 52 Combi Boiler will operate in stages to satisfy the DHW demands. 3. Press the ENTER button to view the “Technical Data”. * Please contact Noritz America at 1-866-766-7489 if you have any questions or concerns. 2 sec. (Data No. 03) (e.g.: 100)
-
Page 53: Outdoor Reset Control With Outdoor Temperature Sensor
11.3 Outdoor Reset Control with Outdoor Temperature Sensor Outdoor Reset Control system heat load with the applicable outdoor temperature range. • The Outdoor Reset Control feature may be used • The built in outdoor reset control provides simple to enhance energy efficiency while maintaining heating curve selection based upon pre-defined optimal heating performance. - Page 54 Setting the Outdoor Reset Control Mode Adjusting Outdoor Reset Control Options [I:01_HCt] 1. The ON/OFF button is OFF. 1. Connect Outdoor Temperature Sensor to terminal. (Refer to pages 55, 56 for details.) The Operation Display must be off. 2. The ON/OFF button is OFF. buttons to navigate 2.
- Page 55 Customized Settings Outdoor Temperature Sensor Installation Guidelines • Avoid areas with direct sunlight and where 1. The ON/OFF button is OFF. temperatures may not be representative of true The Operation Display must be off. outdoor temperature. • Avoid placing sensor in close proximity of heat 2.
- Page 56 Outdoor Temperature Sensor Installation 1. Loosen the screw by hand using a Phillips 5. After leading wire into the case, connect screwdriver indicated in the figure. wire to the terminal by hand using a Phillips screwdriver. 2. Remove the cover by lifting it and pulling it outward.
- Page 57 Outdoor Reset Control [0-10 Volt Input Control] • The Outdoor Reset Control feature may be used not firing [Blinking on the Operation Display. to enhance energy efficiency while maintaining This is not an Error Code.] optimal heating performance. When the signal rises above 1.5 volts, the Combi With the Outdoor Reset Control, the heating Boiler will ignite.
- Page 58 Setting the Outdoor Reset Control • Do NOT connect room thermostat to heat [0-10 Volt Input control] - [I:01_HCt] demand (T-T) when an external control system is connected. * The Combi Boiler is activated only by receiving 1. Connect Heat Demand (0-10 VDC) to terminal. voltage.
-
Page 59: Installer Mode (Parameter Settings)
12 Installer Mode (Parameter Settings) How to enter “Installer Mode” Parameter Settings 1. The ON/OFF button is OFF. [I:00_FC (Fahrenheit/Celsius)] The Operation Display must be off. 1 sec. 2. Press the SETTING button. This mode is for changing temperature and flow buttons, Select using the... - Page 60 [I:02_tHS (Type of Heating System)] (page 53-56) [I:03_Hot (Highest Outdoor Temperature)] (page 53) 1 sec. 1 sec. This mode is for choosing Type of Heating System, when [I:01_HCt] setting is “2:or”. This should be set to the highest average outdoor There are 6 typical Heating Systems that are temperature during the winter season.
- Page 61 [I:05_HHt (Heating High Temp Range)] [I:07_bSt (Boost Timing)] (page 53,57) 1 sec. 1 sec. This setting is to increase the set temperature during unit cold start up if the actual room settings: temperature doesn’t reach the thermostat set [Min Set-point + 30 )] or more 180 °F °C...
- Page 62 [I:10_rFt (Re Fire Time)] [I:14_HPS (Heating Water Pressure Setting)] 1 sec. 1 sec. This function is to set up the interval time in This function is to control the water pressure on Heating Mode to prevent inconsistent heating. the heating side of the Combi Boiler. If the selected time passes and the Combi Boiler’s This will insure there is enough water inside the inside temperature drops, this function will...
- Page 63 [I:16_dHP (DHW / Space Heating Priority)] (page 64-65) 1 sec. This mode is for choosing the Combi Boiler operation “Simultaneous use of DHW &Heating” or “DHW Priority”. This Combi Boiler can operate DHW / Heating at the same time.* But if a heating system is not suitable for simultaneous use of DHW &...
- Page 64 This Combi Boiler is designed for using DHW and Heating at the same time. Simultaneous operations are not always available and suitable. It depends on DHW and Heating setting temperatures. Contact Noritz America for more information about simultaneous use for DHW and Heating. (Phone #: 1-866- 766-7489)
- Page 65 [To expand simultaneous range] Below charts show simultaneous operation is available or not. By default, the Combi Boiler has been set to the “①” area. When adjusting the DIP switch #2 to ON, the Combi Boiler will be set the “①+②” area. This adjustment allows the Combi Boiler to operate simultaneous more flexible. If [I:01_HCt] is set to [2:or] or [3:EC], the Combi Boiler operates simultaneously DHW and Heating automatically by increasing the heating supply temperature.
-
Page 66: Setting Temperature
13 Setting Temperature How to Set Heating Temperature 2. Press the TEMP button twice. The following Heating Temperature Setting can be changed when the “Outdoor Reset Control” is disabled (Refer to page 53-56). (e.g.: 110°F) 1. The ON/OFF button is ON. •... -
Page 67: Service Reminder
14 Service 15 Setting the DIP Reminder Switches The location of DIP switch bank The Combi Boiler is equipped with a Service Reminder to announce for maintenance. The factory default of this Service Reminder is The DIP switch bank is placed on the circuit board. “OFF”. -
Page 68: Water Filling And Trial Operation
Firing the Combi Boiler without filling water and purging air may damage the Combi Boiler. (Centrotherm® - Flex Through Chimney w/ Air Intake Failures and damages caused by improper (Only 3 in.)) procedure are not covered by the Noritz ● ○ ON = / OFF = America limited warranty. - Page 69 2) Make sure that the unit and heating appliance 10. Make sure that heating system pressure is 12 to operation is normal. 30* psi at the unit outlet. Noritz recommended For DHW Side Operation; system pressure is 12 psi. 1) Open the DHW outlet valve and a fixture (i.e.
- Page 70 [If installed with a Quick Connect Multi-System] error code 64 will continue to be displayed on the Operation Display. This warning indicator 4. Slowly open a hot water fixture and check that a unit ignites independently. Check to see that will allow the Combi Boiler to operate.
- Page 71 Zone Valve Circulation Pump Thermostat (T-T) (Circulator) [CN233] T - T *1 Noritz stocks the “Manifold Kit” for easy heating installation. The “Manifold Kit” allows to install primary and Zone1 Zone2 Zone3 Zone# secondary heating loop easier and has shut off...
- Page 72 Refer to the procedure for preventing damage from freezing in the Owner’s Guide. NOTICE Freezing is not covered by the Noritz America Limited Warranty. Lighting Instructions WARNING A fire or explosion may result if these instructions are not followed, which may cause lose of life, personal injury or property damage.
-
Page 73: Checklist After Installation
If you answer NO to any item, installation is not complete. Review the appropriate sections to complete the installation. If you have additional questions or need assistance with installation, contact Noritz America at 1-866-766-7489. Choosing an Installation Location (See page 13 - 15) Make sure that the Combi Boiler is not installed in the following places. - Page 74 Make sure that the cold water supply line and the hot water supply line are properly connected to the Combi Boiler. Make sure that appropriate heat insulation measures are taken according to regional climate. (e.g. wrapping with heat insulation materials, using electric heaters) Connecting the Heating Pipe (See page 44 - 47) Make sure that heating system pressure is 12 to 30 psi at the Combi Boiler outlet.
-
Page 75: Plumbing Applications
18 Plumbing Applications 18.1 General Requirements 1. This drawing is meant to show system piping 8. Unit is equipped with built-in primary pump for concept only. Installer is responsible for all the heating loop. This pump is sized to ensure equipment and detailing required by local codes. -
Page 76: Zoned With Valves
18.3 Zoned with Valves This drawing is meant to show system piping concept only. Installer is responsible for all equipment & detailing required by local codes. Refer to page 51 for electrical wiring instructions. * In case of installing external water feeder. PRESSURE PRESSURE ZONE 1... -
Page 77: Zoned With Pumps
18.4 Zoned with Pumps This drawing is meant to show system piping concept only. Installer is responsible for all equipment & detailing required by local codes. Refer to page 51 for electrical wiring instructions. * In case of installing external water feeder. PRESSURE PRESSURE REDUCING VALVE... -
Page 78: Air Handler
18.5 Air Handler The Combi Boiler can control the operation of an Air Handler when thermostat is used in combination with the Air Handler. The Air Handler function is designed to stop the Air Handler’s pump and fan operation when the Combi Boiler’s operation is not suitable for the Air Handler. -
Page 79: Recirculation System
Neutral warranty. Ground Live *4 Noritz recommends the use of an Isolation Valve Kit with Aquastat Wiring the installation. The kit includes an integrated shut-off and Use Honeywell Aquastat (Model L6006A or L6006C) service valve with unions and a pressure relief valve. -
Page 80: Quick Connect Multi System Installation
Combi Boiler’s Operation Display. Don’t connect the remote controller to the water heater. NRCB199DV or EZ111/98DV The Water Heater’s remote NRCB180DV (Combi Boiler) NCC199CDV controller (Included Accessory) will be required to troubleshoot, Operation Display make sure the customer keeps... -
Page 81: Maintenance
19 Maintenance 19.1 Periodic Check • Check the following to ensure proper operation of the Combi Boiler periodically . • Also check the items of maintenance described in the Owner’s Guide. [Venting System] • The venting system must be examined periodically by a qualified service technician to check for any leaks or corrosion. -
Page 82: Procedure For Flushing The Plate Heat Exchanger
NOTE This procedure is only intended for use by a qualified service professional or authorized Service Representative. Any unauthorized use of this procedure may result in voiding the Noritz America Limited Warranty. Contact Noritz America at 1-866-766-7489 for additional support. - Page 83 For Single Unit [Procedure 2. Cleaning the Plate Heat Exchanger] The flushing solution needs to be rinsed and [Procedure 1. Flushing the Plate Heat Exchanger] cleaned out of the Combi Boiler. 1. Open the front cover. Below is the way to rinse and clean the flushing 2.
- Page 84 For Quick Connect Multi-System 1. Open the front covers. 2. Connect the blue connector marked “FLUSH” for unit needing to be flushed. (The unit is isolated from Quick Connect Multi System when the blue connector marked “FLUSH” for flushing is connected. Not need to disconnect the Quick Connect Cord.) Combi Boiler Water Heater Connect...
Need help?
Do you have a question about the NRCB180DV and is the answer not in the manual?
Questions and answers