
Related Manuals for Daikin ERLQ011BAV3


Summary of Contents for Daikin ERLQ011BAV3
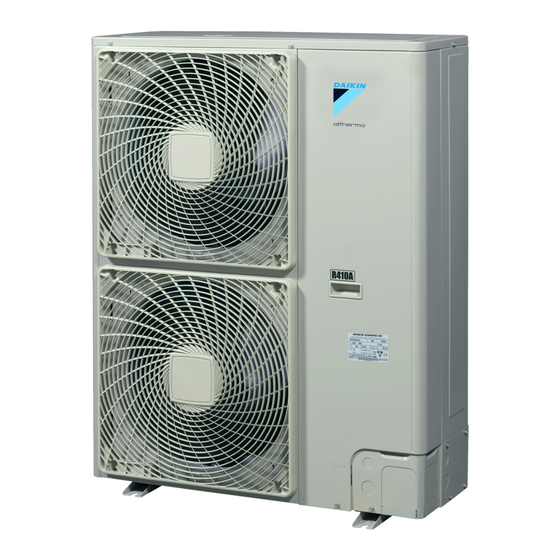
- Page 1 INSTALLATION MANUAL Outdoor unit for air to water heat pump ERHQ011BAV3 ERHQ014BAV3 ERHQ016BAV3 ERHQ011BAW1 ERHQ014BAW1 ERHQ016BAW1 ERLQ011BAV3 ERLQ014BAV3 ERLQ016BAV3 ERLQ011BAW1 ERLQ014BAW1 ERLQ016BAW1...
- Page 2 B 2 B 2 D 2 D 2 D 2 D 2 L 1 L 1 B 1 B 1 L 2 L 2 D 1 D 1 B 2 B 2 D 2 D 2 D 2 D 2 L 1 L 1 B 1 B 1 L 2 L 2...
- Page 3 3PW54251-1A...
-
Page 4: Table Of Contents
OTHER DAMAGE TO THE EQUIPMENT. BE SURE ONLY sure to wear proper gloves. TO USE ACCESSORIES MADE BY DAIKIN WHICH ARE Warning SPECIFICALLY DESIGNED FOR USE WITH THE EQUIPMENT AND HAVE THEM INSTALLED BY A Ask your dealer or qualified personnel to carry out installation work. -
Page 5: Before Installation
Make certain that all electrical work is carried out by qualified Where corrosive gas, such as sulphurous acid gas, is personnel according to the local laws and regulations and this produced. installation manual, using a separate circuit. Corrosion of copper pipes or soldered parts may cause the Insufficient capacity of the power supply circuit or improper refrigerant to leak. -
Page 6: Selecting Installation Site
Model Handling ERLQ units include special equipment (insulation, bottom plate As shown in the figure below, slowly move the unit by grabbing the heater,...) to ensure good operation in areas where low ambient left and right grips. Position your hands on the corner instead of temperature can occur together with high humidity conditions. -
Page 7: Precautions On Installation
Turn the air outlet side toward the building's wall, fence or In heavy snowfall areas it is very important to select an screen. installation site where the snow will not affect the unit. If lateral snowfall is possible, make sure that the heat exchanger coil is not affected by the snow (if necessary construct a lateral canopy). -
Page 8: Installation Servicing Space
About 100 mm is required as the dimension for laying the upper Installation method for prevention of falling over outdoor unit's drain pipe. Get the portion A sealed so that air from the outlet does not bypass. If it is necessary to prevent the unit from falling over, install as shown in the figure. -
Page 9: Precautions On Refrigerant Piping
In order to prevent dirt, liquid or dust from entering the piping, Selection of piping material cure the piping with a pinch or taping. Construction material: phosphoric acid deoxidised seamless copper for refrigerant. Temper grade: use piping with temper grade in function of the pipe diameter as listed in table below. - Page 10 When it is expected that the operating pressure will be low (for Brazing guidelines example, when cooling will be performed while the outside air temperature is low), sufficiently seal the flare nut in the stop Make sure to blow through with nitrogen when brazing. valve on the gas line with silicon sealant to prevent freezing.
-
Page 11: Refrigerant Piping
EFRIGERANT PIPING Preventing foreign objects from entering Field pipes can be installed in four directions. Plug the pipe through-holes with putty or insulating material (procured locally) to stop up all gaps, as shown in the figure. Putty or insulating material (produced locally) Insects or small animals entering the outdoor unit may cause a short circuit in the electrical box. -
Page 12: Leak Test And Vacuum Drying
Cautions for necessity of a trap Leak test Since there is fear of the oil held inside the riser piping flowing back into The leak test must satisfy specification EN 378-2. the compressor when stopped and causing liquid compression Vacuum leak test phenomenon, or cases of deterioration of oil return, it will be necessary 1.1 Evacuate the system from the liquid and gas piping to to provide a trap at an appropriate place in the riser gas piping. -
Page 13: Charging Refrigerant
HARGING REFRIGERANT Precautions and general guidelines Important information regarding the refrigerant used When servicing the unit requires the refrigerant system to be opened, treatment and evacuation of This product contains fluorinated greenhouse gases covered by the refrigerant must be done in accordance with relevant Kyoto Protocol. -
Page 14: Pump Down Operation
UMP DOWN OPERATION Calculating the additional refrigerant charge This unit is equipped with an automatic pump down operation which will collect all refrigerant from the field piping and indoor unit in the Piping length is the one way length of gas or liquid piping outdoor unit. -
Page 15: Electrical Wiring Work
Secure the wiring in the order shown below. LECTRICAL WIRING WORK Secure the earth wire to the stop valve attachment plate so that it does not slide. All wiring must be performed by an authorized electrician. Secure the earth wire to the stop valve attachment plate one All components procured on the site and all electric more time along with the electric wiring and the inter-unit wiring. - Page 16 When cables are routed from the unit, a protection sleeve for the Specifications of standard wiring components conduits (PG-insertions) can be inserted at the knock-out hole. (See figure 3) ERHQ_V3 ERLQ_V3 ERHQ_W1 ERLQ_W1 Wire Phase and frequency 1N~ 50 Hz 3N~ 50 Hz Bush Voltage...
-
Page 17: Test Operation
EST OPERATION Failure diagnosis at the moment of first installation In case nothing is displayed on the remote controller (the current DANGER set temperature does not display), check for any of the following Never leave the unit unattended during installation or abnormalities before you can diagnose possible malfunction servicing. -
Page 18: Maintenance And Servicing
AINTENANCE AND SERVICING NIT SPECIFICATIONS Service precautions Technical specifications WARNING: ELECTRIC SHOCK Painted Painted Casing material galvanised steel galvanised steel Caution when performing service to inverter equipment Dimensions h x w x d (mm) 1170 x 900 x 320 1345 x 900 x 320 Weight ERHQ/ERLQ (kg) 103/105... -
Page 19: Wiring Diagram
IRING DIAGRAM : Wire clamp : Live : Terminal strip : Neutral : Connector : Relay connector : Black : Orange : Field wiring : Blue : Red : Protective earth screw : Brown : White : Noiseless earth : Green : Yellow NOTE 1 This wiring diagram only applies to the outdoor unit... - Page 20 4PW54249-1...
Need help?
Do you have a question about the ERLQ011BAV3 and is the answer not in the manual?
Questions and answers