Table of Contents
Troubleshooting

Related Manuals for Pentair ACU-TROL AK600


Summary of Contents for Pentair ACU-TROL AK600
- Page 1 ACU-TROL CHEMICAL CONTROLLER ® FOR POOL AND SPA MODEL AK600 INSTALLATION AND USER’S GUIDE Certi ed to NS F/ ANSI Standa rd 50 IMPORTANT SAFETY INSTRUCTIONS READ AND FOLLOW ALL INSTRUCTIONS SAVE THESE INSTRUCTIONS...
-
Page 2: Table Of Contents
CONTENTS SECTION 8 The Configuration Menu SECTION 1 Information General Setup Screen 48 IMPORTANT WARNING & SAFETY INSTRUCTIONS 4 Global Alarm % Controller Installation Configuration Global Alarm Delay 49 Exploded View 6 Overfeed Clear Times Parts List Module 1, 2, or 3 Name Controller CHEMICAL CONTROLLER OVERVIEW Backlight Time TECHNICAL SUPPORT... - Page 3 CONTENTS SECTION 11 Service SECTION 13 Appendix Manual MPS Operation 82 ORP Calibration Curves 122 Calibration ORP Chemical Standards pH Calibration Calculated PPM Calibration Curve ORP Calibration Programming Command List ORP Calibration for Large Systems Programming Command List Calibrating Calculated PPM Proportional Feed Gain 127 Calibrating Temperature MPS Wizards...
-
Page 4: Information
IMPORTANT WARNING AND SAFETY INSTRUCTIONS SERIOUS BODILY INJURY OR DEATH CAN RESULT IF THIS PRODUCT IS NOT INSTALLED AND USED CORRECTLY. INSTALLERS, POOL OPERATORS AND POOL OWNERS MUST READ THESE WARNINGS AND ALL INSTRUCTIONS BEFORE USING THIS PRODUCT. Most states and local codes regulate the construction, installation, and operation of public pools and spas, and the construction of residential pools and spas. - Page 5 IMPORTANT WARNING AND SAFETY INSTRUCTIONS WARNING CHEMICAL BURN HAZARD: Make sure all pumps are switched off at the main circuit breakers at the house before drilling into any pipes. Securely fasten all electrical, water and chemical lines. Locate chemical feed pumps and chemical storage tanks in a safe and secure area.
-
Page 6: Controller Installation Configuration
Controller Chemical Controller Installation Configuration Exploded View WARNING For 230 VAC Power the Controller Input Voltage Selection Switch MUST be changed from 115 VAC to 230 VAC or damage will occur to the Controller. This damage is NOT covered by the warranty. -
Page 7: Parts List
Parts List DWG. # PART # DESCRIPTION Enclosure, Controller, lid, overlay, and hardware 714000720 Kit, Controller, Power Switch 755000190 Cord, Power, Controller, GFCI ** Not permitted in all areas** 714000110 Strain Relief, 5/8”, liquid tight 714000100 Strain Relif, 1/2”, liquid tight 724000120 PCB, Relay Board, Controller, 4 NO 724000130... -
Page 8: Controller Chemical Controller Overview
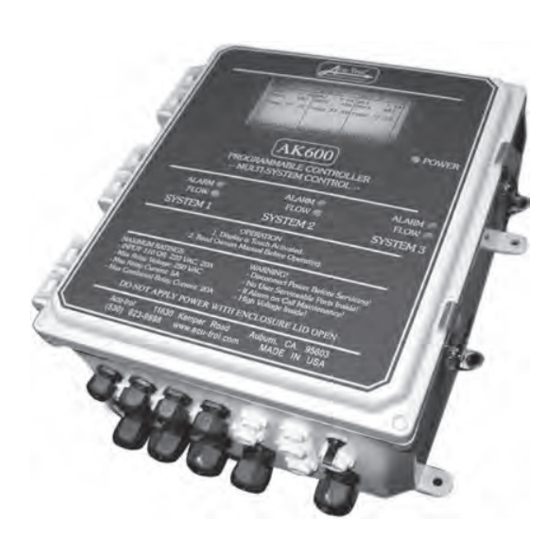
Controller CHEMICAL CONTROLLER OVERVIEW Acu-Trol , a technological leader in swimming pool automation, congratulates you on ® your selection of the Controller Chemical Controller ("Controller") swimming pool controller. The Controller will maintain the pH and sanitizer levels, maintain a set temperature, and control up to 16 external devices in a pump room, on up to three pools or spas. -
Page 9: Technical Support
The Controller Installation, Operation and Programming Guide explains the proce- dures for proper installation and operation. Section one (1) the installation guide, consists of Sections 2, 3, 4, and 5, and introduces the parts of the controller and the process to follow when installing the electrical and plumbing portions. Section two (2) the operation guide, consists of Section 6, and describes all the avail- able screens and menus of the controller, from navigating and initializing the screens to programming and customizing specifications. -
Page 10: Section 2 Installation
Section 2 Installation Installation Preparation As soon as your controller is delivered, inspect the shipping carton carefully for damage. Report any damage directly to the shipping company. Compare the packing list to the contents of the carton. If anything is missing contact your local Acu-Trol dealer. - Page 11 The modular design of the Controller allows the connection and control of any device to any relay. Determine which device you want to connect to each relay or input before you begin the installation process. For Controller can control multiple bodies of water.
- Page 12 Site Name _________________________________________________________ Input Mapping Table INPUT NAME SYSTEM NAME INPUT USED FOR Relay Mapping Table RELAY SYSTEM NAME RELAY USED FOR VOLTAGE VOLTAGE: In most cases, the devices attached to the controller will use the same voltage as the Controller. A controller configured to use 115 VAC will not be able to run devices requiring 230 VAC, and vice versa.
-
Page 13: Installation Overview
Installation Overview The following steps are required to completely install an Controller Chemical Controller: 1. Identify new and existing equipment to be connected. 2. Decide if the sensors will be in-line, in a separate by-pass line, or if the AK1200 flow cell will be used. CAUTION If the AK1200 is used, the input water maximum pressure is 25 PSI. -
Page 14: Mounting The Controller
Mounting the Controller Chemical Controller Select a location for mounting the Controller that will meet the following condi- tions: • At least ten (10) feet from open water. WARNING Proper and safe operation requires an earth ground connection. • Supply power must be routed to the Controller in accordance with the applicable codes in the area;... -
Page 15: 2.4 Plumbing Installation
2.4 Plumbing Installation Every Controller Chemical Controller installation will be different depending on the type of equipment you have, the plumbing that already exists, and the amount of available room for the installation. It is strongly suggested that you create an installa- tion plan for the plumbing and the controller. -
Page 16: Electrical Installation
Electrical Installation Each electrical installation for the Controller Chemical Controller is different de- pending on the electrical codes in your local area, the types of devices you want the Controller to control, and the existing wiring in your facility. While we are un- able to provide you with specific advice regarding your installation, we do suggest that you follow these basic steps. -
Page 17: Input Voltage Selection
Input Voltage Selection The Controller Chemical Controller operates on input voltages of 115 VAC or 230 VAC. The factory default input voltage is set for 115 VAC. The supply power is most com- monly used to power the feed pumps and other external loads. If all the loads are 115 VAC then use 115 VAC and if all the loads are 230 VAC then use 230 VAC as the input voltage. -
Page 18: Controller Installation Configuration
Controller Chemical Controller Installation Configuration Illustrated Parts View WARNING For 230 VAC Power the Controller Input Voltage Selection Switch MUST be changed from 115 VAC to 230 VAC or damage will occur to the Controller. This damage is NOT covered by the warranty. Do NOT connect any load not rated for the supply voltage to any of these relays. -
Page 19: Parts List
Parts List DWG. # PART # DESCRIPTION Enclosure, Controller, lid, overlay, and hardware 714000720 Kit, Controller, Power Switch 755000190 Cord, Power, Controller, GFCI ** Not permitted in all ar- eas** 714000110 Strain Relief, 5/8”, liquid tight 714000100 Strain Relif, 1/2”, liquid tight 724000120 PCB, Relay Board, Controller, 4 NO 724000130... -
Page 20: Controller Inputs & Outputs
Controller Chemical Controller Inputs & Outputs Chemical Feed Pump Installation Follow the instructions included with the chemical feed pump for installation if it is not already installed. Follow the list below for location recommendations: • Mount at least 10 feet from open water. •... -
Page 21: Solenoid Location
Solenoid Location For a sanitizer erosion feeder a solenoid valve will be required to control the flow through the feeder. The solenoid should be installed on the inlet side of the feeder to minimize chemical contact with the internal parts of the solenoid, unless otherwise specified by the feeder manufacturer. -
Page 22: Section Hardware
Section 3 Hardware Modules Modules are the electronic controls and components that make up the Controller. Each module has a specific function or functions that tell the controller what infor- mation to accept, and what information to display. The modular design of the Con- troller enables it to interface with many types of modules including Sensor, Com- munication, Relay, Memory and Remote. -
Page 23: Communication Modules
Communication Modules The Controller has the ability to work with several types of communication modules. The controller can communicate with a PC through an RS232 cable, a standard mo- dem, or a wireless modem. The Controller can also communicate directly with a se- rial printer, and certain remote modules. -
Page 24: Relay Modules
Relay Modules The AK 600 is able to automate nearly any device in your pump room. The controller uses a relay module to turn electricity to the device on and off. Each Controller can control up to 16 relay modules. Each relay module can control one device. All relay modules must be installed in a relay board. - Page 25 • 115 VAC SPDT: These relays are hardwired selectable to be either NO (Nor- mally Open) or NC (Normally Closed) switching of the input voltage. They are always powered, and the wiring will dictate whether the power flows in the on or off position. The relay ratings are 5A and 250 VAC.
-
Page 26: Ak1200 Flow Cell
SECTION 4 AK1200 Flow Cell AK1200 Flow Cell Remove flow cell from shipping carton and make sure all parts are included with AK1200 flow cell. • 1 – AK1200 Lid • 1 – AK1200 Jar with O-Ring • 1 – Flow switch magnet •... -
Page 27: Flow Cell Assembly
Flow Cell Assembly WARNING DO NOT OVER TIGHTEN FITTINGS ON GRAY FLOW CELL TOP AS THIS MAY BREAK OR CRACK FLOW CELL TOP. Wrap all four flex fittings with thread seal tape. Install two flex fittings into two ball valves. Wrap barb fitting with thread seal tape. -
Page 28: Inlet And Exit Lines
Inlet and Exit Lines It is essential that the supply line be at a higher pressure than the discharge line so the water will flow through the cell at a steady rate in the right direction. Installing a ball valve in the main circulation line may be required if the pressure is too low. -
Page 29: Section Sensors
Section 5 Sensors The Controller can accept readings from a wide variety of sensors. The sensors that the Controller is able to read depend on the sensor module installed in the controller. Each sensor has its own unique circuitry that is connected directly to the micro-con- troller for measurement. -
Page 30: Ph And Orp Sensors
pH and ORP Sensors pH electrodes sense the acidity of the water and work with any acid or base. The blue bands on the cables identify the pH sensors. Each sensor is also identi- fied on the sensor body. ORP electrodes are used to monitor the Oxidation-Reduction Potential (sanitization quality of the water) of a given solution. -
Page 31: Flow Sensors
Flow Sensors The Controller can accept information from two types of flow sensors: Flow switches Digital flow sensors. Each AK610, 611, and 613 sensor module has three (3) flow inputs. The first flow input, FS1, must be a flow switch. The Second and third flow inputs, FS2 and FS3, can be either a digital flow sensor or a flow switch. -
Page 32: Section 6 Operations
Section 6 Operations Introduction This PROGRAMMING GUIDE introduces and describes all the available screens and menus of the Controller, from navigating and initializing the screens to pro- gramming and customizing specifications. If you have any questions after reading through this manual, please contact your local Acu-Trol dealer for further assis- Navigating in the Controller Chemical Controller The Controller has a touch screen display, similar to a PDA or an ATM machine. -
Page 33: Selecting Items
Selecting Items The Controller offers the option to make changes or to customize the screens. There are several methods for selecting menu items in the menu screens. The System menus are accessed by touching the menu item title directly on the screen. In this manual, System menus are always in BOLD CAPITAL LETTERS. -
Page 34: The Alphanumeric Keyboard
Many of the settings in the Controller are completely user selectable. For these setings you may enter any combination of letters, numbers, and symbols. The controller will generally prompt you for a certain number of characters, and will reject characters that do not meet certain logical standards for that specific setting. -
Page 35: Initializing The Controller
Initialization Screen Once all initialization tests have been passed, the controller will automatically open the Dealer Information screen. Acu-Trol Multi System Control Pentair Water Pool and Spa® 10951 W. Los Angeles Ave. Moorpark, CA 93021 (800)-831-7133 www.pentairpool.com Dealer Information Screen ACU-TROL ®... -
Page 36: Section 7 The System Menu
Section 7 The System Menu Once the controller has identified itself, it will open the system menu screen. The system menu screen displays the unique serial ID number for your Controller. It also displays the current time, day and date. The MPS status for the relays is also dis- played on the system menu screen. -
Page 37: The Display Menu
The Display Menu The DISPLAY MENU has five sub-menus, Specific, Data, Summary, MPS Timers, and Information. Each of these sub-menus will help you to view the data captured by the Controller. • The Specific sub-menu displays an overview of chemical levels and feed times for each pool or spa controlled by the Controller •... -
Page 38: The Specific Display Screen
The Specific Display Screen The Specific Screen displays an overview of the current chemical levels and feed times for one pool or spa. When the Controller is controlling more than one pool or spa, a series of numbers will appear next to the screen title, System. These numbers correspond with a specific body of water. -
Page 39: The Data Display Screen
The Flow column is used to indicate whether or not there is flow in the system. When there is flow an X will appear in the box. The box will be empty if no flow is detected. If the Controller has any kind of alarm it will alert you here. The controller will dis- play the alarm condition, as well as the relay that has met or exceeded this condition. - Page 40 The status code of the flow, alarm, remote, modem, and password security level for all three sets of sensors are recorded during each reading. To view these status code read- ings, usually referred to as the FARMP readings, use the right arrow button while in the data display screen.
-
Page 41: Program The Data Recording Interval
Program the Data Recording Interval Display Config Service The factory default data recording General Setup interval is one hour. To change the data recording interval start in the System system screen. Open the CONFIG Adv Setups menu by pressing on the heading with your stylus Programming Communications... -
Page 42: Summary Display Screen
Summary Display Screen The Summary Screen provides a brief overview of the sensor readings and relay sta- tus for all systems controlled by the Controller. For each system, the Controller will display the current pH reading, the current ORP reading, the current temperature, the feed relay status, and the flow status for each individual system. - Page 43 The summary screen also contains a brief overview of information that can help you to maintain your water balance. The Water balance screen is reached by pressing the NEXT button at the bottom right hand corner of the summary screen. SYS 1 SYS 2 SYS 3...
-
Page 44: Mps Timers
MPS Timers The Controller contains 16 physical relays and 8 soft relays. Physical relays are used to control the devices in your pool room. Soft relays are used to expand the capabilities of the relays and can be used to program the controller to react to the conditions created by the physical relays. - Page 45 The Controller uses up to forty-four (44) Mini Programs (MPS) to determine which relays, alarms and pag- ers should be ON or OFF. Each relay in the Controller can be operated with any one of the 44 mini pro- grams. Relays in the Controller are configured at the factory to accept any of the mini programs and function with the selected program.
-
Page 46: Information Screen
Information Screen The Information Screen contains system information about the operation of your Controller. This screen provides information on how long the controller has been in operation, its serial number and the date of the last software update. AK600D5 5/30/06 1. - Page 47 7. Watchdog Timer. The Controller has several built in programs that observe the functions of the controller and ensure that the controller is functioning properly. The watchdog timer monitors the Controller for unexpected operations. If the Controller has an error, the watchdog timer will reset the system and clear the error.
-
Page 48: Section 8 The Configuration Menu
Section 8 The Configuration Menu The CONFIGURATION MENU contains all of the sub-menus that allow the user to program and customize the Controller. When programming or organizing the Controller it is important to remember that all changes are automatically saved. There is no way to reverse selections once they have been made. Cycling the power to the Controller will not reset the programming in the controller. -
Page 49: Global Alarm
General Setup Global Alarm % : 10 Global Alarm Delay 00:00:00 Overfeed Clear Time 1 08:00:00 Overfeed Clear Time 2 08:00:00 POwer On Delay Module 1 Name Module 2 Name Module 3 Name Backlight Time Seconds : 00:00:30 DFL1 Backlight None Data Setup CHANGE... -
Page 50: Overfeed Clear Times
The Global Alarm Delay behaves differently from the Global Alarm %. This delay is only used when the Programming/Alarm/Wiz is reset. In the programming for the alarm the delay that is used is the Global Alarm Delay. If the delay is changed in the Config/General menu there is nothing else that has changed and the original alarm delay is still in effect. -
Page 51: Dfl1 Backlight
DFL1 Backlight The Controller is configured to allow a user to turn on the Controller backlight with an external switch instead of the touch screen. The external switch can be wired in to the controller using the DFL1 slot in any one of the three systems (or modules) installed in the Controller. -
Page 52: Used
% Used This line displays the percentage of the data memory that has been filled. When 100% of the data memory has been filled the controller will begin to record over the existing data, oldest data first. Number of Days The Controller will use the user specified time spacing to calculate the number of day’s worth of readings that the memory will hold. -
Page 53: Graphing The Event Index
To see how many index entries you have you can press the DATA SETUP button located in the lower left corner of General Setup window. The Event Index is the number of records currently stored. The maximum number of records that can be stored is 4,500. When all 4,500 records have been used the oldest recorded entries will start to be over written. -
Page 54: Sensor Setup
Sensor Setup The Controller will allow the operator to determine which sensor measurements are displayed when viewing the data in the System and Summary Display Screens. To access the Sensor Setup menu, touch the SENSORS button, located in the lower left corner of Data Setup screen. MODULE Sensor Setup Measurement Temp... -
Page 55: The System Menu
The System Menu The System menu is one of the most important menus in the Controller. This menu is the gateway to all the menus and settings for the controller system itself, the hardware, the security settings, and the sensor module assignments. -
Page 56: Weekday
Weekday The current day of the week is displayed here. To change the current day of the week, use the directional arrows to highlight the settings. Use the change button to scroll through the selections, which includes Monday through Sunday. Once you have reached the appropriate day, exit the selected item using the up and down arrow buttons. -
Page 57: The System Menu Sub Menus
The System Menu Sub Menus The System Menu contains a number of sub-menus that are accessed through buttons on the system menu screen. These sub-menus include: HARDWARE, DISPLAY, PRINT, SECURITY, and RESET MENU: Each system sub-menu contains a group of like items, dealing with the overall function of the system. Hardware Configuration The Hardware Configuration sub-menu is used when the sensor modules in the Controller are expanded or changed. -
Page 58: Display
After selecting the correct sensor module for each of the three modules, touch the x in the upper right hand corner to return to the System Menu. Your new entry will automatically be saved by the controller. The controller will then ask you; “Do you want to reset the associated 4 relays to the factory defaults for Module 1, 2 or 3?”... -
Page 59: Display Setup
Display Setup The Display Setup screen opens the list of measurements that can be displayed. This screen will enable you to select which measurement will be displayed on a specific line. It also will enable the user to select the relay that will be controlling that measurement. - Page 60 • Lan1, 2, 3: The Langlier saturation index is an indication of the waters tendency to be scaling, corrosive or balanced. The controller will use current measurements along with the alkalinity, Total dissolved solids (TDS) and hardness input by the operator. If a conductivity sensor is in use the TDS used in the calculation will be the measured TDS from the sensor.
-
Page 61: Printer Setup
Printer Setup To open the Printer Setup screen, touch the PRINT button, in the System Menu. The Printer Setup screen contains the controls for the Communication module that will allow you to print your stored data from the Controller with a serial printer. There are two methods of communicating with serial printers. -
Page 62: Security
Security One of the most important features of the Controller is the multiple levels of password security that are available for your use. To access the Main Security Setup Screen, press the SECURITY button, located in the System Menu. This screen is used to set passwords, and enable and manage different security levels. Your Controller will be shipped to you without any security passwords. - Page 63 MASTER: The master password allows the highest level of security clearance. The master password will allow the user to access and modify every screen and command in the Controller, including the creation and management of passwords. A master password must be entered in to the controller before any other levels of passwords are created.
-
Page 64: Entering A Password
NOTE When a password has been entered to allow access, it will be reset when the backlight turns off. NOTE The password can use upper and lower case characters in addition to numbers and symbols. NOTE When the wireless modem is being used any password must be entered and security must be enabled or direct communication "WILL NOT BE ALLOWED."... -
Page 65: Reset Menu
To enter a password, use the directional arrows to highlight the desired level and touch the CHANGE button with your stylus. The alpha numeric keyboard will automatically open. Each password may be up to ten (10) characters. You may use any combination of the characters available in the Controller’s alphanumeric keyboard. - Page 66 • Reset Totalizers: This command clears the accumulated volume measurements for all flow meters. • Reset Configuration: This command clears the hardware sensor modules and leaves the programming intact. It is highly recommended that you do not use this setting without assistance from your dealer.
- Page 67 To activate one of the reset commands, Use the directional arrows to highlight the appropriate command for the items you wish to reset and touch the CHANGE button. The controller will ask “Are you sure: Y or N”. Press the Y button to reset the selected settings. Press the N button if you do not wish to reset the selected settings at this time.
-
Page 68: Section 9 Programming
Sectionr 9 Programming The Controller has an easy programming interface which allows the operator to modify the timing, set points, and other operating parameters and variables that are a part of the standard factory programs or wiz- ards. These wizards have been optimized to work with your Controller. Mini Programs are used to control all the relays in the Controller. -
Page 69: Select Mps To Configure
The relays in the Controller are organized in to five distinct groups. The physical, or R relays are used to control physical devices attached to your controller. Soft relays, or S relays are used to run operations where more than one device is involved. Alarm or A relays are used to turn on an alarm condition when user speci- fied conditions are met. -
Page 70: Select New Configuration
Select New Configuration The Select New Configuration screen allows you to select the type of device you wish to control with the MPS relay you have selected Select New Configuration Empty PRESSING OK Sanitizer RESETS Sanitizer/Super ALL COMMANDS pH - Acid AND TIMERS pH - Base FOR THIS... -
Page 71: Modifying Mps Settings Screen
Modifying MPS Settings Screen Select the MPS that is to be changed in the Select MPS to Configure screen. The following screen, Modi- fying MPS Settings will open. In this detailed command screen, you can scroll through the commands for your selected MPS using the up and down arrows PH - Acid SequencesON... -
Page 72: Alarm Configuration
Alarm Configuration The Controller is designed to allow the operator to have full control over the programming of alarms. The typical alarm assignments are as follows: ALARM Pager/Voice Alarm 1 Sensor Module 1 Alarm 2 Sensor Module 2 Alarm 3 Sensor Module 3 Alarm 4 The alarms are programmed the same as any MPS. -
Page 73: Pager/Voice/Email Alarms
The Global Alarm % is measured in percentage units. The factory default global alarm % is 10%. To change the global alarm percentage, highlight the item using the up and down arrow buttons. Once highlighted, press the CHANGE button. The alphanumeric keyboard will automatically appear and allow you to enter a new global alarm percentage. -
Page 74: Communication
Communication The ability to communicate is one of the most useful and beneficial features of the Controller. While mo- dems are optional equipment we strongly recommend that you consider a modem when making your pur- chase. Modems are especially useful because they enable an operator to monitor and maintain the water balance and to operate the controller from any computer with the AcuCOM software package. - Page 75 Voice Code: When using the voice mode the controller will identify itself with the serial number if this code is zero (0). If you wish the controller to identify itself with another type of numeric identity code, enter this code as the voice code. The controller will identify itself with the numeric code you have entered in this slot.
-
Page 76: Voice Communication
Voice Communication When the optional Expansion Memory module is installed, the Controller will answer in voice mode when called from a remote phone. The Controller will cycle through the measurements and give the status for each body of water being controlled. Use this window to listen and record all messages. In order for the voice communication system to work, you will need to complete the following steps: 1. -
Page 77: Voice Communication Menus77
Voice Communication Menus Once you have called into the unit and established voice communication you can press 0 to open up additional areas to control or change some values. In order to access any of the menu items you will need to input a proper password. While in voice mode, the Controller has only one level of password security. -
Page 78: Voice Button
Voice Button To RECORD or PLAYBACK a manual call must be placed to the Controller while in this menu. If the call is placed to the Controller without being in this window, it will go to data mode or normal voice mode. There are 100 different phrases/words the Controller has recorded and each one must be in the correct index. -
Page 79: Voice System Testing
Voice system Testing You will want to verify that your Controller has been correctly configured to call out when alarm conditions occur. To verify that the system will call out properly, you will need to verify that the system is able to call out. -
Page 80: Pager Testing
VOICE: First character must be ‘-‘ and can’t include an ‘@’. Simply enter the phone number to be called, EX: -2345678#. EMAIL: Must be a valid email address including the ‘@’ symbol. The first character can’t be ‘-‘. ACUMANAGE DATA PACKET: If the PVE is simply “AM”, then if this PVE is activated a data packet will automatically be sent. -
Page 81: Section 11 Service
Sectionr 11 Service The SERVICE MENU contains all of the functions used in the day to day operation of the Controller. All of the commands you will need to perform the daily and weekly service necessary on your pool or spa are contained in this menu. -
Page 82: Manual Mps Operation
Manual MPS Operation The Controller will allow you and your service technician to choose whether each relay in the Controller is operated manually, by the programming in the controller, or off completely. This determination is done in the Manual screen. To open this screen, touch the Manual sub-menu item line in the SERVICE pull down menu. - Page 83 To temporarily turn off a relay, touch the box to right of the MPS relay to manually turn the relay ON or OFF. If the MPS relay is currently ON, it will turn OFF. An X will appear in this box to show that this relay is OFF.
- Page 84 Calibration When you first install your Controller the raw reading from each sensor will probably not match up with the values you obtain from your hand tests. The raw sensor reading of each sensor is affected by variances in the manufacturing process and the natural profile of the water in your area.
- Page 85 Measure: The last manual pH value entered in the controller. Current Measurement: The current actual sensor reading. Before making any adjustments to the calibration of the pH sensor, measure and record the pH using a standard test kit. If there is a difference of more than a few hundredths between your test kit results and the current controller measurement, you will probably want to calibrate your sensor.
- Page 86 It is important to maintain the pH levels in your system. High pH levels limit the ORP sensor’s ability to read the ORP level. If the pH is high, the ORP sensor will read less than the actual level of sanitizer. A very low pH level will cause the ORP sensor to read higher than the actual level of sanitizer.
- Page 87 PPM vs. ORP at pH 7.4-7.6 695 700 705 710 715 720 750 755 If there is a difference of more than a few hundredths between your test kit results and the current controller measurement, you will probably want to calibrate your sensor. Touch the Reset button to clear any calibrations on this sensor.
- Page 88 The ability of the ORP sensor to correctly measure the sanitizer content in the water is affected by the pH level of the water. If the pH is above the set point, the ORP measurement taken by the Controller will be lower than the actual ORP measurement.
- Page 89 Calibrating Calculated PPM The Calculated PPM calibration screen displays the following measurements: PPM: The calculated PPM measurement to be adjusted with the correct manual measurement. ORP: The current ORP measurement used as a reference point for calculated PPM. pH: The current pH measurement used as a reference point for calculated PPM. Cal Calculated PPM PPM: 0.01...
- Page 90 Calibrating Temperature The Temperature Calibration screen displays the following items: Point 1: This is a single point calibration. You will only need to make one adjustment to align this reading. Actual: The last actual sensor reading taken before the last calibration. Measure: The last manual temperature measurement entered in your Controller.
- Page 91 The most commonly observed issues with temperature sensors are: • Temperature variance within the system itself. The temperature is not always the same at the Controller temperature sensor as at the heater or other measurement locations. Outdoor temperatures, time of day, and whether the equipment is inside or outside can also cause the temperature to vary within the system.
- Page 92 To install a digital flow sensor 1) Follow instructions that accompany the sensor. 2) Install sensor into the waterline. 3) Unplug the controller. 4) Hook up the red wire into the +12 terminal in the Acu-Trol controller. • AK110: Main Board •...
- Page 93 Conductivity Setup Conductivity sensors measure the ability of a specific body of water to conduct an electric current. Conduc- tivity is measured by passing a current between two electrodes that are placed into a sample of water. The unit of measurement for conductivity is microSiemens (uS/cm). Electricity flows more easily through water with dissolved ions, salts, and other substances than it does through pure water.
- Page 94 Entering a Cyanuric Acid Measurement Use a standard test kit, or take a water sample to your local pool supply store to have it analyzed. An accu- rate Cyanuric acid measurement is important to assure the accuracy of the calculated water balance indices. You will probably want to re-enter the Cyanuric acid level measurement at least once every three months to ensure the accuracy of the calculations done by the Controller.
-
Page 95: Entering A Total Dissollved Solids Measurement
Module Flow Cond Hard The alphanumeric keyboard will automatically launch and prompt you to enter the Alkalinity reading from your test kit or water analysis. Enter this measurement and press the Enter button. The alphanumeric keyboard will automatically close and the screen will return to the Calibration menu. Entering a Total Dissollved Solids Measurement Use a standard test kit, or take a water sample to your local pool supply store to have it analyzed. -
Page 96: Global Disable
Entering a Hardness Measurement Use a standard test kit, or take a water sample to your local pool supply store to have it analyzed. An accurate Calcium Hardness measurement is important to assure the accuracy of the calculated water balance indices. You will probably want to re-enter the Calcium Hardness level measurement at least once every three months to ensure the accuracy of the calculations done by the Controller. - Page 97 Highlighted Items are Disabled Relays 1 - 4 5 - 8 9 - 12 13 - 16 Soft 1 - 4 5 - 8 10 Mins 30 Mins Alarms 1 - 4 4 Hrs 1 - 4 5 - 8 12 Hrs 9 - 12 13 - 16...
-
Page 98: Enter Password
Enter Password Touch Enter Password to open the keyboard screen and type in the password. See Security section for password levels. When the security features are enabled, a number other than O will be displayed next to the x in the upper right corner of the screen. The password must be entered before accessing the controller for servicing and reconfiguration. -
Page 99: Section 12 Optional Features
Section 12 Optional Features The Advanced setup menu contains the menus that will allow you to configure and activate optional equipment for your Controller. This menu is used to set up your AK Color system or to set up communica- tion with an AK245 or an AK250. -
Page 100: Overview
Overview Each installation of an AKCOLOR can be different. This manual gives the basic principles to be applied for any specific installation as follows: 1. Identify the equipment to be connected. 2. Locate a suitable 115 VAC outlet for the 12VAC wall pack. Determine if an external ON/OFF switch is necessary. - Page 101 13. Perform the Setup and Startup procedures WARNING Have a licensed electrician perform all electrical wiring. It is important that any electrical work be compliant with all electrical codes in the area. AK COLOR WIRING DIAGRAM ACU-TROL ® AK600 Chemical Controller Installation and User's Guide...
-
Page 102: Akcolor Configuration
AKColor Configuration Display Config Service General Setup To configure the Controller for the AKCOLOR you will need to open the System configuration menu. Once in the configuration menu, select the System sub-menu. Adv Setups Programming Communications System Menu Time : 11:14:00 Date : 05/30/06 After opening the System sub-menu, select the... -
Page 103: Akcolor Setup
AKColor Setup System Menu Time : 11:14:00 Date : 05/30/06 Weekday : Monday Open the System Menu, and select the Units : English Advanced Setup sub-menu. : Enabled Program Mode : Easy Serial # : 10000 PRINT HARDWARE DISPLAY SECURITY Reset Menu CHANGE Advanced Setup... -
Page 104: Akcolor Diagnostic Screen
AKColor Diagnostic Screen The AKCOLOR Diagnostic Screen allows the operator to view information about the operation of the AK- COLOR. In this screen you can follow the progress of a sample, ensure that the sample chamber is properly functioning, and view the results of each test. To view the AKCOLOR diagnostic screen press the “c” in the upper right corner from either the Display/Specific or Summary screens. - Page 105 Chamber clean/dirty: Cleanliness of the sample chamber is an important factor in the accuracy of the AK- Color. The status of the glass test chamber is monitored by the AKColor and displayed here. When the sample chamber is listed as dirty, perform the cleaning procedure as directed in your AKColor manual. Manual: The AKColor can be operated manually.
-
Page 106: Akcolor Start Up
AKColor Start Up After AKCOLOR has been installed you should go through the following steps to start and verify its opera- tion. Go to Service/Adv Setups/Colorimetric Setup. Colormetric Setup TOT Ctime 1 Begins Ctime2 Begins TOT: On to enable Combined Ctime: Cycle time in minutes Begins: The hour the cycle begins If new chemicals have been loaded into the storage tanks press the appropriate purge button ( Prg1, Prg2, or... -
Page 107: Cleaning The Sensor
8. Release both clamps on the chemical feed lines. 9. Go to Service/Adv Setups/Colorimetric Setup to set the time of day that a cycle time (CTime) becomes effective. “Begins” for CTime1 should be set one hour before normal daily chlorine consumption begins and “CTime1”... -
Page 108: Loading The Akcolor Reagents
Loading the AKColor Reagents Read and follow MSDS sheets before working with chemicals. Wear the recommended personal protective equipment and know your facilities emergency action plan. You will need to replace your DPD solution every 30 – 45 days whether or not it has been consumed by the reaction process. -
Page 109: Calibration
Calibration The CALIBRATION MENU provides easy calibration of PPM. Note: Always balance the system to desired pH, TDS, Conductivity and PPM levels prior to calibrating sen- sors. 1. Go to Service/Calibration Select the Module number on the top line that pertains to the matching AK215 board. -
Page 110: The Clear Voltage Is Reading > 4.0 Volts
The Clear Voltage is Reading > 4.0 Volts Usually this is an indication that the RED and GREEN wire on either the controller or the AKCOLOR are backwards and need to be switched. The Clear Voltage is Reading < 2.3 Volts Check the following: Remove sample chamber view window plug and observe sample chamber during flushing. -
Page 111: Inaccurate Readings
Inaccurate Readings Remove AKCOLOR sample chamber viewing window plug and verify the magnet is spinning. The magnet will spin at 5, 42 and 95 seconds from the counter. Verify that green light is ON in chamber. ACU-TROL ® AK600 Chemical Controller Installation and User's Guide... -
Page 112: Network - Ak245
Network - AK245 Expansion Circuit Board The AK245 is an expansion device for the Controller. It allows a user to add 4-20mA or 0-5V signal output for control of pumps, valves, chart recorders and other such devices. The AK245 is a microprocessor based, 0-25 mA/0-5 Volt signal generator capable of control of up to four (4) 0-25mA or 0-5 VDC input driven ap- plications or devices. - Page 113 5. Connect the supply voltage. Use the +12VDC wall pack provided. The blue wire goes to the +12 and the brown wire goes to the GND. If one wire is striped connect it to +12 and the solid to GND. NOTE: up to four additional AK245 or AK250 units can be daisy chained off any of the RS485 serial connections for a total of five units.
-
Page 114: Setting An Ak245 Address
Setting an AK245 Address The AK245 uses a 4-dip switch interface for address setup. The dip switch interface is used to assign a two digit numeric address to each device attached to the RS485 serial control bus. Up to 15 different addresses can be assigned. -
Page 115: Output Signals
Output Signals The AK245 can generage three difrerent current signals, a 0-25 mA signal, a 4-25mA signal, and a 0-5V signal. 0-25MA Signals The AK245 can generate a 0-25mA current signal at the request of an Controller via the RS485 serial con- nection. -
Page 116: Electrical Specifications
Electrical Specifications The following electrical specifications in the table below must not be exceeded. ITEM DESCRIPTION LIMIT Communications Serial 4 wires RS485 Power DC wall Pack 12VDC (500 mA) 0-5V signal Number of devices per channel 4-20mA signal Number of devices per channel Controller Network - AK245 Setup The AK245 is a quad isolated, 0-25mA, 0-5VDC output converter designed to interface with the Control- ler controller system. - Page 117 RS485 1: Remote Address: 1 Step 3: Press the down arrow to select the Remote Model: AK245 Remote Model menu item. Press the CHANGE Channel Configuration button. This will toggle the Remote Model to CH SEN Sen L Sen H AK245.
-
Page 118: Resetting Ak245 Setup118
RS485 1: Remote Address: 1 Step 7: Press then use CHANGE to set 0L% Remote Model: AK245 to 16.0 for 4mA low current (use 15.0 for 3.75mA Channel Configuration to drive uncalibratable device off or closed) or to CH SEN Sen L Sen H 00.0 for 0 V low voltage. -
Page 119: Controller Viewing Ak245 Sensors119
Controller Viewing AK245 Sensors From the DISPLAY/SUMMARY, press the NEXT button twice to get to the Network view screen. This screen summarizes the setup of all five networks. SCREEN FOR THE Controller The screen below is based on the setup example above. RS485 View: CH1 CH2 CH3 CH4 SW1234... -
Page 120: Finishing And Testing120
Finishing and Testing Once the controller system has been installed with applicable sensors and expansion modules the following steps are required for final system finishing and testing. 1. Plug in the supplied cable from the AK245 to the Controller. The cable can be plugged into either receptacle located on the cover of the AK245;... - Page 121 ACU-TROL ® AK600 Chemical Controller Installation and User's Guide...
-
Page 122: Orp Calibration Curves
Section 13 Appendix ORP Calibration Curves PPM v. ORP at pH 7.4-7.6 695 700 705 710 715 720 750 755 How to use this chart: 1. The values on the left side of the chart are free-chlorine PPM. The values on the bottom are the approximate equivalent ORP Values. -
Page 123: Calibration 84 Orp Chemical Standards
ORP Chemical Standards The Association of Pool and Spa Professionals Suggested Chemical Standards for Swimming Pools Table for Pools Minimium Ideal Maximum Free Chlorine, PPM 1.0-3.0 Combined Chlorine, PPM None None Bromine, PPM 2.0-4.0 7.4-7.6 Total Alkalinity, PPM 80-100** TDS, PPM 1000-2000 3000 Calcium Hardness, PPM... -
Page 124: Ph Calibration 84 Calculated Ppm Calibration Curve
Calculated PPM Calibration Curve Acu-Trol CALCULATED PPM - Cynuric = 0 10.00 9.00 8.00 7.00 6.00 5.00 4.00 3.00 2.00 1.00 0.00 650.00 660.00 670.00 680.00 690.00 700.00 710.00 720.00 730.00 740.00 750.00 760.00 770.00 780.00 790.00 ACU-TROL ® AK600 Chemical Controller Installation and User's Guide... -
Page 125: Orp Calibration 86 Programming Command List
Programming Command List The output from the mini-programs (MPS) controls the state of the relays, alarms, pagers and voice calling. Each MPS inculdes up to 20 commands from the following list. COMMAND VALUE DESCRIPTION ** ON ** Turns the current MPS ON. ** OFF ** Turns the current MPS OFF. -
Page 126: Orp Calibration For Large Systems 88 Programming Command List
Programming Command List COMMAND VALUE DESCRIPTION OFF If Alarm ON The selected module indicates which alarm this is based ON The MPS will turn ON if the overfeed timer has been reached ON If Overfeed 1 < x < 24 for the indicated MPS. -
Page 127: Calibrating Calculated Ppm 89 Proportional Feed Gain
NOTE Max Ctime ON: In cases where the chemicals are injected ahead of the sensors this command will allow the readings to exceed the setpoint without stopping the feed cycle. NOTE Set Overfeed: This command is calculated based on the amount of feed time it would take to bring the worst case out of range measurement in to range. -
Page 128: Calibrating Temperature 90 Mps Wizards
MPS Wizards The following are some examples of wizards and explanations of their workings. Program for Super Chlorination Super chlorination is the addition of excessive amounts of sanitizer at a specific time. The purpose is to oxi- dize the water, remove the small particles and keep the water crystal clear. The following questions should be asked before programming: 1. -
Page 129: Conductivity Setup 93 Program For Dechlorination
Program for Dechlorination De-Chlorination is the removal of excess sanitizer and is typically used immediately after a super-chlorination cycle. The amount of sanitizer added in a super-chlorination cycle may make the water undesirable for many hours; the de-chlorination cycle will quickly bring the pool back within limits. In the MPS Wizard, select De-Chlor for the desired MPS. -
Page 130: Entering A Cyanuric Acid Measurement 94 Program For Auto Fill
Program for Auto Fill Auto fill is the addition of additional water to the pool or spa when the water level is below a preset thresh- old. There are two (2) basic methods for determining when to add water. The first is to use a level sensor connected to a switch input to determine when water is needed. -
Page 131: Entering A Hardness Measurement 96 Program For Ph
Program for pH The following tables show the factory default programming for Acid Feed. pH-Acid Line 1: Sequences ON Line 2: Manual OnTime 00:01:00 Line 3: Prop GON % Line 4: On If pH >7.50 Line 5: On Delay 00:00:00 Line 6: Max Time On 00:01:00 LIne 7: Min Time Off... -
Page 132: Program For Ppm
Program for PPM Note: The PPM is almost the same as the pH except the delay command is not used and the set point will be for PPM. Sanitizer CMD # 01 S S1 M2 Sequences ON CMD # 02 N S1 M2 Manual OnTime00:01:00 CMD # 03 N S1 M2 Prop GON % CMD # 04 N S1 M2 On If PPM <2.00 CMD # 05 N S1 M2 Off if Sw... - Page 133 NOTES ACU-TROL ® AK600 Chemical Controller Installation and User's Guide...
- Page 134 NOTES ACU-TROL ® AK600 Chemical Controller Installation and User's Guide...
- Page 135 NOTES ACU-TROL ® AK600 Chemical Controller Installation and User's Guide...
- Page 136 Pentair Water Pool and Spa, Inc. Those names and brands may be the trademarks or registered trademarks of those third parties.
Need help?
Do you have a question about the ACU-TROL AK600 and is the answer not in the manual?
Questions and answers