
Related Manuals for Abit Siluro GF4 MX Series

Summary of Contents for Abit Siluro GF4 MX Series
- Page 1 All manuals and user guides at all-guides.com Siluro GF4 MX Series Graphics Accelerator (MX-8X, MX-8X LP, MX-SE, MX-SE T) User’s Manual 4200-0368-11 Rev. 1.02...
- Page 2 All manuals and user guides at all-guides.com Copyright and Warranty Notice The information in this document is subject to change without notice and does not represent a commitment on part of the vendor, who assumes no liability or responsibility for any errors that may appear in this manual. No warranty or representation, either expressed or implied, is made with respect to the quality, accuracy or fitness for any particular part of this document.
-
Page 3: Table Of Contents
All manuals and user guides at all-guides.com Siluro GF4 MX Series Graphics Accelerator Index Schnellinstallationsanleitung..............1 Guide d’Installation Rapide ..............3 Guida all’installazione rapida ..............5 Краткое руководство по установке ............. 7 快速安裝指引 .................... 9 クイックインストールガイド.............. 11 빠른 설치 설명서 .................. 13 CHAPTER 1. - Page 4 5-2. DVD ................. 5-5 ILURO 5-3. X..................5-7 IRECT 5-4................5-9 RAPHIC 5-5..............5-11 ISPLAY Display Modes Table............5-13 5-6. BIOS F ............5-14 LASHING TILITY APPENDIX A. HOW TO GET TECHNICAL SUPPORT ..A-1 Siluro GF4 MX Series...
-
Page 5: Schnellinstallationsanleitung
All manuals and user guides at all-guides.com Schnellinstallationsanleitung Schnellinstallationsanleitung Installation der Karte Diese Grafikkarte kann nur auf Motherboards mit AGP-Steckplatz installiert werden. Bitte behandeln Sie diese Karte vorsichtig und vergewissern Sie sich, die Netzversorgung Ihres Systems vor der Installation abzutrennen. Neue Systeme: Trennen Sie alle Netzkabel von Ihrem Computer. - Page 6 (siehe Kapitel 2-2 “Geräteverbindung”). Treiberinstallation Starten Sie nach der Verbindung Ihren Computer neu und installieren dann die Treiber und Utility-Software. Klicken Sie auf “Driver”, um die Einstellung des Treibers für diese Karte zu starten. (Detaillierte Installationsvorgänge finden Kaptitel “Treiberinstallation”.) Siluro GF4 MX Series...
-
Page 7: Guide D'installation Rapide
All manuals and user guides at all-guides.com Guide d’Installation Rapide Guide d’Installation Rapide Installation de la Carte Cette carte graphique ne peut être installée que sur une carte disposant d’un slot AGP. Veuillez manipuler cette carte avec précautions et assurez-vous de débrancher la source d’alimentation de votre système avant l’installation. - Page 8 Après la connexion, relancez votre ordinateur et installez les drivers du logiciel ainsi que les utilitaires. Cliquez “Driver” pour commencer définition du driver pour cette carte. (Pour connaître procédure d’installation détaillée, veuillez vous référer au Chapitre 3 “Installation du pilote”.) Siluro GF4 MX Series...
-
Page 9: Guida All'installazione Rapida
All manuals and user guides at all-guides.com Guida all’installazione rapida Guida all’installazione rapida Installazione della scheda Questa scheda grafica può essere installata solamente su schede madri che abbiano uno slot AGP. Maneggiare la scheda con cura ed assicurarsi di scollegare l’alimentazione del sistema prima dell’installazione. - Page 10 Fare clic su “Driver” per iniziare ad impostare il driver della scheda. (Per la descrizione dettagliata della procedura installazione, si rimanda al Capitolo 3, “Installazione del driver”.) Siluro GF4 MX Series...
-
Page 11: Краткое Руководство По Установке
All manuals and user guides at all-guides.com Краткое руководство по установке Краткое руководство по установке Установка Платы Данную графическую плату можно установить только в систему с AGP слотом. Пожалуйста, аккуратно обращайтесь с платой и, прежде чем ее устанавливать, убедитесь в том, что питание компьютера выключено. Новые... - Page 12 изображения (см. Часть 2-2 “Подключение Устройств”). Установка Драйвера После завершения подключения перезагрузите компьютер и установите драйверы и программные утилиты. Нажмите “Driver” (“Драйвер”) для запуска настройки драйвера этой платы. (За подробную процедуру установки обращайтесь к Части 3 “Установка Драйвера”.) Siluro GF4 MX Series...
-
Page 13: 快速安裝指引
All manuals and user guides at all-guides.com 快速安裝指引 快速安裝指引 卡片安裝 全新系統: 現有顯示卡之系統: “ ” 使用手冊... - Page 14 All manuals and user guides at all-guides.com 快速安裝指引 安裝驅動程式 “Driver” “ ” Siluro GF4 MX Series...
-
Page 15: クイックインストールガイド
All manuals and user guides at all-guides.com クイックインストールガイド クイックインストールガイド カードの取り付け 新しいシステム: VGA カードの配置は型式によって異なります ユーザーマニュアル... - Page 16 All manuals and user guides at all-guides.com クイックインストールガイド 既存の VGA カードを搭載するシステム: ドライバのインストール “Driver” Siluro GF4 MX Series...
-
Page 17: 빠른 설치 설명서
All manuals and user guides at all-guides.com 빠른 설치 설명서 빠른 설치 설명서 카드 설치 새 시스템: VGA 카드 레이아웃은 모델에 따라 다릅니다. 사용 설명서... - Page 18 All manuals and user guides at all-guides.com 빠른 설치 설명서 기존 VGA 카드를 가진 시스템: " " 드라이버 설치 “Driver” " " Siluro GF4 MX Series...
-
Page 19: Chapter 1. Introduction
(for Siluro GF4 MX-8X/MX-8X LP only). With ABIT Siluro GF4 MX Series Graphics Cards, you will not just see things in the old way but also experience the dynamic and vivid modern 3D world. -
Page 20: Specification
AGP 8X/4X/2X/1X support and AGP texturing support ® ® Complete OpenGL and DirectX support High-quality HDTV/DVD playback support TV-Out supports S-Video/RCA output up to 1024x768 DVI-I interface for LCD Monitor Siluro GF4 MX Series... -
Page 21: Siluro Gf4 Mx-8X Lp
All manuals and user guides at all-guides.com Introduction Siluro GF4 MX-8X LP: ® Powered by NVIDIA GeForce 4 MX 440 GPU with AGP 8X working on 250MHz with 256-bit Graphics Core On board 64MB Video Memory Integrated dual 350MHz RAMDACs supporting twin-view at 2048 x 1536 @ 75Hz 1.1 billion texels/sec fill rate ®... -
Page 22: Siluro Gf4 Mx-Se/Mx-Se T
Integrated TV encoder provides TV-out functionality supporting 1024x768 resolution AGP 4X/2X support and AGP texturing support ® ® Complete support for DirectX 8.1 and OpenGL High-quality HDTV/DVD playback support TV-Out supports S-Video/RCA output Siluro GF4 MX Series... -
Page 23: Chapter 2. Hardware Setup
All manuals and user guides at all-guides.com Hardware Setup Chapter 2. Hardware Setup 2-1. Card Installation This graphics card can only be installed in a motherboard with AGP slot. Please handle this card with care and make sure to unplug the power supply of your system before installation. -
Page 24: Devices Connection
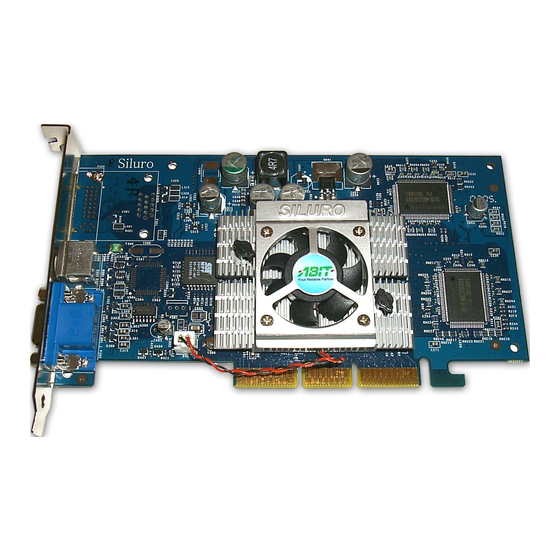
VGA card may not be exactly the same as the one you have. Siluro GF4 MX-SE: Package List: Siluro GF4 MX-SE 3D Graphics Accelerator User's Manual S-Video to RCA Cable S-Video Extended Cable Installation CD: Driver/SiluroDVD 4 Siluro GF4 MX Series... -
Page 25: Siluro Gf4 Mx-8X
All manuals and user guides at all-guides.com Hardware Setup Siluro GF4 MX-8X: Please note that DVI-I to D-Sub Adapter and TV-Out connector could not be selected as output interface at the same time. Package List: Siluro GF4 MX-8X 3D Graphics Accelerator User's Manual S-Video to RCA Cable S-Video Extended Cable... -
Page 26: Siluro Gf4 Mx-8X Lp
Siluro GF4 MX-8X LP 3D Graphics Accelerator User's Manual S-Video to RCA Cable S-Video Extended cable DVI-I to D-Sub Adapter Bundled Software Installation CD: Driver/SiluroDVD 4 Siluro Software Album CD: Soldier Fortune II Demo/ WindowBlinds NV Edition/ Earthviewer 3D Demo Siluro GF4 MX Series... -
Page 27: Siluro Gf4 Mx-Se T
All manuals and user guides at all-guides.com Hardware Setup Siluro GF4 MX-SE T: Package List: Siluro GF4 MX-SE T 3D Graphics Accelerator User's Manual S-Video to RCA Cable S-Video Extended cable Installation CD: Driver/SiluroDVD 4 User’s Manual... - Page 28 All manuals and user guides at all-guides.com Chapter 2 Siluro GF4 MX Series...
-
Page 29: Chapter 3. Driver Installation
The contents of the Installation CD that came with this card are subject to change at any time without notice. The latest driver for this board is also downloadable from our Web site at http://www.abit.com.tw. 3-1. Windows 98/ME Auto Setup: 1. -
Page 30: Windows 2000
“E:\Driver\Win2KXP” to specify the path. E: is the CD-ROM drive. Click “OK” to continue. 2. Select “Search for a suitable driver for my device [recommended]”, and then click “Next>”. Siluro GF4 MX Series... - Page 31 All manuals and user guides at all-guides.com Driver Installation 5. The wizard has found the driver for this device. Click “Next>” to continue. 6. Click “Yes” to continue. 7. Windows has finished installing the software for this device. Click “Finish” to close the wizard.
-
Page 32: Auto Setup
Installation CD to enter the installation menu. Click “Driver”. 4. Click “Yes” to continue. 2. Click “VGA Driver”. 5. Click “Yes, I want to restart my computer now”, and then click “Finish”. Siluro GF4 MX Series... -
Page 33: Windows Xp
All manuals and user guides at all-guides.com Driver Installation 3-3. Windows XP Plug and Play Setup: 1. Start Windows. 3. Click “Continue Anyway”. When Windows detects your graphics card, the Found New Hardware Wizard dialog box appears. Click “Next>”. 4. Click “Finish” to complete the Found New Hardware Wizard. -
Page 34: Auto Setup
Installation Disk. After it has been executed, the setup screen appears. Click “Driver”. 4. Click “Continue Anyway”. 2. Click “VGA Driver”. 5. Click “Yes, I want to restart my computer now”, then click “Finish”. Siluro GF4 MX Series... -
Page 35: Chapter 4. Display Properties
Adapter, Monitor, Performance, Color Management, Display Position, and nView functions. To use the Display Properties, right-click the ABIT Display Tray Icon on the taskbar’s status area and then click Display Properties to enter, or you may right-click the Windows 98/ME/2000/XP desktop, click “Properties”... -
Page 36: General
Ask me before applying the new display settings: Specifies whether Windows should display a prompt to restart every time you change system color settings. Siluro GF4 MX Series... -
Page 37: Adapter
All manuals and user guides at all-guides.com Display Properties 4-3. Adapter This tab shows what type of display adapter you are currently using. Properties: Click this button to display device driver properties for this video adapter. List All Modes: Click this to view all of the video modes available for this adapter. -
Page 38: Troubleshoot
4-6. Color Management This tab lists all the color profiles currently associated with this monitor. Click a profile to make it the active profile. Otherwise, the default profile is the active profile. Siluro GF4 MX Series... -
Page 39: Geforce4 Mx 440 (With Agp 8X)
All manuals and user guides at all-guides.com Display Properties 4-7. GeForce4 MX 440 (with AGP 8X) NOTE: The display information in this section is for reference only, and will vary according to different video adapter. This Adapter Information: information details the hardware aspects of the currently selected NVIDIA GPU. - Page 40 2x: Results in improved image quality at the cost of performance. 4x: Results in improved image quality at the cost of performance. 8x: Results in best image quality. Texture Sharpening: Sharpens textures when running 3D applications with antialiasing enabled. This can help improve image quality. Siluro GF4 MX Series...
-
Page 41: Direct3D Settings
All manuals and user guides at all-guides.com Display Properties Direct3D Settings: Enable fog table emulation: This option is used to turn fog table emulation on or off. Direct3D specifies that a display adapter capable hardware acceleration should be able to implement either vertex fog or table fog. -
Page 42: More Direct3D
The list box below is disabled when this option is enabled. Override refresh rates: Allows the driver to override the refresh rate for Direct3D applications. The list box below is enabled when this option is enabled. Siluro GF4 MX Series... -
Page 43: Opengl Settings
All manuals and user guides at all-guides.com Display Properties OpenGL Settings: Disable support for enhanced CPU instruction sets: Select this option to disable driver support enhanced instructions used by certain CPUs. Some CPUs support additional 3D instructions that complement your NVIDIA graphics processor and improve performance in 3D games or... - Page 44 PCI compatibility mode). Custom OpenGL settings: A list of the custom settings (or “tweaks”) you have saved. Selecting an item from the list will activate the setting. To apply the setting, choose the “OK” or “Apply” button. Siluro GF4 MX Series...
-
Page 45: Overlay Controls
All manuals and user guides at all-guides.com Display Properties 4-11 Overlay Controls: Full Screen Device: Click the down arrow and then select either the Primary display or Secondary display, depending on the display where you want to play video in full-screen mode. -
Page 46: Nvrotate
The nView functions allow you to connect two separate output devices (analog monitor, digital flat panel or TV) to a single graphics card. Standard Mode (DualView): Use this mode if you have only one display device attached to your NVIDIA GPU-based graphics card. Siluro GF4 MX Series... - Page 47 All manuals and user guides at all-guides.com Display Properties 4-13 This mode Clone Mode: outputs an exact copy of the primary display secondary device. To enable Clone Mode, select Clone Mode and click OK or Apply. Both display monitors now display the same image. To disable Clone Mode, select Standard Mode and click OK or Apply.
- Page 48 Use this feature if you have plugged in any displays after the control panel was opened. Device Settings: Click this button to setup or change settings related to the output device used for the current display. Siluro GF4 MX Series...
-
Page 49: Desktop Utilities
All manuals and user guides at all-guides.com Display Properties 4-15 Desktop Utilities: Display the Media Center icon in the taskbar: This option adds the Media Center icon to the Windows taskbar, allowing you to apply any of the custom Direct3D, OpenGL or color settings “on the fly”... -
Page 50: Nview Desktop Manager
(For detailed setup procedure, please refer to Chapter 5-1 “nView Desktop Manager Setup Wizard”.) Display Settings: Click to access the Windows Display Properties Settings panel where you can turn on or off [attach or detach] your connected displays. Siluro GF4 MX Series... -
Page 51: Profiles
All manuals and user guides at all-guides.com Display Properties 4-17 Profiles: This tab displays a list of all currently available profiles. A profile contains a record of all nView display settings for easy software setup. You can load a profile after selecting it from the list. -
Page 52: Windows
Center on monitor XX: Allows you to display dialog boxes on the specified display. Center on cursor’s monitor: Allows you to reposition dialog boxes to the display where the cursor is located. Locate on application’s monitor: Allows you to display dialog boxes on the parent application’s display. Siluro GF4 MX Series... -
Page 53: Effects
All manuals and user guides at all-guides.com Display Properties 4-19 Effects: This tab provides special windows effects that users can apply to their applications. Automatically activate windows under cursor: Select this function could make windows under cursor become active and move to the front of the window order. -
Page 54: Zoom
Video Mirroring Options: Click this button to open the Overlay Setting panel, where you can zoom a video window to fit an entire screen at full playback speed. Siluro GF4 MX Series... -
Page 55: Hot Keys
All manuals and user guides at all-guides.com Display Properties 4-21 Hot Keys: Hot Keys lets users perform various actions with shortcut keys or key combinations. Select an Action: Lists actions that can be performed when you press a key or combination of keys. -
Page 56: Select Tv Output
Adjustment” and “Display Timing” on page 4-26; for TV Display, refer to “TV Output” on page 4-24.) Select TV Output: 1. Select “nView Display Mode” tab and click “Device Settings>>” “Select Output Device” “TV”. Click “Apply”. Siluro GF4 MX Series... -
Page 57: Select Ntsc/Pal Format
All manuals and user guides at all-guides.com Display Properties 4-23 Click “OK”. 4. Now the output device switches to TV. Click “Yes” to confirm the display settings. Select NTSC/PAL Format: 1. Select “nView Display Mode” tab and click “Device Settings>>” 3. -
Page 58: Tv Output
Flicker Filter: Use this control to adjust the amount of flicker filter you want applied to the TV signal. It is recommended that you turn off the flicker filter completely for DVD movie playback from a hardware decoder. Siluro GF4 MX Series... -
Page 59: Color Correction
All manuals and user guides at all-guides.com Display Properties 4-25 Color Correction: Digital Digital Vibrance: Vibrance gives you more control over color separation intensity, resulting in brighter cleaner images in all of your applications. Brightness, Contrast, Gamma: The slider controls allow you to adjust the brightness, contrast or gamma values for the selected color... -
Page 60: Display Timing
Timings This older (DMT): standard still in use on some hardware. Enable this option if your hardware requires DMT. Fixed Aspect Ratio timing: Select this option to adjust the monitor timing maintaining the current aspect ratio. Siluro GF4 MX Series... -
Page 61: Chapter 5. Utility Setup
All manuals and user guides at all-guides.com Utility Setup Chapter 5. Utility Setup 5-1. nView Desktop Manager Setup Wizard nView is an application to create, manage and switch among maximum 32 different desktop displays. You can keep your e-mail and Web browsing on one desktop while using a second desktop for word processing, or even set up a custom wallpaper for each desktop. - Page 62 7. Click the check box whether you want to allow or prevent the window spanning. Click “Next >” to continue. 5. Click the check box if you want to automatically enable nView when starting Windows. Click “Next >” to continue. Siluro GF4 MX Series...
- Page 63 All manuals and user guides at all-guides.com Utility Setup 8. Click the check box if you want to 10. Click the check box to decide how enable nView system menu extensions. many initial desktops you want to use. Click “Next >” to continue. Click “Next >”...
- Page 64 Click “Next >” to continue. Click “Next >” to continue. 15. Click “Finish” to complete the 13. Click the check box if you want to setup. make the windows transparent when dragged. Click “Next >” to continue. Siluro GF4 MX Series...
-
Page 65: Silurodvd
All manuals and user guides at all-guides.com Utility Setup 5-2. SiluroDVD The SiluroDVD is a simple-to-use DVD player combining all the features you would expect to find in a standard consumer DVD player, in addition to some very advanced functionality, such as full VCD 2.0 support, full precision video decoding, a choice of user interfaces, and video display options. - Page 66 Please proceed with the necessary steps if you want to continue. If you don’t want to have Help files installed, simply click “Cancel” to end the installation process. Type a new folder name, or select Siluro GF4 MX Series...
-
Page 67: Directx
All manuals and user guides at all-guides.com Utility Setup 5-3. DirectX For the best gaming capability, we suggest that you install the latest DirectX driver. Some newer games will also ask you to install the DirectX driver before you start them. - Page 68 NOTE: Some games written for older DirectX versions may not work properly under DirectX 9. Please make sure your application support DirectX 9 before installation. Also note that the DirectX 9 cannot be uninstalled in the normal way. Siluro GF4 MX Series...
-
Page 69: Graphic Max
The usage of this utility is at your own risk. This risk includes all damages caused by this utility. If you don't accept this warning, don’t use this utility. ABIT does not recommend any over-clocking settings for your hardware. Over-clocking can cause overheating which will damage your chip. - Page 70 NOTE: The information on this figure is for your reference only; the exact clock frequency would vary by models. 5. Type a new folder name, or select one from the existing folders list. Click “Next>” to continue. Siluro GF4 MX Series...
-
Page 71: Display Tray Icon
All manuals and user guides at all-guides.com Utility Setup 5-11 5-5. Display Tray Icon After installation of display drivers, you will find a display tray icon on the taskbar’s status area. Clicking this icon opens this Display Tray, showing a menu composed of shortcuts of the graphics board’s enhanced and other functions. - Page 72 Please refer to your display monitor user’s manual for detailed specifications. Click “Windows Display Properties…” to start setting up your display properties. Choose “Exit” to leave this program. Siluro GF4 MX Series...
-
Page 73: Display Modes Table
All manuals and user guides at all-guides.com Utility Setup 5-13 Display Modes Table This display mode table is for your reference only. The display mode will differ depending on your specific monitor, and so the resulting display may not be identical to this table. -
Page 74: Bios Flashing Utility
5-6. BIOS Flashing Utility You may update the newest drivers or BIOS files from your dealer or directly download from our WEB site at http://www.abit.com.tw. NOTE: When you use the flash utility to flash the BIOS, the screen will be blank for about 10 seconds. - Page 75 All manuals and user guides at all-guides.com Utility Setup 5-15 The following commands are for the NVIDIA Flash ROM programming utility V4.38, for your reference only. NVIDIA Flash ROM utility v4.38 Command List: Usage: nvflash [commands] [rom filename] file f <filename> Flash the ROM using <filename>...
- Page 76 Use a single dash ("-") to use the single letter version of a command. Use a double dash ("--") to use the longer descriptive version of a command. Use equals ("=") to specify parameters, with separating commas (","). Sample usage: nvflash --index=1 nv30nz.rom Siluro GF4 MX Series...
-
Page 77: Appendix A. How To Get Technical Support
3. Check the ABIT Technical Terms Guide and FAQ on our Website. We are trying to expand and make the FAQs more helpful and information rich. Let us know if you have any suggestions. - Page 78 How they serve you is also a good reference for your next purchase. 6. Contacting ABIT. If you feel that you need to contact ABIT directly you can send email to the ABIT technical support department. First, please contact the support team for the branch office closest to you.
- Page 79 Stevenage, Herts SG1 4QX, U.K. Tel: 44-1438-228888 Fax: 44-1438-226333 sales@abitcomputer.co.uk technical@abitcomputer.co.uk Germany, Benelux (Belgium, Netherlands, Luxembourg), Denmark, Norway, Sweden, Finland, and Switzerland: AMOR Computer B.V. (ABIT's European Office) Van Coehoornstraat 7, 5916 PH Venlo, The Netherlands Tel: 31-77-3204428 Fax: 31-77-3204420 sales@abit.nl technical@abit.nl http://www.abit.nl...
- Page 80 All manuals and user guides at all-guides.com Appendix A Japan: ABIT Computer (Japan) Co. Ltd. Fax: 81-3-5396-5110 http://www.abit4u.jp Shanghai: ABIT Computer (Shanghai) Co. Ltd. Tel: 86-21-6235-1829 Fax: 86-21-6235-1832 http://www.abit.com.cn Russia: ABIT Computer (Russia) Co. Ltd. Fax: 7-095-937-2837 techrussia@abit.com.tw http://www.abit.ru France, Italy, Spain, Portugal, and Greece:...
- Page 81 Technical Support Form and send it to your dealer or our technical support mailbox. The mailbox address is: technical@abit.com.tw. We will try to solve your problem as soon as possible. You must provide specific information on your equipment. Also please describe in detail the problems you encountered.
- Page 82 Intel: □PII □PIII □P4 CPU Type AMD: □Socket A Other: _________________________ □Intel □VIA □SiS □ALi Chipset Chipset code name description: _________________________ Hardware name Type Specifications IDE1 IDE2 CD-ROM IDE1 Drive IDE2 System Memory Size (SDRAM) Monitor maker/model Problem Description: Siluro GF4 MX Series...
Need help?
Do you have a question about the Siluro GF4 MX Series and is the answer not in the manual?
Questions and answers