
Subscribe to Our Youtube Channel
Related Manuals for Scott SM51TR


Summary of Contents for Scott SM51TR
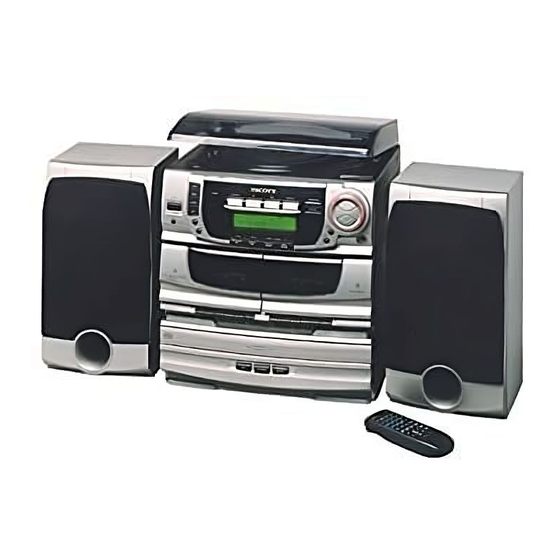
- Page 1 HOME AUDIO SYSTEM with 5 CD CHANGER and TURNTABLE OWNER'S MANUAL SM51TR Visit our web site at www.emersonscott.com 2001/7/3, PM 02:25 SM51TR.p65...
-
Page 2: Before We Begin
This product was manufactured using the highest quality components and standards of workmanship. It was tested by H.H. SCOTT inspectors and found to be in perfect working order before it left our factory. However, there is always the chance that some problem may occur because of rough handling during shipment to the retail store or to the final consumer. -
Page 3: Important Notes
This device complies with Part 15 of the FCC Rules. Operation is subject to the following two conditions: (1) This device may not cause harmful interference, and (2) This device must accept any interference received, including interference that may cause undesired operation. 2001/7/3, PM 02:21 SM51TR.p65... -
Page 4: Preparation For Use
AC outlet, do not try to defeat this safety feature by filing the wide blade to make it fit into your outlet. If this plug will not fit into your outlet, you probably have an out-dated non-polarized AC outlet. You should have your outlet changed by a qualified licensed electrician. 2001/7/3, PM 02:21 SM51TR.p65... -
Page 5: Remote Control
For this reason do not cover any vents and make sure that there is sufficient ventilation around the unit. Always remove all CDs from the changer before moving the system. 2001/7/3, PM 02:21 SM51TR.p65... -
Page 6: Rear Panel Connections
For connecting external audio equipment. connection points. 3. FRONT SPEAKERS (4 OHM) Connect supplied left and right front speakers. 4. AC POWER CORD Plug into a standard 120V/60Hz household wall outlet. 2001/7/3, PM 02:21 SM51TR.p65... -
Page 7: Connecting The Speakers
Connect the right speaker to the speaker “ R” terminals on the back of the main unit, and the left speaker to the speaker “ L” terminals. Make sure the (+) red and (–) black cables are connected to the correct speaker terminals. 2001/7/3, PM 02:21 SM51TR.p65... -
Page 8: Connecting To External Equipment
AUX IN Audio output of external A/V equipment Connect the “ L” and “ R” Audio output terminals of your A/V system to the “ L” and “ R” AUX IN terminals of the main unit. 2001/7/3, PM 02:22 SM51TR.p65... -
Page 9: Front Panel
LOCATION OF CONROLS FRONT PANEL 7 8 9 10 16 17 VOLUME FLAT TUNER/BAND TAPE PHONO/AUX OPEN/CLOSE DISC SKIP MODE/ SLEEP REMAIN PHONES MEMO/ C-ADJ. RECORD/PLAY BACK PLAY BACK INTRO. PLAY/PAUSE RANDOM 2001/7/3, PM 02:22 SM51TR.p65... - Page 10 NOTE: The above Time display includes: Clock display, 12. TUNER / BAND Button. Timer ON, Timer OFF. • Press to select TUNER mode. • In TUNER mode, press to select FM or AM band. 2001/7/3, PM 02:22 SM51TR.p65...
- Page 11 F. FWD — Press to activate fast forward. STOP / EJECT — Press to stop at play, rewind or fast forward modes. Press a second time to eject the cassette. PAUSE — Press to pause playback. 2001/7/3, PM 02:22 SM51TR.p65...
- Page 12 MODE / REMAIN button repeatedly. Illuminates if you select the repeat play function in CD mode. OFF will flash if Timer OFF function is selected by pressing the MODE / REMAIN button repeatedly. 2001/7/3, PM 02:23 SM51TR.p65...
-
Page 13: Installing Batteries
(+ / –) inside the battery Press to select TAPE function . compartment. 9. EQ Button. 3. Replace the battery cover. Press the button repeatedly to select ROCK, CLASSIC, POP or FLAT EQ setting and the corresponding indicator will illuminate. 2001/7/3, PM 02:23 SM51TR.p65... -
Page 14: Random Button
CD memory. • In TUNER mode, press to display the preset 20. VOLUME – / + Buttons. memory in descending order. Press (+) or (-) button to adjust the sound level up or down. 2001/7/3, PM 02:23 SM51TR.p65... -
Page 15: Clock Setting
2. Press the MEMO / C-ADJ button one time and hour digit will flash. Then press the TUNING DOWN / PREVIOUS or TUNING UP / NEXT button until the correct hour is set. Observe AM or PM hour. 2001/7/3, PM 02:23 SM51TR.p65... -
Page 16: Sleep Timer
4. Press the TIMER button until the appears, then press the POWER button to turn the system to STANDBY mode. NOTE: Make sure the is displayed. The system will automatically turn on/off itself when set time arrives. 2001/7/3, PM 02:24 SM51TR.p65... -
Page 17: Listening To Tuner
TUNER / BAND button. 2. Press the REPEAT / MEMO-UP or STOP / MEMO DOWN button until the desired preset memory number appears. Or press the 0-9/+10 digit buttons on the remote control to select the preset stations directly. 2001/7/3, PM 02:24 SM51TR.p65... -
Page 18: Controls And Features
7. Move the tone arm over the record and release gently. The stylus will lower onto the record and start to play. 8. Adjust the VOLUME control to obtain desired listening level. 2001/7/3, PM 02:24 SM51TR.p65... -
Page 19: Normal Cd Playback
2. If there is no disc in the selected tray, the disc resume playback. number indicator light goes out. 10. To select another disc, simply press the DISC SKIP or CD button repeatedly until the desired disc is selected. 2001/7/3, PM 02:24 SM51TR.p65... -
Page 20: Cd Random Playback
REPEAT ONE DISC mode, and the “REPEAT ONE DISC” indicator will illuminate. When this mode is selected, all tracks on the selected disc will play repeatedly. • Total playing time of current disc. 2001/7/3, PM 02:24 SM51TR.p65... -
Page 21: Programming Cd Tracks
2. Also you can press the TUNING DOWN / PREVIOUS or TUNING UP / NEXT button to select a particular programmed track to play. 3. Programmed tracks will remain stored in the memory (even if the system is switched off) until they are erased. 2001/7/3, PM 02:25 SM51TR.p65... -
Page 22: Playing Cassette Tapes
High Speed Dubbing does not function during CD or PA U S E b u t t o n o n D E C K A w i l l r e l e a s e TUNER recordings. automatically and playback will begin. 2001/7/3, PM 02:25 SM51TR.p65... -
Page 23: Care And Maintenance
• Use only well-known brands of tape. Avoid use of C-120 cassettes. Furthermore, do not expose cassettes to direct sunlight, dust or oil, and do not touch the tape surfaces. 2001/7/3, PM 02:25 SM51TR.p65... -
Page 24: Head Cleaning
Wipe in a straight line from the inside to the outside of the disc. Small dust particles and light stains will have absolutely no effect on reproduction quality. 2001/7/3, PM 02:25 SM51TR.p65... -
Page 25: Troubleshooting
THE SYSTEM YOURSELF, AS THIS WILL INVALIDATE YOUR WARRANTY. FOR ADDITIONAL SET-UP OR OPERATING ASSISTANCE PLEASE CALL: 1-972-884-2380 (9 AM to 4 PM Central Time) FOR CUSTOMER SERVICE, PLEASE WRITE TO: H.H. SCOTT, INC. Consumer Affairs Dept. 1901 Diplomat Drive, Farmers Branch, TX 75234. 2001/7/3, PM 02:25 SM51TR.p65... -
Page 26: Limited Warranty
H.H. SCOTT, INC. LIMITED WARRANTY What does this warranty cover? Any manufacturing defects in original material, including original parts and workmanship, under normal use and conditions. For how long? For a period of one (1) year from the date of original purchase in the U.S. - Page 27 H.H. SCOTT, INC. H.H. SCOTT, INC. Part No.: 100-5099 106-01 Printed in China 2001/7/3, PM 02:25 SM51TR.p65...
Need help?
Do you have a question about the SM51TR and is the answer not in the manual?
Questions and answers