Advertisement
Quick Links
User Manual of Laser Master 1
Laser Engraver
Dongguan Ortur Intelligent Technologies Co., Ltd.
(EN)Address: No. 56 Maxin Road, Changping Town, Dongguan 523565, Guangdong Province, China
(FR)Adresse: No. 56 Route Maxin, Changping Town, Dongguan 523565, Province de Guangdong, Chine
(DE)Adresse: 56 Maxin Road, Stadt Changping, Dongguan 523565, Provinz Guangdong, China
(IT)Indirizzo: No. 56 Maxin Road, Città Changping, Dongguan 523565, Provincia del Guangdong, Cina
(ES)Dirección: 56 Maxin Road, Ciudad Changping, Dongguan 523565, Provincia de Guangdong, China
1
Advertisement

Subscribe to Our Youtube Channel
Summary of Contents for Ortur Laser Master 1
- Page 1 User Manual of Laser Master 1 Laser Engraver Dongguan Ortur Intelligent Technologies Co., Ltd. (EN)Address: No. 56 Maxin Road, Changping Town, Dongguan 523565, Guangdong Province, China (FR)Adresse: No. 56 Route Maxin, Changping Town, Dongguan 523565, Province de Guangdong, Chine (DE)Adresse: 56 Maxin Road, Stadt Changping, Dongguan 523565, Provinz Guangdong, China (IT)Indirizzo: No.
-
Page 2: Brief Introduction
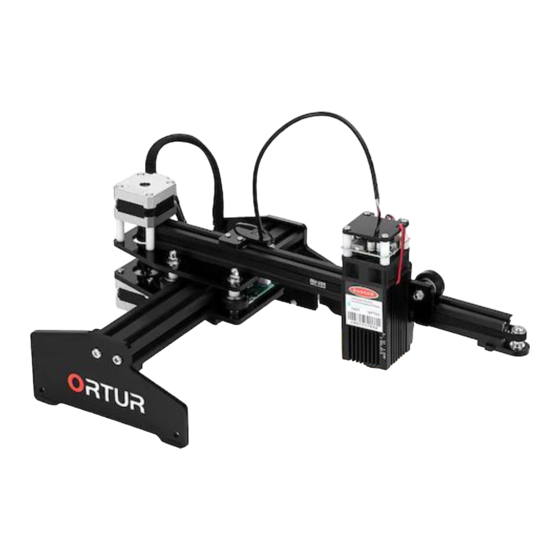
Brief Introduction This laser engraver 1 is a desktop laser engraver, not for industrial use. Active Position Protection, there is a G-sensor on the motherboard, If the machine detects unauthorized movement, the laser beam will stop. Laser Beam Safety Guard, if your computer system halted or USB cable disconnected, led to that the laser engraver stop moving, the laser beam will stop, to prevent fire. - Page 3 Attention Do NOT operate laser without eye protection (Laser goggles) Please set up laser engraver in the fireproofing area, with good ventilation. Please keep minors (especially kids younger than 14 yours old) away from this laser engraver. Minors of any age should not use this laser without direct Adult supervision and proper eye protection Please avoid strongly impact on the machine.
-
Page 4: Assembly Procedure
Assembly Procedure Please use M3*8 screws and M3 spacers to fix the Laser Module on Y axis assembly Please use M5*16 screws and M5 Nuts to fix X axis and extended supporting plate (with 4 holes, shows in picture below) - Page 5 Please use M5*16 screws and M5 nuts fix the other side of X axis and extended supporting plate (with 2 threaded holes only, shows in the picture below) Please plug the Laser Module Cable into the pinboard.
- Page 6 Please align the Screws at the Screw Holes and put the X Axis Assembly onto the Y Axis Assembly. Please use the rench fix 4*M5 Nuts and 4*M5 Spacers one by one.
- Page 7 Please use the Plastic Cable Tie to ensure the Laser Module Cable. Please plug the X Motor Cable into the X Motor.
- Page 8 Stickup the non-slip pad to the bottom of four corners, then assembly finished. Please put this laser engraver in a fireproofing area to give the first test.
- Page 9 Installation Program - LaserGRBL 1. Please download the Host Control Software ”LaserGrbl” and the Drivers at: https://www.dropbox.com/s/xby8bad4jxdjgy0/Ortur.zip?dl=0 https://tinyurl.com/rr2hsnq 2. Please install the appropriate driver for your Windows system. VCP_xxx_Setup_x32.exe is for 32Bits computer system VCP_xxx_Setup_x64.exe is for 64Bits computer system 3.
- Page 10 4. Please plug the cable of power adapter into the Power Adapter Interface, press the Power Switch button, and connect the laser engraver and computer via USB cable. PS. Press the Power button, 0.5 second to power on, and press 2 seconds to power off.
- Page 11 Please run the host control software“LaserGRBL” , and right click in the blank area of this lower section to get menu, then click ”Import custom buttons” , and select the profile file ” CustomButtons.gz” for advanced settings. TIPS: When the profile file ” CustomButtons.gz” imported, you could use LaserGRBL directly for this Laser Engraver.
- Page 12 Advanced Settings Introduction:...
- Page 13 8. Setting Procedure...
- Page 14 9. Please adjust the laser focus. For your information: 1st Please wear the safety goggles, then put the object under the laser lens. 2nd The best distance, from the upside of object to the bottom of hea t sink (not lens), is 55mm. You could adjust the laser unit height at th e acrylic holder plate.
- Page 15 10. Please start the engraving. For your information:1st Please click this icon, to home X、Y axis. 2nd Please click these icons, to move the laser u nit to be the correct position you want. 3rd Please click this icon, to set up the current position as the starting point of the engraving.
- Page 16 Installation Program - LaserBurn 1. Please download the appropriate trial version of Laserburn from: https://lightburnsoftware.com/pages/trial-version-try-before-you-buy PS. If you think the trial version is good, you could pay for it. 2. Install the software in your computer and run it. 3. Launch the application from your computer (Windows, MAC, Linu 4.
- Page 17 6. Select Serial/USB and press Next. 7. Fill your Device Name, as well as X and Y axis and press Enter a. Ortur Laser Master b. X = 150c. c. Y = 160 8. Select Front Left as your Origin X,Y and activate Auto...
- Page 18 “Home ”, then press Next. 9.Click Finish. 10. Select Ortur Laser Master and press Make Default. Your Ortur Laser Master is ready to be used in LaserBurn software.


Need help?
Do you have a question about the Laser Master 1 and is the answer not in the manual?
Questions and answers