
Subscribe to Our Youtube Channel
Related Manuals for Amica ADC700


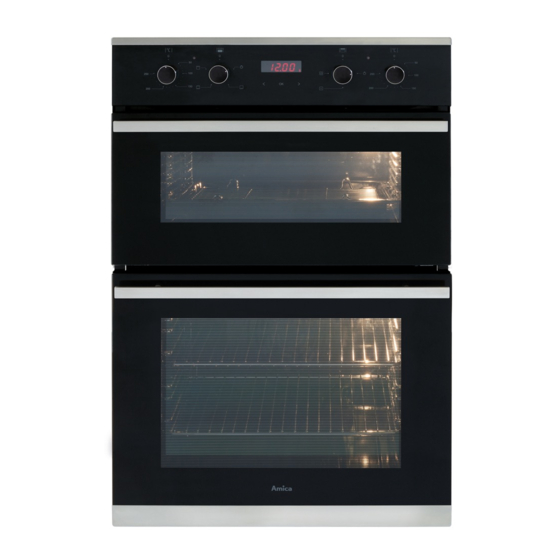
Summary of Contents for Amica ADC700
- Page 1 ADC700 & ADC900 Double ovens Installation, use and maintenance www.amica-international.co.uk...
-
Page 2: Table Of Contents
Contents: Important information Important safety notes Before first use Notes on usage Oven controls and use Setting the time/clock Minute minder Semi-automatic cooking Automatic cooking Care and maintenance Changing the oven lamp Removing the oven door(s) Troubleshooting Mains electricity connection Installation Appliance dimensions Energy efficiency information... - Page 3 Important This appliance must only be used for the purpose for which it is intended, i.e. domestic cooking. Any other use could be dangerous and may lead to premature failure of the appliance. The CDA Group Ltd cannot be held responsible for injuries or losses caused by incorrect use or installation of this product.
-
Page 4: Important Information
Appliance information: Please enter the details on the appliance rating plate below for reference, to assist CDA Customer Care in the event of a fault with your appliance and to register your appliance for guarantee purposes. Appliance Model Serial Number EU Declarations of Conformity: This oven has been designed, constructed and marketed in compliance with safety requirements of EU Directive 2014/35/EU (LVD) - Page 5 Disposing of a household appliance separately avoids possible negative consequences for the environment and health deriving from inappropriate disposal and enables the constituent materials to be recovered to obtain significant savings in energy and resources. As a reminder of the need to dispose of household appliances separately, the product is marked with a crossed-out wheeled dustbin.
- Page 6 • Do not perform maintenance or cleaning of the oven without first switching off the electricity supply. If the oven has recently been used, allow to cool. • Do not place hot enamel parts in water. Leave them to cool first. •...
- Page 7 Top oven 15 minutes full grill 60 minutes conventional Lower oven 60 minutes fan oven Please note: • This oven has been fitted with a cooling fan to achieve maximum efficiency and to maintain low surface temperatures. The cooling fan will switch on automatically when the oven is switched on and runs for a while after the oven has been switched off - the length of time can vary and will be increased by poor ventilation.
-
Page 8: Oven Controls And Use
Oven controls and use Cooking function knobs To set the function, turn the cooking function knob for the required oven clockwise to the required function. Each of the oven functions uses different elements within the oven to offer you the best choice of cooking every time. - Page 9 Oven Lamp This function switches on the oven light in the cavity. Please note: the oven light will operate on all cooking functions Defrost Using the fan only this oven function circulates the air around the oven cavity, speeding up the natural defrost process (1kg takes approximately one hour, depending on the type of food).
-
Page 10: Setting The Time/Clock
Programming the oven Please note: • The semi-automatic and automatic cooking programmes will only work with the main (lower) oven. • The alert beep will cut off after two minutes if it is not switched off manually. • The current time must be set in order for the functions to work. -
Page 11: Semi-Automatic Cooking
It can be set for up to 23 hours and 59 minutes. To set the minute minder: • Touch repeatedly until the minute minder indicator flashes. • Then touch > or < to select the required duration for the minute minder. -
Page 12: Automatic Cooking
• When the cooking time is complete, there will be an alert beep which will continue for two minutes and the cooking time indicator will flash. To switch off the alert beep, touch any key. • Turn the control knobs to the off position. Please note: At the end of the cooking programme, remember to turn off the oven manually. -
Page 13: Care And Maintenance
oven off at the control knobs, pressing a control panel key will re- activate the previously set function. Care and maintenance IMPORTANT Before any maintenance is started involving electrical parts, the appliance must be disconnected from the power supply. If the oven has been in use, let the oven cavity and the heating elements cool down before attempting any maintenance. -
Page 14: Changing The Oven Lamp
scouring pads/cloths should not be used on the cavity surface. IMPORTANT: • Steam cleaners must not be used when cleaning this appliance. • Once care and maintenance is complete, ensure that all parts are correctly replaced before using the oven. Changing the oven lamp Before any maintenance is started involving electrical parts, the appliance must be disconnected from the power supply. - Page 15 IMPORTANT Never use screwdrivers or other utensils to remove the light cover. This could damage the enamel of the oven or the lamp holder. Remove only by hand. Make sure the power is off and the lamp assembly has cooled. IMPORTANT Never replace the bulb with bare hands as contamination from your fingers can cause premature failure.
-
Page 16: Removing The Oven Doors
Oven doors Removing the oven doors The oven door can easily be removed as follows: • Open the door to the full extent (fig. 4). • Open the lever A completely on the fig. 3 left and right hinges (fig. 5). •... -
Page 17: Troubleshooting
If you have any problems with your appliance, you should check the following troubleshooting steps prior to calling Amica Customer Care to help avoid unnecessary service visits. Contact details for Amica Customer Care are on page 18 and the rear cover of this manual. - Page 18 14. If none of the previous troubleshooting checks resolve your issue, please contact Amica Customer Care using the contact details below: A: Amica CCD, The CDA Group Building, Harby Road, Langar, Nottinghamshire, NG13 9HY...
-
Page 19: Mains Electricity Connection
Mains electricity connection Warning! This appliance must be earthed To connect this appliance to a UK standard mains supply, connect the bridging links between 1-2-3 for the live feed and 4-5 for the neutral feed. This appliance must be connected to the power supply by a qualified electrician or engineer, who is a member of the N.I.C.E.I.C. - Page 20 Feed the mains lead through the Green/yellow cable clamp to prevent accidental Blue disconnection. Brown Tighten the cable clamp securely and close the connector cover. Green and Yellow = Earth (PE) Fig.9 Blue = Neutral Brown = Live Please note: •...
-
Page 21: Installation
How to install your oven You will need the following housing area fit your oven correctly. ADC700 only: We recommend that you fit end support panels onto the adjacent units to allow the oven to be secured in place (as shown in fig. - Page 22 ADC700 ADC900 Dimensions Oven Housing Dimensions Oven Housing Height (mm) Height (mm) Width (mm) Width (mm) Depth (mm) 560 (min) Depth (mm) 560 (min) 30-50 ADC700 ADC900 end support panels 720 min fig.10...
-
Page 23: Energy Efficiency Information
Energy Efficiency Information Value Model c i f ADC700 ADC900 Mass of the i l p Number of i t i Heat source per cavity (electricity or gas) Electricity Electricity Volume per y t i 35 / Upper: 35 /... - Page 24 For more information please contact: The Sales Department on 01949 862 010 Customer Care Department: Amica CCD, The CDA Group Building, Harby Road, Langar, Nottinghamshire, NG13 9HY T: 01949 862012 F: 01949 862003 E: customercare@amica-international.co.uk www.amica-international.co.uk...
Need help?
Do you have a question about the ADC700 and is the answer not in the manual?
Questions and answers