Table of Contents
Advertisement
Quick Links
Advertisement
Table of Contents

Related Manuals for Asus PA328CGV Series


Summary of Contents for Asus PA328CGV Series
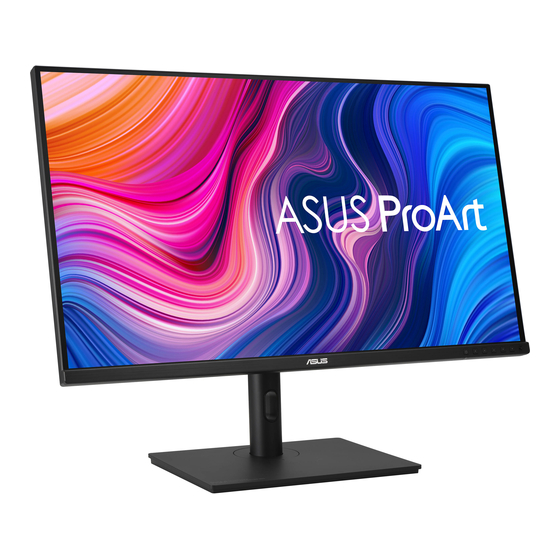
- Page 1 PA328CGV Series LCD Monitor User Guide...
-
Page 2: Table Of Contents
Product warranty or service will not be extended if: (1) the product is repaired, modified or altered, unless such repair, modification of alteration is authorized in writing by ASUS; or (2) the serial number of the product is defaced or missing. -
Page 3: Tco Certified
TCO Certified A third-party certification according to ISO 14024 Toward sustainable IT products Say hello to a more sustainable product IT products are associated with a wide range of sustainability risks throughout their life cycle. Human rights violations are common in the factories. -
Page 4: Notices
Notices Federal Communications Commission Statement This device complies with Part 15 of the FCC Rules. Operation is subject to the following two conditions: • This device may not cause harmful interference, and • This device must accept any interference received including interference that may cause undesired operation. - Page 5 The device may fall, causing serious personal injury or death. To prevent injury, this device must be securely attached to the floor/wall in accordance with the installation instructions.
-
Page 6: Safety Information
Safety information • Before setting up the monitor, carefully read all the documentation that came with the package. • To prevent fire or shock hazard, never expose the monitor to rain or moisture. • Never try to open the monitor cabinet. The dangerous high voltages inside the monitor may result in serious physical injury. •... - Page 7 WARNING Usage of other than specified head- or earphones can result in hearing loss due to excessive sound pressures. Please confirm the distribution system in building installation shall provide the circuit breaker rated 120/240V, 20A (maximum). If provided with a 3-pin attachment plug on the power cord, plug the cord into a grounded (earthed) 3-pin outlet. Do not disable the power cord grounding pin, for example, by attaching a 2-pin adapter. The grounding pin is an important safety feature. Stability Hazard.
- Page 8 Excessive sound pressure from earphones and headphones can cause hearing loss. Adjustment of the equalizer to maximum increases the earphones and headphones output voltage and therefore the sound pressure level. 1. Do not dispose of electrical appliances as unsorted municipal waste, use separate collection facilities. 2. Contact your local government for information regarding the collection systems available. 3. If electrical appliances are disposed of in landfills or dumps, hazardous substances can leak into the groundwater and get into the food chain, damaging your health and well-being.
- Page 9 Prevent Tipping When using the display, fasten the LCD to a wall using a cord or chain that can support the weight of the monitor in order to prevent the monitor from falling. M4 or M6 Screw Cord Cord or chain • Display design may differ from those illustrated. • Installing must be done by a qualified technician , and please contact your supplier for more information.
-
Page 10: Care & Cleaning
Care & Cleaning • Before you lift or reposition your monitor, it is better to disconnect the cables and power cord. Follow the correct lifting techniques when positioning the monitor. When lifting or carrying the monitor, grasp the edges of the monitor. Do not lift the display by the stand or the cord. •... - Page 11 Refer to the following sources for additional information and for product and software updates. ASUS websites The ASUS websites worldwide provide updated information on ASUS hardware and software products. Refer to http://www.asus.com Optional documentation Your product package may include optional documentation that may have been added by your dealer. These documents are not part of the standard package.
-
Page 12: Welcome
Check your package for the following items: LCD Monitor Stand/Base Quick Start Guide Warranty Card 1 x USB Type-C Cable(optional) 1x Power Cord 1x HDMI Cable (optional) 1x DP Cable (optional) Color calibration testing report ProArt welcome card C-Clamp • If any of the above items is damaged or missing, contact your retailer immediately. • * Also the Replaceable parts required by the TCO Certified. ASUS LCD Monitor PA328 Series... -
Page 13: Assembling The Monitor
Assembling the monitor To assemble the monitor: Insert the stand into the monitor head,Align the screw hole on the arm with the bundled screw on the base. Then insert the base into the arm. Fix the base to the arm by fastening the bundled screw. *Base screw size: M6 x 17mm Chapter 1: Product Introduction... -
Page 14: Assembling The C-Clamp
Assembling the C-Clamp The C-Clamp attaches the monitor to surfaces up to 8cm thick, Before starting, make sure you have enough room to fit the entire clamp and the surfaces is sturdy and flat. Follow the illustrations below to mount the monitor. ASUS LCD Monitor PA328 Series... -
Page 15: Connect Cables
Connect cables 1.5.1 Rear of the LCD monitor 5 6 7 8 9 AC-IN Port Power Switch HDMI1 Port HDMI2 Port DP - in Port USB3.1 Type-C Earphone - out Port USB3.1 Type A USB3.1 Type A 10. USB3.1 Type A 11. USB3.1 Type A This monitor is Super-Speed USB 3.1 compatible (5 Gbps). The port offers Max. 65W power delivery with output voltage 5V/3A, 9V/3A, 12V/3A, 15V/3A and 20V/3.25A. Connecting the USB Type-C cable can input the DisplayPort source, output power and enable the USB Type-A ports (downstream) on the monitor. Connecting the USB Type-C to Type-A cable only enables the USB Type-A ports (downstream) on the monitor. Chapter 1: Product Introduction... -
Page 16: Monitor Introduction
• Exit the OSD menu. Shortcut 1: • Default: Brightness hotkey • To change the hotkey function, go to the Shortcut > Shortcut 1 menu. Shortcut 2: • Default: Blue light filter hotkey • To change the hotkey function, go to the Shortcut > Shortcut 2 menu. Input Select Button • Use this hotkey to switch from HDMI-1, HDMI-2, DisplayPort, USB Tpye-C ProArt Preset • Press this button to select Preset mode. ASUS LCD Monitor PA328 Series... - Page 17 Power button/power indicator: • Turns the monitor on/off. • The color definition of the power indicator is as the below table. Status Description White Amber Standby mode Chapter 2: Setup...
-
Page 18: Adjusting The Monitor
• Hold the stand to prevent the monitor from falling when you change its angle. • You can adjust the monitor’s angle from +23˚ to -5˚ and it allows 30˚ swivel adjustment from either left or right. -5 ~ 23 +30° -30° 130mm 90° 90° ASUS LCD Monitor PA328 Series... -
Page 19: Detaching The Arm/Stand (For Vesa Wall Mount)
Detaching the arm/stand (for VESA wall mount) The detachable stand of this monitor is specially designed for VESA wall mount. To detach the arm/stand Disconnect power and signal cables. Carefully put the monitor facedown on its EPS packaging. Press the quick release button from rear cover. Detach the stand (arm and base) from the monitor. • The VESA wall mount kit ( 100 x 100 mm) is purchased separately. • Use only the UL Listed Wall Mount Bracket with minimum weight/load 28.8 kg (Screw size: M4 x 10 mm). Chapter 2: Setup... -
Page 20: Outline Dimension
Outline dimension Unit: mm ASUS LCD Monitor PA328 Series... -
Page 21: Osd (On-Screen Display) Menu
Press and to change the settings of the selected function. To exit and save the OSD menu, press repeatedly until the OSD menu disappears. To adjust other functions, repeat steps 1-4. ASUS LCD Monitor PA328 Series... -
Page 22: Osd Function Introduction
3.1.2 OSD Function Introduction ProArtPreset This function contains ten sub-functions that you can select for your preference. PA328CGV Preset Signal Brightness ProArt 2560x1440 60Hz Standard Mode HDMI-2 Standard Mode Preset sRGB Mode Rec. 709 Mode Blue Light DCI-P3 Mode Palette Scenery Mode Reading Mode Image... - Page 23 Scenery Reading Darkroom Rapid User User Mode Mode Mode Rendering Mode 1 Mode 2 Mode Color Temp. V (*1) Brightness V(*2) Contrast Sharpness Saturation ProArt Palette/ Color Black Level Gamma Input Range V: adjustable NA: function disabled (*1) 6500K & P3-Theater(default) only (*2) Rapid Rendering Mode 1. Non OFF, Brightness = Disable 2. OFF, Brightness = 50 ASUS LCD Monitor PA328 Series...
- Page 24 Blue Light Adjust the energy level of blue light emitted from LED backlight. PA328CGV Preset Signal Brightness ProArt 2560x1440 60Hz Standard Mode HDMI-2 Level 0 Preset Level 1 Level 2 Blue Light Level 3 Level 4 Palette Image Sound Back Enter Exit • Level 0: No change • When Blue Light Filter is activated,the default settings of Standard Mode will be automatically imported. •...
- Page 25 Hue: Shifts the image color between green and purple • Color Temp.: Contains five preset color modes 9300K, 6500K, 5500K, 5000K and P3-Theater. • Gamma: Contains five gamma modes including 1.8, 2.0, 2.2, 2.4, 2.6. • Black Level: To adjust the initialized 1st signal level of darkest gray level. *Signal: The adjusting range is from 0 to 100. *Backlight: The adjusting range is from 0 to 10. • Color: * Six-axis Hue adjustment. * Six-axis Saturation adjustment. * Adjusts the gain levels for R, G, B. * Adjusts the black level offset values for R, G, B. ASUS LCD Monitor PA328 Series...
- Page 26 P3-Theater is only available when DCI-P3 Mode is selected. • Color Reset: * Current mode color reset: Resets the color settings of current color mode to the factory default value. * All modes color reset: Resets the color settings of all color modes to the factory default value. Image You can adjust Sharpness, Trace Free, Aspect Control, Input Range from this main function. PA328CGV Preset Signal...
- Page 27 Standard Mode HDMI-2 PIP/PBP Mode PIP/PBP PIP/PBP Source PIP Size QuickFit Plus Signal Settings Shortcut Back Enter Exit • PIP/PBP Mode: Select PIP, PBP or turn it off. • PIP/PBP Source: Selects the video input source among, “HDMI-1”, “HDMI-2”, DisplayPort or USB Type-C. • PIP Size: Adjust the PIP size to “Small”, “Middle”, or “Large”. ASUS LCD Monitor PA328 Series...
- Page 28 QuickFit Plus Allows users to have a preview of the document or photo layout directly on screen without printing test copies PA328CGV Preset Signal Brightness ProArt 2560x1440 60Hz Standard Mode HDMI-2 Safe Area PIP/PBP Center Marker Customization QuickFit Plus Ruler Signal Settings Shortcut Back Enter Exit • Safe Area: Facilitates designers and users to organize content and layout on one page and achieve a consistent look and feel.
- Page 29 Signal Select the input source from HDMI-1, HDMI-2, DisplayPort, USB Type-C. PA328CGV Preset Signal Brightness ProArt 2560x1440 60Hz Standard Mode HDMI-2 HDMI-1 PIP/PBP HDMI-2 DisplayPort QuickFit Plus USB Type-C Signal Settings Shortcut Back Enter Exit ASUS LCD Monitor PA328 Series...
- Page 30 Settings PA328CGV Preset Signal Brightness ProArt 2560x1440 60Hz Standard Mode HDMI-2 Freesync Premium Pro Dynamic Dimming PIP/PBP USB Setup Power Level QuickFit Plus OSD Setup Signal DisplayPort Stream Key Lock Settings Power Indicator Shortcut Back Enter Exit PA328CGV Preset Signal Brightness ProArt 2560x1440 60Hz...
- Page 31 Select OSD language. The selections are: English, French, German, Spanish, Italian, Dutch, , Russian, Poland, Czech, Croacia, Hungary, Romania, Portugal, Turkey, Simplified Chinese, Traditional Chinese, Japanese, Korean, Persian, Thai, Indonesian. • All Reset: Selects “Yes” to revert all settings to the factory default mode. ASUS LCD Monitor PA328 Series 3-11...
- Page 32 10. Shortcut Selecting this option allows you to set two shortcut keys. User can select from Blue Light, Brightness, Contrast, PIP/PBP, Color Temp., Volume, sRGB Mode, Rec. 709 Mode, User Mode 1, User Mode 2 and set as shortcut key. PA328CGV Preset Signal Brightness ProArt 2560x1440 60Hz Standard Mode HDMI-2 Shortcut 1 PIP/PBP Shortcut 2 QuickFit Plus...
-
Page 33: Specifications
Chassis Colors Black < 0.5W Power saving mode < 0.5W Power off mode Tilt -5° ~ +23° 727.08 x 601.48 x 245 mm(highest) Phys. Dimension (WxHxD) 727.08 x 471.48 x 245 mm(lowest) Phys. Dimension without stand 727.08 x 428.13 x 67.72 mm (WxHxD) (For VESA Wall Mount) Box Dimension (WxHxD) 840 x 516 x 280 mm Net Weight (Esti.) 11.7 kg(Net); 7.15 kg(without stand) Gross Weight (Esti.) 16.8 kg Voltage Rating AC 100~240V(Built-in) Operational temperature 0~40° ASUS LCD Monitor PA328 Series 3-13... -
Page 34: Troubleshooting (Faq)
Troubleshooting (FAQ) Problem Possible Solution Power LED is not ON • Press the button to check if the monitor is in the ON mode. • Check if the power cord is properly connected to the monitor and the power outlet. • Check Power Indicator function in main menu OSD. Select “ON” to turn on power LED. -
Page 35: Supported Timing List
800x600@72Hz 800x600@75Hz 832x624@75Hz 1024x768@60Hz 1024x768@70Hz 1024x768@75Hz 1152x864@75Hz 1280x720@60Hz 1280x768@60Hz(CVT RB) 1280x768@60Hz 1280x800@60Hz(CVT RB) 1280x800@60Hz 1280x960@60Hz 1280x1024@60Hz 1280x1024@75Hz 1366x768@60Hz 1366x768@60Hz 1440x900@60Hz(CVT RB) 1440x900@60Hz 1600x1200@60Hz 1600x1200@75Hz 1680x1050@60Hz(CVT RB) 1920x1080@24Hz 1920x1080@60Hz 1920x1080@60Hz 2560x1440@60Hz(CVT RB) 2560x1440@100Hz 2560x1440@120Hz(CVT RB1) 2560x1440@144Hz 2560x1440@165Hz 3840x1080@60Hz 4096x2160@60Hz 4096x2160@60Hz 4096x2160@60Hz ASUS LCD Monitor PA328 Series 3-15... - Page 36 Video timing Timing List HDMI DisplayPort 720x480P@60Hz 720x576P@50Hz 1280x720P@50Hz 1280x720P@60Hz 1280x720P@60Hz 1440x480P@60Hz 1440x480P@60Hz 1440x576P@50Hz 1920x1080P@50Hz 1920x1080i@60Hz 1920x1080i@60Hz 1920x1080P@60Hz * The modes not listed in the above tables may not be supported. For optimal resolution, we recommend that you choose a mode listed in the above tables. 3-16 Chapter 3: General Instruction...
Need help?
Do you have a question about the PA328CGV Series and is the answer not in the manual?
Questions and answers