Subscribe to Our Youtube Channel
Summary of Contents for Hoover H-GO 300
- Page 1 USER MANUAL (GB) ......2 MANUAL DE USUARIO (ES) .....9 ®...
-
Page 2: Instructions For Safe Use
Do not continue to use your appliance or charger if it appears faulty. Hoover service: To ensure the continued safe and efficient operation of this appliance we recommend that any servicing or repairs are only carried out by an authorised Hoover service engineer. -
Page 3: Important Notes Before Use
Please read the following information carefully before using your Robot or its accessories. Do not disassemble the Robot and do not attempt to repair it yourself. If a fault occurs, please contact the Hoover after Sales Service for professional advice. -
Page 4: Getting To Know Your Cleaner
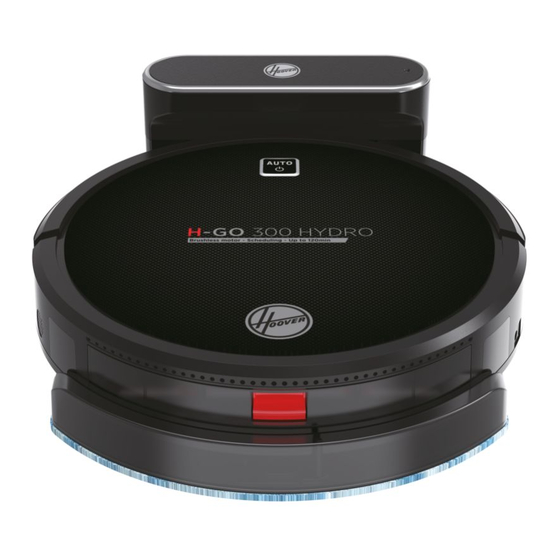
GETTING TO KNOW YOUR CLEANER On/Standby Switch with Power LED Front Bumper Dust Container Release Button Dust Container Filter Mesh Epa Filter Sponge Filter Filter Holder DC Jack, vacuum Robot Charging Contacts Charger Base Mains Power Adaptor DC Jack, Charger Base Agitator Drive Wheel Edge Cleaning Brush... - Page 5 GETTING TO KNOW YOUR ROBOT CLEANER Trasmitter Diode Suction Power Button Forward Button Left Scheduling Button Charging Station Button Timing Setting Button Button Backward Button Right Start/Pause Button Mode Button Display PREPARE YOUR ROBOT CLEANER PACKAGING Do not dispose of your Robot packaging. It may be required the validity of your guarantee in the future. When unpacking your Robot and its accessories, take care to keep plastic bags away from babies, young children and animals to avoid the risk of suffocation.
- Page 6 Error Battery Over time the capacity of your robot battery will diminish and it will need to be replaced. A replacement battery can be purchased from an approved Hoover retailer. Only use genuine Hoover spares and accessories. Removal and replacement Fig.
- Page 7 Setting up the Cleaning Schedule [Fig. 12] Press the schedule button. Press the Left/Right buttons to select a day. Press the Up/Down buttons to select or deselect that day, several days can be selected. When all required days are selected, press the Play/Pause button to set. The hours will then start flashing.
-
Page 8: Troubleshooting
Robot manually. IMPORTANT INFORMATION Hoover Spares and Consumables Always replace parts with genuine Hoover spares. These are available from your local Hoover dealer or direct from Hoover. When ordering parts always quote your model number. Quality Hoover’s factories have been independently assessed for quality. Our products are made using a quality system which meets the requirements of ISO 9001. - Page 9 No debe seguir utilizando el electrodoméstico o el cargador si parece estar defectuoso. Servicio Técnico de Hoover: Para garantizar el funcionamiento seguro, eficaz y duradero del aspirador, recomendamos que las tareas de mantenimiento sean realizadas exclusivamente por técnicos autorizados del servicio Técnico de Hoover.
-
Page 10: Contenido De La Caja
ANTES DE SU USO: NOTAS IMPORTANTES Lea atentamente la siguiente información antes de utilizar el Robot o sus accesorios. No desmonte el robot y no intente repararlo usted mismo.. En caso de fallos, contacte con el Servicio Postventa de Hoover para recibir asesoramiento profesional. -
Page 11: Información Sobre El Aparato
INFORMACIÓN SOBRE EL APARATO Interruptor de encendido/espera con LED de encendido Amortiguador frontal Pulsador desbloqueo contenedor recolector polvo Depósito de suciedad Malla del filtro Filtro Epa Filtro de la esponja de extracción Portafiltros Clavija de CC, robot aspirador Contactos de carga Base de Carga Adaptador Conector de CC, base de carga... -
Page 12: Preparación Del Robot
INFORMACIÓN SOBRE SU ROBOT Transmisor de diodo Poder de Succión Botón adelante Botón izquierdo Botón de programación Botón de base de carga Botón de configuración del horario Botón retroceder Botón derecha Botón de inicio/pausa Botón de modo de potencia Display PREPARACIÓN DEL ROBOT EMBALAJE No tirar el embalaje del Robot. -
Page 13: Uso Del Robot
Batería Con el tiempo, la capacidad de la batería de su robot disminuirá y tendrá que ser reemplazada. Se puede comprar una batería de repuesto en un Servicio Técnico Oficial de Hoover. Solo use repuestos y accesorios genuinos de Hoover. - Page 14 Configuración de establecimiento de programación de limpieza. [Fig. 12] Pulse el botón de programación. Pulse los botones Izquierda/Derecha para seleccionar un día. Pulse los botones Arriba/Abajo para seleccionar o deseleccionar ese día, se pueden seleccionar varios días. Cuando se hayan seleccionado todos los días necesarios, pulse el botón Reproducir/Pausa para ajustar. Las horas empezarán a parpadear.
-
Page 15: Solución De Problemas
SOLUCIÓN DE PROBLEMAS A continuación se expone una lista de problemas comunes y sus soluciones. Si cualquiera de dichos problemas persiste, póngase en contacto con su representante local de Hoover. • El Robot requiere supervisión. • Controle que el Robot esté conectado. - Page 16 ® PRINTED IN P.R.C. 48031327/01...


Need help?
Do you have a question about the H-GO 300 and is the answer not in the manual?
Questions and answers