Table of Contents
Advertisement
Advertisement
Table of Contents

Related Manuals for Areva MVAJ05


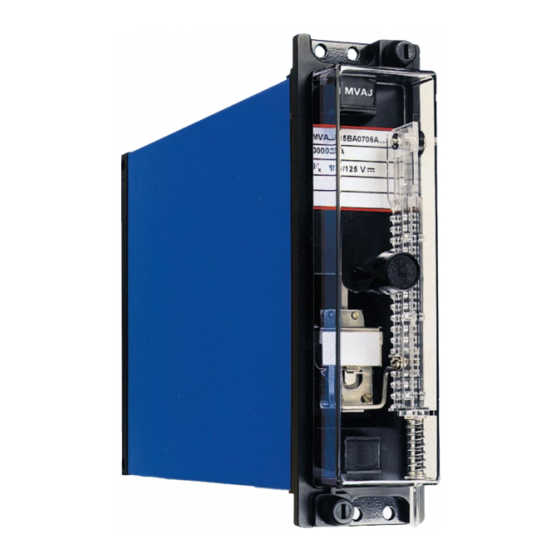
Summary of Contents for Areva MVAJ05
- Page 1 Types MVAJ05, 10, 20 Tripping and Control Relays Service Manual R8141B...
- Page 3 The electronic circuits of AREVA T&D products are immune to the relevant levels of electrostatic discharge when housed in their cases. Do not expose them to the risk of damage by withdrawing modules unnecessarily.
-
Page 5: Table Of Contents
Self, hand, electrical and hand/electrical reset 2.4.2 Self-reset 2.5s delayed reset Restoration of wiring Problem analysis MAINTENANCE MECHANICAL SETTINGS General Cleaning contacts Contact settings Settings 4.4.1 Relay types MVAJ05 4.4.2 Relay types MVAJ10, MVAJ20 SPARES Repairs CONNECTION DIAGRAMS COMMISSIONING TEST RECORD REPAIR FORM... - Page 6 Figure 1 Typical application diagram MVAJ051 Figure 2 Typical application diagram MVAJ053 Figure 3 Typical application diagram MVAJ054 Figure 4 Typical application diagram MVAJ055 Figure 5 Typical application diagram MVAJ101 Figure 6 Typical application diagram MVAJ102 Figure 7 Typical application diagram MVAJ103 Figure 8 Typical application diagram MVAJ104 Figure 9...
- Page 7 CONTENT SAFETY SECTION Health and safety Explanation of symbols and labels INSTALLING, COMMISSIONING AND SERVICING EQUIPMENT OPERATING CONDITIONS Current transformer circuits External resistors Battery replacement Insulation and dielectric strength testing Insertion of modules and pcb cards Fibre optic communication OLDER PRODUCTS DECOMMISSIONING AND DISPOSAL TECHNICAL SPECIFICATIONS...
-
Page 9: Safety Section
SAFETY SECTION This Safety Section should be read before commencing any work on the equipment. Health and safety The information in the Safety Section of the product documentation is intended to ensure that products are properly installed and handled in order to maintain them in a safe condition. -
Page 10: Equipment Operating Conditions
Voltage and current connections should be made using insulated crimp terminations to ensure that terminal block insulation requirements are maintained for safety. To ensure that wires are correctly terminated, the correct crimp terminal and tool for the wire size should be used. Before energising the equipment it must be earthed using the protective earth terminal, or the appropriate termination of the supply plug in the case of plug connected equipment. -
Page 11: Fibre Optic Communication
Fibre optic communication Where fibre optic communication devices are fitted, these should not be viewed directly. Optical power meters should be used to determine the operation or signal level of the device. OLDER PRODUCTS Electrical adjustments Equipments which require direct physical adjustments to their operating mechanism to change current or voltage settings, should have the electrical power removed before making the change, to avoid any risk of electrical shock. -
Page 12: Technical Specifications
TECHNICAL SPECIFICATIONS Protective fuse rating The recommended maximum rating of the external protective fuse for this equipment is 16A, Red Spot type or equivalent, unless otherwise stated in the technical data section of the product documentation. Insulation class: IEC 601010-1 : 1990/A2 : 2001 This equipment requires a Class I protective (safety) earth... -
Page 13: Installation
If damage due to rough handling is evident, a claim should be made to the transport company concerned immediately and AREVA T&D should be promptly notified. Relays which are supplied unmounted and not intended for immediate installation should be returned to their protective polythene bags. -
Page 14: Installation
Installation The installation should be clean, dry and reasonably free from dust and excessive vibration. The site should preferably be well illuminated to facilitate inspection. An outline diagram is normally supplied showing panel cut-outs and hole centres. For individually mounted relays these dimensions will also be found in publication R6141. -
Page 15: Preliminary Checks
Relay type Feature Link in Link out MVAJ 051, 053, 054, 055 Burden High Cut-off Instantaneous Instantaneous MVAJ 101, 103, 104, 105 Burden High 201, 203, 204, 205 Cut-off 40-60ms time delayed Instantaneous MVAJ102, 202 Link not necessary - configured as high burden models Note: At the point at which the relay cut-off occurs the current drawn by the relay is either reduced to an economised level or is removed entirely (ie. -
Page 16: Insulation Tests
2.2.2 Carefully remove the rubber band securing the flag mechanism. 2.2.3 Check that the bottom end of the contact operating card has not been dislodged from the slot in the armature extension. 2.2.4 Check that all push-on connections to the PCB are secure. Check that all the push-on connections to the back of the contacts are secure. -
Page 17: Self-Reset 2.5S Delayed Reset
Problem analysis Repeat Section 2.2 with particular attention to the connection of external links. If the relay is found to be faulty it should be returned to AREVA T&D for repair and recalibration. There are no user serviceable parts inside. -
Page 18: Cleaning Contacts
Normal duty Make (normally open) Break (normally closed) Settings Settings should be within those specified in the following tables. 4.4.1 Relay types MVAJ05 Standard armature gap 1.5 to 1.25 Make Follow through – just closed – just open Force to make... -
Page 19: Relay Types Mvaj10, Mvaj20
Repairs Should the need arise for the equipment to be returned to AREVA T&D for repair, then the form at the back of this manual should be completed and sent with the equipment together with a copy of any commissioning test results. -
Page 20: Connection Diagrams
Section 6. CONNECTION DIAGRAMS 5 contact versions 01 MVAJ051 01 self reset 01 MVAJ053 01 hand reset 01 MVAJ054 01 electrical reset 01 MVAJ055 01 hand and electrical reset 10 contact versions 01 MVAJ101 01 self reset 01 MVAJ102 01 self reset (2s delayed reset) 01 MVAJ103 01 hand reset... - Page 21 Page 19...
- Page 22 Page 20...
- Page 23 Page 21...
- Page 24 Page 22...
- Page 25 Page 23...
- Page 26 Page 24...
- Page 27 Page 25...
- Page 28 Page 26...
- Page 29 Page 27...
- Page 30 Page 28...
- Page 31 Page 29...
- Page 32 Page 30...
- Page 33 Page 31...
- Page 34 Page 32...
-
Page 35: Commissioning Test Record
Section 7. COMMISSIONING TEST RECORD Date Site Station Circuit Relay model no. Serial no. Rating Operating Volts DC Resetting Volts DC Diagram no. Visual inspection Check operation at 60% LNV Check operating time at 100% LNV Check contact continuity Check electrical reset at 60% LNV Check reset time at 100% LNV (MVAJ102 only) Check unit resets correctly Check flags/cover... - Page 36 Page 34...
-
Page 37: Repair Form
REPAIR FORM Please complete this form and return it to AREVA T&D with the equipment to be repaired. This form may also be used in the case of application queries. AREVA T&D St. Leonards Works Stafford ST17 4LX England For :... - Page 38 6. What did happen? 7. When did the fault occur? Instant Yes / No Intermittent Yes / No Time delayed Yes / No (Delete as appropriate) ___________________ By how long? 8. What indications if any did the relay show? 9. Was there any visual damage? 10.
- Page 40 AREVA T&D's Automation & Information Systems Business www.areva-td.com T&D Worldwide Contact Centre online 24 hours a day: +44 (0) 1785 25 00 70 http://www.areva-td.com/contactcentre/...
Need help?
Do you have a question about the MVAJ05 and is the answer not in the manual?
Questions and answers