Table of Contents
Advertisement
Advertisement
Table of Contents

Subscribe to Our Youtube Channel
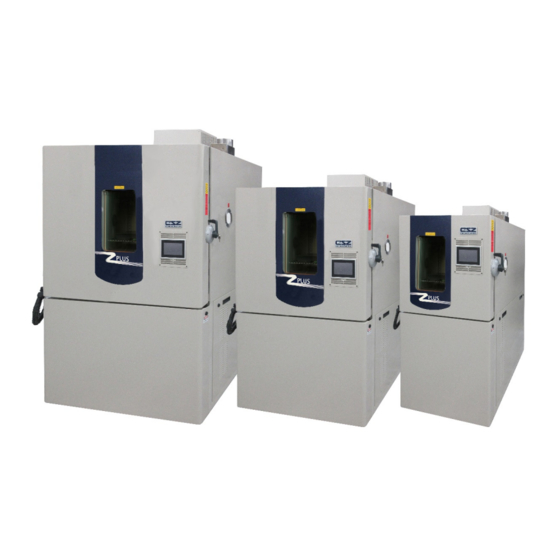
Related Manuals for Cincinnati Sub-Zero ZP Series


Summary of Contents for Cincinnati Sub-Zero ZP Series
- Page 1 Installation Operation Maintenance Manual ZP Series 58911 rev B 1/2021...
- Page 2 Note: CSZ is continuously upgrading the components used in its equipment. Consequently, the physical appearance of certain components may vary from that shown.
- Page 3 CSZ chambers that are “SPECIFIC” to a customer. Please refer to this section for warranty, controller PID parameters, and calibration/verification test data sheets. Cincinnati Sub-Zero Temperature Chamber: MODEL NO. SERIAL NO. DO NOT USE THIS MANUAL IN AN ATTEMPT TO OPERATE OR MAINTAIN ANY OTHER MODEL OR SERIAL NUMBER.
- Page 4 THIS PAGE INTENTIONALLY LEFT BLANK...
- Page 5 CHAMBER LABELS AND MEANINGS Some graphical safety labels may be replaced with textual based safety labels. Read the entire manual for other safety information that is applicable to our chamber. GENERAL DANGER, WEAR EYE PROTECTION CONSULT MANUAL TURN OFF AND LOCK OUT ELECTRICAL SHOCK SYSTEM POWER BEFORE SERVICING...
- Page 6 THIS PAGE INTENTIONALLY LEFT BLANK CHAMBER LABELS AND MEANINGS...
-
Page 7: Table Of Contents
CHAPTER 1 SAFETY PRECAUTIONS-FEATURES INTRODUCTION ......................1 GENERAL SAFETY PRECAUTIONS .................. 1 ELECTROSTATIC DISCHARGE SENSITIVE DEVICES ............4 SAFETY FEATURES ......................5 ELECTRICAL CIRCUIT PROTECTION ................5 REFRIGERATION SYSTEM PROTECTION ................ 5 OVER-TEMPERATURE PROTECTION ................5 PRODUCT HIGH LIMIT (IF EQUIPPED) ................5 CHAMBER HIGH LIMIT .................... - Page 8 FIGURES AND TABLES Figure 2-1: Chamber Components Location ................9 Figure 2-2: ZPRC Chamber – Side View ..................10 Figure 2-3: ZPRC Chamber – Top View ..................10 Figure 2-4: Achievable Humidity Points ..................12 Figure 2-5: Optional Recirculating Water/ Demineralizer Filter ..........13 Figure 2-6: Humidity Panel Location &...
- Page 9 CHAPTER 4 INSTALLATION PREPARATION FOR USE ....................55 MAIN POWER CONNECTION ..................57 VOLTAGE CHANGE ON ZP CHAMBERS ................. 58 REFRIGERATION SYSTEM PRESSURES ................58 WATER COOLED UNITS (OPTIONAL) ................58 SCROLL COMPRESSORS ONLY ..................61 HUMIDITY SYSTEM (OPTIONAL) .................. 61 FIGURES AND TABLES Figure 4-1: Transporting A Chamber ................
- Page 10 CHAPTER 5 MAINTENANCE AND Q & A GENERAL MAINTENANCE ..................63 TEST EQUIPMENT REQUIRED .................. 63 INSPECTION SCHEDULE ................... 64 VISUAL INSPECTION ....................68 TROUBLESHOOTING PROCEDURES ................68 SYSTEM TROUBLESHOOTING .................. 68 SATURATED TEMPERATURE/PRESSURE CHART ............75 PFC REFRIGERANTS ....................77 RESETTING A CIRCUIT BREAKER ................
- Page 11 CHAPTER 6 WARRANTY & SHIPPING INFORMATION HOW TO CONTACT CSZ ....................85 HOW TO OBTAIN REPLACEMENT PARTS / PARTS ORDERING PROCEDURE ....85 STANDARD LIMITED EQUIPMENT WARRANTY *THESE CHAPTERS INCLUDED FOR PRINT MANUALS* CHAPTER 7 SPECIFIC INFORMATION CALIBRATION REPORTS CHAPTER 8 PARTS LISTS ELECTRICAL BILL OF MATERIALS (IF REQUIRED) REFRIGERATION BILL OF MATERIALS (IF REQUIRED)
- Page 12 THIS PAGE INTENTIONALLY LEFT BLANK TABLE OF CONTENTS viii...
-
Page 13: Safety Precautions-Features
INTRODUCTION Warnings contained in this manual are identified by this symbol. Warnings identify WARNING any conditions or practices that, if not strictly observed, could result in personal injury or possible loss of life. Cautions in this manual are identified by this symbol. Cautions identify any CAUTION condition or practice that, if not strictly observed, could result in damage to, or destruction of, the system equipment. - Page 14 DO NOT replace components or make adjustments inside the equipment with the main WARNING power supply turned on. Under certain conditions, dangerous potentials may still exist when the power switch is in the off position due to charges retained by capacitors. To avoid injury, always remove power and ground a circuit before touching it.
- Page 15 All loads must be removed from the chamber prior to transport and/or maintenance and WARNING securing. The chamber door must be shut prior to transport or moving. The installation manual and all notes on the electrical schematic must be followed to ensure WARNING safe installation, operation, and maintenance.
-
Page 16: Electrostatic Discharge Sensitive Devices
ELECTROSTATIC DISCHARGE SENSITIVE DEVICES This manual contains maintenance procedures for parts and assemblies sensitive to damage by electrostatic discharge (ESD). Parts or assemblies are identified as ESD sensitive by the symbol to the left. The following are general precautions that should be observed when handling ESD sensitive devices or assemblies: 1. -
Page 17: Safety Features
SAFETY FEATURES DO NOT BYPASS any of the safety features provided in Cincinnati Sub-Zero incorporates many safety features in the design of its this equipment. Failure to equipment. These safety features provide protection for the equipment, as well follow these instructions as for operating and maintenance personnel. -
Page 18: Figures And Tables Figure 1-1: Communication Plates
COMMUNICATION CONNECTIONS CONNECTION FOR EVENT RELAY Figure 1-1: Communication Plates Note: CSZ is continuously upgrading the components used in its equipment. Consequently, the physical appearance of certain components may vary from that shown. NOTE Connection for event relay(s). Do not connect 115-volt power to these connections. -
Page 19: General Description
CHAPTER 2: GENERAL DESCRIPTION SYSTEM DESCRIPTION NOTE The ZP-Series Temperature chambers are pre-engineered chambers designed to provide an environment with specific temperature (humidity) conditions. The Condensation on exterior standard ZP model is composed of the following: 1. Controller, 2. Chamber, 3. surfaces is normal when Refrigeration/ Heating components. -
Page 20: Refrigeration/Heating Components
A multiple-pane window assembly in the door of the chamber allows viewing of the chamber interior during operation. The window is constructed of tempered glass panes with a heater harness to assure frost- free viewing during low temperature chamber operation. Under certain ambient conditions, it may be normal to see some condensation around the outer window frame area during low temperature operation. -
Page 21: Figure 2-1: Chamber Components Location
Chamber Vent LN2 Boost Valves (Optional) Dry Air Purge (Optional) Upper Refrigeration Components Water Inlet Location Steam Generator System Electrical Connection (1 ¼” EMT Conduit – 35mm Water Cooled Metric Conduit Trade Size) Condenser Connection location (Knockouts) (If Applicable) Lower Refrigeration Components Figure 2-1: Chamber Components Location Note: CSZ is continuously upgrading the components used in its equipment. -
Page 22: Figure 2-2: Zprc Chamber - Side View
Supply Air Return Air Blower Motor Figure 2-2: ZPRC Chamber – Side View Adjustable Supply Air Damper Figure 2-3: ZPRC Chamber – Top View Note: CSZ is continuously upgrading the components used in its equipment. Consequently, the physical appearance of certain components may vary from that shown. -
Page 23: Humidity
HUMIDITY The ZPH-Series chambers provide the same temperature ranges for heating and cooling as the ZP-Series, but add the ability to control humidity within the range of 10% to 98% relative humidity as limited by a 185°F (85°C) maximum dry bulb temperature and a 45°F (7°C) dewpoint. -
Page 24: Figure 2-4: Achievable Humidity Points
Figure 2-4: Achievable Humidity Points GENERAL DESCRIPTION... -
Page 25: Figure 2-5: Optional Recirculating Water/ Demineralizer Filter
Demineralizer Filter (Optional with Humidity) Float Switch Recirculating Water System (Optional with Humidity) Pump (inside base compartment) Drain Valve Figure 2-5: Optional Recirculating Water/ Demineralizer Filter Note: CSZ is continuously upgrading the components used in its equipment. Consequently, the physical appearance of certain components may vary from that shown. -
Page 26: Figure 2-6: Humidity Panel Location & Components
Steam Generator Assembly Float Switch Enclosure (With Humidity Option) Water Inlet Location Electrical Connection (1 ¼” EMT Conduit 35mm Metric Conduit Trade Size) Connection Location for Water Cooled Units Compressor System #1 Pressure Compressor Gauges System #2 Figure 2-6: Humidity Panel Location & Components (Steam Generator System) Note: CSZ is continuously upgrading the components used in its equipment. - Page 27 HUMIDITY COMPONENTS (CONTINUED) The chamber area contains the remaining components necessary to generate and maintain humidity levels within the work space. The following is a description of these components (see Figures 3 to 5). A. Solid-State Humidity Sensor DO NOT RELOCATE. It has been located at the factory for maximum performance. This unit utilizes a solid-state relative humidity sensor which takes the place of the traditional wet bulb and dry bulb sensors.
-
Page 28: Figure 2-7: Chamber Interior
PLENUM COVER REMOVED Fans Chamber Light Plenum Area Heaters Evaporator Coil Dehumidification Coil Air Temperature Sensor (behind cover) PLENUM COVER ON Solid State Humidity Sensor (behind cover) Plenum Cover Product Wet Coil Sensor Figure 2-7: Chamber Interior Note: CSZ is continuously upgrading the components used in its equipment. Consequently, the physical appearance of certain components may vary from that shown. -
Page 29: Pen Recorders (Optional)
Some options may be equipped with a GFCI Receptacle for power. If any options are installed in this manner, check the GCFI Receptacle(s) monthly. OPTIONS CAUTION PEN RECORDERS (OPTIONAL) If any options are installed The Circular Chart Recorder features fully programmable inputs, ranging, and using a GFCI Receptacle, linearization, with stepper motor, pen, and chart drive speed. -
Page 30: Programmable Door Lock (Optional)
Mode: Mechanical cooling with LN2 boost: At temperatures above -70°C the refrigeration system operates normally. When the LN2 switch is turned “on” the LN2 cooling valve will open when there has been a call for cooling from the controller for more than 10 seconds. This will boost the cooling effect and reduce the temperature in the chamber faster. -
Page 31: Limited Temperature Sheath Heater (Optional)
LIMITED TEMPERATURE SHEATH HEATER (OPTIONAL) Each heater has its own temperature controller and redundant high limit safety. The temperature controller is set to maintain the heater sheath temperature below 80% of the auto ignition temperature of the fluid or vapor in the chamber. -
Page 32: Figure 2-8: Shelf And Bracket
SHELF DESCRIPTION WARNING Test samples should be placed in the chamber in a Shelf manner that allows proper Rail ventilation. “C” Channel Shelf Rail WARNING Shelves pulled more than halfway out can become unstable. Figure 2-8: Shelf and Bracket WARNING “C”... - Page 33 ZP(H) - 8 ZP(H) - 16 ZP(H) – 32 ZP(H) - 44 ZP(H) - 64 ZP(H) - 80 ZP(H) - 96 Workspace 8 Cubic Ft 16 Cubic FT 32 Cubic Ft 44 Cubic Ft 64 Cubic Ft 80 Cubic Ft 96 Cubic Ft Volume (230 L)
- Page 34 Cascade -70° C to 190° C Live Load Capacity Electrical Power Requirements Watts Full Load Amps Model -18° C -34° C -40°C -54°C -68°C 208/230V, 1Phase 208/230V, 3Phase 460V, 3Phase ZP-8-2-2-H/AC 1200 ZP-8-3.5-3.5-SC/AC 1700 1200 ZP-16-2-2-H/AC 1800 1200 ZP-16-3.5-3.5-SC/AC 2000 1600 1000 ZP-16-6-6-SC/WC...
- Page 35 Cascade -70° C to 190° Z-Plus Performance Cooling Performance Cooling Heating Performance with Empty Chamber in Minutes from: Rate with Empty Chamber in Minutes from: Models 24° C 85° C ° C / min 24° C -34° C -68° C Model -18°C -34°C...
- Page 36 Tundra® -45°C to 190° Live Load Capacity Electrical Power Requirements Watts Full Load AMPs Model -18° C -34° C -40°C 208/230V, 1Ph 208/230V, 3Ph 460V, 3Ph ZP-8-2-SCT/AC 1800 ZP-8-3.5-SCT/AC 2110 1100 ZP-8-6-SCT/WC 2200 1500 1200 ZP-16-3.5-SCT/AC 3000 1700 1300 ZP-16-6-SCT/WC 3600 2300 1800...
- Page 37 Tundra® -45°C to 190° Cooling Performance Heating Performance Cooling Rate with Empty Chamber in Minutes from: with Empty Chamber in Minutes from: 24° C 85° C ° C / min 24° C -34° C Model -18°C -34°C -40°C -40°C 93°C 190°C 24°C ZP-8-2-SCT/AC...
-
Page 38: Sequence Of Operation
SEQUENCE OF OPERATION CASCADE UNIT - SYSTEM 1 (R-404A) DESCRIPTION (Refer to Refrigeration Diagram in Drawing Section) NOTE: Pressure settings are approximate. The compressor (item 101) will pump compressed R-404A vapor through the discharge line where the high-pressure gauge (item 183) displays the high-pressure of the refrigerant. System 1 –... - Page 39 Cascade Cooling (2 HP – 3.5 HP systems) After passing the bypass tee, the liquid refrigerant flows through the thermostatic expansion valve (item 111) where it changes to a low pressure, two phase refrigerant. The two phase refrigerant is cold due to the flashing of refrigerant.
- Page 40 The second path is to the wet coil humidity solenoid (item H127) and into the capillary tube (item H123). Two phase refrigerant exits the capillary tube and enters the evaporator (item H125). The wet coil is cold enough to attract moisture from the chamber air, but not cold enough to freeze the moisture on the evaporator.
- Page 41 The cascade condenser (item 113) cools the high pressure R-508B/R23 vapor, and condenses it into a high pressure liquid. A relief valve (item 281) is mounted near the condenser and will relieve at 400 PSIG. High pressure liquid refrigerant exits the cascade condenser. The liquid flows through a filter drier (item 208) and enters a tee.
- Page 42 Chamber Cooling (2 HP – 6 HP Systems) After passing the bypass tee, the liquid refrigerant flows through the liquid line solenoid (item 210) and into the thermostatic expansion valve (item 211) where it changes to a low pressure, two phase refrigerant.
- Page 43 (101-PS and 204-PS) will turn the compressor off if a high discharge pressure event is reached. Contact Cincinnati Sub-Zero’s service department if this occurs. The high pressure switch will automatically reset. When there is call for cooling, (202-SOL) is energized. When the chamber is near the set point, the controller begins to cycle (202-SOL) on and off.
- Page 44 The high pressure switch (101-PS and 204-PS) will turn the compressor off if a high discharge pressure event is reached. Contact Cincinnati Sub-Zero’s service department if this occurs. The high pressure switch will automatically reset. When there is call for cooling, (202-SOL) is energized. When the chamber is near the set point, the controller begins to cycle (202-SOL) on and off.
- Page 45 Mode: Pumpdown (10 HP – 15 HP) When the conditioning system is turned off, the refrigeration system will go into pumpdown mode. In pumpdown mode, the compressor will automatically turn on when the pressure in the suction line is above 50 PSIG (3.4 bar(g)). The compressor turns off when the suction line pressure is reduced to 10 PSIG (0.7 bar(g)).
- Page 46 Chamber Cooling (2 HP – 3.5 HP systems) After passing the bypass tee, the liquid refrigerant flows through the liquid line solenoid (item 110), and into the thermostatic expansion valve (item 111) where it changes to a low pressure, two phase refrigerant.
- Page 47 If the chamber is equipped with a Low RH package, the following description applies. When dehumidification is called for, some of the liquid refrigerant is diverted to the humidity loop. The refrigerant passes through a solenoid valve (item H131), and a Low RH thermostatic expansion valve (item H130).
- Page 48 The high pressure switch (101-PS) will turn the compressor off if a high discharge pressure event is reached. Contact Cincinnati Sub-Zero’s service department if this occurs. The high pressure switch will automatically reset. When there is call for cooling, (101-SOL) and (107-SOL) is energized. Once the chamber has reached a preset factory chamber temperature, the maximum liquid line solenoid (101- SOL) will deenergize.
- Page 49 Mode: Pumpdown (10 HP - 15 HP systems) When the conditioning system is turned off, the refrigeration system will go into pumpdown mode. In pumpdown mode, the compressor will automatically turn on when the pressure in the suction line is above 50 PSIG (3.4 bar(g)).
- Page 50 Chamber Cooling After passing the bypass tee, the liquid refrigerant flows through the liquid line solenoid (item 110) and into the thermostatic expansion valve (item 111) where it changes to a low pressure, two phase refrigerant. The two phase refrigerant is cold due to the flashing of refrigerant. The two-phase refrigerant enters the distributor (item 112), where the refrigerant is evenly distributed to evaporator circuits.
- Page 51 (108-SOL) energize. The R-404A compressor turns on. The high pressure switch (101-PS) will turn off the compressor if a high discharge pressure event is reached. Contact Cincinnati Sub-Zero’s service department if this occurs. The high-pressure switch will automatically reset. When there is call for cooling, 101-SOL is energized.
- Page 52 THIS PAGE INTENTIONALLY LEFT BLANK GENERAL DESCRIPTION...
-
Page 53: Operating Instructions
CHAPTER 3: OPERATION START-UP INSTRUCTION SUMMARY (EZT-570S NOTE CONTROLLER) Humidity performance will be affected if live loads are The control section, illustrated in Figure 4-1, is composed of a CSZ EZT-570S placed in the chamber Controller. Specifications for the Controller may be found in the EZT-570S when trying to achieve User's manuals, located on the digital media included in this binder. -
Page 54: Pumpdown
PUMPDOWN Chambers with large horsepower refrigeration systems have an automatic mode of operation called “pumpdown”. The refrigeration system is in this mode whenever it is not running to cool or dehumidify the chamber. In pumpdown mode, the System 1 compressor will automatically turn on and off at preset pressures in order to force refrigerant into the high side of the system. -
Page 55: Single Set Point Operation
SINGLE SET POINT OPERATION To adjust the setpoint: 1. Select one of the loop views from the main View menu. 2. Input the setpoint temperature. Press the numeric display for the setpoint (SP) for temperature. The setpoint adjust keypad will be shown on the screen. -
Page 56: Manual Event Control
MANUAL EVENT CONTROL (TURNING THE CHAMBER ON/OFF) Events are the “switches” used to turn the chamber, its related functions, and optional systems on and off. These events can be manually turned on and off as well as programmed into profiles so that they can be turned on and off at set time intervals. -
Page 57: Start-Up Instruction Summary
START-UP INSTRUCTION SUMMARY (WATLOW F4 NOTE CONTROLLER) The following start-up The control section, illustrated in Figure 3-2, is composed of a Watlow F4 instructions are written for Controller. Specifications for the Controller may be found in the Watlow F4 the F4 controller. For User's manuals located on the digital media included in this binder. -
Page 58: Watlow F4 Controller Outputs
Single Set-Point Operation - Humidity (Optional) 1. Turn the humidity system ON. 2. Use the arrow keys to navigate through the lower display and place the arrow cursor on setpoint 2. NOTE a. Use the right arrow key to enter the setpoint field. ... -
Page 59: Figure 3-2: Watlow F4 Controller Outputs
Watlow F4 Controller Audible Optional High/Low Alarm Limit Controller Light On/ Chamber Hi Limit (Indicator) Event # 1 Event # 2 Event # 3 Event # 4 Event # 5 Power On/ Figure 3-2: Watlow F4 Controller Outputs Event Outputs Event # 1: Conditioning system. -
Page 60: Dry Air Purge
DRY AIR PURGE NOTE In normal operation, the dryer towers will switch every 30 seconds. Each tower purges with an audible exhaust. Do not plug or restrict the purge air exhausts. During humidity operation, If operating conditions change, different purge orifices may be required. If the dry air purge system orifices are replaced, they should be replaced in matched pairs. -
Page 61: Ieee 488 - F4 Controller
IEEE 488 - F4 CONTROLLER The ICS GPIB to Serial Converter is used to convert the information on the GPIB NOTE bus into serial data to communicate with the F4. The F4 is set to use its RS-232 Since the F4 transmits and interface with the ICS converter. -
Page 62: High/Low Limit Control
HIGH/LOW LIMIT CONTROL If the chamber is operated with a live load (heat dissipating product), protection should be provided. Provisions must be made to remove power from the product being tested and from the chamber in the event the WARNING chamber temperature exceeds safe limits for the product being tested. -
Page 63: Programmable Door Lock (If Equipped)
PROGRAMMABLE DOOR LOCK (IF EQUIPPED) The programmable door lock can be configured to lock the chamber door at certain temperature setpoints or in profile steps. The setpoint values that trigger the door to lock can be adjusted in the Settings Menu under Alarm Settings. -
Page 64: Air Supply Damper (Zprc Units)
AIR SUPPLY DAMPER (ZPRC UNITS) This device regulates the flow of supplied air to the chamber. To change the flow of air, loosen the wing nut and rotate the handle located on the top left corner of the chamber. Once the handle is adjusted, tighten the wing nut so your settings will hold. -
Page 65: Attaching Gloves (Glove Port Option)
ATTACHING GLOVES (GLOVE PORT OPTION) Procedure: 1. Slide the left hand glove into the left port. Leave approximately 3” (8cm) of the glove outside the port. 2. Pull the end of the glove over the port, all the way to the port collar. 3. - Page 66 THIS PAGE INTENTIONALLY LEFT BLANK OPERATING INSTRUCTIONS...
-
Page 67: Installation
1. Inspect all equipment for damage that may have occurred during maintenance or installation shipment. Contact Cincinnati Sub-Zero immediately if any shipping procedures. damage is noticed. 2. Ensure that all packing materials have been removed from all parts. -
Page 68: Figure 4-1: Transporting A Chamber
Figure 4-1: Transporting a Chamber NOTE Drawing above is for illustration purposes only. Not drawn to scale. INSTALLATION... -
Page 69: Main Power Connection
MAIN POWER CONNECTION 1. Connect to the power source per electrical schematic. The main power wiring must be connected per the NEC, CEC, and any applicable local and national codes or regulations. For installation, the chamber is a NOTE measurable category III piece of equipment. The unit can be cord connected or Electrical connections are hard wired. -
Page 70: Voltage Change On Zp Chambers
VOLTAGE CHANGE ON ZP CHAMBERS Your chamber was configured prior to shipment for the particular voltage that was specified at the time of order. If applicable, these instructions should be used to CAUTION change the input voltage from one configuration to another. Do not make final ZP-Series chambers with 1HP-2HP refrigeration systems can be set to run off 208V connection to water inlet... - Page 71 2-2-H/WC 3.5-3.5-SC/WC 6-6-SC/WC WATER TEMPERATURE REQUIRED FLUID PRESSURE DIFFERENTIAL WATER FLOW RATE WATER FLOW RATE WATER FLOW RATE INLET OUTLET °F °C °F °C PSID 85.00 29.44 7.82 1,780.81 9.58 2,181.68 16.21 3,691.49 40.00 2.76 80.00 26.67 5.21 1,187.32 6.39 1,454.49 10.80 2,460.98...
- Page 72 6-SCT/WC 10-SCT/WC 15-SCT/WC WATER TEMPERATURE REQUIRED FLUID PRESSURE DIFFERENTIAL WATER FLOW RATE WATER FLOW RATE WATER FLOW RATE INLET OUTLET °F °C °F °C PSID 85.00 29.44 13.12 2,987.64 21.45 4,886.39 32.68 7,443.34 40.00 2.76 80.00 26.67 8.74 1,991.76 14.30 3,257.59 21.78 4,962.23...
-
Page 73: Scroll Compressors Only
Maximum water inlet be tripped during this process. If so, reset to continue filling. If alarm pressure is 10 PSI (69kPa) continues to go off, call Cincinnati Sub-Zero. for an atomizer and 25 PSI (172 kPa) for a boiler. WARNING... - Page 74 Demineralizer Filter (Optional with Humidity) LN2 Vent Dry Air Purge (Must be vented outdoors) (Optional) Upper Refrigeration Water Inlet Location Electrical Connection Drain Valve Recirculating Water Steam Generator Float Switch (Optional with Humidity) Assembly Enclosure Float Switch Figure 4-2: Installation Locations Note: CSZ is continuously upgrading Pump the components used in its...
-
Page 75: General Maintenance
CHAPTER 5: MAINTENANCE WITH Q & A GENERAL MAINTENANCE WARNING This chapter contains only general maintenance instructions that can be Only qualified maintenance performed outside the factory. More detailed maintenance instructions may be personnel should be found in the supplemental manuals included on the digital media in the manual permitted to perform any binder that shipped with your unit, (and, if applicable, the booklets in the rear maintenance or installation... -
Page 76: Inspection Schedule
An inspection program should be developed for this equipment. To assist in require maintenance, your development of this program, Cincinnati Sub-Zero has prepared a list of contact a qualified service routine inspections. While this list is not all inclusive, it will serve as a good base technician or CSZ's Service on which to build your own custom program. - Page 77 DAILY 1. Interior and Exterior Cleaning a. Wipe or vacuum out all debris. b. Clean interior surfaces with a damp cloth, mild detergent, or stainless steel cleaner. Avoid cleaners that are abrasive or leave a residue. DO NOT use steel wool. WARNING c.
- Page 78 8. Compressor Oil Level There is an oil level indicator on scrolls and semi-hermetic compressors. The CAUTION compressors are factory charged and the level should be checked periodically. Polyol Ester Oil (P.O.E.) is used in the R-404A, R-410A and R- Mineral Oil (3GS) does not 508B/R-23 compressors.
- Page 79 16. Humidity Sensor It is recommended to perform this routine maintenance monthly to avoid inaccurate readings. If you are having trouble achieving levels or if you can see dirt, please make sure to clean the sensor. Depending on the conditions of measurement, the dust filter should be checked from time to time.
-
Page 80: Visual Inspection
VISUAL INSPECTION NOTE Visually inspect the chamber according to inspection procedures in Table 5-3. Disassemble unit only to the extent required for inspection, repair, or testing. ITEM INSPECT FOR Chassis Deformation, dents, punctures, badly worn surfaces, damaged connectors, damaged fastener, worn door gasket, devices, or damaged handles. Inspect for corrosion and damage to finish. - Page 81 GENERAL TROUBLESHOOTING PROCEDURES PROBLEM PROBABLE CAUSE CORRECTIVE ACTION Compressor will Conditioning system OFF Turn ON conditioning system not run No electrical power Check facility circuit breaker Wrong voltage applied to unit Check voltage and correct Compressor internal overload Will automatically reset when cooled tripped High/Low Limit tripped Correct cause of limit condition, repair and reset...
- Page 82 GENERAL TROUBLESHOOTING PROCEDURES PROBLEM PROBABLE CAUSE CORRECTIVE ACTION R-508B/R-23 Refrigerant shortage Repair leak and recharge head pressure too low R-404A head Condensing air too warm Maximum condenser inlet air = 80°F pressure too Restricted air cooled condenser Clean condenser high Air in system Recover, evacuate and recharge R-404A head...
- Page 83 DRY AIR PURGE TROUBLESHOOTING PROCEDURES (OPTIONAL EQUIPMENT) PROBLEM PROBABLE CAUSE CORRECTIVE ACTION Unit delivers Improper operating conditions Change temperature and RH setpoint to be within moist air recommended operating range for Dry Air Purge. Moisture Solenoid core spring not seated Remove solenoid valve.
- Page 84 DRY AIR PURGE TROUBLESHOOTING PROCEDURES (OPTIONAL EQUIPMENT) PROBLEM PROBABLE CAUSE CORRECTIVE ACTION Excessive drop Improper operating conditions Correct operating conditions in outlet Solenoid coil burned out Remove cover, place iron or steel material (screwdriver or pressure nail) on exposed end of solenoid base to feel the magnetic effect indicating proper operation.
- Page 85 LN2 BOOST COOLING TROUBLESHOOTING PROCEDURES (OPTIONAL EQUIPMENT) PROBLEM PROBABLE CAUSE CORRECTIVE ACTION No LN2 Flow Check LN2 Supply Is the LN2 Supply tank empty? Check solenoid valves Are the solenoid valves opening? Do the solenoid coils have power? They should have 120 VAC applied to the coil.
- Page 86 FROZEN COIL TROUBLESHOOTING PROCEDURES (OPTIONAL EQUIPMENT) PROBLEM PROBABLE CAUSE CORRECTIVE ACTION Coil not Frozen Coil Mode not engaged Dewpoint not low enough, let wet coil remove moisture freezing water before unit enters frozen coil mode Solenoid valve not working Check liquid line solenoid (Frozen Coil) Check EPR bypass solenoid.
-
Page 87: Saturated Temperature/Pressure Chart
SATURATED TEMPERATURE/PRESSURE CHART TEMP. GAUGE PRESSURE (P.S.I.G.) ° R-404A R-410A R-23 R-508B -130 28.0* 11.4* 3.8* -125 27.5* 7.9* -120 27.0* 3.9* -115 26.1* 0.3* -110 25.5* -105 24.6* 12.8 -100 23.5* 16.8 22.3* 12.7 21.4 20.9* 16.7 26.3 19.2* 21.3 31.8 17.5*... - Page 88 SATURATED TEMPERATURE/PRESSURE CHART TEMP. GAUGE PRESSURE (P.S.I.G.) ° HFC/PFC R-404A R-410A R-23 R-508B -90.0 11.5* 3.9* -87.2 8.0* -84.4 4.0* -81.7 -78.9 -76.1 -73.3 -70.6 -67.8 -65.0 -62.2 16.9* 13.2* -59.4 14.8* 10.4* -56.7 12.3* 7.2* 9.5* 3.5* -53.9 6.4* -51.1 -48.3 2.9*...
-
Page 89: Pfc Refrigerants
It has also been established that SUVA® 95, a PFC, has a long atmospheric lifetime and therefore, emissions of this refrigerant should be minimized. Cincinnati Sub-Zero Products, LLC recommends that SUVA® 95 should never be discharged to the atmosphere, and that servicing of your equipment should be performed by those persons certified to work on this type of refrigerant system. -
Page 90: Humidity System Maintenance
3" from the bottom of the cartridge. Damage will cartridge should be changed before it completely changes color. Spare occur if the cartridge is cartridges are available through the Cincinnati Sub-Zero Service not replaced when the Department. color changes from dark blue to orange-brown. - Page 91 NOTE CLEANING THE ATOMIZING NOZZLE (FLUID CAP) On humidity units, a water 1. To clean, you will need a 12" (31 cm) piece of stranded electrical wire. atomizing nozzle is used to create humidity. With clean 2. Strip back 4" (11 cm) of the wire at one end and 1" (3 cm) of the wire at the water, the nozzle and filter opposite end.
-
Page 92: Water Quality
CAUTION WATER QUALITY Water specification 0.05 to Purified water is recommended for use with our humidity systems. Water 2 Mega OHMS in addition should be provided within 0.05 to 2M (.25 to 10ppm) DI and <2mg/L of free to <2mg/L of free chlorine. chlorine, Distilled water or Reverse Osmosis (RO) water outside of these limits may cause either corrosion or scaling. -
Page 93: Questions & Answers
6 feet. Cincinnati Sub-Zero recommends that the appropriate method for your installation be determined by a qualified electrician who is familiar with industrial plant wiring. - Page 94 Why do I smell something when I operate the chamber for the first time at high temperatures? Cincinnati Sub-Zero chambers are cleaned and polished before leaving the factory. Stainless steel polish can give off an odor while at elevated temperatures. This is a temporary condition and is non- toxic.
- Page 95 This does not necessarily mean that the unit is undercharged or has a leak. Under certain conditions, it is possible to see bubbles in the sight glass. Contact Cincinnati Sub-Zero if you have any questions. MAINTENANCE WITH Q & A...
- Page 96 THIS PAGE INTENTIONALLY LEFT BLANK MAINTENANCE WITH Q & A...
- Page 97 HOW TO OBTAIN REPLACEMENT PARTS / PARTS ORDERING PROCEDURE If a part fails and must be returned to Cincinnati Sub-Zero Products for repair or replacement under the terms of the warranty, follow the procedure below. 1. Contact our Service Department at (513) 719-3300 from 7:30 AM to 5:30 PM (Eastern Time Zone).
- Page 98 THIS PAGE INTENTIONALLY LEFT BLANK SERVICE, PARTS & WARRANTY...
- Page 99 ELECTRICAL SCHEMATIC SYMBOLS Figure 9-1: Symbols Used on Electrical Scematics SYSTEM DIAGRAMS...
- Page 100 ELECTRICAL SCHEMATIC SYMBOLS Figure 9-1: Symbols Used on Electrical Scematics (Continued) SYSTEM DIAGRAMS...
- Page 101 REFRIGERATION SCHEMATIC SYMBOLS HIGH-PRESSURE GAUGE FILTER DRIER LOW-PRESSURE GAUGE SIGHT GLASS BALL VALVE WITH SERVICE ACCESS VALVE PRESSURE RELIEF VALVE PRESSURE SWITCH (HIGH, LOW, ETC..) REFRIGERATION SERVICE ACCESS VALVE CAPILLARY TUBE EXPANSION DEVICE SOLENOID VALVE FAN AND MOTOR ASSEMBLY DOWNSTREAM PRESSURE REGULATING VALVE (HOT GAS BYPASS) RECEIVER...
- Page 102 REFRIGERATION SCHEMATIC SYMBOLS WATER REGULATING VALVE HIGH-PRESSURE REFRIGERANT ACTUATED HEAT EXCHANGER REFRIGERANT EVAPORATOR COMPRESSOR SERVICE VALVE VIBRATION ELIMINATOR HEAT EXCHANGER REFRIGERANT EVAPORATOR WITH DISTRIBUTOR PIPING CONTINUATION ARROW BALL VALVE TEMPERATURE MONITORING THERMOCOUPLE HEATER STRAINER (WATER INLET) (CRANKCASE HEATER, RECEIVER HEATER) Figure 9-2: Symbols used on Refrigeration Diagrams (Continued) SYSTEM DIAGRAMS...
- Page 103 REFRIGERATION SCHEMATIC SYMBOLS HERMETIC SCROLL COMPRESSOR - K4 SERIES HERMETIC RECIPROCATING COMPRESSOR SEMI-HERMETIC RECIPROCATING COMPRESSOR SEMI-HERMETIC RECIPROCATING COMPRESSOR (2-3 CYLINDERS) (6 CYLINDERS) SEMI-HERMETIC RECIPROCATING COMPRESSOR (4 CYLINDERS) Figure 9-2: Symbols used on Refrigeration Diagrams (Continued) SYSTEM DIAGRAMS...
- Page 104 REFRIGERATION SCHEMATIC SYMBOLS BRAZED PLATE HEAT EXCHANGER (CASCADE CONDENSER WITH INSULATION KIT) HEAT EXCHANGER AIR COOLED CONDENSER WITH FAN AND MOTOR ASSEMBLY (SINGLE STAGE & TUNDRA) BRAZED PLATE HEAT EXCHANGER (WATER COOLED CONDENSER, DESUPERHEATER, ETC..) COAXIAL HEAT EXCHANGER (WATER COOLED CONDENSER) HEAT EXCHANGER AIR COOLED CONDENSER WITH SEPARATE DESUPERHEATER CIRCUIT, FAN AND MOTOR ASSEMBLY...
Need help?
Do you have a question about the ZP Series and is the answer not in the manual?
Questions and answers