
Related Manuals for Laundrylux CROSSOVER 2.0 WHLFP817M


Summary of Contents for Laundrylux CROSSOVER 2.0 WHLFP817M
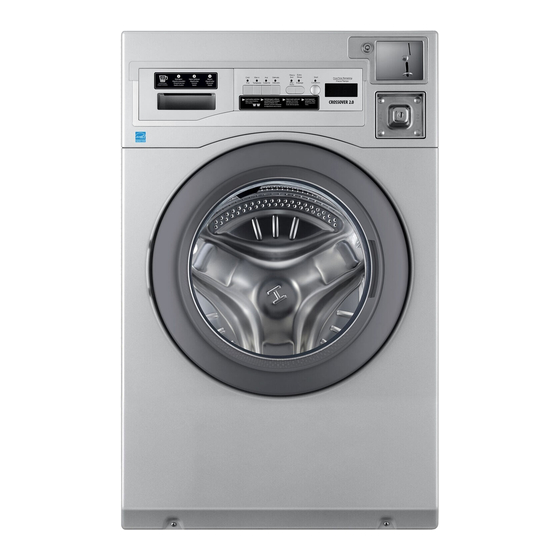
- Page 1 OPERATING MANUAL CROSSOVER 2.0 SERIES In a class by itself MODEL NO. WHLFP817M WHLFP817MI W A S H E R I N S T A L L A T I O N M A N U A L DOC. NO. 0020506871C EDITION 23.2018...
- Page 2 ATTENTION INSTALLER Four transportation bolts are installed in the rear of the machine, to protect the suspension and tub assembly from damage during shipment. REMOVE ALL FOUR BOLTS AND PLASTIC TUBES THROUGH WHICH THE BOLTS PASS BEFORE OPERATING THE MACHINE!! See instructions later in this manual.
- Page 3 Installation Manual WHLFP817M WHLFP817MI WARNING: ALL OPERATING AND MAINTENANCE PROCEDURES SHOWN IN THIS MANUAL MUST BE FOLLOWED AT THE FREQUENCY SPECIFIED FOR PROPER OPERATION OF YOUR MACHINE. PLEASE ENTER THE FOLLOWING INFORMATION AS IT APPEARS ON THE MACHINE(S) DATA PLATE(S). MACHINE MODEL MACHINE SERIAL NUMBER(S) ELECTRICAL CHARACTERISTICS:...
- Page 4 Intentionally blank...
- Page 5 Ne pas réparer ou remplacer les pièces de l’appareil ou procéder à l’entretien de celui-ci sauf si les instructions visant l’entretien et les réparations qui doivent être effectués par l’utilisateur le spécifient, si vous comprenez bien ces instructi si vous possédez les connaissances nécessaires. MANUFACTURED BY HAIER EXCLUSIVELY FOR LAUNDRYLUX...
- Page 6 Missing or illegible ones must be replaced immediately. Be sure you have spare signs and labels available at all times. These can be obtained from your distributor or from Laundrylux. 2. Check the door safety interlock, as follows: (a) OPEN THE DOOR of the machine and attempt to start in the normal manner: For coin-operated models, insert the proper coins to start the machine.
- Page 7 NOTICE TO INSTALLER Improper installation of this machine: • May cause serious damage to the machine. • May result in other property damage. • May cause personal injury. • Will void the manufacturer’s warranty. Location Requirements • The location for your washer should have a flat and even floor. This will improve performance, minimize noise and decrease washer movement.
- Page 8 Contents Technical Data ....................1:1 Installation ......................2:1 Water Connections ..................3:1 Drain Connection ..................4:1 Connection of External Liquid Supplies ............5:1 Function Checks ....................6:1 Preventive Maintenance ...................7:1 The manufacturer reserves the right to make changes to design, material and/or specifications without notice. Safety Instructions •...
- Page 9 Technical Data Technical Data Innerdrum volume litres/ft 98/3.5 diameter mm/inch 554/21 13/16 Drum speed wash extraction max rpm 1000 G-factor Weight, net kg/lbs 136/300 Connections Water valves DN20 connection 3/4" Garden Hose via included hoses Rec. water pressure 30-90 200-600 Functioning limits 8-145 for water valve...
- Page 10 Technical Data Power Line Air Vent for Safety Cold Water Hot Water Drain Coin Meter (coin operated models only) Control Panel Detergent Dispenser Door NOTES: A 1098mm = 43 1/4 inch B 584mm = 23 inch C 310mm = 12 3/16 inch D 686mm = 27 inch E 765mm = 30 1/8 inch...
- Page 11 Installation Installation For safety, two people should install this product. Leave the machine on the transport pallet until it can be placed in the final, prepared position. First remove all the packing materials. Upon opening of the package, water drops may be seen on the plastic bag and the drum.
- Page 12 Installation Transportation Bolts The washer is fitted with transportation bolts to prevent internal damage during transportation. Transportation bolts must be removed before using the washer. Removing Transportation Bolts Fig. 2 Bolt Fig. 1. Unscrew the 4 bolts with a wrench. Remove the Sleeve lower 2 bolts first, then the upper two.
- Page 13 Installation Siting Install the machine close to a drain standpipe or floor drain, and within 4 feet of the water supply spigots. In order to make installation and servicing Water supply the machine easier the following clearances are Drain standpipe recommended: •...
- Page 14 Installation Water Connections All inlet connections to the machine are to be fitted with manual shut-off valves and filters, to facilitate installation and servicing. NOTE: The inlet filter screens are provided inside the machine’s connection fittings. Water pipes and hoses should be flushed clean before installation. After installation, hoses should hang in gentle arcs.
- Page 15 Installation Water Type Water Connection Fig. Cold and Cold...
- Page 16 Installation Drain Connection Connect the machine’s drain hose to the back of the washer, using the spring clamp provided in the accessories package. Avoid sharp bends in the hose which may prevent proper draining. • You can connect the drain hose to a sewer stand pipe. If you do this, make sure Fig.
- Page 17 Connection of External Price Reduction Control Signal Optional harness 0020400145C is available for price Fig. reduction (promotion) activation. Contact Laundrylux for more information about other timer-based kits that are available for this function. The harness mates with a connector on the machine’s front main control circuit board.The price reduction harness carries a +5VDC...
- Page 18 Installation Electrical Connections This appliance must be grounded. In the event of an electrical short circuit, grounding reduces the risk of electric shock by providing an escape wire for the electric current. This appliance is equipped with a cord having a grounding wire with a grounded plug. The plug must be inserted into an outlet that is properly installed and grounded.
- Page 19 Function Checks Function Checks Perform the following checks once the machine is installed: • Open the water supply valves. • Press the START button or, if needed, insert coins and press START. Check: • that the drum rotates normally and that there are no unusual noises. •...
- Page 20 - Check that there are no signs of leakage on the floor beneath the machine. Locate and repair any leak. Contact your local dealer, or Laundrylux Technical Support at (516) 371-0700 if you have questions regarding installation, operation, or maintenance of your machine.
- Page 22 Sales and Administration: (516) 371-4400 Spare Parts: (516) 371-2000 Technical Support: (516) 371-0700 En Mexico: 001-800-010-1010 461 Doughty Blvd., Inwood, NY 11096 laundrylux.com...
Need help?
Do you have a question about the CROSSOVER 2.0 WHLFP817M and is the answer not in the manual?
Questions and answers