Table of Contents
Advertisement
Quick Links
Advertisement
Table of Contents

Related Manuals for K-Rain RPS 46


Summary of Contents for K-Rain RPS 46
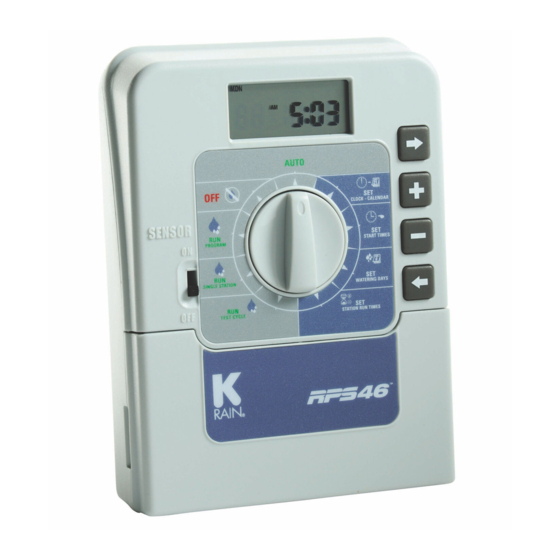
- Page 1 MINI IRRIGATION CONTROLLER ( BỘ ĐIỀU KHIỂN TƯỚI MINI) STATION MODELS: Available in 4 or 6 stations (Model: Có 4 hoặc 6 kênh) INDOOR MODEL: Supplied with Đi kèm trong hộp: 120VAC (240VAC International) x 24 VAC 120VAC (240VAC quốc tế) x 24 VAC Plug Pack Transformer Máy biến áp bộ...
- Page 2 INSTRUCTION MANUAL (Cẩm Nang Hướng Dẫn)
-
Page 3: Table Of Contents
TABLE OF CONTENTS ( Mục lục) FEATURES( Đặc trưng)................1 GLOSSARY( Chú thích) ................2 PROGRAMMING INSTRUCTIONS ( Hướng dẫn lập trình) Introduction ............3 ( Giới thiệu) Other Functions. - Page 4 tự động tái thiệt lập. Clear the Programs......…………………………………11 Xóa các chương trình Fitting a Rain Sensor (Optional)..... . ………………………..12 Lắp cảm biến mưa ( tùy chọn) Rain Off Mode.
-
Page 5: Features Đặc Trưng
FEATURES Đặc trưng This unit is available in 4 & 6 station configurations. Designed for residential applications, this controller has four separate programs with a maximum of sixteen start times a day. This ensures efficient watering of different garden or turf areas. Thiết bị... - Page 6 This controller has three types of watering day options. Either individual day selection per program, or a 365 day calendar for ODD/EVEN day watering, interval watering from everyday to every 15th day. Bộ điều khiển này có ba loại tùy chọn ngày tưới. Một là...
- Page 7 GLOSSARY Bảng chú thích INDOOR CONTROLLER MODEL Mô hình điều khiển trong nhà LCD DISPLAY SELECTION DIAL Màn hình điều PROGRAMMING BUTTONS Kỳ số lựa chọn chỉnh Các nút lập trình Used for adjusting the programmed information Easy to read display Được sử...
-
Page 8: Programming Instructions Hướng Dẫn Lập Trình
PROGRAMMING INSTRUCTIONS Hướng dẫn lập trình INTRODUCTION – Giới thiệu This controller has been designed with four separate program starts, to allow different areas to have their own individual watering requirements. Bộ điều khiển này đã được thiết kế với bốn chương trình riêng biệt bắt đầu, để... - Page 9 3. Setting the current time and correct day of the week.. Đặt thời gian hiện tại và ngày chính xác trong tuần 4. Setting an automatic program start.. Cài đặt khởi động chương trình tự động Use the following 3 steps to program each group. Sử...
-
Page 10: Other Functions
PROGRAMMING INSTRUCTIONS Hướng dẫn lập trình OTHER FUNCTIONS ( Các chức năng khác) This controller can also manually run a selected program once, or an individual station can be set to run once from 1 minute up to 12 hours and 59 minutes. A test for checking the valves and sprinklers is also provided. -
Page 11: Programming Lập Trình
PROGRAMMING Lập trình SET CURRENT TIME & CORRECT DAY Đặt thời gian hiện tại và ngày đúng Turn the dial to Set Clock/Calendar position. Xoay mặt số để điều chỉnh vị trí đồng hồ/ lịch The minutes will be flashing. Use to adjust. - Page 12 Press button and the “month” will flash. Use to adjust. Nhấn nút và “ tháng” sẽ nhấp nháy. Sử dụng hoặc để điều chỉnh Press button and the “day” will flash. Use to adjust. Nhấn nút và “ ngày” sẽ nhấp nháy. Sử dụng hoặc để...
-
Page 13: Bước 1: Đặt Thời Gian Bắt Đầu
PROGRAMMING SETTING PROGRAM 1 The program number can only be set/changed in the Set Start Times position. Số chương trình chỉ có thể được đặt/ thay đổi trong vị trí cài đặt thời gian bắt đầu STEP 1.. SET START TIMES Bước 1: Đặt thời gian bắt đầu All valves will activate in sequential order for each start time. - Page 14 Each program has up to four start times and should you require a second start time, press twice & “Start 1” will flash. Mỗi chương trình có tối đa bốn thời gian bắt đầu và nếu bạn yêu cầu hai lần và “Start 1” sẽ nhấp nháy thời gian bắt đầu thứ...
-
Page 15: Step 2.. Set Watering Days
PROGRAMMING STEP 2.. SET WATERING DAYS Bước 2: Đặt ngày tưới This unit has individual day selection, or a 365 day calendar with odd/even day selection in areas where water restrictions require this feature, or interval watering from every day to every 15th day Đơn vị... -
Page 16: Odd / Even Day Selection
ODD / EVEN DAY SELECTION (OPTIONAL) Lựa chọn Ngày Chẵn/ lẻ ( Tùy chọn) In some areas, users are only allowed to water on ODD dates if their house number is ODD, or on EVEN dates when their number is EVEN. This controller allows this to be done simply by setting the relevant selection of ODD or EVEN and setting the current date into the controller. - Page 17 PROGRAMMING INTERVAL DAY SELECTION Lựa chọn khoảng thời gian trong ngày If you require the interval day option, simply press until THE DISPLAY WILL SHOW: “Interval 1” will be flashing. This means that watering will occur every day. Nếu bạn yêu cầu tùy chọn khoảng thời gian trong ngày, chỉ...
-
Page 18: Step 3.. Set Station Run Times
STEP 3.. SET STATION RUN TIMES Đặt thời gian chạy trạm tưới This is the length of time that each station (valve) is set to water on a particular program. Maximum watering time is 12 hours 59 minutes for each station. A station can be assigned from 1 to 4 programs if required, with different run times. - Page 19 PROGRAMMING STEP 3.. SET STATION RUN TIMES.. (CONTINUED) Bước 3: Đặt thời gian chạy trạm ( tiếp theo) To adjust the Run time in minutes press , and use Điều chỉnh thời gian chạy theo phút nhấn và sử dụng hoặc To set the run time in hours, press and “0”...
- Page 20 Xoay nút điều chỉnh để “Set Start Times” và “ Prog 1” sẽ nhấp nháy Press and change to program 2 position and follow the same 3 steps to set an automatic watering program. Nhấn và thay đổi vị trí chương trình 2 và làm theo 3 bước tương tự để thiết lập một chương trình tưới nước tự...
-
Page 21: Manual Operations. ( Hướng Dẫn Vận Hành)
MANUAL OPERATIONS Kiểm tra hệ thống SYSTEM TEST Kiểm tra hệ thống: Turn the dial to Run Test Cycle. Xoay nút quay để chạy chu kỳ kiểm tra There will be a two second pause. Sẽ có 2 giây tạm dừng THE DISPLAY WILL SHOW: Màn hình sẽ... -
Page 22: Run A Single Station
Unused stations linked back to last used station RUN A SINGLE STATION Chạy 1 trạm duy nhất Turn the dial to Run Single Station. There will be a two second pause. Xoay quay số để Chạy một trạm . Sẽ có hai giây tạm dừng. to advance to the required station and to adjust the run time, then... -
Page 23: Run A Program
MANUAL OPERATIONS (CONT..) RUN A PROGRAM Chạy 1 chương trình To manually run a complete program once for the run times as set in the automatic schedule turn the dial to the Run a Start position. “Prog 1” will be shown in the display. To run program 1, leave or advance to start 2 by pressing Để... -
Page 24: Clear The Programs
A standard 9 volt battery should be fitted to the battery snap supplied to maintain the clock accuracy. Khi pin không được lắp hoặc bị chai trong khi mất điện, các chương trình tự động sẽ được giữ lại trong một bộ nhớ. Ngoài ra thời gian đồng hồ sẽ được giữ... - Page 25 OTHER FEATURES Các chức năng khác: RAIN SENSOR Cảm biến mưa A rain sensor can be wired directly into the terminal block. When the sensor is wet, all automatic and manual watering will not operate. Terminal block( khối cầu Một cảm biến mưa có thể được nối trực tiếp vào đấu dây) .
- Page 26 2. Connecting the rain sensor wires: Kết nối các dây cảm biến mưa A. Remove the link connector by loosening both screws and slide out. (Link located under the terminal cover.) Tháo đầu nối liên kết bằng cách nới lỏng cả hai vít cầu đấu và...
-
Page 27: Rain Off Mode
OTHER FEATURES RAIN OFF MODE Tắt chế độ cảm biến Mưa To stop the automatic watering cycles during winter, turn the dial to the Off position. The word “Off” will appear in the display. This means the automatic programs will not come on, but the programmed information is still retained in the memory. - Page 28 Example: 50% reduces watering by half. Ví dụ: 50% giảm lượng nước tưới một nửa. To adjust in 10% increments, use buttons. hoặc Để điều chỉnh theo gia số 10%, hãy sử dụng nút To return to the clock press the button.
-
Page 29: Installation Instructions ( Hướng Dẫn Cài Đặt)
INSTALLATION INSTRUCTIONS MOUNTING THE CONTROLLER Nút bộ điều khiển This controller unit is an INDOOR MODEL and MUST not be exposed to rain or water ingress, or direct sunlight. Bộ điều khiển này là MÔ HÌNH TRONG NHÀ và KHÔNG ĐƯỢC tiếp xúc với mưa hoặc nước, hoặc ánh sáng mặt trời trực tiếp. -
Page 30: Electrical Hook-Up
ELECTRICAL HOOK-UP MÓC ĐIỆN TỬ WARNING CẢNH BÁO 1. All electrical work must be carried out in accordance with these instructions following all applicable Local, State and Federal codes, or warranty will be void. Tất cả các công việc liên quan đến điện phải được thực hiện theo các hướng dẫn theo tất cả... -
Page 31: Field Wiring Connections
INSTALLATION INSTRUCTIONS Hướng dẫn cài đặt: FIELD WIRING CONNECTIONS Kết nối Dây PREPARATION Chuẩn bị 1. Prepare wires for hook-up by cutting the wires to the correct length and stripping approximately ¼ inch (6mm) of insulation from the end to be connected to the controller. Chuẩn bị... -
Page 32: Terminal Block Layout
TERMINAL BLOCK LAYOUT Bố cục của thiết bị đấu dây THE TERMINAL BLOCK IS LAID OUT AS FOLLOWS: GLOSSARY ( bảng chú thích) 24VAC 24VAC Power Supply ( nguồn điện cung cấp) Common valve wire input ( Đầu vào dây Van chung) Master valve or pump start active wire 1 to 6 Station (Valve) active wire connection ( Van chính hoặc dây hoạt động khởi động máy... -
Page 33: Power Supply Connections
INSTALLATION INSTRUCTIONS Hướng dẫn cài đặt POWER SUPPLY CONNECTIONS Kết nối cung cấp điện The controller itself can run off a 120VAC (240VAC International) to 24VAC external. Bản thân bộ điều khiển có thể chạy ra 120VAC (240VAC Quốc tế) đến 24VAC bên ngoài It is recommended that the transformer is not connected to a 120VAC (240VAC International) supply which is also servicing or... -
Page 34: Connection Of Valves
CONNECTION OF VALVES Kết nối các Van Up to two 24VAC Solenoid Valves can be connected to each station output and wired back to the common (C) thus: Có thể kết nối tối đa hai Van điện từ 24VAC với mỗi trạm đầu ra và có dây trở... -
Page 35: Pump Hook-Up Connections
INSTALLATION INSTRUCTIONS PUMP HOOK-UP CONNECTIONS Kết nối móc bơm Do not attempt to drive a pump starter directly from the controller. Pump start is provided by connecting one side of the coil of a suitable relay to the Master Valve/Pump Start output of the controller and the other side to the controller common. - Page 36 The diagram shows an 6 station controller with 4 active stations (valves): Sơ đồ cho thấy một bộ điều khiển 6 trạm với 4 trạm hoạt động (van): Unused stations must be linked back to the last used station. Use insulated cable. Các trạm không sử...
-
Page 37: Electricalcharacteristics
ELECTRICAL CHARACTERISTICS Đặc điểm điện từ POWER SUPPLY Nguồn điện This unit can run off a external transformer, (plug pack), with an output of 24VAC 50 Hz / 60 Hz @ 1.0 Amp. Thiết bị này có thể chạy khỏi một máy biến áp bên ngoài, (phích cắm), với một đầu ra của 24VAC 50 Hz / 60 Hz @ 1.0 Amp. - Page 38 Chip bộ nhớ vĩnh viễn sẽ giữ các chương trình và thời gian chạy cuối cùng trước khi cúp điện, nếu pin không được khít hoặc bị chai. NOTE: To clear the programs in the memory, turn the dial to “OFF”...
-
Page 39: Servicing The Controller
SERVICING THE CONTROLLER Chăm sóc khách hàng The controller should always be serviced by an authorized agent. Bộ điều khiển phải luôn được bảo dưỡng bởi một đại lý được ủy quyền FOLLOW THESE STEPS: Hãy làm theo các bước sau 1. -
Page 40: Troubleshooting
TROUBLESHOOTING Xử lý sự cố SYMPTOM POSSIBLE CAUSE SUGGESTION Dấu hiệu Nguyên nhân có thể Gợi ý Check fuse. Check field wiring. No display. Kiểm tra cầu chì. Kiểm tra hệ thống Không hiển thị Faulty transformer. dây điện Fuse blown. Máy biến áp bị... - Page 41 bàn phím lập trình chạy không không hoạt đúng động to supplier or manufacturer. Xem lai sách hướng dẫn để chắc chắn rằng lập trình chính xác. Nếu bàn phím vẫn không hoạt động trả lại bảng điều khiển cho nhà cung cấp/ nhà...
- Page 42 Display cracked Display damaged Return panel to supplier during transportation. or missing Trả lại bảng điều khiển cho nhà cung cấp segments. Màn hình bị nứt hoặc không Màn hình bị hư hỏng hiển thị 1 phần. trong quá trình vận chuyển...
-
Page 43: Spare Watering Planner
SPARE WATERING PLANNER... - Page 44 WARRANTY Chế độ bảo hành The manufacturer guarantees to the original purchaser that any product supplied by the manufacturer will be free from defects in materials and workmanship for a period of two years from the date of purchase. Any product found to have defects in material or workmanship within the period of this warranty shall be repaired or replaced by the manufacturer FREE OF CHARGE..
- Page 45 Người mua có trách nhiệm trả lại bộ điều khiển cho nhà sản xuất hoặc đại lý của họ bằng cước phí trả trước. K-Rain Manufacturing Corp.. 1640 Australian Avenue Riviera Beach, FL 33404 (561) 844-1002 (561) 842-9493 FAX (800) 735-7246 / www.krain.com © K-Rain Manufacturing Corp. AN ISO 9001 CERTIFIED COMPANY...
Need help?
Do you have a question about the RPS 46 and is the answer not in the manual?
Questions and answers