
Related Manuals for SHOWTEC Net-8/3


Summary of Contents for SHOWTEC Net-8/3
- Page 1 MANUAL ENGLISH Net-8/3 Ordercode: 50804 Highlite International B.V. – Vestastraat 2 – 6468 EX – Kerkrade – the Netherlands...
-
Page 2: Table Of Contents
Backside ..................................7 Installation ................................... 7 Set Up and Operation ............................... 7 Control Modes ................................8 Setup Net-8/3 with Laptop/PC ..........................8 Setup Net-8/3 with Lighting controller ........................9 Fixture Linking ................................10 Data Cabling ................................10 Control Panel ................................11 Status Menu .................................11 Main Menu Options ..............................12... -
Page 3: Warning
Save the carton and all packing materials. In the event that a fixture must be returned to the factory, it is important that the fixture be returned in the original factory box and packing. Your shipment includes: ● Showtec Net-8/3 ● Schuko to Pro Power connector power cable (1,3m) ●... - Page 4 Never attempt to bypass the thermostatic switch or fuses. The user is responsible for correct positioning and operating of the Net-8/3. The manufacturer will not accept liability for damages caused by the misuse or incorrect installation of this device.
-
Page 5: Operating Determinations
Any other operation may lead to dangers like short-circuit, burns, electric shock, crash etc. You endanger your own safety and the safety of others! The Net-8/3 can be mounted in a 19-inch mounting rack. Improper installation can cause serious damage to people and property! Connection with the mains Connect the device to the mains with the power-plug. -
Page 6: Return Procedure
Net-8/3 Return Procedure Returned merchandise must be sent prepaid and in the original packing, call tags will not be issued. Package must be clearly labeled with a Return Authorization Number (RMA number). Products returned without an RMA number will be refused. Highlite will not accept the returned goods or any responsibility. -
Page 7: Description Of The Device
DMX512 to ArtNET. A maximum of 4096 channels can be transported over a single CAT5. This makes the NET-8/3 suitable for small to large scale events. The NET-8/3 embeds a built-in network switch to be used as a Ethernet repeater as well as 8 isolated DMX-512 universes which can be used as an input or output. -
Page 8: Backside
11) Ethernet RJ45 connecter 2 with Activity and Speed LED indicators Installation Remove all packing materials from the Net-8/3. Check that all foam and plastic padding is removed. Connect all cables. Do not supply power before the whole system is set up and connected properly. -
Page 9: Control Modes
Setup Net-8/3 with Laptop/PC 01) Fasten the distributor to a 19-inch rack. 02) Use a 3-pin XLR cable to connect the Net-8/3 with your fixtures by using the DMX outputs. 03) Connect the network switch with the Net-8/3 (cat 5, 6, etc cable). -
Page 10: Setup Net-8/3 With Lighting Controller
Setup Net-8/3 with Lighting controller 01) Fasten the distributor to a 19-inch rack. 02) Use a 3-pin XLR cable to connect the Net-8/3 with your fixtures by using the DMX outputs. 03) Connect the network switch with the Net-8/3 (cat 5, 6, etc cable). -
Page 11: Fixture Linking
Net-8/3 Fixture Linking You will need a serial data link to run light shows of one or more fixtures using a DMX-512 controller or to run synchronized shows of two or more fixtures set to a master/slave operating mode. The combined number of channels required by all the fixtures on a serial data link determines the number of fixtures the data link can support. -
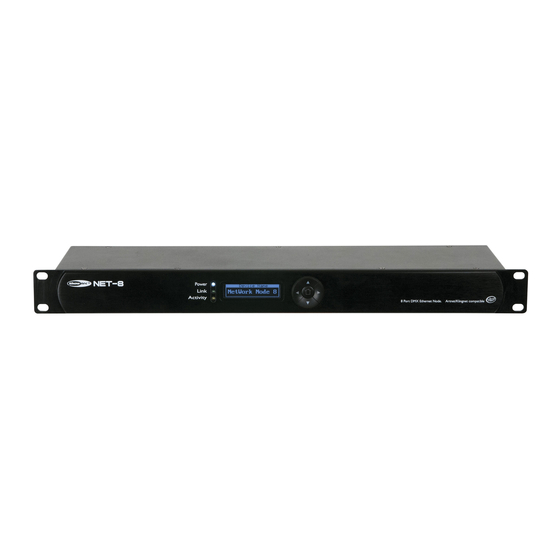
Page 12: Control Panel
Net-8/3 Control Panel LCD display UP button C) RIGHT button D) HOME button LEFT button DOWN button Fig. 05 Status Menu In the start up mode ( ) you can see 4 different status modes on the display. It gives you instant information on the 4 important parameters. -
Page 13: Main Menu Options
Net-8/3 Main Menu Options 1. Rename 2. Set DHCP 3. Set IP Address 4. Set Netmask 5. Set DMX Port 6. Set Device ID 7. Set LCD Backlight 8. Set Display 9. User Preset 10. Set Default 11. Version Note: If no button is pressed after 10 seconds, the display will return to the start-up (Status Menu) screen. -
Page 14: Set Netmask
Net-8/3 03) Press the UP/DOWN buttons to scroll through the numbers, Cancel or Enter. 04) Press the RIGHT button to select three numbers. The selected numbers will be highlighted. 05) Press the UP/DOWN buttons to change the numbers (0-255). 06) Press the LEFT button to go back to the previous step. - Page 15 Net-8/3 Explanation options DMX port Disp Type With this option you can choose between two display formats: Hexadecimal (0-F) or Decimal (0-255). DMX Status This option is for setting the status of the port. It can be an Output, Input or Disable.
-
Page 16: Set Device Id
Net-8/3 6. Set Device ID 01) Press the LEFT button to enter the main menu. 02) In the main menu, press the UP/DOWN buttons to select Set Device ID and press the RIGHT button to open the submenu. The display shows: 03) Press the UP/DOWN buttons to scroll through the number, Cancel or Enter. -
Page 17: User Preset
Net-8/3 9. User preset 01) Press the LEFT button to enter the main menu. 02) In the main menu, press the UP/DOWN buttons to select User preset and press the RIGHT button to open the submenu. The display shows: 03) Press the UP/DOWN buttons to scroll through the options: 8 x INPUT: The node converts 8 x DMX512 inputs into 8 separate ArtNet universes. -
Page 18: Maintenance
04) If all of the above appears to be O.K., plug the unit in again. 05) If you are unable to determine the cause of the problem, do not open the Net-8/3, as this may damage the unit and the warranty will become void. - Page 19 Net-8/3 Problem Probable cause(s) Solution No power to the fixture • Check if power is switched on and cables are plugged in One or more fixtures do not function at all Primary fuse blown • Replace fuse ArtNet protocol is not active •...
-
Page 20: Product Specification
Net-8/3 Product Specification Model: Showtec Net-8/3 Input Voltage: 100-240 VAC, 50/60 Hz Power consumption: Fuse: F1A / 250V Dimensions: 483 x 143 x 44 mm (LxWxH) 19 inch x 1HE (LxH) Weight: 2,22 kg Operation and Programming Signal pin OUT:... -
Page 21: Dimensions
Net-8/3 Dimensions Ordercode: 50804... -
Page 22: Notes
Net-8/3 Notes Ordercode: 50804... - Page 23 Net-8/3 Ordercode: 50804...
- Page 24 ©2016 Showtec...
Need help?
Do you have a question about the Net-8/3 and is the answer not in the manual?
Questions and answers