
Related Manuals for Firetrol FTA740 Series


Summary of Contents for Firetrol FTA740 Series
- Page 1 INSTALLATION AND MAINTENANCE GUIDE FOR MARKIII+ ELECTRIC FIRE PUMP CONTROLLERS MODEL SERIES: FTA740, FTA750, FTA1000, FTA1250, FTA1300, FTA1350, FTA1500, FTA1800, FTA1930...
- Page 2 FTElectric Manual v2.8.2.x (CDL) Introduction Electric fire pump controllers are designed to start an electric motor driven fire pump. It can either start the fire pump manually through the local start pushbutton or automatically through the sensing of a pressure drop in the sprinkler system.
-
Page 3: Installation
METHODS OF STOPPING MANUAL STOP Manual stop is done by pressing the priority STOP push button. Note that pressing the stop push button will prevent the motor from restarting as long as the button is pressed, plus a two second delay. AUTOMATIC STOP Automatic stop is possible only after an automatic start and this function has been activated. - Page 4 The structural engineer of record on the project shall be responsible for anchorage details. Storage If the controller is not installed and energized immediately, Firetrol recommend following the instructions from the chapter 3 of the NEMA ICS 15 standard.
- Page 5 The installer is responsible for adequate protection of the fire pump controller components against metallic debris or drilling chips. Failure to do so may cause injuries to personnel, damage the controller and subsequently void warranty. Energy Consumption Standby power: 10W Sizing Incoming power terminals on the controller are suitable to accept wire based on that selection with insulation not less than 60°C.
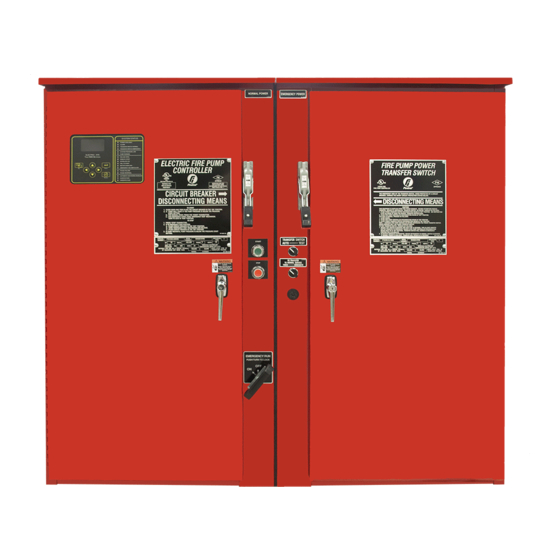
- Page 6 Quick Start-Up Guide The rating label is the most important label. It must be read carefully to ensure the compatibility between the controller and the installation. Verify that the controller is installed securely on the wall, or optionally on the mounting stand.
- Page 7 Make sure to drill holes for the motor and power connections and run the cables inside the panel, all in accordance with the specifications in order to minimize interference with other equipment. Verify and/or install the proper water connections for the water input and the drain. They must be securely installed and tightened.
- Page 8 Connect the input power and the motor on their respective terminals. Secure with the appropriate torque as indicated on the torque label and verify all connections. Secure the door in closed position then put the circuit breaker disconnecting means in ON position. Verify the readings on the controller main screen. Once the controller has booted up, the “First Start Up”...
- Page 9 Verify that the normal voltage shown at L1-L2, L2-L3 and L1-L3 (nominal) is the same as what is written on the fire pump controllers nameplate. The fire pump controller will validate the nominal voltage automatically versus what it has been built for. If all is adequate green check marks will appear.
- Page 10 Press “Motor Rotation” Press the “Start” button to start the electric motor and validate that the electric motor is rotating in the correct direction. If it is not rotating in the correct direction adjust the motor connections as per below. Press the “Stop” button to stop the electric motor.
- Page 11 Choose the desired units of measurement for pressure reading and verify that it matches with the calibrated pressure gauge installed on the sensing line. Set the Cut-In value according to your system specifications. Cut-Out value will default to Cut-In plus 10 PSI. To manually enter the cut-out, select the check-box beside it and enter the desired value (optional).
- Page 12 From the “Home” page, verify that the displayed values are correct. The “First Start up” is now completed. The controller is fully installed and configured.
-
Page 13: Main Features
Main Features The Mark III+ A: Power LED 3 colors: Pulsing green if the Mark III+ is properly powered. B: Start button: Used to manually start the motor. C: Stop button: Used to stop the motor if all starting conditions are gone. D: Not used. - Page 14 First Setup The First Setup must be done prior to using the controller. Completing the First Setup is the only way to access the homepage and enable the automatic mode of the controller. Mark III+: Manual Rebooting Method If required, here is the procedure to manually reboot the Mark III+: 1- Turn OFF all disconnecting means to de-energize the Mark III+.
- Page 15 1. Go to Home page 2. Go to Alarms page 3. Go to Configuration page 4. Go to History page 5. Go to Service page 6. Go to Download Manual page 7. Select Controller Language System Status: Display the overall system status. For more details, refer to the system status page. Motor power voltage.
- Page 16 History History (Menu) History This page is used to access all data related to events, statistics, pressure history, power logs and the downloading of this information via one of the two USB ports. -Events: This button leads to the “Events” page, which displays the events from the most recent 500 logs. Each event log contains the date and time of occurrence as well as a brief description of the event.
-
Page 17: Download Manuals
The “Nameplate Information” page contains all the information found on the nameplate. The Jockey Pump Cut-Out and Cut-In can be set on this page. It is possible to install a custom Service card on this page. Contact Firetrol for more information. Download Manuals Pressing on the question mark on the Mark III+ will redirect to the download page. - Page 18 Firetrol Inc. +1 919 460 5200 3412 Apex Peakway, Apex NC, 27502...
Need help?
Do you have a question about the FTA740 Series and is the answer not in the manual?
Questions and answers