Advertisement
Quick Links
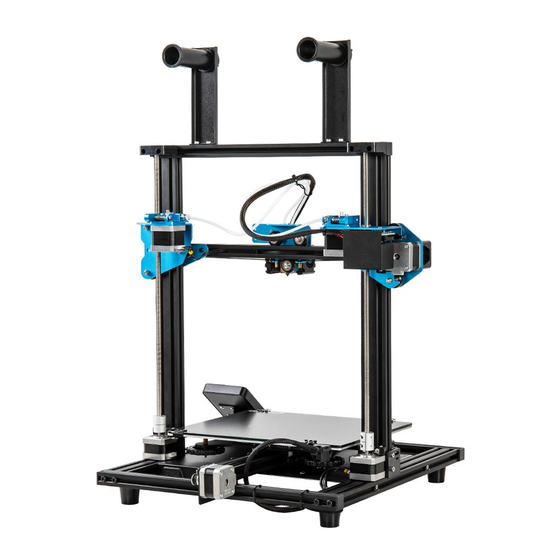
SOVOL-SV02 Printer
Guidebook To:
Constructing Sovol's Top-quality 3D printer
This guidebook is for Sovol's SV02 3D printer.
Select the correct input voltage to match your local mains
(220V or 110V).
Please plug the power cord into a three-hole power jack.
Detailed instructions for use are available on the SD card.
V.1.0
Advertisement

Related Manuals for Sovol SV02


Summary of Contents for Sovol SV02
- Page 1 SOVOL-SV02 Printer Guidebook To: Constructing Sovol’s Top-quality 3D printer This guidebook is for Sovol’s SV02 3D printer. Select the correct input voltage to match your local mains (220V or 110V). Please plug the power cord into a three-hole power jack.
- Page 2 Notes Do not use this machine in any way other than described herein. Failure to do so may result in personal injury and/or damage to property. Do not place the printer near any heat source or flammable or explosive materials. We suggest placing it in a well-ventilated, low-dust environment.
- Page 3 12 ......Preparing to printing maintenance and so on. (3) Sovol User Group on Facebook. Be a part of the Sovol 13 ......Circuit Wiring Diagram community sharing your projects and helping each other. 14 ......
-
Page 4: On/Off Control
Filament Holder Tool List 1 Image Name Gantry Wrench & Assembly 1set Screwdriver TF Card & Reader 1set Extruders Spatula Pliers Hot end 0.4mm Nozzle Cleaner Hot bed Power Cable Touch- Screen USB Cable Spare Parts 1set on-off control... -
Page 5: Gantry Assembly
Gantry Assembly Display screen Filament Holder Base (*2) Tool Box Filament (200g) Tool List 2 Image Name M5x25 Black Hex-Bolt and Lock Washer Z-axis limit plate assembly 1set M3x4 Screw Touch screen support... - Page 6 Gantry Frame Installation 1. Carefully remove all parts from the box and remove any tape or padding from them. Inspect each component and ensure nothing was damaged during shipment. Gantry Back 2. Install the gantry frame (A) to the base frame (B) Front On the gantry frame, make sure the nozzle assembly is to the front, and the long vertical lead screw is to the back.
- Page 7 3. Installation of the filament spool holder. Filament Holder Installation Secure the filament holder using two M4*8 screws and T-nuts. Loosen the t-nuts by hand and align them so they will fit inside the grooves of the frame. It is essential that the nuts are loose so that when you tighten the screws, the nuts will rotate 90°...
- Page 8 Tip: Try not to bend the pin connectors as you push them in. Pay attention to the working voltage of your machine The X cable is connected to the motor and running belt switch Touch Screen Cable Select the correct input voltage to match your local mains (220V or 110V).
-
Page 9: Information Displayed
Information Displayed Print Speed Levelling Automatic Refuel Manual Moving Cooling Motor Printer info Language Set temperature Set temperature of the Nozzle of the Nozzle Current temperature Current temperature of the Nozzle of the Nozzle... - Page 10 1. Preheat 2. Feeding Filament Method 1 Press and hold the extrusion clip, insert the filiment from the inlet to the position with red line above the small pneusmatic Method 2 connector. Tip : How to Replace the Filament ? 1.
- Page 11 Tighten the four levelling nuts at the bottom of the platform before initial levelling. Select Settings→Levelling, click on the number ② Adjust the platform height by turning the knob underneath. Use a piece of A4 paper (standard printer paper) to assist with the adjustment, making sure that the nozzle lightly scratches the paper.
-
Page 12: Install The Cura
1. Install the Cura 4.5 2. Add the machine How to add the choice of SV02 Machine in Cura, please refer to 'SV02 Machine Profile guide.docx' in the 'Machine Profile' folder in SD card. - Page 13 1. Add and merge the models 2. Select custom 3. Select the profile “Draft” 4. Select Enable Prime Tower...
- Page 14 1. Save file to SD card 2. Printing Insert SD card into computer with Reader. Insert the SD card Select “Print from SD” Select the file to be printed...
- Page 16 Service 1.The printer can be returned within seven days, 15 days replacement, one-year warranty, lifetime maintenance. Every machine is assembled and tested by our expert staff before departing our facilities. Replacement requirement 1. The appearance of the product is intact, without damage, cracks, deformation, etc.; 2.
- Page 17 SHENZHEN Lian Dian Chuang Technology LTD. Official Website: www.sovol3d.com Tel: +86-0755-2107 4700 E-mail: sale@sovol3d.com info@sovol3d.com...
Need help?
Do you have a question about the SV02 and is the answer not in the manual?
Questions and answers