Table of Contents
Advertisement
Quick Links
G30270AH Troubleshooting Guide – Optum 2692
Note: Refer to Product Instructions for Use of full instructions, warning, and contraindications.
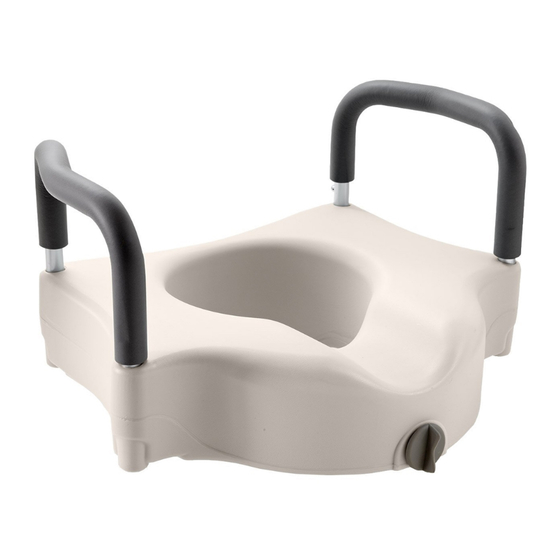
Product Description
Locking Raised Toilet Seat with Arms
G30270AH
Troubleshooting Topics
Top Issue # 1 – Seat Not Locking
Yes
No
☐
Has the customer followed installation instructions(See Page 5)?
☐
☐
☐
Is customer toilet seat elongated? If so, the product may not be
compatible.
☐
☐
Certain bowl types will require removal
of toilet seat/lid before installing raised seat. Has customer tried this?
☐
☐
Does the customers toilet seat have any raised points on the inner ring?
If so, the product may not be compatible.
☐
Issue Solved? If not, continue to
☐
Complaint Form on Page 2
Top Issue # 2 – Arms Not Locking
Yes
No
☐
Did the customer follow the Assembly Instructions(See page 5)?
☐
☐
☐
Do the arms appear damaged?
☐
☐
Do the receptacle holes on the raised toilet seat appear damaged?
☐
☐
Do the holes on the arms appear to be damaged in any
way?
☐
☐
Are the push (detent) butttons present and functional?
☐
Issue Solved? If not, continue to Complaint Form on Page 2
☐
Figure
Photo
– Product
Advertisement
Table of Contents

Related Manuals for Medline G30270AH


Summary of Contents for Medline G30270AH
- Page 1 G30270AH Troubleshooting Guide – Optum 2692 Note: Refer to Product Instructions for Use of full instructions, warning, and contraindications. Product Description Locking Raised Toilet Seat with Arms G30270AH Troubleshooting Topics Top Issue # 1 – Seat Not Locking Figure –...
- Page 2 Document the following information below. Do not leave blank fields Convey Representative Name Customer Name Customer Phone Number Customer Address Customer Email Address Item Number G30270AH Optum Item number 2692 Age of Product (estimated) Product Serial or Lot Number Photo Available? Defect Code ☐...
- Page 3 Additional Information: Lot Number/Serial Placement: Lot# Located on Rear of Seat; Bottom of Box o Format of Lot # XXXYYZZ0001 Product Photos:...
- Page 4 Item Photo Removable Armrests (2) Paddle Adjustment Knob...
- Page 5 Assembly Instructions 1. With the detent buttons toward the front, insert the armrest tubing into the receptacle holes on the raised toilet seat until the detent button engages. Installation Instructions 1. Lift the seat and lid of the toilet or remove. 2.
- Page 6 4. Center raised seat on bowl rim and push it back as far as possible with your hands. 5. Rotate adjustment knob clockwise to tighten. Turn until resistance is felt, then turn an additional 1/8” turn until snug. 6. If the top rear of the raised seat is hitting the toilet seat or lid, remove the toilet seat and lid and repeat steps 2 to 5.
Need help?
Do you have a question about the G30270AH and is the answer not in the manual?
Questions and answers