Table of Contents
Advertisement
Quick Links
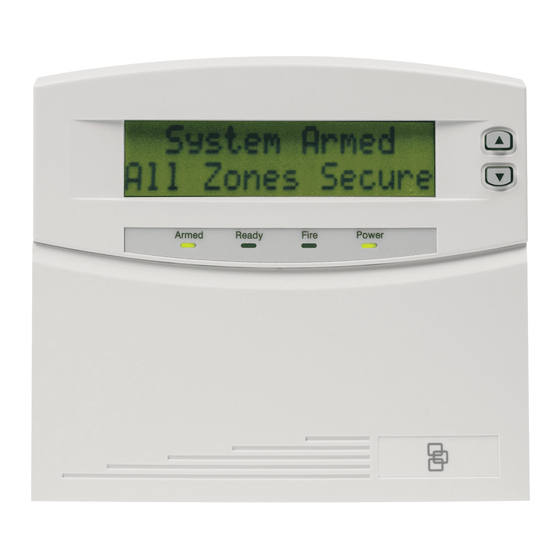
NX148-E LCD KEYPAD
ENTERING THE PROGRAM MODE.................................................................... 2
SELECTING THE MODULE TO PROGRAM....................................................... 2
PROGRAMMING A LOCATION .......................................................................... 2
NX148-E LIBRARY .............................................................................................. 3
LOADING FACTORY DEFAULTS....................................................................... 4
ENROLLING MODULES AND KEYPADS........................................................... 4
PROGRAMMING THE NX148-E LCD KEYPADS ............................................... 4
USING THE FUNCTION MENU ........................................................................... 4
ADJUSTING THE VIEW / BRIGHTNESS OF THE LCD.................................. 5
PROGRAMMING CUSTOM MESSAGES IN THE KEYPAD ........................... 5
SET KEYPAD OPTIONS ................................................................................. 6
SET KEYPAD NUMBER AND PARTITION ..................................................... 7
KEYPAD FUNCTIONS......................................................................................... 7
READING THE EVENT LOG........................................................................... 7
SET ELAPSED INCREMENTS SINCE LAST AUTOTEST.............................. 8
SET SYSTEM TIME AND DATE...................................................................... 8
ADJUST KEYPAD TONE ................................................................................ 8
VIEW ZONE STATUS ..................................................................................... 9
VIEW ALARM MEMORY ................................................................................. 9
LIGHT CONTROL FOR X-10 DEVICES.......................................................... 9
HOUSE CODES FOR X-10 DEVICES............................................................. 9
CHANGE LANGUAGES ................................................................................ 10
CHANGING USER CODES........................................................................... 10
ASSIGNING AUTHORITY LEVEL ................................................................. 10
PARTITIONED SYSTEMS OPERATION ........................................................... 11
LIGHTS IN PARTITIONING MASTER MODE ............................................... 11
DISPLAYS IN THE PARTITIONING MASTER MODE .................................. 12
SERVICE DISPLAY ........................................................................................... 13
NX148-E MAXIMUM WIRE RUN........................................................................ 15
SYSTEM NOTES ............................................................................................... 15
SPECIFICATIONS ......................................................................................... BACK
INSTALLATION MANUAL
Table of Contents
1
Advertisement
Table of Contents

Related Manuals for Interlogix CADDX NX148-E


Summary of Contents for Interlogix CADDX NX148-E
-
Page 1: Table Of Contents
NX148-E LCD KEYPAD INSTALLATION MANUAL Table of Contents ENTERING THE PROGRAM MODE..............2 SELECTING THE MODULE TO PROGRAM............2 PROGRAMMING A LOCATION ................2 NX148-E LIBRARY ....................3 LOADING FACTORY DEFAULTS............... 4 ENROLLING MODULES AND KEYPADS............4 PROGRAMMING THE NX148-E LCD KEYPADS ..........4 USING THE FUNCTION MENU ................ -
Page 2: Entering The Program Mode
ENTERING THE PROGRAM MODE To enter the Program Mode, press [r]-[8]. At this time, the LCD screen will prompt you for the programming code. Next, enter the "Go To Program Code" (FACTORY DEFAULT IS [9]-[7]-[1]-[3]). If the "Go To Program Code" is valid, the LCD screen will prompt you for the device address you wish to program. -
Page 3: Nx148-E Library
Table 1.1 English ù " & < > º » NX148-E ENGLISH LIBRARY ALARM DETECTOR GARAGE LIBRARY SMOKE VAULT AREA DINING GLASSBREAK LIGHT PORCH SOUND WAREHOUSE AUDIO DOOR GUEST LIVING ROOM SOUTH WEST BACK DOWN HALL MASTER RUMPUS STAIRS WINDOW BATHROOM DURESS HEAT... -
Page 4: Loading Factory Defaults
NX148-E AMERICAN SPANISH LIBRARY ABAJO CONTACTO EXTERIOR JARDIN PRINCIPAL SOTANO ALARMA CRISTAL FACHADA LABORATORIO PUERTA TALLER ALMACEN DESPACHO FUEGO LATERAL RECEPCION TECHO ARRIBA DETECTOR GARAJE LAVABO RECIBIDOR TERRAZA AVERIA DISPARO GERENCIA MAGNETICO SABOTAJE TIENDA AZOTEA DOBLE TECHNOLOGIA GOLPE OFICINA SALA TRASERO BARRERA DORMITORIO... -
Page 5: Adjusting The View / Brightness Of The Lcd
The menu selections will scroll automatically. The other messages are shown below. For further details regarding the functions, please refer to the page indicated. 0=Set Tone ......Page 8 1=Master Mode 2=Service Check ....Page 13 3=Alarm Memory ....Page 9 44=Test........ -
Page 6: Set Keypad Options
For custom messages in the second language: NOTE: The above [r]-[9]-[2] mode must be exited prior to changing languages. 1) Enter [r]-[4]-[9] The keypad is now toggled to the second language. The LCD Screen will prompt “Please Enter Your Code". 2) Enter [r]-[9]-[2] 3) Enter [program code] The LCD will now prompt you to enter message number followed by [#]. -
Page 7: Set Keypad Number And Partition
r 9 4 SET KEYPAD NUMBER AND PARTITION 1) Enter [r]-[9]-[4] The LCD screen will prompt “Please Enter Your Code”. The LCD will now prompt you for the keypad number followed by 2) Enter [program code] [r]. The current keypad number will be displayed in the lower right hand corner. -
Page 8: Set Elapsed Increments Since Last Autotest
End Prog End Programming - Local programming is ended. Start Download - Download session is started. Start Dnld End Download - Download session is ended. End Dnld Cancel Cancel - System is disarmed; Cancel was initiated within 5 minutes of an alarm. Gnd Flt Ground Fault - A short to ground has been detected. -
Page 9: View Zone Status
VIEW ZONE STATUS r • 1) Enter [r]-[•] The LCD Screen will display the zone status. 2) Use the up and down scroll keys to The LCD Screen will display the list of ALL zones in sequential browse through the descriptions. order by zone number 3) Press [#] to exit this function. -
Page 10: Change Languages
6) Press [#] to exit this function. r 4 9 CHANGE LANGUAGES 1) Enter [r]-[4]-[9] The LCD keypad is now toggled to the second language. If you enter [r]-[4]-[9] again, the keypad will revert to the first language. CHANGING USER CODES Note: For partitioned systems, someone changing the code of another person must have access to all or more partitions than the user being changed. -
Page 11: Partitioned Systems Operation
RESET FUNCTION 1) Disarm the system. The smoke detectors, zone troubles, and zone tampers have now 2) Enter [r]-[7] been reset. If the keypad begins beeping, the reset did not execute properly. Enter your code to silence the keypad. Wait a few minutes and repeat step 2 to attempt another reset. -
Page 12: Displays In The Partitioning Master Mode
DISPLAYS IN THE PARTITIONING MASTER MODE Armed and Ready Status The LCD screen will display the Armed and Ready status of ALL eight (8) partitions if any or all of the areas is armed or not ready. Ready 12345678 This display is reflecting all 8 areas are Ready, and Area 5 is disarmed. -
Page 13: Service Display
To exit this screen, press [#]. Area 5 is selected and Area 5 is ready to arm. To exit the individual partition Area 5 Ready mode, enter [#]-[#]. Type code to arm Silencing Alarms in the Multi-Partition Mode If the keypad is sounding an alarm or the siren is running, it can be silenced by entering a code with the authority for the area(s) that are in alarm. - Page 14 Control The main power to your system is not on. Power Trouble Control The standby battery is low. Low Battery An auxiliary reporting device has failed to communicate, i.e. NX580, Expansion NX582, etc. Aux Comm Fail Expansion A short circuit of an expansion device=s power supply has occurred. Over-current Expansion The main power to an expansion power supply is not on.
-
Page 15: Nx148-E Maximum Wire Run
The following chart provides the device numbers that will be reported for trouble conditions. KEYPAD PARTITION NX148-E MAXIMUM WIRE RUN (Note: These numbers are for one keypad at the end of the wire. When connecting more than one keypad to the end of the wire, a heavier gauge wire will be required.) WHEN CONNECTED TO NX8-E WHEN CONNECTED TO NX-320... -
Page 16: Specifications
SPECIFICATIONS OPERATING POWER 12 VDC Regulated Supplied by NX8-E or NX-320 OPERATING TEMPERATURE 32 to 120 degrees F CURRENT DRAW 110 mA Maximum 75 mA without Sounder LCD KEYPAD DIMENSIONS 6.4" Wide 5.3" High 1.0" Deep SHIPPING WEIGHT 2 lbs. CADDX CONTROLS, INC.
Need help?
Do you have a question about the CADDX NX148-E and is the answer not in the manual?
Questions and answers