Advertisement
Quick Links
Advertisement

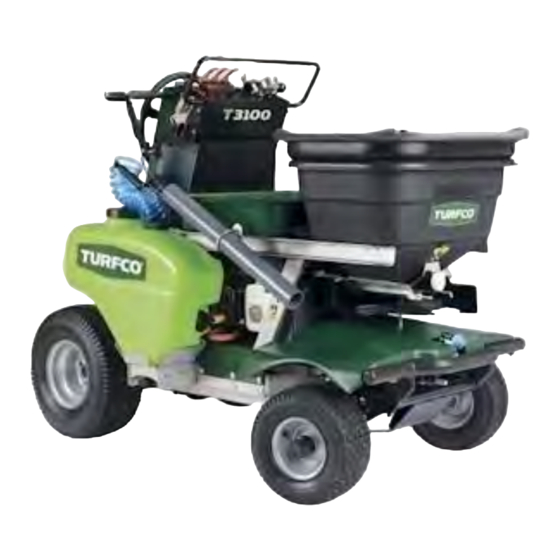
Related Manuals for TURFCO T3100


Summary of Contents for TURFCO T3100
- Page 1 Service Quick Tips...
- Page 2 Significant T3100 Upgrades 2009 Added Skid plate to transmission o Upgrade kit available 2010 Increased weld strength on the front axel 2011 Aquatec pump release (FIGURE 1) o Kit #87517 Electric Start option o Upgrade kit available on 2011 units or...
- Page 3 2015 New idler pulley system (FIGURE 5) Larger tanks for liquid Larger connection between tanks Access panel for brake adjustment and transmission oil change Adjustable stainless steel clevis on steering cables (FIGURE 6) o Will Fit Old Cable Longer slots in hopper for adjustment on front belt New switch location for 3 in 1 tank FIGURE 5: New idler pulley system Higher foot pedal clearance...
- Page 4 TURFCO Service Quick Tip T3000i/T3100 Daily Preventative Maintenance Checklist WHAT? Daily Preventative Maintenance for the T3000i/T3100. WHY? Preventative maintenance. Checklist Clear any fertilizer and debri off of the unit every day with a blower or pressurized air hose. Key areas include:...
- Page 5 Spindles, c) 1 Front Axle, d)Idler Arm, e)Steering Arm C. 1 Front wheel pivot (All model years will have these fittings) D. 1 Idler arm for drive belt tensioner pulley (T3100’s do not have this fitting) E. 1 Steering Arm (2016 & Newer Models) Check and clean your engine air filter.
- Page 6 T3000 – T3100 Service Quick Tip Upright Repair Position WHAT? Need to perform repairs underneath the T3000i. WHY? Some items to repair are easier to access from the bottom of the unit. Approximate time 5 Minutes Machine Preparation (Figure 1) FIGURE 1: Machine preparation 1.
-
Page 7: Pump Replacement
T3000/T3000i Service Quick Tip Pump Replacement WHAT? Need to replace the pump for the spray system on the T3000i. If the pump assembly needs to be replaced see T3000/T3000i Service and Repair Bulletin “Pump Assembly Replacement”. WHY? Eventually pump diaphragms will fail and the pump must be replaced. Approximate time 20 Minutes Machine Preparation (Figure 1) FIGURE 1: a) Main shut off valve, b) Hose clamp 1. Stand the machine up for easy access to the parking break adjustment (see T3000/T3000i Service and Repair Bulletin “Upright Repair Position”) 2. Ensure the main shut off valve is in the off position (FIGURE 1a). Removing the Pump Head 1. Remove the two hose clamps and hoses on the inlet and outlet side of the pump (FIGURE 1b). 2. Remove the 5 hex bolts (FIGURE 2) IMPORTANT! Do not remove the torx bolts) from the bottom of the pump. 3. Remove the pump from the T3000 leaving the pump hub on the FIGURE 2: Hex bolts to remove the pump unit (FIGURE 3). ... -
Page 8: Pump Assembly Replacement
T3000/T3000i Service Quick Tip Pump Assembly Replacement WHAT? Pump and pulley assembly have stopped working. If only the pump needs to be replaced see T3000/T3000i service and repair bulletin “Pump Replacement”. WHY? The pump and assembly will wear out over time. Approximate time 20 Minutes FIGURE 1: a) Main shut off valve, b) Hose clamps Machine Preparation 1. Stand the machine up for easy access to the pump assembly (see T3000/T3000i Service and Repair Bulletin “Upright Repair Position”) 2. Ensure the main shut off valve is in the off position (FIGURE 1a). Removing the Pump Assembly 1. Remove the two hose clamps and hoses on the inlet and outlet side of the pump (FIGURE 1b). 2. Remove the two nylock nuts from the pump assembly bracket (FIGURE 2). FIGURE 2: Nylock nuts holding the pump assembly on. 3. Remove the belts from the pump assembly pulley and then remove old pump assembly from the frame. ... - Page 9 T3000/T3000i Service Quick Tip Spinner Shaft Adjustment WHAT? Spinner shaft is not perpendicular to the ground when the unit is sitting level. This can cause the front belt to slip and potentially fall off. WHY? Normal use of the machine can eventually cause the spinner shaft to shift position. Approximate time 15 Minutes Machine Preparation 1. Ensure your spinner shaft is out of alignment using a FIGURE 1: Spinner Shaft not perpendicular level (FIGURE 1). to level 2. Locate the adjustment area on the spinner pulley bracket and the hopper of the T3000i (FIGURE 2a and b) Adjusting the Spinner Shaft a 1. Adjust the spinner pulley bracket first before you adjust the hopper to align the spinner shaft (FIGURE 2a). 2. If you have used all of the adjustment in the spinner pulley shaft then adjust the hopper to complete your alignment (FIGURE 2b). FIGURE 2: a) Slotted holes for belt pulley adjustment, b) slotted holes Wrap Up for hopper adjustment ...
-
Page 10: Steering Cable Adjustment
T3000 – T3100 Service Quick Tip Steering Cable Adjustment *For 2015 & Newer units go to 2 page for adjustment Approximate time 5-15 Minutes Machine Preparation 1. Stand the machine up for easy access to the parking break adjustment (see T3000/T3000i Service and FIGURE 1: Steering cable clevis and locking nut Repair Bulletin “Upright Repair Position”) - Page 11 T3000 – T3100 Service Quick Tip Replace clevis on to steering arm with clevis pin and cotter pin. Repeat steps 2-4 for the other steering cable. When both steering cables have been tightened equally and have been reattached to the steering arm sometimes more tension is needed.
-
Page 12: Parking Brake Adjustment
T3000/T3000i Service Quick Tip Parking Brake Adjustment WHAT? The parking break will no longer engage on the T3000/T3000i (machine still moves when brake is in the on position (FIGURE 1). WHY? Normally occurs when the parking brake is left on while driving the machine. FIGURE 1: Parking brake Approximate time 10 Minutes Machine Preparation 1. Stand the machine up for easy access to the parking break adjustment (see T3000/T3000i Service and Repair Bulletin “Upright Repair Position”) 2. Find the crown nut on the transaxle (FIGURE 2). Parking Brake Adjustment 1. Remove the cotter pin and rotate the crown nut clockwise ½ turn (FIGURE 3). 2. Turn your parking brake on and off to ensure the brake FIGURE 2: Crown nut location feels tight. If it still feels loose move the nut clockwise to tighten it more. If it is to tight move the nut counterclockwise to loosen it. 3. - Page 13 T3000/T3100 Bearing removal Removal for inspection or replacement of front wheel bearings on the T3000/T3100 Remove inner and Once tires are Remove outer outers retainer rings removed push retainer w/ snap ring using a flathead bearings out by pliers screwdriver to pop out...
- Page 14 T3000/T3000i Service Quick Tip Transaxle Oil Change WHAT? Change the oil and filter of the transaxle every 400 hours after the initial break in oil change. WHY? Normal use of the machine will require oil and filter change on the transaxle. Approximate time 60 Minutes + extra filling time. Machine Preparation 1. Stand the machine up for easy access to transaxle oil FIGURE 1: Transaxle oil filter being removed from the transaxle filter (see T3000/T3000i Service and Repair Bulletin “Upright Repair Position”) 2. Place an oil drain pan under the filter of the transaxle. Changing the Oil 1. Remove the filter guard and the filter from the transaxle. Drain oil into the oil drain pan (dispose of all oil properly) (FIGURE 1). 2. Apply a film of oil to the gasket of the new transaxle oil filter (use transaxle manufacturers recommended FIGURE 2: Side diagram of the transaxle showing the oil level check port. Insert is an image replacement filter) and replace the oil of the oil level check port removed. filter (install by hand and turn ¾ to one ...
- Page 15 T3000/T3000i Service Quick Tip expansion tank. Allow ample time for all air to escape from the transaxle and continue filling until on the cold level (FIGURE 3). 8. Purge any excess air from the transaxle. (Perform this procedure in an open area free of any objects or bystanders). a. Start the T3000i engine and disengage the parking brake b. Open the bypass valve on the transaxle (Placing the T3000i in freewheel will open the bypass valve) (FIGURE 4) and move the speed control handles in the forward and reverse direction 5 or 6 times. c. Close the bypass valve (take the T3000i out of FIGURE 4: Place the T3000i in freewheel to open the transaxle bypass valve. free wheel) and drive the T3000i in the forward and reverse direction 5 or 6 times. d. Stop the engine and check the transaxle oil level. Add oil as required. Repeat steps b through d until adding oil is not required. When the T3000i transaxle operates at a normal noise level and normal forward and reverse speeds it is considered purged. Wrap Up 1. Ensure the T3000i runs at normal speeds. Transaxle Oil Change Page 2 of 2 ...
- Page 16 T3000/T3000i Service Quick Tip Transaxle Oil Change WHAT? Change the oil and filter of the transaxle every 400 hours after the initial break in oil change. WHY? Normal use of the machine will require oil and filter change on the transaxle. Approximate time 60 Minutes + extra filling time. Machine Preparation 1. Stand the machine up for easy access to transaxle oil FIGURE 1: Transaxle oil filter being removed from the transaxle filter (see T3000/T3000i Service and Repair Bulletin “Upright Repair Position”) 2. Place an oil drain pan under the filter of the transaxle. Changing the Oil 1. Remove the filter guard and the filter from the transaxle. Drain oil into the oil drain pan (dispose of all oil properly) (FIGURE 1). 2. Apply a film of oil to the gasket of the new transaxle oil filter (use transaxle manufacturers recommended FIGURE 2: Side diagram of the transaxle showing the oil level check port. Insert is an image replacement filter) and replace the oil of the oil level check port removed. filter (install by hand and turn ¾ to one full turn after the filter gasket contacts the filter base surface).
- Page 17 T3000/T3000i Service Quick Tip expansion tank. Allow ample time for all air to escape from the transaxle and continue filling until on the cold level (FIGURE 3). 8. Purge any excess air from the transaxle. (Perform this procedure in an open area free of any objects or bystanders). a. Start the T3000i engine and disengage the parking brake b. Open the bypass valve on the transaxle (Placing the T3000i in freewheel will open the bypass valve) (FIGURE 4) and move the speed control handles in the forward and reverse direction 5 or 6 times. c. Close the bypass valve (take the T3000i out of FIGURE 4: Place the T3000i in freewheel to open the transaxle bypass valve. free wheel) and drive the T3000i in the forward and reverse direction 5 or 6 times. d. Stop the engine and check the transaxle oil level. Add oil as required. Repeat steps b through d until adding oil is not required. When the T3000i transaxle operates at a normal noise level and normal forward and reverse speeds it is considered purged. Wrap Up 1. Ensure the T3000i runs at normal speeds. Transaxle Oil Change Page 2 of 2...
- Page 18 Additional transaxle service and maintenance proceedures can be found in the any objects or bystanders. the oil approved for use in hydrostatic drive Turfco Maintenance and Service CD that came with your Turfco applicator. The systems. 1. Disengage the brake if activated.
- Page 19 FLUID CHANGE PROCEDURE FILTER AND FILTER GUARD Refer to Figure 3 to disposal. Place used oil in appropriate for ease of maintenance. To ensure constant Assembly containers and deliver to an approved re- Disassembly cycling collection facility. 1. Reassemble all parts in the reverse order 1.
- Page 20 T3000i/T3100 Winter Service Quick Tip T3000i/T3100 Recommended Winter Service Check List This Quick tip is only a guide, always refer to your operator manuals. Read through all instructions and be sure you have all the required tools to safely perform each procedure before you begin.
- Page 21 T3000i/T3100 Winter Service Quick Tip T3000i/T3100 Recommended Winter Service Check List continued Clean carb linkage, choke control, and governor spring. Blow off the area with air (brake cleaner works as well) and then using a DRY LUBRICANT work the linkage back and forth (FIGURE 4) Check V-Belts &...
Need help?
Do you have a question about the T3100 and is the answer not in the manual?
Questions and answers