Table of Contents
Advertisement
Quick Links
Advertisement
Table of Contents

Related Manuals for Grainfather G40


Summary of Contents for Grainfather G40
- Page 1 G40 BREWING SYSTEM QUICK START GUIDE...
- Page 2 Get your equipment ready by following these quick and easy steps and you’ll be brewing in no time. NOTE: These are shortened instructions for product assembly only. The full online instructions provide more detail about the brewing process using your G40: grainfather.com/instructions WARNING! (NORTH AMERICA 220 V ONLY) Please check your unit rating label for the voltage.
- Page 3 • Means for disconnection must be incorporated in the fixed wiring in accordance with the wiring rules. • The fixed wiring insulation must be protected, for example, by insulating sleeving having an appropriate temperature rating. THE FOLLOWING STATEMENT APPLIES TO THE GRAINFATHER G40 PRODUCT SOLD IN AUSTRALIA AND NEW ZEALAND. • This appliance is not intended for use by persons (including children) with reduced physical, sensory, or mental capabilities, or lack of experience and knowledge, unless they have been given supervision or instruction concerning use of the appliance by a person responsible for their safety.
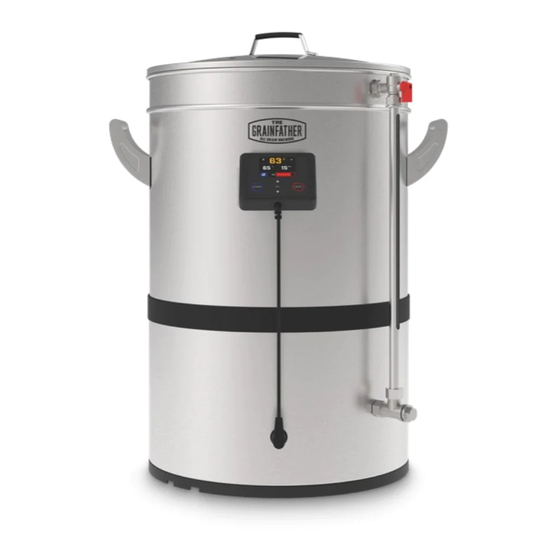
- Page 4 ANATOMY DIAGRAM & PARTS LIST G40 lid Pump 12. Recirculation barb and hose 2. Support ring 8. G40 powerbox 13. Bottom plate 3. Support ring retainer 9. G40 base 14. Grain basket 4. Hop filter 10. Recirculation pipe, 15. Counter flow wort chiller sight glass and fittings 5.
- Page 5 3. CONNECTING TO POWER Take the main power cable and plug it into the base at the back of the G40. Next, plug the other end of the cable into a suitable power socket (15 amp in USA, Canada & EU, 13 amp in UK or 10 amp in AU/NZ). The...
- Page 6 4. ADVANCED WIRELESS CONNECTION AND APP CONTROL 4. INSTALL GRAIN BASKET At this point you will be able to use your new G40 and Slowly insert the assembled grain basket (14) complete a brew using the G40 controller. The G40 is into the G40.
- Page 7 A TWO PERSON or mechanical lift begin recirculating, press the ‘Pump’ button on the is recommended when using larger controller or via the Grainfather App. grain bills on this system. A single person lift may lead to serious injury. NOTE: To save time, we recommend preparing your sparge water during your mash.
- Page 8 Always disconnect the G40 before cleaning. designed to efficiently cool your wort, and allow easy, and sanitary transfer directly into a fermenter. At • After use, the G40 and all of its components the end of the boil, circulate hot wort through the should be cleaned immediately and dried counter flow wort chiller for 2 minutes to sanitise thoroughly.
Need help?
Do you have a question about the G40 and is the answer not in the manual?
Questions and answers