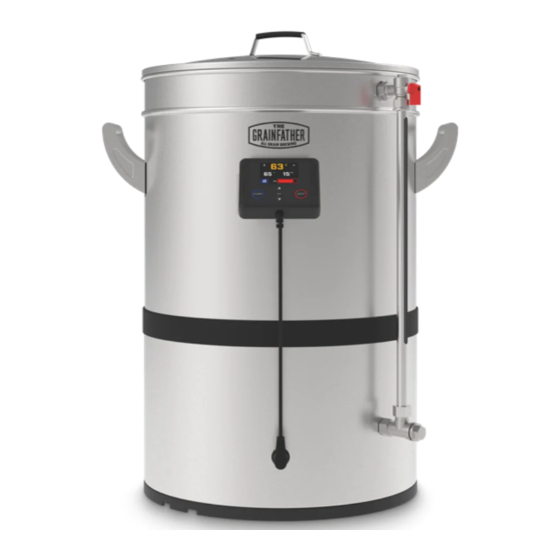
Grainfather G Series Instruction Manual
Hide thumbs
Also See for G Series:
- Instruction manual (18 pages) ,
- Quick start manual (12 pages) ,
- Manual (4 pages)
Advertisement
Quick Links
Advertisement

Summary of Contents for Grainfather G Series
- Page 1 CHEERS, NICE TO MEET YOU INSTRUCTION MANUAL G SERIES...
- Page 2 LET ME CHANGE WAY YOU BREW G SERIES...
- Page 3 THANK YOU FOR CHOOSING THE GRAINFATHER Get started by following these instructions on how to assemble and use your G40. We recommend reading the following safety information before use. Please also find enclosed, advice for cleaning and storing your G40.
- Page 4 The fixed wiring insulation must be protected, for example, by insulating sleeving having an appropriate temperature rating. THE FOLLOWING STATEMENT APPLIES TO GRAINFATHER PRODUCTS SOLD IN AUSTRALIA AND NEW ZEALAND: • This appliance is not intended for use by persons (including children) with reduced physical, sensory, or mental capabilities, or lack of experience and knowledge, unless they have been given supervision or instruction concerning use of the appliance by a person responsible for their safety.
-
Page 5: Parts List
16. Counterflow wort chiller 8. Pump 11. Recirculation 17. Hex nut pipe, sight 9. Power box glass, ball valve and 18. Tap adapter set fittings 10. Base NOTE: The full spare parts list for the G40 is available online: help.grainfather.com... - Page 6 Remove the G40 controller (5) and the power cable your G40 and all of its components from the packaging, and place the controller securely using the Grainfather High on the bracket on the front of the unit. Next, remove Performance Cleaner. For detailed the small cap from the M16 socket (7).
-
Page 7: Network Configuration
‘add new network‘, then follow the instructions device as a remote control. on the next page. If you’ve previously connected your G40 to other networks, you can also clear these here. Connect to the free Grainfather App for step-by-step brewing SETTINGS and access bazillions of recipes. - Page 8 Grainfather App. config’ then ‘add new network’. Once on the connection setup screen, open the Grainfather App on your mobile device. Make sure that your wireless network reaches the location where you will be using your G40.
- Page 9 IEC/EN 60335-1 and will appear each time you connect to the G40 via a mobile device. Within the Grainfather App you can now select recipes or even create your own. You can also use the step-by-step brewing system to brew confidently.
- Page 10 Place the lid on the G40 to reduce the heating time. At this stage, if your G40 is connected to the Grainfather App, you can run your brew session remotely from your mobile device. ASSEMBLE THE GRAIN BASKET...
- Page 11 CAUTION the side of the basket. An additional grain plate can be purchased on the online Grainfather Store or at your local retailer. A two person or mechanical lift is recommended when using larger grain bills The maximum grain weight that the G40 basket on this system.
- Page 12 Once the sparge has finished, refit the lifting bar to CAUTION the grain basket to lift and remove the basket from the boiler. NOTE: If you are using a large grain bill, we recommend scooping some of the grain from the basket to reduce BE VERY CAREFUL not to twist the basket while the weight before lifting.
- Page 13 COOLING WITH THE COUNTERFLOW WORT CHILLER The G40 includes a counterflow wort At the end of the boil turn the heating element off. Create a whirlpool by stirring the wort vigorously with your paddle. chiller (16). This has been designed to NOTE: A moderate whirlpool may automatically form efficiently cool your wort, and allow...
-
Page 14: Cleaning In Place (Cip)
After use, the G40 and all of its components should be cleaned immediately and dried thoroughly. We CAUTION: RISK OF BURNS recommend using the Grainfather High Performance Cleaner as it removes the need for tedious scrubbing. However, all stainless steel components can be... - Page 15 Purchase the NZ/AU 15 amp power cable accessory from the online Grainfather Store or at your local retailer. Transfer the o-ring from the hex nut to the tap. Plug the 15 amp power cable into the base at the Install the ball valve tap onto the T-section.
- Page 16 READ AND FOLLOW ALL INSTRUCTIONS CAUTION – Risk of fires and electric shock. – Replace only with genuine Grainfather cord set, part No. SJTO. – Do not immerse in water. SAVE ALL WARNINGS AND INSTRUCTIONS FOR FUTURE REFERENCE FOR COMMERCIAL AND INDOOR USE ONLY...


Need help?
Do you have a question about the G Series and is the answer not in the manual?
Questions and answers