Table of Contents
Advertisement
Quick Links
Advertisement
Table of Contents

Subscribe to Our Youtube Channel
Related Manuals for Electrolux EDH803CEWA


Summary of Contents for Electrolux EDH803CEWA
- Page 1 EDH803CEWA Tumble Dryer User Manual...
-
Page 2: Table Of Contents
Products must be used, installed and operated in accordance with this manual. You may not be able to claim on the Electrolux manufacturer’s warranty in the event that your product fault is due to failure to adhere to this manual. -
Page 3: Safety Information
ENGLISH Warning / Caution-Safety information General information and tips Environmental information Subject to change without notice. SAFETY INFORMATION Before the installation and use of the appliance, carefully read the supplied instructions. The manufacturer is not responsible if an incorrect installation and use causes injuries and damage. - Page 4 Keep children and pets away from the appliance when • the door is open. If the appliance has a child safety device, it should be • activated. Children shall not carry out cleaning and user • maintenance of the appliance without supervision.
-
Page 5: Conditions Of Use
ENGLISH Do not use the appliance if items have been soiled • with industrial chemicals. Wipe away lint or packaging debris that has • accumulated around the appliance. Do not run the appliance without a filter. Clean the lint • filter before or after each use. - Page 6 • Do not install or use the appliance • If you have washed your laundry with where the temperature can be lower a stain remover start an extra rinse than 5°C or higher than 35°C. cycle before you start the dryer.
-
Page 7: Product Description
ENGLISH tight. The damage of the system can • Disconnect the appliance from the cause a leakage. mains electrical and water supplies. • Cut off the mains electrical cable 3.6 Service close to the appliance and dispose of • To repair the appliance contact the •... -
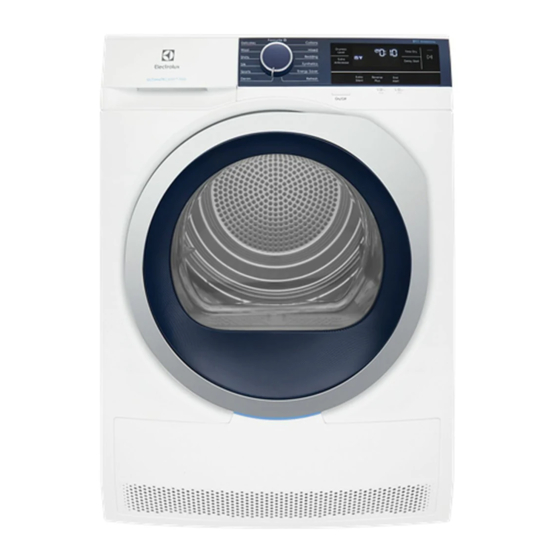
Page 8: Control Panel
5. CONTROL PANEL Programme knob On/Off button Extra Anticrease touch button Press the touch buttons with your finger in the area with Dryness Level touch button the symbol or name of the Display option. Do not wear gloves Time Dry touch button... -
Page 9: Programme Table
ENGLISH Symbol on the display Symbol description clean filter indicator: drain the water container indicator: child lock on wrong selection or knob is in the "Reset" po‐ sition drying phase indicator: cooling phase indicator: anti-crease phase indicator: programme duration extension of default anti-crease phase: +30min, +60min, +90min, +2h) time drying selection (10min-2h) delay start selection (1h-20h) - Page 10 Programme Load Properties / Fabric type With this programme you can use the Time Dry option and set the programme duration. Time Drying 5 kg Drying time should be adequate to the load, e.g. 2h for 5 kg of cotton.
-
Page 11: Options
ENGLISH 7. OPTIONS 7.1 Extra Anticrease 7.5 End Alert Extends the anti-crease phase by 30,60, The buzzer sounds at the: 90 or 2 hours at the end of the drying • cycle end cycle. This function reduces creases. • start and end of the anti-crease phase The laundry can be removed during the •... -
Page 12: Settings
Extra Re‐ Extra Time Dryness Level Anti‐ verse Programmes Silent crease Plus Energy Saver ■ ■ Refresh ■ Time Drying ■ Sports ■ ■ Silk ■ ■ Shirts ■ ■ Wool ■ Delicates ■ ■ 1) Together with the programme you can set 1 or more options. To activate or deactivate them, press the related touch button. - Page 13 ENGLISH 2. Set the programme and available Every time you enter in the options. "Adjustment of remaining 3. Press the (E) button for some laundry moisture" mode, seconds. previously set degree of The sound and the message on the remaining moisture will display confirm that the configuration is change into next value ( e.g memorised.
-
Page 14: Before First Use
Deactivating the water standard dry laundry container indicator: 1. Press the on/off button to activate the 8.4 Water container indicator appliance. 2. Wait approximately 8 seconds. By default, the water container indicator 3. Press and hold touch buttons (A) and is on. -
Page 15: Daily Use
ENGLISH Working pump and transferring condensation to the tank. Working fans. 10. DAILY USE 10.1 Start a programme without The display shows the programme duration. delay start Real drying time will depend 1. Prepare the laundry and load the on type of the load (quantity appliance. -
Page 16: Hints And Tips
10.3 Change a programme • The display still shows • The indicator is off. 1. Press the on/off button to deactivate appliance • The indicators Filter and Tank 2. Press the on/off button to activate the remain on. appliance. -
Page 17: Care And Cleaning
ENGLISH • Dry only the laundry that is suitable • Shake the large clothes, fabrics for tumble drying. Refer to the fabric before placing in the tumble dryer. It is label on the items. to avoid moist places inside the fabric •... - Page 18 5. 1) 1) If necessary remove fluff from the filter socket and gasket. You can use a vacuum cleaner. 12.2 Emptying the water container You can use the water from the water container as an alternative to distilled water (e.g.
- Page 19 ENGLISH 12.4 Cleaning the humidity CAUTION! sensor Do not touch the metal surface with bare hands. CAUTION! Risk of injury. Wear Risk of humidity sensor protective gloves. Clean damage. Do not use carefully to avoid damaging abrasive materials or steel the metal surface.
-
Page 20: Troubleshooting
We recommend to clean the sensor at Use a standard neutral soap detergent to least 3 or 4 times or if you observe the clean the inner surface of the drum and drop of drying performance. drum lifters. Dry the cleaned surfaces with a soft cloth. -
Page 21: Technical Data
ENGLISH Problem Possible solution Load is too small, increase the load or use the Time Drying programme. The cycle time is too long or unsatisfacto‐ Make sure that the weight of the laundry is suitable for the duration of the pro‐ ry drying result. -
Page 22: Warranty
This document sets out the terms and of 3-5 Niall Burgess Road, Mount conditions of the product warranties Wellington, in respect of for Electrolux Appliances. It is an Appliances purchased in New important document. Please keep it Zealand; with your proof of purchase e) ‘Warranty Period’... - Page 23 Appliance to and from Electrolux writing; or its ASC. Travel and transportation c. the Appliance’s serial number or will be arranged by Electrolux as part warranty seal has been removed of any valid warranty claim. or defaced 6. Proof of purchase is required before 8.
- Page 24 Electrolux and its agents including New Zealand, the Appliances come ASC may exchange information in with a guarantee by Electrolux relation to you to enable Electrolux to pursuant to the provisions of the meet its obligations under this Consumer Guarantees Act, the Sale warranty.
- Page 25 ENGLISH...
- Page 26 www.electrolux.com...
- Page 27 ENGLISH...
- Page 28 www.shop.electrolux.com.au...
Need help?
Do you have a question about the EDH803CEWA and is the answer not in the manual?
Questions and answers