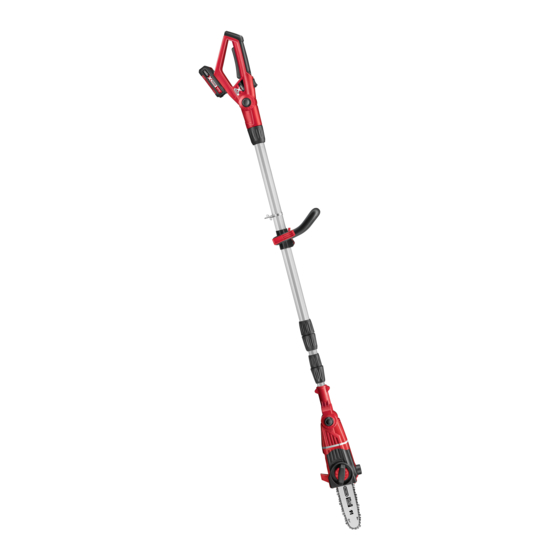
Ozito POWER X CHANGE PXCPPS-018 Instruction Manual

Ozito POWER X CHANGE PXCPPS-018 Instruction Manual

Cordless pole pruner, cordless pole hedge trimmer head, compact fast charger

Advertisement

CORDLESS
POLE PRUNER
INSTRUCTION MANUAL
SPECIFICATIONS
Input:
18V
Bar Length:
200mm
Cutting Length Max.:
170mm
Chain Speed:
3.76m/s
Oil Tank Capacity:
125ml
Length:
1.83 - 2.77m
Weight:
3.9kg
ozito.com.au
IN ORDER TO MAKE A CLAIM UNDER THIS WARRANTY YOU
MUST RETURN THE PRODUCT TO YOUR NEAREST BUNNINGS
WAREHOUSE WITH YOUR BUNNINGS REGISTER RECEIPT. PRIOR TO
RETURNING YOUR PRODUCT FOR WARRANTY PLEASE TELEPHONE
OUR CUSTOMER SERVICE HELPLINE:
Australia 1800 069 486
New Zealand 0508 069 486
TO ENSURE A SPEEDY RESPONSE PLEASE HAVE THE MODEL
NUMBER AND DATE OF PURCHASE AVAILABLE. A CUSTOMER
SERVICE REPRESENTATIVE WILL TAKE YOUR CALL AND
ANSWER ANY QUESTIONS YOU MAY HAVE RELATING TO THE
WARRANTY POLICY OR PROCEDURE.
WARNING
The following actions will result in the warranty being
void.
• If the tool has been operated on a supply voltage other
than that specified on the tool.
• If the tool shows signs of damage or defects caused
by or resulting from abuse, accidents or alterations.
• Failure to perform maintenance as set out within the instruction manual.
• If the tool is disassembled or tampered with in any way.
OZITO
Australia/New Zealand (Head Office) 1-23 Letcon Drive, Bangholme, Victoria, Australia 3175.
WARRANTY
The benefits provided under this warranty are in addition to other rights and
remedies which are available to you at law.
Our goods come with guarantees that cannot be excluded at law. You are entitled to
a replacement or refund for a major failure and for compensation for any other
reasonably foreseeable loss or damage. You are also entitled to have the goods
repaired or replaced if the goods fail to be of acceptable quality and the failure
does not amount to a major failure.
Generally you will be responsible for all costs associated with a claim under this
warranty, however, where you have suffered any additional direct loss as a result of
a defective product you may be able to claim such expenses by contacting our
customer service helpline above.
5 YEAR REPLACEMENT WARRANTY
Your Product is guaranteed for a period of 60 months from the original date of
purchase and is intended for DIY (Do It Yourself) use only. If a product is defective it
will be replaced in accordance with the terms of this warranty. Lithium Ion
batteries and chargers are covered by a 36 month
warranty Warranty excludes consumable parts, for example: guide bar, chain
and included accessories.
STANDARD EQUIPMENT
Pole
Chain
Guide Bar
Guide Bar Cover
Rear Handle
Pruner Head
Shoulder Strap
Auxiliary Handle
PXCPPS-018
0219

Advertisement

Table of Contents
loading
Need help?

Need help?

Do you have a question about the POWER X CHANGE PXCPPS-018 and is the answer not in the manual?

Questions and answers

Subscribe to Our Youtube Channel

Summary of Contents for Ozito POWER X CHANGE PXCPPS-018

  • Page 1 125ml Length: 1.83 - 2.77m Shoulder Strap Weight: 3.9kg ozito.com.au Auxiliary Handle PXCPPS-018 WARRANTY IN ORDER TO MAKE A CLAIM UNDER THIS WARRANTY YOU The benefits provided under this warranty are in addition to other rights and remedies which are available to you at law.
  • Page 2 3. Select the most comfortable position and close the lever This tool is compatible with all battery and to lock the auxiliary handle in chargers from the Ozito Power X Change Range. position. ONLINE MANUAL Scan this QR Code with your mobile device to take you to the online manual.
  • Page 3: Tensioning The Chain

    2. TENSIONING THE CHAIN Fitting Pruner Head CAUTION: THE CHAIN HAS SHARP EDGES. FOR YOUR 1. Align the pruner head and OWN SAFETY, PLEASE WEAR WORK GLOVES. the motor head so the arrows on both coincide. 1. Loosen the chain cover lock.
  • Page 4 3. OIL 4. PREPARATION Adjusting the telescope length IMPORTANT: ONLY USE OIL THAT IS EXPRESSLY LABELLED 1. To unlock the telescopic tube lock, twist it in “CHAIN BAR OIL”. a clockwise direction while pointing the chain away from the user. 1.
  • Page 5: Inserting And Removing The Battery

    5. INSERTING & REMOVING THE BATTERY Adjusting the Pruner Head Installing a Battery into the Pole Pruner • Pivoting the Pruner Head 1. Align the ribs of the battery with the recess below the handle 1. Press the two pivoting head releases, one each side and adjust the angle of the pruner head...
  • Page 6: Operation

    OPERATION Limbing 6. SWITCHING ON/OFF • Limbing is the process of removing the branches from a fallen tree. Switching On Check the direction in which a branch will bend before cutting it. Always 1. Hold the pruner firmly with both hands. cut on the opposite side to the bending direction so that the guide bar is not pinched in the cut.
  • Page 7: Maintenance

    Chain Replacement: The battery pack is not fully charged out of the carton. First read the safety instructions and then follow the charging The chain can be purchased through Ozito spare parts or from your local Bunnings notes and procedures.
  • Page 8: Electrical Safety

    The power supply for this products charger should be protected by a residual current device (rated at 30mA Note: The supply of 230V and 240V on Ozito chargers are interchangeable for Australia and New Zealand. or less). A residual current device reduces the risk of electric shock.
  • Page 9: Warranty

    Max. Cutting Capacity: 12mm No Load Speed: 1,700/min Weight: 1.57kg ozito.com.au PXCPHTA-400 WARRANTY IN ORDER TO MAKE A CLAIM UNDER THIS WARRANTY YOU MUST The benefits provided under this warranty are in addition to other rights and remedies which are available to you at law.
  • Page 10: Know Your Product

    KNOW YOUR PRODUCT SETUP & PREPARATION POLE HEDGE TRIMMER HEAD 1. ASSEMBLY 1. Trimmer Head CAUTION: ENSURE THE TOOL IS OFF & THE BATTERY 2. Blade REMOVED BEFORE PERFORMING ANY OF THE FOLLOWING OPERATIONS. Fitting Trimmer Head CAUTION: THE BLADE HAS SHARP EDGES. FOR YOUR OWN SAFETY, PLEASE WEAR WORK GLOVES.
  • Page 11 2. PREPARATION Pivoting the Trimmer Head Adjusting the telescope length 1. Press the two pivoting 1. To unlock the telescopic tube lock, twist it in a head releases, one each clockwise direction while pointing the trimmer side and adjust the angle blade away from the user.
  • Page 12 OPERATION 3. APPLICATIONS • Trimming the top. WARNING!: FAMILIARISE YOURSELF WITH Where the branches have SURROUNDING HAZARDS SUCH AS POWER LINES, grown extremely long, cut PHONE LINES, METAL FENCES AND OTHER OBJECTS back the hedge in several THAT COULD BE IN YOUR TRIMMING PATH, FAILURE stages.
  • Page 13 DESCRIPTION OF SYMBOLS • There are no user serviceable parts in the Hedge Trimmer Head; if a fault is suspected, please contact Ozito customer service. • The blade rail should be cleaned and treated with light machine oil or spray lubricant (such as WD40, CRC 5.56 or RP7) after each use.
  • Page 14 The charger has been designed for 230V and 240V only. Always check that the power supply corresponds to the voltage on the rating plate. Note: The supply of 230V and 240V on Ozito tools are interchangeable for Australia and New Zealand. This tools charger is double insulated in therefore no earth wire is required.
  • Page 15 21. Keep the battery charger, batteries and the cordless tool out of children’s reach. 22. Do not use damaged battery chargers. 23. Do not use the supplied battery charger to charge other cordless tools. Only charge Ozito Power X Change PXBP-250 rechargeable batteries with an Ozito Power X Change Charger.
  • Page 16 Australia 1800 069 486 tool) for the battery to reach its optimum performance / runtime. This battery is compatible with chargers from the 18V Ozito Power X Change range New Zealand 0508 069 486 available through your local Bunnings Warehouse. Product availability may differ.
  • Page 17 21. Keep the battery charger, batteries and the cordless tool out of children’s reach. 22. Do not use damaged battery chargers. 23. Do not use the supplied battery charger to charge other cordless tools. Only charge Ozito Power X Change rechargeable batteries with an Ozito Power X Change Charger.
  • Page 18: Charging A Battery

    The correct dimensions for drill holes can be found on the back of the charging unit; a on the tool. template for the mounting hole locations can also be found on the Ozito website. • If the tool shows signs of damage or defects caused by or resulting from abuse, accidents or alterations.

This manual is also suitable for:

Power x change pxcphta-400Power x change pxcg-030c

Table of Contents