
Related Manuals for Beko WDIK752421F


Summary of Contents for Beko WDIK752421F
- Page 1 Washer-Dryer User Manual WDIK752421F Document Number : 2820529483_EN/ 13-04-21.(23:56)
- Page 2 PRECAUTION! Dear Customer, • Precautions that need to be taken. Thank you for choosing a Beko appliance. Please take some time to read this user manual before using your appliance, to ensure you know INFORMATION how to safely operate the controls and functions.
-
Page 3: Important Instructions For Safety And Environment
1 Important instructions for safety and environment This section contains safety instructions WARNING! that will help protect from risk of personal injury or property damage. Failure to follow • If you are going to use the product these instructions shall void any warranty. in a wardrobe/cabinet/module and 1.1 General safety if the opening is not sufficient, it is... -
Page 4: Product Safety
WARNING! WARNING! • Unplug the product when it is not • The product should be used without in use. removing the upper plate. • Never touch the plug with wet hands! Never unplug by pulling on the cable, INFORMATION always pull out by grabbing the plug. •... - Page 5 INFORMATION DANGER! • Do not install or leave the product in • Rubber (latex) foam, shower caps, places where it might be exposed to waterproof fabrics, clothes and outdoor conditions. rubber-reinforced/rubber-foam • Do not play with control elements of pillows must not be dried with the the product.
- Page 6 WARNING! CAUTION! • Before loading the machine, check • Do not stop the machine before the each laundry item and make sure drying programme is completed. that there is no lighter, change, If you have to do so, remove all metal objects, needles etc.
-
Page 7: Intended Use
1.2 Intended use 1.3 Children's safety INFORMATION CAUTION! • This product has been designed for • Children under the age of 3 must be domestic use. It is not suitable for kept away from the product unless commercial use and it must not be they are continuously supervised. -
Page 8: Compliance With The Weee Directive And Disposing Of The Waste Product
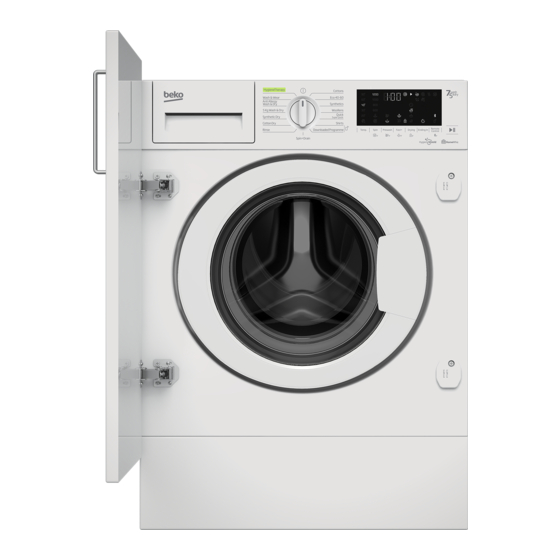
2 Your washer-dryer 1.4 Compliance with the WEEE Directive and disposing 2.1 Overview of the waste product This product does not contain the harmful and prohibited materials described in the “Directive on the Management of Waste Electrical and Electronic Equipment”. It complies with the WEEE Directive. -
Page 9: Package Contents
2.2 Package contents Power cable Water discharge hose Transit bolts Mains water inlet hose User manual Plastic plug group • Figures in this manual are schematic and may not match the product exactly. NOTE 9 / EN Washer-Dryer / User Manual... -
Page 10: Technical Specifications
2.3 Technical specifications Supplier name or trademark Beko WDIK752421F Model name 7166044100 Maximum spin speed (rpm) 1200 Washing capacity (cotton) (kg) Drying capacity (cotton) (kg) Built-in Height (cm) Width (cm) Depth (cm) Single Water inlet / Double Water inlet • / - •... -
Page 11: Appropriate Installation Location
3.1 Appropriate 3 Installation installation location To make the product ready for use, review the • Place the product on a solid and level information in the user manual and make sure floor. Do not place it onto a carpet with that the electricity, tap water supply and water high pile or other similar surfaces. -
Page 12: Connecting Water Supply
3.3 Removing the transit bolts PRECAUTION! • Do not remove the transit bolts before removing the packaging reinforcement. • Remove the transit bolts before operating 1 Connect the special hose supplied with the the washing machine! Otherwise, the product to the water inlet on the product. product will get damaged. -
Page 13: Adjusting The Feet
• If the hose is run along the floor (or at less Adjusting Rear Feet than 40 cm above it) and raised later on, water drain becomes difficult and laundry may come out extremely wet. Therefore, observe the heights described in the figure. •... -
Page 14: Electrical Connection
3.7 Electrical connection Connect the product to a grounded outlet protected by a 13 A fuse. Our company shall not be liable for any damages that will arise when the product is used without grounding in accordance with the local regulations. •... -
Page 15: Sorting The Laundry
4 Preparation INFORMATION 4.1 Sorting the laundry • Laundry that is subjected to heavy deposits * Sort laundry according to type of of materials such as flour, lime dust, milk fabric, colour, and degree of soiling powder, etc. Must be shaken off before and allowable water temperature. - Page 16 4.4 Initial use Before starting to use the product make sure that all preparations are made in accordance with the “Important safety and environment Bathrobe 1200 Hand towel instructions” and the instructions in the “Installation” section. Women‘s night Fabric napkin To prepare the product for washing laundry, gown perform first operation in Drum Cleaning...
-
Page 17: Detergent Drawer
4.7.1 Detergent drawer 4.7.2 Main Wash Compartment The detergent drawer is composed of four Before starting the washing Programme, put compartments: powder detergent into the left compartment with number “II”. Powder bleach/stain remover must also be put into this compartment. Put the liquid detergent into the main wash compartment with number “II ”... -
Page 18: Adjusting The Amount Of Detergent
4.7.7 Using gel and tablet detergent You must select extra rinsing option if you use liquid bleach in a washing Programme. Bleach • If the gel detergent thickness is fluidal and must be removed from the laundry with rinsing; your machine does not contain a special liquid otherwise it may cause itching on the skin. -
Page 19: Using Limescale Remover
• Use just a little amount (approx. 50 ml) of bleaching agent and rinse the clothes very well as it causes skin irritation. Do not pour the bleach onto the laundry and do not use it with the coloured items. •... -
Page 20: Tips For Correct Drying
4.9 Tips for correct drying Programmes Cottons Drying Synthetics Drying Babyprotect + Washing and Drying Wash&Wear Washes and dries Washes and dries Sheet, bedding, baby Stainless clothes that has respectively! Sheet, respectively! Sheet, bedding, clothes, t-shirts, been worn for a short time bedding, baby clothes, baby clothes, t-shirts, sweatshirts, durable knit... -
Page 21: Operating The Product
5.3 Preparing the Machine 5 Operating the product 1. Check if the hoses are connected tightly. 5.1 Control panel 2. Plug in your machine. 3. Turn the tap on completely. 4. Place the laundry in the machine. 5. Add detergent and fabric softener. 5.4 Selecting a washing programme 1. - Page 22 • Cottons • Woollens You can wash your durable cotton laundry Use this programme to wash your woollen (sheets, bedlinen, towels, bathrobes, underwear clothes. Select the appropriate temperature etc.) in this programme. When you press the complying with the tag of your clothes. Your quick wash function key, programme duration laundry will be washed with very delicate becomes notably shorter but effective washing is...
- Page 23 • Quick / Super Quick • Down Wear Use this programme to wash your lightly soiled Use this programme to wash down coats, vests, cotton clothes in a short time. The programme jackets etc. that bear a “machine-washable” tag. duration can be reduced down to 14 minutes Thanks to special spin profiles, it is ensured that when the quick wash function is selected.
-
Page 24: Temperature Selection
• Rinse Use when you want to rinse or starch separately. INFORMATION • Spin+Drain • You can dry your laundry without any Use this programme to drain the water in the interruption right after the washing programme machine. (it is possible to perform automatic or scheduled drying after the washing cycle). - Page 25 5.7 Spin speed selection You can also change the spin speed after the washing cycle has started. After the washing cycle has ended, you can press the spin speed adjustment button to select a spin speed. However, you need to do this before the spinning step begins.
-
Page 26: Washing And Drying Programmes
• 5 Kg Wash & Dry Use this programme to wash cotton laundry of INFORMATION up to 5 kg and to dry right after the washing • There is a spinning step in the drying programme without making any other selection. programmes. -
Page 27: Programme And Consumption Table
• HygieneTherapy INFORMATION Hygienic washing with warm air (program period 58 min.) • Hygiene air refresh program is not a With the hygiene air refresh program, hygienic program where laundry is washed with cleaning with air is ensured by keeping the water. - Page 28 • : Selectable. * : Automatically selected, cannot be cancelled. ***: Eco 40-60 with 40 °C temperature selection is the washing performance test program in accordance with EN 62512 and energy label test program in accordance with Commission Delegated Regulation (EU) 2019/2014 Eco 40-60 with 40 °C temperature and cup board dry selection is the wash and dry cycle test program in accordance with EN 62512 and energy label test program in accordance with Commission Delegated Regulation (EU) 2019/2014 *****: These programmes can be used with the HomeWhiz application.
-
Page 29: Auxiliary Function Selection
Consumption Values (EN) 1200 03:27 0,810 Eco 40-60 1200 02:41 0,560 1200 02:41 0,310 Cottons 0,600 1200 03:40 Cottons 1,800 1200 03:40 Synthetics 0,850 1200 02:25 Quick / Super Quick 0,200 1200 00:28 3,835 1200 08:05 Eco 40-60+Cupboard Dry 2,340 1200 05:55 The values given for programmes other than the eco 40-60 programme and the wash and dry cycle are indicative only. -
Page 30: Auxiliary Functions
• Custom Programme This auxiliary function can be used for Cottons and INFORMATION Synthetics programmes only with the HomeWhiz • If the selected wetness level (Iron Dry, application. When this auxiliary function is enabled, Cupboard Dry, Cupboard Extra Dry) you can add up to 4 additional rinse steps to the cannot be reached at the end of the drying programme. -
Page 31: Drying Steps
• Anti-Crease+ • Bluetooth If you press and hold the spin selection button You can use the Bluetooth connection function for 3 seconds, this function will be selected and to pair your machine with your smart device. the programme follow-up light of the relevant This way, you can use your smart device to get programme will turn on. -
Page 32: Time Based Drying - Minutes
5.14 End Time 5.12.3 Extra Dry Drying continues until the drying level reaches the Cupboard Extra Dry step. INFORMATION • The dryness level might change depending With the End Time function, start of the on the mix of laundry, type of material, programme can be delayed up to 24 hours. -
Page 33: Starting The Programme
5.15 Starting the programme 1. Press the Start/Pause button to start the programme. 2. The flashing light of the Start/Pause button will remain on, indicating that the programme has started. • Turn off and unplug the appliance. 3. Loading door will be locked. When •... - Page 34 5.18 Cancelling the programme If the water level in the machine is not suitable when you press the Start/Pause button, the panel will warn you that the door is closed. The programme will be cancelled if the 5.17.2 Switching the programme selection knob is switched to machine to pause mode another programme or if the machine is...
- Page 35 5.21 HomeWhiz and the 5.21.1 HomeWhiz Setup Remote Control Function Your product and the HomeWhiz app must be connected for the app to run. To establish HomeWhiz allows you to use your smart device this connection, please follow the steps below to control your washing machine and get for setup both on your product and on the information about it.
-
Page 36: Using The Remote Control Function
• Follow the steps in the HomeWhiz Setup (5.21.1 HomeWhiz Setup) INFORMATION to complete the setup. • If you cannot complete the setup successfully in 5 minutes, the washing WARNING! machine will switch off automatically. In this • Since the HomeWhiz and Remote Control case, you will have to start over the setup functions of your product work through procedure. -
Page 37: Maintenance And Cleaning
6 Maintenance and cleaning Service life of product extends and frequently experienced problems will be reduced if it is cleaned at regular intervals. When Remote Control is enabled, you can only 6.1 Cleaning the detergent drawer manage and switch off the machine and follow status on the washing machine. -
Page 38: Cleaning The Loading Door And The Drum
6.2 Cleaning the loading 6.3 Cleaning the body door and the drum and control panel For products with drum cleaning programme, Wipe the body of the machine with soapy please see Operating the product - water or non-corrosive mild gel detergents as Programmes. -
Page 39: Draining Remaining Water And Cleaning The Pump Filter
6.5 Draining remaining water 2. Some of our products have emergency draining hose and some does not have. and cleaning the pump filter Follow the steps below to discharge the water. The filter system in your machine prevents solid items such as buttons, coins and fabric fibers Discharging the water when the product does clogging the pump impeller during discharge not have an emergency draining hose:... -
Page 40: Troubleshooting
7 Troubleshooting Machine directly discharges the water it takes in. • The drain hose might be at an inappropriate height. >>> Programmes won’t start after the loading door has Connect the water drain hose as described in the user manual. been closed. - Page 41 Programme time does not countdown. (*) Colour of the clothes faded. (**) • The laundry in the machine might be unbalanced. >>> The • Machine might have been overloaded. >>> Do not overload automatic unbalanced load detection system might have been the machine.
- Page 42 There is detergent left on the laundry. Machine does not start or programme cannot be started. • Power cable might be unplugged. >>> Make sure that • Machine might have been overloaded. >>> Do not overload the machine. the power cable is plugged in. •...
- Page 43 BUILT-IN INSTALLATION Ø 4 x 16mm M 5 x 10mm 5 8 0 6 0 0 m 43 / EN Washer-Dryer / User Manual...
- Page 44 44 / EN Washer-Dryer / User Manual...
- Page 45 45 / EN Washer-Dryer / User Manual...
- Page 46 46 / EN Washer-Dryer / User Manual...
- Page 47 47 / EN Washer-Dryer / User Manual...
- Page 48 48 / EN Washer-Dryer / User Manual...
- Page 49 49 / EN Washer-Dryer / User Manual...
- Page 50 Moreover, to ensure product safety and to prevent risk of serious injury, the mentioned self-repair shall be done following the instructions in the user manual for self-repair or which are available in support.beko.com. For your safety, unplug the product before attempting any self-repair.
- Page 51 If you have purchased an American style Fridge freezer, the standard guarantee starts from the date of original purchase of the product, and lasts for a period of twenty four (24) months unless Beko plc (the “Manufacturer”) agrees to extend the guarantee for the product in writing.
- Page 52 If you are resident in the Republic of Ireland, this guarantee will be governed by Irish law and the Irish courts will have jurisdiction. This guarantee is provided by Beko plc. Beko House, 1 Greenhill Crescent, Watford, Hertfordshire. WD18 8QU. Beko plc is registered in England and Wales with company registration number 02415578.
- Page 53 Beko Free standing appliances come with a 12 month parts and labour guarantee as standard, Beko Built-in appliances come with a 12 month parts and labour guarantee as standard. This is extended to 24 months, free of charge, upon registration of the appliance. When you register your appliance for additional guarantee, you will automatically activate the ProSmart Motor 10 year guarantee.
- Page 54 Send us a secure message through our online contact us form. Please visit our website, click Contact Us and choose a product support topic from the list of options. Complete the required details and click send message. Product registrations For UK registrations please visit beko.co.uk/register and for the Republic of Ireland visit beko.ie/register.
Need help?
Do you have a question about the WDIK752421F and is the answer not in the manual?
Questions and answers