
Related Manuals for Beko WDIY854310F


Summary of Contents for Beko WDIY854310F
- Page 1 Washer-Dryer User Manual WDIY854310 Document Number= 2820524990_EN/ 27-12-16.(11:34)
- Page 2 Please read this user manual first! Dear Customer, Thank you for choosing a Beko product. We hope that you get the best results from your product which has been manufactured with high quality and state-of-the-art technology. Therefore, please read this entire user manual and all other accompanying documents carefully before using the product and keep it as a reference for future use.
- Page 3 INFORMATION • Important information or useful hints about usage. • Read user manual. • Packaging materials of the product are manufactured from recyclable materials in accordance with regulations. • Do not dispose of the Packaging materials together with the domestic or other wastes. Take them to the packaging material collection points designated by the local authorities. • Allergy UK, is the brand of British Allergy Association. Their main endorsement is the ‚Seal of Approval‘ . When you see a product with this logo on it, you have the reassurance the product has been scientifically tested to prove it is efficient at reducing/removing allergens...
-
Page 4: Table Of Contents
TABLE OF CONTENTS Important instructions for safety and environment 1.1 General safety .............................7 1.1.1 Electrical safety ............................8 1.1.2 Product safety ............................9 1.1.3 Warnings for drying ..........................10 1.2 Intended use ............................13 1.3 Children's safety ..........................13 1.4 Compliance with WEEE Directive and disposing of the waste product ....14 1.5 Package information ........................14 2 Your washer-dryer 2.1 Overview ..............................15... - Page 5 TABLE OF CONTENTS 4.9 Tips for correct drying ........................34 5 Operating the product 5.1 Control panel ............................35 5.2 Display symbols ..........................36 5.3 Preparing the machine ........................36 5.4 Selecting the washing programme ..................37 5.5 Washing programmes ........................37 • Cottons ................................38 • Synthetics ..............................38 • Woollens .................................
- Page 6 TABLE OF CONTENTS 5.17 Changing the selections after programme has started ..........56 5.17.1 Adding laundry after the programme has started: ..............56 5.17.2 Switching the machine to pause mode: ..................56 5.17.3 Changing the programme selection after programme has started: ......56 5.17.4 Changing the auxiliary function, spin speed and temperature ........57 5.18 Child Lock ............................57 5.18.1 To activate the child lock: ........................57 5.18.2 To deactivate the child lock: ......................58...
-
Page 7: Important Instructions For Safety And Environment
Important instructions for safety and environment This section contains safety instructions that will help protect from risk of personal injury or property damage. Failure to follow these instructions shall invalidate any warranty. 1.1 General safety CAUTION • This product can be used by children at and above 8 years old and by persons whose physical, sensory or mental capabilities were not fully developed or who lack experience and knowledge provided that they... -
Page 8: Electrical Safety
Important instructions for safety and environment 1.1.1 Electrical safety DANGER! If the product has a failure, it should not be operated unless it is repaired by the Authorised Service Agent. There is the risk of electric shock! Never wash the product by spreading or pouring water onto it! There is the risk of electric shock! CAUTION • If the power cable is damaged, it must be replaced by... -
Page 9: Product Safety
Important instructions for safety and environment 1.1.2 Product safety DANGER! Never open the loading door or remove the filter while there is still water in the drum. Otherwise, risk of flooding and injury from hot water will occur. CAUTION • The water supply and draining hoses must be securely fastened and remain undamaged. Otherwise, there is the risk of water leakage. -
Page 10: Warnings For Drying
Important instructions for safety and environment 1.1.3 Warnings for drying DANGER! Laundry that is previously washed, cleaned, soiled or stained with petrol / gasoline, dry cleaning solvents other flammable explosive substances must not be dried in the machine as they give out flammable or explosive steam. It may cause fire risk. - Page 11 Important instructions for safety and environment DANGER! Do not touch loading door glass with bare hands after drying. There is the risk of getting burnt. In order to maintain laundry in a temperature that will prevent them from getting damaged, a cooling step is performed as a final step.
- Page 12 Important instructions for safety and environment PRECAUTION • Do not dry leather laundry or laundry that contains leather (such as leather jeans label). The colour from Leather parts can run into other textiles. • In failures that cannot be repaired using information given in safety instructions, turn off the machine, unplug the power cable and call the Authorised Service Agent. • You can just wash laundry, just dry laundry or wash and dry laundry in your washer-dryer. Machine must not be used only to dry wet loads for a long time. When machine is used only for drying, it must be operated empty without...
-
Page 13: Intended Use
Important instructions for safety and environment 1.2 Intended use INFORMATION • This product has been designed for domestic use. It is not suitable for commercial use and it must not be used out of its intended use. • The product must only be used for washing, rinsing and drying of textile products that are marked accordingly. • The manufacturer waives any responsibility arisen from incorrect usage or transportation. • The service life of your product is 10 years. During this period, original spare parts will be available to operate the product properly. 1.3 Children's safety CAUTION • Children below the age of 3 must be kept away from... -
Page 14: Compliance With Weee Directive And Disposing Of The Waste Product
Important instructions for safety and environment 1.4 Compliance with WEEE Directive and disposing of the waste product • This product does not contain harmful and forbidden materials described in the "Regulation on the Control of the Waste Electrical and Electronic Equipment". It complies with the WEEE Directive. This product has been manufactured with high quality parts and materials which can be reused and are suitable for recycling. -
Page 15: Your Washer-Dryer
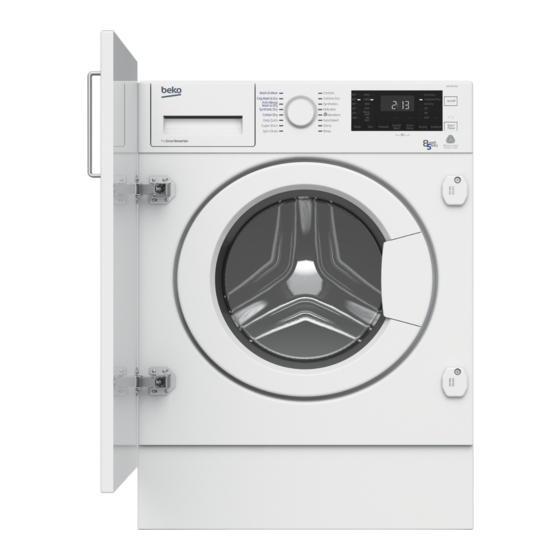
Your washer-dryer 2.1 Overview 1- Power cable 2- Top panel 3- Control panel 4- Filter cover 5- Adjustable feet 6- Loading door 7- Detergent drawer 8- Water discharge hose 15 / EN User’s Manual... -
Page 16: Package Contents
Your washer-dryer 2.2 Package contents Power cable Water discharge hose Transit bolts Mains water inlet hose User manual Plastic plug group • Figures in this manual are schematic and may not match the product exactly. NOTE 16 / EN Washer-Dryer... -
Page 17: Technical Specifications
Your washer-dryer 2.3 Technical specifications Complying Commission Delegated Regulation (EU) No.96/60/EC/1996 Supplier name or trademark Beko Model name WDIY854310 Washer Dryer Energy efficiency class Washing Energy efficiency class (Washing & Drying) Energy Consumption - full load per cycle (kWh) 5,44 Washing Energy Consumption - full load per cycle (kWh) 0,76 Annual (Washing &... -
Page 18: Installation
Installation To make the product ready for use, review the information in the user manual and make sure that the electricity, tap water supply and water drainage systems are appropriate. If they are not, call a qualified technician and plumber to have any necessary arrangements carried out. -
Page 19: Appropriate Installation Location
Installation 3.1 Appropriate installation location • Place the product on a solid and level floor. Do not place it onto a carpet with high pile or other similar surfaces. • Do not place the product close to the edge if the floor contains steps. Do not also place the product on a platform. • Do not place the product on the power cable. • Do not install the product in environments where the temperature falls below 0 ºC.(See. Warnings for Drying) Operate the product in a well ventilated and dust free environment. 3.2 Removing packaging reinforcement Tilt the machine backwards to remove the packaging reinforcement. Remove the packaging reinforcement attached to the ribbon. -
Page 20: Removing The Transit Bolts
Installation 3.3 Removing the transit bolts PRECAUTION • Do not remove the transit bolts before removing the packaging reinforcement. • Remove the transit bolts before operating the washing machine! Otherwise, the product will get damaged. 1 Use a tool to loosen all bolts until they rotate freely. (C) 2 Remove the transit bolts by turning them slightly. 3 Attach the plastic covers supplied in the user manual bag into the holes on the rear panel. -
Page 21: Connecting To The Drain
Installation 1 Connect the special hose supplied with the product to the water inlet on the product. CAUTION • Ensure that the cold water connection is made correctly when installing the product. Otherwise, your laundry will come out hot at the end of the washing process and wear out. 2 Tighten the hose nuts securely by hand. -
Page 22: Adjusting The Feet
Installation 90 cm 90 cm 90 cm min.40 • Connect the hose to a minimum height of 40 cm and a maximum height of 90 cm. • If the hose is run along the floor (or at less than 40 cm above it) and raised later on, water drain becomes difficult and laundry may come out extremely wet. Therefore, observe the heights described in the figure. • To prevent flowing of dirty water back into the machine and to allow for easy discharge, do not immerse the hose end into the dirty water or do not drive it in the drain more than 15 cm. -
Page 23: Electrical Connection
Installation a) Loosen the lock nuts on the feet by hand. b) Adjust the feet until the product stands level and balanced. c) Tighten all lock nuts again by hand. 3.7 Electrical connection Connect the product to a grounded outlet protected by a 16 A fuse. Our company shall not be liable for any damages that will arise when the product is used without grounding in accordance with the local regulations. -
Page 24: Transportation Of The Product
Installation 3.8 Transportation of the product 1 Unplug the product before transporting it. 2 Remove water drain and water supply connections. 3 Drain all water that has remained in the product. See 6.5 4 Install the transit bolts in reverse order of the disassembly procedure. See 3.3 DANGER! Your product is too heavy for one person to carry. -
Page 25: Preparation
Preparation LAUNDRY WASH SYMBOLS Machine Wash Symbols WASH Maximum Water Temperatures Symbol(s) Drying Suitable for No Iron Do not dry- Sensitive / Do not dry Do not dry Symbols dryer clean Delicate dry with dryer DRYING Drying Settings Iron - Iron at high Iron at medium Iron at low... -
Page 26: Preparing Laundry For Washing
Preparation 4.2 Preparing laundry for washing • Laundry items with metal attachments such as, underwired bras, belt buckles or metal buttons will damage the machine. Remove the metal pieces or wash such clothes by putting them in a cotton laundry bag or cotton pillow case. Also these type of clothes can heat too much during drying and damage your other clothes. Do not dry such laundry in the machine. -
Page 27: Tips For Energy Saving
Preparation 4.3 Tips for energy saving Energy efficiency will be improved by using lower temperature programmes and appropriate detergents. • Operate the product in the highest capacity allowed by the programme you have selected, but do not overload; see, "Programme and consumption table". See, “Programme and consumption table" • Always follow the instructions on the detergent packaging. • Wash slightly soiled laundry at low temperatures. • Use faster programmes for small quantities of lightly soiled laundry. • Do not use prewash and high temperatures for laundry that is not heavily soiled or stained. -
Page 28: Correct Load Capacity
Preparation 4.5 Correct load capacity The maximum load capacity depends on the type of laundry, the degree of soiling and the desired washing programme. The product automatically adjusts the water amount according to the weight of the laundry put inside it. CAUTION • Follow the information in the “Programme and consumption table”. When overloaded, machine's washing performance will drop. Moreover, noise and vibration problems may occur. For a successful drying... -
Page 29: Using Detergent And Softener
Preparation 4.7 Using detergent and softener INFORMATION • When using detergent, softener, starch, fabric dye, bleach and descaling agents; read the manufacturer's instructions written on the package and follow the dosages specified. Use a measuring cup if available. 4.7.1 Detergent drawer The detergent drawer is composed of four compartments: 1)Left compartment with number “II” (Main wash compartment for powder detergent or powder bleach/stain remover) 2)Left compartment with number “II ”... -
Page 30: Main Wash Compartment
Preparation INFORMATION • Never leave the detergent drawer open while the washing programme is running! • When using a programme without prewash, do not put any detergent into the prewash compartment (compartment nr. “I“). • Do not select a programme with prewash if you are using a detergent bag or dispensing ball. Place the detergent bag or the dispensing ball directly among the laundry in the machine. Remove these if drying • When machine is in Drying step, do not add any washing chemicals (Liquid detergent, Softener, etc.). 4.7.2 Main Wash Compartment Before starting the washing Programme, put powder detergent into the left compartment with number “II”. -
Page 31: Pre-Wash Compartment
Preparation 4.7.4 Pre-Wash Compartment Put the powder pre-wash detergent or powder stain remover into the middle compartment with number “I”. You can also put liquid bleach into this compartment while the machine takes in water during pre-wash or first rinsing step. Adding the liquid bleach while the machine takes in water allows it to be diluted before it is poured onto the laundry. -
Page 32: Using Laundry Starch
Preparation • If the gel detergent thickness is not fluidal or in the shape of capsule liquid tablet, put it directly into the drum before washing. • Put tablet detergents into the main wash compartment (compartment nr. "2") or directly into the drum before washing. INFORMATION • Tablet detergents may leave residues in the detergent compartment. If you notice such residues, place the tablet detergent between the laundry, close to the lower part of the drum in future washings. -
Page 33: Tips For Efficient Washing
Preparation 4.8 Tips for efficient washing Clothes Delicates/ Light Colours Black/Dark Colours Woollens/ and Whites Colours Silks (Recommended (Recommended (Recommended (Recommended temperature temperature temperature range temperature range range based on range based on based on soiling based on soiling soiling level: cold soiling level: cold level: 40-90 o C) level: cold -40 o C) -40 o C) -
Page 34: Tips For Correct Drying
Preparation 4.9 Tips for correct drying Programmes Cottons Synthetics Babyprotect + Wash&Dry Wash&Wear Drying Drying It washes Clothes which It washes and dries are worn for a Bed sheet, and dries consecutively! short period bedding, baby consecutively! Bed sheet, of time an clothes, t-shirt, Bed sheet, Durable bedding, baby... -
Page 35: Operating The Product
Operating the product 5.1 Control panel 1 - Programme selection knob 2 - Temperature selection lights 3 - Spin speed selection lights 4 - Display 5 - Drying Programme Lights 6 - On / Off button 7 - Start / Pause button 8 - End Time Adjustment button 9 - Drying Level Adjustment button 10 - Auxiliary Function buttons... -
Page 36: Display Symbols
Operating the product 5.2 Display symbols a- Washing indicator b - Rinsing indicator c - Spinning indicator d- Drying indicator e- End indicator f- No Water indicator g - Duration Information display h- Loading Door Lock indicator Child Lock indicator 5.3 Preparing the machine 1. Check if the hoses are connected tightly. 2. -
Page 37: Selecting The Washing Programme
Operating the product 5.4 Selecting the washing programme 1. Determine the programme suitable for the type, quantity and soiling level of the laundry in accordance with the "Programme and consumption table". 2. Select the desired programme with the Programme Selection knob. INFORMATION • Programmes are limited with the highest spin speed appropriate for that particular type of fabric. -
Page 38: Cottons
Operating the product • Cottons Use for your cotton laundry (such as bed sheets, duvet and pillowcase sets, towels, bathrobes, underwear, etc.). Your laundry will be washed with vigorous washing action for a longer washing cycle. INFORMATION • You can dry your laundry after the washing cycle without any interruption (automatic or timed drying can be performed after washing). For this, you must also select the Drying function before starting the washing... -
Page 39: Woollens
Operating the product • Woollens Use to wash your woollen laundry. Select the appropriate temperature complying with the tag of your clothes. Use appropriate detergents for woollens. INFORMATION • Drying function cannot be selected for the woollen wash programme. • Cottons Eco Use to wash your normally soiled, durable cotton and linen laundry. Although it washes longer than all other programmes, it provides significant energy and water savings. -
Page 40: Hand Wash
Operating the product • Hand Wash Use to wash woollen/delicate laundry that bear “not machine-washable” care labels and for which hand wash is recommended. Your laundry will be washed with a very gentle washing action in order not to damage the clothes. • Daily Quick Use to wash your lightly soiled and unstained cotton laundry in a short time. -
Page 41: Shirts
Operating the product • Shirts Use to wash the shirts made of cotton, synthetic and synthetic blended fabrics together. INFORMATION • You can dry your laundry after the washing cycle without any interruption (automatic or timed drying can be performed after washing). For this, you must also select the Drying function before starting the washing programme. -
Page 42: Temperature Selection
Operating the product 5.6 Temperature selection Whenever a new programme is selected, the recommended temperature for the programme appears on the temperature indicator. It is possible that the recommended temperature value is not the maximum temperature that can be selected for the current programme. -
Page 43: Spin Speed Selection
Operating the product 5.7 Spin speed selection Whenever a new programme is selected, the spin speed recommended for the selected programme is displayed on the Spin Speed indicator. INFORMATION • It is possible that the recommended spin speed value is not the maximum spin speed that can be selected for the current programme. Press the Spin Speed Adjustment button to change the spin speed. Spin speed decreases gradually. -
Page 44: If You Want To Spin Your Laundry After The Rinse Hold Function
Operating the product 5.7.1 If you want to spin your laundry after the Rinse Hold function: - Adjust the Spin Speed. - Press Start / Pause / Cancel button. The programme resumes. Machine drains the water and spins the laundry. If you want to drain the water at the end of the programme without spinning, use No Spin function. -
Page 45: Drying Programmes
Operating the product 5.8 Drying programmes CAUTION • Machine cleans the lint coming off the laundry automatically during the drying cycle. Machine uses water during drying. For this reason, water tap of the machine should be open also in the drying programmes. • When a new programme is selected, press Auxiliary Function Selection button to adjust the drying option that is suitable for the selected washing programme. -
Page 46: Washing And Drying Programmes
Operating the product 5.9 Washing and drying programmes CAUTION • Machine cleans the lint coming off the laundry automatically during the drying cycle. Machine uses water during drying. For this reason, water tap of the machine should be open also in the drying programmes. • 5kg Wash&Dry Use to wash cotton laundry up to 5 kg and dry it right after the washing cycle without making any other selection. -
Page 47: Anti Allergy Wash&Dry
Operating the product • Anti Allergy Wash&Dry Use to wash and then immediately dry your laundry up to 2 kg which requires an anti-allergic and hygienic washing (baby clothes, bed sheets, bedding, underpants, etc. cotton items). INFORMATION • Anti Allergy programme is tested and approved by “The British Allergy Foundation” (Allergy UK) in United Kingdom. -
Page 48: Programme And Consumption Table
Operating the product 5.10 Programme and consumption table (for washing) Auxiliary functions Selectable temperature Programme (°C) range °C 2,40 1400 • • • • 90-Cold Cottons 1,50 1400 • • • • 90-Cold 1,00 1400 • • • • 90-Cold Cottons Eco 60** 0,76 1400 •... - Page 49 Operating the product INFORMATION • ***: If maximum spin speed of the machine is lower then this value, you can only select up to the maximum spin speed. • The auxiliary functions in the table may vary according to the model of your machine. • Water and power consumption may vary subject to the changes in water pressure, water hardness and temperature, ambient temperature, type and amount of laundry, selection of auxiliary functions and spin speed, and changes in mains voltage.
- Page 50 Operating the product Programme and consumption table (for drying) Auxiliary Drying level functions Selectable Programme (°C) temperature range °C Cotton Dry 2,75 1400 • • • • Synthetic Dry 1,70 • • • Anti Allergy Wash&Dry 120 3,80 1400 • • • • 90-30 5 kg Wash&Dry 5,00 1400 •...
-
Page 51: Auxiliary Function Selection
Operating the product 5.11 Auxiliary function selection Select the desired auxiliary functions before starting the programme. Whenever a programme is selected, lights of the auxiliary functions that can be selected together with that programme illuminate. INFORMATION • Light of the auxiliary function that cannot be selected with the selected programme does not illuminate. When you press the buttons of these auxiliary functions, buzzer is heard and selection is prohibited. -
Page 52: Prewash
Operating the product INFORMATION • If the selected dampness level (Iron Dry, Wardrobe Dry, Extra Wardrobe Dry) cannot be reached at the end of the drying cycle, your machine will extend the programme duration automatically. Programme will last longer. • If Timed-Drying is selected, programme is finished at the end of the drying period even if the laundry does not get dry. • If the selected dampness level (Iron Dry, Wardrobe Dry, Extra Wardrobe Dry) is reached during drying cycle, or extra dryness is detected in the timed-drying options, programme will take a shorter time. Time decrease will be shown on the display. -
Page 53: Drying Steps
Operating the product • Drying This function enables drying of the laundry after washing. Check with which programmes this auxiliary function can be selected, from the programme table. 5.12 Drying steps 5.12.1 Iron Dry Drying is performed until the drying level reaches Iron Dry step. 5.12.2 Cupboard Dry Drying is performed until the drying level reaches Wardrobe Dry step. -
Page 54: Time Display
Operating the product 5.13 Time display Remaining time for the completion of the programme while it is running is displayed as “01:30” in hours and minutes format. INFORMATION • Programme time may differ from the values in section "Programme and consumption table" depending on the water pressure, water hardness and temperature, ambient temperature, amount and the type of laundry, auxiliary functions selected and the changes at the... -
Page 55: Starting The Programme
Operating the product INFORMATION • Do not use liquid detergents when you activate End Time function! There is the risk of staining of the clothes. • Door keeps locked during the End Time countdown period. In order to unlock the door, machine should be switched to the pause mode by pressing the programme start/pause button. At the end of the countdown, End Time indicator turns off, washing cycle starts and the time of the selected programme appears on the display. -
Page 56: Changing The Selections After Programme Has Started
Operating the product 5.17 Changing the selections after programme has started Malzeme rengi ARC 716 Colour of material is ARC 716 10.5 5.17.1 Adding laundry after the programme has started: INLAY STOCK NO: 2846559001 1400 Extra Kurutma 1400 Extra Kurutma 1000 Dolap Kuruluğu 1000 Dolap Kuruluğu Ütü Kuruluğu Ütü Kuruluğu 30’ 30’ 20° 20° 90’... -
Page 57: Changing The Auxiliary Function, Spin Speed And Temperature
Operating the product 5.17.4 Changing the auxiliary function, spin speed and temperature Depending on the step the programme has reached, you can cancel or select auxiliary functions. See, "Auxiliary function selection". Also, you can change the spin speed, temperature and drying settings. See, "Spin speed selection" and "Temperature selection". INFORMATION • The loading door will not open if the water temperature in the machine is high or the water level is above the... -
Page 58: To Deactivate The Child Lock
Operating the product 5.18.2 To deactivate the child lock: Press and hold 2nd and 3rd auxiliary function buttons for 3 seconds. After the countdown as "Child Lock 3-2-1" on the display is over, "Child Lock Enabled" is turned off on the display. Malzeme rengi ARC 716 5.19 Cancelling the programme Colour of material is ARC 716 10.5... -
Page 59: End Of Programme
Operating the product 5.20 End of programme When the programme is over the End of Programme indicator illuminates and a buzzer is heard. If you do not press any button for 2 minutes, the machine will switch to standby mode. Display and all indicators are turned off. If you press any button or turn the Programme Selection knob when the machine is in standby mode, programme steps that are completed will appear on the display. -
Page 60: Maintenance And Cleaning
Maintenance and cleaning Service life of product extends and frequently experienced problems will be reduced if it is cleaned at regular intervals. 6.1 Cleaning the detergent drawer Remove any powder residue buildup in the drawer. To do this; 1. You can remove the detergent drawer by pulling it towards yourself strongly. INFORMATION • If more than a normal amount of softener and liquid detergent mixture starts to remain in the softener... -
Page 61: Cleaning The Body And Control Panel
Maintenance and cleaning INFORMATION • Repeat Drum Cleaning process in every 2 months. • Use an anti-limescale suitable for the washing machines. After every washing and drying make sure that no foreign substance is left in the drum. If the holes on the bellow shown in the figure are blocked, open the holes using a toothpick. -
Page 62: Draining Remaining Water And Cleaning The Pump Filter
Maintenance and cleaning 1. Close the taps. 2. Remove the nuts of the water intake hoses to access the filters on the water intake valves. Clean residues on them with an appropriate brush. If the filters are too dirty, remove them from their places with a pliers and clean in this way. 3. - Page 63 Maintenance and cleaning Discharging the water when the product does not have an emergency draining hose: a. Place a large container in front of the filter to catch water from the filter. b. Loosen pump filter (anticlockwise) until water starts to flow. Fill the flowing water into the container you have placed in front of the filter.
-
Page 64: Troubleshooting
Troubleshooting Programmes do not start after the loading door is closed. Start / Pause / Cancel button is not pressed.>>> *Press Start/Pause/Cancel button. Programme cannot be started or selected. • Washing machine has switched to self protection mode due to a supply problem (line voltage, water pressure, etc. >>> Press and hold On/Off button for 3 seconds to reset the machine to factory settings. (See. “Cancelling the programme”) Water in the machine. • Some water may remain in the product due to the quality control processes in the production. - Page 65 Troubleshooting • Draining hose is not at adequate height. >>> Connect the water draining hose as described in the user manual. No water can be seen in the machine during washing. • The water level is not visible from outside of the washing machine. This is not a failure. Loading door cannot be opened. • Loading door lock is activated because of the water level in the machine. >>> Drain the water by running the Pump or Spin programme. • Machine is heating up the water or it is at the spinning cycle. >>> Wait until the programme completes. • Loading door lock is engaged. Loading door lock will be deactivated a couple of minutes after the programme comes to an end. >>> Wait for a couple of minutes for deactivation of the loading door lock.
- Page 66 Troubleshooting • Laundry is unbalanced in the machine. >>> Automatic unbalanced load detection system might be activated due to the unbalanced distribution of the laundry in the drum. • The machine will not spin if water is not drained completely. >>> Check the filter and the draining hose. • Excessive foam has occurred and automatic foam absorption system has been activated due to too much detergent usage. >>> Use recommended amount of detergent. Washing performance is poor: Laundry turns grey. (**) • Insufficient amount of detergent has been used over a long period of time. >>> Use the recommended amount of detergent appropriate for water hardness and the laundry.
- Page 67 Troubleshooting • The amount, brand and storage conditions of the detergent used are inappropriate. >>> Use a detergent appropriate for the washing machine and your laundry. Keep detergents closed in an environment free of humidity and do not expose them to excessive temperatures. • Detergent is put in the wrong compartment. >>> If detergent is put in the prewash compartment although prewash cycle is not selected, machine can take this detergent during rinsing or softener steps. Put the detergent in the correct compartment. • Pump filter is clogged. >>> Check the filter. • Drain hose is folded. >>> Check the drain hose. Laundry became stiff after washing. (**) • Insufficient amount of detergent is used. >>>...
- Page 68 Troubleshooting • Improper detergents for the washing machine is used. >>> Use detergents appropriate for the washing machine. • Excessive amount of detergent is used. >>> Use only sufficient amount of detergent. • Detergent was stored under improper conditions. >>> Store detergent in a closed and dry location. Do not store in excessively hot places. • Some meshed laundry such as tulle may foam too much because of their texture. >>> Use smaller amounts of detergent for this type of item. • Detergent was put in the wrong compartment. >>> Put the detergent in the correct compartment. • Softener is being taken early. >>> There may be problem in the valves or in the detergent drawer. Call the Authorised Service Agent.
- Page 69 Troubleshooting Drying lasts too long. • Excessive laundry loaded. >>> Do not load the machine in excess. • Laundry is not spun enough.>>> Spin at a higher spin speed in washing step in the Dryer- Washing Machine. • Tap is turned off. >>> Turn on the taps. Laundry is still damp after drying. • An appropriate programme according to laundry type might is not selected.>>>Check care labels on clothes and select an appropriate programme or use timed programmes in addition. • Excessive laundry loaded. >>> Do not load the machine in excess. • Laundry is not spun enough.>>> Spin at a higher spin speed in washing step in the Dryer- Washing Machine. Machine does not start or programme cannot be started. • Power cable is not connected. >>> Make sure the power cable is connected.
-
Page 70: Uilt-In Installation
BUILT-IN INSTALLATION GUIDE BUILT-IN INSTALLATION 820 mm 153 mm 70 / EN Washer-Dryer... - Page 74 IF THE CABINET DOOR OPENS TO RIGHT IF THE CABINET DOOR OPENS TO LEFT...
- Page 78 Service Ref. No. Service Ref. No. 1493 1493...
- Page 80 The guarantee starts from the date of original purchase of the product for a period of twelve (12) months unless Beko plc (the “Manufacturer”) agrees to extend the guarantee for the product in writing. If you have any questions about the guarantee on your product (including how long it is valid), please contact your retailer or our Call Centre on 0333 207 9710.
- Page 81 Optional extras, where available (i.e. extendable feet) are supplied on a chargeable basis only. Does Beko offer replacements? This is a repair-only guarantee. On occasion, the Manufacturer may at its sole discretion, replace your product with a new product instead of carrying out a repair. Where a replacement is offered, this would normally be an identical model but when this is not possible, a model of similar specification will be provided.
- Page 82 It is your responsibility to ensure our Engineers have a clean and safe environment to carry out any repairs. ………………………………………………………………………………………………………… Model No: Serial No: Retailer: Date of purchase: ………………………………………………………………………………………………………….. For service under guarantee simply telephone the appropriate number below: UK Mainland & Northern Ireland: 0333 207 9710 or customerservice@support.Beko.co.uk...
- Page 83 Should you experience any difficulty in obtaining service contact the Beko Customer Helpline on Tel: 0333 207 9710 or e-mail: CustomerService@support.beko.co.uk …………………………………………………………………………………………………………… This guarantee is provided by Beko plc. Beko House, 1 Greenhill Crescent, Watford, Herts, WD18 8QU. Beko plc is registered in England and Wales with company registration number 02415578.
- Page 84 www.beko.com...
Need help?
Do you have a question about the WDIY854310F and is the answer not in the manual?
Questions and answers