Table of Contents
Advertisement
Advertisement
Table of Contents

Related Manuals for 3Ware 9500S-4LP


Summary of Contents for 3Ware 9500S-4LP
- Page 1 3ware ® SATA RAID Controller Supports the 9000 Series PN 720-0117-01 March 2005...
- Page 2 AMCC, 455 West Maude Ave., Sunnyvale, CA 94085. Trademarks 3ware, Escalade, and 3DM are all registered trademarks of AMCC. The 3ware logo, 3BM, StorSwitch, TwinStor, and R5 Fusion are all trademarks of AMCC. All other trademarks herein are property of their respective owners.
-
Page 3: Table Of Contents
Conventions Used in This Guide ....... . v About the 3ware RAID Controller ..... . . 1 Product Features . - Page 4 Driver Installation Under Linux ......65 Obtaining 3ware Linux Drivers ....... . 66 Be Sure to Use the Correct Drivers .
- Page 5 Driver Installation Under FreeBSD ..... 87 Obtaining 3ware FreeBSD Drivers......88 Materials Required.
- Page 6 3ware 9000 Series Serial ATA RAID Controller Installation Guide...
-
Page 7: About This Guide
About this Guide This guide describes how to install the 3ware 9000 series RAID controller, configure arrays, and make the arrays available to your operating system—Microsoft Windows, Red Hat Linux, SuSE Linux, or FreeBSD. For more complete information about managing and using arrays connected to the 3ware RAID controller, see 3ware 9000 Series Serial ATA RAID Controller User Guide. - Page 8 About this Guide 3ware 9000 Series Serial ATA RAID Controller Installation Guide...
-
Page 9: About The 3Ware Raid Controller
About 3ware Driver Versions System Requirements Package Contents Product Features The 3ware 9000 Series Serial ATA family includes 9500S-4LP, 9500S-8, 9500S-12, 9500S-8MI, and 9500S-12MI. Features of the 3ware 9000 series controllers include: Advanced RAID features for greater data protection and management. -
Page 10: What's New With The 3Ware 9000 Series Controllers
PCI slots comply with PCI 2.2 or above standards. PCI slot that meets the Plug and Play and PC99 specifications. For all 3ware 9000 series models, install the card in a 64- Note: bit, 66MHz PCI or PCI-X slot for best performance. - Page 11 Drives Depending on the particular model, the 3ware RAID controller may be connected to up to, four, eight, or twelve SATA drives using the supplied interface cables. Drives must meet serial ATA 150 (SATA I) or serial ATA 300 (SATA 2) Gb/s standards. Drives may be of any capacity or physical form factor.
-
Page 12: Package Contents
About the 3ware RAID Controller Package Contents If your package is missing any of the items listed below, contact 3ware before proceeding with installation (disk drives and disk mounting brackets are not included). 3ware Serial ATA RAID Controller in an ESD-protective bag Serial ATA interface cables (one per port). -
Page 13: Installation Overview
Insert the controller card into the computer. If the drives are not already installed in the computer, install them. Connect the interface cables to the drives. Close up the case. Power on the system. www.3ware.com... - Page 14 Confirm the array configuration. Save your changes and exit. Specify a hot spare (optional). Install the 3ware driver and make the units available to the operating system. For details see one of the following: “Driver Installation Under Windows” on page 53 “Driver Installation Under Linux”...
-
Page 15: Installing The Hardware
Installing the Hardware This section describes the physical installation of the 3ware 9000 RAID controllers. It contains the following topics: “Before You Begin” things you should consider before starting installation, and tools and equipment you will need. “Safety Factors” personal safety and to protect your equipment and data. Be sure to read this section. -
Page 16: Before You Begin
Consider these factors when deciding on the slot in which to insert the controller: Cable routing may be easier if you install the 3ware RAID controller next to an open slot. The amount of clearance you need will depend on the number of drives you will be connecting to the controller. - Page 17 If you are building a system from scratch, you may want to consider using a chassis or drive carrier that is compatible with the 3ware RAID controller activity LEDs, such as the AMCC RDC-400 drive carrier, available through AMCC.
-
Page 18: What You Need: Tools And Equipment
An ESD grounding strap or mat Standard hand tools to open your system’s case and install the 3ware RAID controller into an available PCI expansion slot. Safety Factors Be sure to follow the guidelines presented on the next few pages to insure your own safety, and that of your equipment. - Page 19 Do not remove the 3ware RAID controller from its protective bag until you are properly grounded. Handle the 3ware RAID controller by its edges or by the black rail and metal bracket at its two ends. Do not touch any pin, contact, lead or component on the 3ware RAID controller.
-
Page 20: Installing A Serial Ata Raid Controller
Figure 1. 12-Port 3ware 9500S-12 Serial ATA RAID Controller Figures 2 and 3 show 3ware Serial ATA RAID controllers with 8 ports (there are two versions of the 9500S-8 controller). The earlier models use Pchip v1.4 and are not BBU-compatible. The more recent models use Pchip v1.5 and are BBU-compatible. - Page 21 (memory Backup Unit) module) connector Figure 2. 8-Port 3ware 9500S-8 Serial ATA RAID Controller, Pchip v1.5 (BBU-compatible) Additional Details About the LED Status Connectors As shown in Figures 1 through 5, LED connectors for individual drives are on J7, J8, and J9 for the full size cards, and on J3 for the half-size 4-port card.
- Page 22 Installing the Hardware A common or shared LED ground on a chassis is not Warning: supported and can damage the 3ware controller. Check with your chassis documentation before connecting. Table 1: LED Indicator Pin Positions Controller Header 9500S-4LP 9500S-8 (Pchip v1.4) 9500S-8 (Pchip v1.5)
- Page 23 J7 is for drives 0, 1, 2, 3 (left to right) module) J8 is for drives 4, 5, 6, 7 (left to right) Figure 3. 8-Port 3ware 9500S-8 Serial ATA RAID Controller, Pchip v1.4 (Non-BBU Compatible) www.3ware.com Installing a Serial ATA RAID Controller...
-
Page 24: To Connect Serial Cables To The Controller
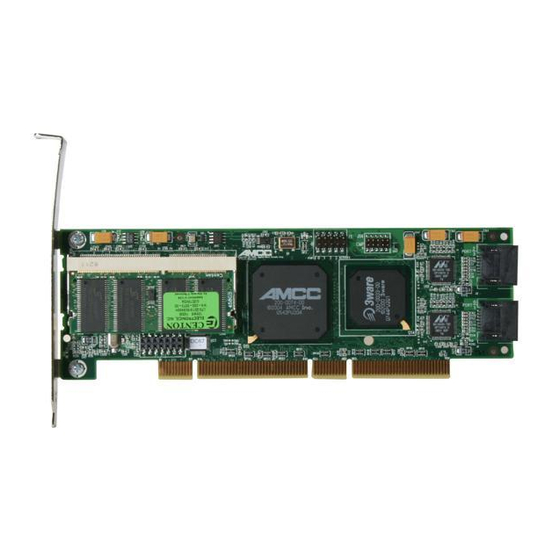
Figure 4. 4-Port 3ware 9500S-4 Serial ATA RAID Controller To connect serial cables to the controller Take out the serial cables provided with the 3ware SATA RAID controller. 3ware serial controllers are supplied with serial interface cables, one for each port on the controller. -
Page 25: To Install The Controller In The Computer
10.) Open the computer case according to the manufacturer’s instructions. Find the PCI slot you want to use for the serial 3ware RAID controller. For a discussion of which slot to use, see “Selecting the Slot in Which to Install the Controller”... -
Page 26: To Connect The Interface Cables To The Drives
Installing the Hardware Press down gently on the edge of the 3ware RAID controller directly above the slot until it is fully seated. Check that the 3ware RAID controller’s metal bracket covers the hole in the case and secure the bracket with the screw that was used to secure the filler bracket in step 5. -
Page 27: Installing A Serial Ata Raid Controller With Multi-Lane Internal Connectors
SODIMM (memory module) Figure 5. 12-Port 3ware 9500S-12MI Serial ATA RAID Controller Models 9500S-12MI and 9500S-8MI, have multi-lane internal connectors, each of which can handle up to four drives. These controllers can be installed in an enclosure with a backplane. The... -
Page 28: To Connect The Multi-Lane Cables
If your enclosure has a backplane, connect the other end of each interface cable to the backplane. If you are using a standard enclosure, connect each of the individual SATA connectors to a drive. 3ware 9000 Series Serial ATA RAID Controller Installation Guide... -
Page 29: To Install The Controller In The Computer
Find the PCI slot you want to use for the serial RAID controller. Remove the metal filler bracket for the slot. Save this screw; it will be used to secure the 3ware RAID Controller after you have seated it in the slot. -
Page 30: Finishing Up
Close the case and reconnect the power cables. Configure your RAID Arrays Turn to “Configuring Units” on page 27 for information about configuring the RAID arrays. 3ware 9000 Series Serial ATA RAID Controller Installation Guide... -
Page 31: Moving Units From An 8000 Controller To A 9000 Controller
In order to preserve the data that is on the units Note: attached to the 8000, you will need to run a special utility, available from 3ware Technical Support, to convert the units to a format that the 9000 controller can use. Contact Technical Support to obtain the utility. -
Page 32: Moving Legacy Jbod Units To A 9000 Controller
Power down the system, disconnect the drives from the 8000 controller and remove the controller from the system. Install the 9000 controller and attach the drives to the 9000 board, as described earlier in this section. 3ware 9000 Series Serial ATA RAID Controller Installation Guide... - Page 33 Policy screen. (The next section in this guide, “Configuring Units”, describes how to work in 3BM. Additional information about 3BM is available in 3ware 9000 Series Serial ATA RAID Controller User Guide.) Press the F8 or Esc key to save and exit.
- Page 34 Installing the Hardware 3ware 9000 Series Serial ATA RAID Controller Installation Guide...
-
Page 35: Configuring Units
This section includes the following topics: “Understanding RAID Concepts and Levels” on page 28 “Determining What RAID Level to Use” on page 31 “Working with the 3ware BIOS Manager (3BM)” on page 34 “Specifying the Unit Configuration” on page 40 “Initializing Units” on page 49 “Checking the Motherboard Boot Sequence”... -
Page 36: Understanding Raid Concepts And Levels
Arrays and Units used to describe two or more disk drives that appear to the operating system as a single unit. When you work with 3ware software, “unit” is the term used to refer to an array of disks that is configured and managed through the 3ware software. - Page 37 Striped disk arrays achieve high transfer rates because they can read and write data on more than one drive simultaneously. The stripe size is configurable in 3ware BIOS Manager (3BM). Requires a minimum of two drives. When drives are configured in a striped disk array, large files are distributed across the multiple disks using RAID 0 techniques.
- Page 38 . A single drive that has been configured as a unit Single Disk through 3ware software (3BM, 3DM 2, or CLI). Like disks in other RAID configurations, single disks contain 3ware Disk Control Block (DCB) information and are seen by the OS as available units.
-
Page 39: Other Important Concepts
Hot Spare array can be automatically rebuilt in case of drive failure. For additional information about RAID levels, see the article “RAID Primer” on the 3ware website, at: http://www.3ware.com/ products/pdf/RAID_Primer.pdf. Other Important Concepts . Used to store data locally on the drive before it is... - Page 40 The total array capacity is defined as follows: Table 3: Drive Capacity RAID Level Capacity RAID 0 (number of drives) X (capacity of the smallest drive) RAID 1 capacity of the smallest drive 3ware 9000 Series Serial ATA RAID Controller Installation Guide...
- Page 41 2 TB or smaller that can be addressed by the operating systems as separate volumes. For more information, see “Enabling Auto-Carving for Units Larger Than 2 TB” on page 47, and in 3ware 9000 Series Serial ATA RAID Controller User Guide, see “Multi LUN Support and Auto-Carving.”...
-
Page 42: Working With The 3Ware Bios Manager (3Bm)
Configuring Units Working with the 3ware BIOS Manager (3BM) This section describes the basics of working with the 3ware BIOS Manager (3BM) configuration utility. It includes the following sections: Starting the 3BM configuration utility Exiting the 3BM configuration utility Working in the 3BM configuration screens... - Page 43 Figure 8. Warning Message When you Start 3BM If you need to backup data before continuing, press ESC and do so now. Otherwise, press any key to continue. www.3ware.com Working with the 3ware BIOS Manager (3BM)
-
Page 44: Exiting 3Bm
Whether you press F8 or Esc to leave 3BM will not have an effect on those changes. For more information, see the 3ware 9000 Series Serial ATA RAID Controller User Guide. 3ware 9000 Series Serial ATA RAID Controller Installation Guide If you make changes on the Policy screen,... -
Page 45: Working In The 3Bm Screens
Incomplete Drives and Others. If you connected drives to the controller that were previously used on a 7000/8000-series 3ware RAID controller, they may appear in a section titled Incomplete Drives and Others. Before you can use these drives, they must be deleted. For more information, see the discussion of Deleting Units in 3ware 9000 Series Serial ATA RAID Controller User Guide. - Page 46 Highlight one of the primary buttons on the main screen: Create Delete Maintain Rebuild Policy 3ware 9000 Series Serial ATA RAID Controller Installation Guide Use these keys Up and Down Arrow Keys Left and Right Arrow Keys Tab and Shift+Tab Enter or the Spacebar Enter...
- Page 47 (BIOS, Firmware, monitor), serial number, controller and model number, cache memory size, slot # of the 3ware card, and whether or not BBU-support is available.) Return to the main 3ware BIOS Manager screen, from the Advanced...
-
Page 48: Specifying The Unit Configuration
You can implement one or more units of supported RAID levels on a single controller, depending on the number of drives that the specific 3ware RAID controller supports and the number of drives attached. Basic Steps for Creating a Unit... - Page 49 After all drives for the unit are selected, use the Tab or Right Arrow key to move to the Create Unit button and press Enter. The Create Disk Array screen appears (see Figure 11 and Figure 12 for examples). Make sure that the proper drives are listed. www.3ware.com Specifying the Unit Configuration...
- Page 50 Configuring Units Figure 11. Create Disk Array Display, RAID 0 Example Figure 12. Create Disk Array Display, RAID 5 Example 3ware 9000 Series Serial ATA RAID Controller Installation Guide...
- Page 51 The default is for write cache to be enabled. For more information about write cache, see page 31. Press Tab to move to the field Stripe Size and select the desired stripe size (16KB, 64KB, or 256KB). www.3ware.com Specifying the Unit Configuration...
- Page 52 Figure 14. Stripe Sizes for a RAID 5 For information about the field “Continue on Source Error,” see the 3ware 9000 Series Serial ATA RAID Controller User Guide. To confirm unit configuration Press Tab to select the OK button and press Enter to confirm creation of the unit.
- Page 53 A warning message asks you to confirm that all existing data on the drives will be deleted. Figure 15. Confirmation Message when Saving and Exiting Type Y to continue, delete any existing data on the drives, and create the unit. www.3ware.com Specifying the Unit Configuration...
-
Page 54: Specifying A Hot Spare
Type s to specify that the selected drive will be the hot spare. You’ll see the words “Hot Spare” appear next to the drive in the Available Drives list. Figure 16. Hot Spare Indicated 3ware 9000 Series Serial ATA RAID Controller Installation Guide... -
Page 55: Enabling Auto-Carving For Units Larger Than 2 Tb
To enable auto-carving At the main 3BM screen, tab to Policy and press Enter. On the Policy screen, tab to 2TB Auto-Carving, and change the setting to “Enabled.” www.3ware.com Specifying the Unit Configuration... -
Page 56: Leaving Individual Drives As Jbods
If you have JBODs attached to an 8000 controller that you want to use with the 9000 controller, see “Moving Units from an 8000 Controller to a 9000 Controller” on page 23. 3ware 9000 Series Serial ATA RAID Controller Installation Guide... -
Page 57: Initializing Units
RAID 5 units with 5 or more disks, and RAID 50 units with 10 or 12 disks configured into two subunits do need to be initialized for full performance. For these configurations, initialization begins automatically after you create them in the 3BM utility. Zeroes are written to all unit members. www.3ware.com... -
Page 58: For Raid 1 And Raid 10
3 subunits of 4 each or 4 subunits of 3 each will take place the first time the array is verified, either via 3BM, through 3ware 3DM 2, or through the 3ware CLI. The steps below describe how to do this through the BIOS (3BM). For information about using 3DM 2, see 3ware 9000 Series Serial ATA RAID Controller User Guide. -
Page 59: Checking The Motherboard Boot Sequence
Using your computer’s Setup utility, ensure that it shows the appropriate boot device. After installing the 3ware 9000 controller in your system, go into the BIOS for your computer system to check and change the boot order. This is necessary because most systems automatically change the boot order when they detect a newly installed controller and device. -
Page 60: Installing Drivers And Making The Units Available For Use
Installing Drivers and Making the Units Available For Use The final steps in setting up your RAID arrays are to load the 3ware drivers and make the units available to your operating system. Will the unit you have created be your system's boot device? If so, you will install the driver for the controller as you install the operating system. -
Page 61: Driver Installation Under Windows
It is recommended that you upgrade to the latest service pack available. A drive or unit managed by the 3ware RAID controller may be configured to be your system’s boot device. Or, you can use another device as your boot device, such as a disk attached to the motherboard. -
Page 62: Materials Required
ROM. (Not required if Windows is already installed on another drive.). Floppy diskette, to create a driver diskette. If you are installing Windows, you must create a 3ware driver diskette. If Windows is already installed on another device, you may install the 3ware driver from either the 3ware software CD-ROM or from a diskette. -
Page 63: Installing The 3Ware Driver And Windows On A New Unit
When you see the message: “Setup could not determine the type of one or more mass storage devices or you have chosen to manually specify an adapter…” Type S to specify that you have an additional 3ware RAID controller. Insert the 3ware driver diskette and press Enter. -
Page 64: Installing The Driver On A System That Boots From A Different Device
Installing the Driver on a System that Boots from a Different Device If you are installing the 3ware RAID controller on a system that already has the operating system installed on another drive, follow the instructions in this section, depending on the version of Windows installed on your system: “To install the 3ware driver under Windows 2000”... - Page 65 Windows recognizes it as a Plug and Play device, and brings up the Found New Hardware Wizard. This wizard guides you through installing the 3ware drivers (see Figure 17). Note that you will see screens for the installation of two drivers during this process.
- Page 66 When the Completing the Found New Hardware Wizard screen appears (Figure 18), click Finish. Figure 18. Completing Found New Hardware Wizard If the “Completing” screen similar to Figure 18 indicates that you should restart your computer, do so now. 3ware 9000 Series Serial ATA RAID Controller Installation Guide...
- Page 67 (Figure 19), click Next and follow the prompts on the screen to install the second driver. Figure 19. Install Hardware Device Drivers When the second Completing the Found New Hardware screen appears, click Finish. Figure 20. Completing Found New Hardware Wizard www.3ware.com...
- Page 68 Windows recognizes it as a Plug and Play device, and brings up the Found New Hardware Wizard. This wizard guides you in installing the 3ware drivers (see Figure 21). Note that you will see screens for the installation of two drivers during this process.
- Page 69 If the “Completing” screen similar to Figure 22 indicates that you should restart your computer, do so now. When the Welcome to the Found New Hardware Wizard screen appears again (Figure 23), click Next and follow the prompts on the screen to install the second driver. www.3ware.com...
- Page 70 Figure 24. Completing Found New Hardware Wizard After the driver has been installed, continue with the instructions below under “Making Units Managed by a 3ware Controller Available to Windows” on page 63. 3ware 9000 Series Serial ATA RAID Controller Installation Guide...
-
Page 71: Making Units Managed By A 3Ware Controller Available To Windows
Making Units Managed by a 3ware Controller Available to Windows After the 3ware driver has been installed, you need to partition and format the new units or disks. Remove the driver diskette or CD, reboot the system, and log in as the system administrator. -
Page 72: Finishing Up
Your RAID unit is now ready for use. You may also want to install 3ware’s browser-based Disk Management tool, 3DM 2, or the 3ware Command Line Interface (CLI). With 3DM 2 and CLI, you can maintain your RAID units while running Windows. For more information, see the 3ware 9000 Series Serial ATA RAID Controller User Guide and the 3ware Escalade 9000 Series Serial ATA RAID Controller CLI Guide. -
Page 73: Driver Installation Under Linux
3ware RAID controller in the system. A drive or unit managed by the 3ware RAID controller may be configured to be your system’s boot device. Or, you can use another device as your boot device, such as a disk attached to the motherboard. -
Page 74: Obtaining 3Ware Linux Drivers
3ware software CD or download the source from the 3ware website and compile a new driver. For more information, see “Compiling a 3ware Driver for Red Hat Linux” on page 77 and “Compiling a 3ware Driver for SuSE Linux” on page 83. - Page 75 64-bit, used for both AMD Opteron and Intel 64-bit Xeon (EM64T) For SuSE, AMCC offers the following drivers: x86 32-bit, for Intel x86 and AMD Athlon amd 64-bit, for AMD Opteron and Intel 64-bit Xeon (EM64T) www.3ware.com Obtaining 3ware Linux Drivers...
-
Page 76: Determining The Current Version Of Your 3Ware Driver
Driver Installation Under Linux Determining the Current Version of your 3ware Driver If you already have a 3ware controller installed, you can check the current driver version. If you have a 2.4 kernel or earlier, type the following command: cat /proc/scsi/3w-9xxx/* where the asterisk (*) represents SCSI host ID and “9xxx”... -
Page 77: Creating A Red Hat Linux Driver Diskette
If Red Hat Linux is already installed and bootable on another Note: drive, turn to “Installing the 3ware Driver on a Red Hat Linux System that Boots From a Different Device” on page 70. We have tested some older systems where an IDE... -
Page 78: Installing The 3Ware Driver On A Red Hat Linux System That Boots From A Different Device
Installing the 3ware Driver on a Red Hat Linux System that Boots From a Different Device The steps for installing the 3ware driver vary slightly, depending on your specific installation requirements. Select the appropriate set of steps below, based on whether:... - Page 79 3w-9xxx.o for 2.4 kernels, or 3w-9xxx.ko for 2.6 kernels. The available module files are: For UP kernels: 3w-9xxx.o For SMP kernels: For Enterprise kernels: For Bigmem kernels: For Hugemem kernels: For IA32E kernels: www.3ware.com Driver Installation Under Red Hat Linux 2.4.18-14smp 2.4.18-14enterprise 3w-9xxx.* 3w-9xxx.smp 3w-9xxx.ent 3w-9xxx.big 3w-9xxx.hug 3w-9xxx.i32...
- Page 80 Driver Installation Under Linux To install the 3ware driver and update the RAM disk Log in as root and open a console window. Mount the CD which contains the 3ware driver: To mount the CD, type: and press Enter. Copy the driver:...
- Page 81 For 2.4 Kernels, add the following line to /etc/modules.conf: alias scsi_hostadapter 3w-9xxx.o For 2.6 Kernels, add the following line to /etc/modprobe.conf alias scsi_hostadapter 3w-9xxx.ko www.3ware.com Driver Installation Under Red Hat Linux , type: /update 3w-9xxx.o /update 3w-9xxx.o /update 3w-9xxx.ko , type:...
- Page 82 Reboot. The 3ware driver will be loaded from the ram disk automatically at boot time. To install the 3ware driver and load the driver manually instead of using a RAM disk Log in as root and open a console window.
- Page 83 Otherwise, go on to Step 5. For Redhat workstation on Intel x86 cp /mnt/cdrom/packages/drivers/linux/redhat/ ws3_u3/x86_intel/3w-9xxx.* /lib/modules/ <put kernel string here> If prompted to overwrite, type www.3ware.com Driver Installation Under Red Hat Linux , type: /kernel/drivers/scsi/ /kernel/drivers/scsi/ /kernel/drivers/scsi/ , type: /update 3w-9xxx.o...
- Page 84 Update the modules.dep file, by issuing the following command: Run /sbin/depmod -a Load the driver manually. Type: modprobe 3w-9xxx You can also incorporate the insmod command into a startup script. 3ware 9000 Series Serial ATA RAID Controller Installation Guide /update 3w-9xxx.o /update 3w-9xxx.ko , type:...
-
Page 85: Compiling A 3Ware Driver For Red Hat Linux
Compiling a 3ware Driver for Red Hat Linux For Experts Only If necessary, you can compile the 3ware driver yourself. (For example, if you are running a different kernel version.) Notes: You must have a full Linux kernel source tree in /usr/src/linux in order to do the compile. - Page 86 To build Boot module (this is used when creating a driver for the 32-bit driver diskette), type: make bot -f Makefile.rh The file created is 3ware 9000 Series Serial ATA RAID Controller Installation Guide Makefile.rh for 2.4 kernels, and 3w-9xxx.o 3w-9xxx.smp 3w-9xxx.ent...
- Page 87 3w-9xxx.o If you installed a previous driver when you installed your operating system, then perform this step to copy the driver into the update directory, as well. <kernel string> /lib/modules/ www.3ware.com Driver Installation Under Red Hat Linux 3w-9xxx.i32 /kernel/drivers/scsi/ /update/3w-9xxx.o...
-
Page 88: Driver Installation Under Suse Linux
Creating a SuSE Linux Driver Diskette If you are installing Linux on the new drive or unit managed by the 3ware RAID controller, you must create a 3ware driver diskette. If Linux is already installed on another device, you may install the 3ware driver from the 3ware software CD-ROM. -
Page 89: Installing The 3Ware Driver And Suse Linux With Yast2 On A New Unit
If SuSE Linux is already installed on another drive, Note: turn to “Installing the 3ware Driver on a SuSE Linux System that Boots from a Different Device” on page 81. Boot directly from the SuSE installation CD #1 or DVD. - Page 90 CD-ROM. If a driver is not available for your system, you will need to compile your own driver, as described below. /sbin/depmod -a Type / sbin/mkinitrd 3ware 9000 Series Serial ATA RAID Controller Installation Guide In the instruction below, replace <kernel string> /kernel/drivers/scsi/ <kernel string>...
-
Page 91: Compiling A 3Ware Driver For Suse Linux
To compile a 3ware driver for SuSE Linux 2.4 kernels Download the 3ware 2.4 driver source from the 3ware website (www.3ware.com) or copy the driver source from the CD into a working directory. Install the Kernel source under Create a symbolic link. - Page 92 The created file is 11 Copy the module <kernel string> /lib/modules/ 3w-9xxx.o 12 Edit /etc/modprobe.conf alias scsi_hostadapter 3w-9xxx 13 Load the module modprobe 3w-9xxx 3ware 9000 Series Serial ATA RAID Controller Installation Guide 3w-9xxx.o 3w-9xxx.smp to the scsi directory. 3w-9xxx.o /kernel/drivers/scsi/ and add...
- Page 93 Download the 3ware 2.6 driver source from the 3ware website (www.3ware.com). Copy the driver source into a working directory. (The latest 3ware driver source is bundled with the latest firmware and is in the /src sub-directory.) Install the Kernel source under Create a symbolic link.
- Page 94 11 Copy the module 3w-9xxx.ko to /lib/modules/<kernel string>/kernel/drivers/scsi/ 3w-9xxx.ko 12 Edit /etc/modprobe.conf alias scsi_hostadapter 3w-9xxx 13 Load the module modprobe 3w-9xxx 3ware 9000 Series Serial ATA RAID Controller Installation Guide and add...
-
Page 95: Driver Installation Under Freebsd
3ware RAID controller in the system. A drive or unit managed by the 3ware RAID controller may be configured to be your system’s boot device. Or, you can use another device as your boot device, such as a disk attached to the motherboard. -
Page 96: Obtaining 3Ware Freebsd Drivers
If you are using FreeBSD 4.8 or 4.9, you will need to install the 3ware FreeBSD driver as described below. The 3ware software CD-ROM that came with the 3ware RAID controller includes compiled and tested drivers for FreeBSD 4.8 and 4.9. To see if a more recent driver is available, please see the 3ware web site. - Page 97 Installing the Driver While Installing FreeBSD on the 3ware RAID Controller To install the driver as a module Boot with the FreeBSD CD-ROM or diskette. In the sysinstall menu, select Configure > Load KLD module. Immediately after the OS starts booting from the CD,...
- Page 98 Add line 'twa_load="YES"' /boot/loader.conf Eject the floppy disk and reboot. The 3ware driver, twa.ko, should be automatically loaded at reboot time. To make the driver part of the kernel Boot with the FreeBSD CD-ROM or diskette. In the sysinstall menu, select Configure > Load KLD module.
- Page 99 Installing the Driver While Installing FreeBSD on the 3ware RAID Controller drive. If you do not insert it immediately, the loader may fail to recognize the floppy drive. At the loader prompt, run ‘lsdev’ to make sure the floppy drive has been discovered.
-
Page 100: Installing The 3Ware Driver On A Freebsd System That Boots From A Different Device
For FreeBSD 5.x, copy the driver into Load the driver kldload twa.ko If units are present, you should see unit information in the system log (usually, 3ware 9000 Series Serial ATA RAID Controller Installation Guide opt_twa.h TWA_FLASH_FIRMWARE opt_twa.h <number from 0 to 10>... - Page 101 Installing the 3ware Driver on a FreeBSD System that Boots from a Differ- Since twa.ko behaves like a SCSI driver, the units that it Note: controls are seen as da0, da1 etc. To make the driver part of the kernel...
-
Page 102: Compiling The Driver As A Loadable Module
Create the directories /sys/modules/twa and /sys/dev/twa mkdir /sys/modules/twa mkdir /sys/dev/twa Copy the 3ware driver source file archive (twa.tgz) to /sys/dev/twa 3ware 9000 Series Serial ATA RAID Controller Installation Guide opt_twa.h TWA_FLASH_FIRMWARE opt_twa.h... - Page 103 Installing the 3ware Driver on a FreeBSD System that Boots from a Differ- Unpack the driver source files. cd /sys/dev/twa tar -xzvf twa.tgz Move the Makefile to /sys/modules/twa mv Makefile /sys/modules/twa Change the directory to /sys/modules/twa/ cd /sys/modules/twa Uncomment or comment the following line in Makefile, based...
- Page 104 Driver Installation Under FreeBSD 3ware 9000 Series Serial ATA RAID Controller Installation Guide...
-
Page 105: Troubleshooting: Problems And Solutions
3ware RAID controllers, refer to: 3ware support page at: http://www.3ware.com/support/ 3ware knowledgebase: http://www.3ware.com/KB/kb.asp 3ware software downloads: http://www.3ware.com/support/download.asp 3ware documentation: http://www.3ware.com/support/userdocs.asp 3ware Compatibility Lists: http://www.3ware.com/support/sys_compatibility.asp Hardware installation Q1: The rail on the 3ware RAID controller doesn't fit in the case. www.3ware.com... - Page 106 Master. Q5: Preventing the 3ware BIOS from installing. If drives are attached and you do not want to install the 3ware BIOS, press Alt-b to bypass the BIOS installation when you start the system. This is useful when booting temporarily from another device, if the operating system is already installed on the 3ware unit.
-
Page 107: Appendix A. Installing The Battery Backup Unit
Battery Backup Unit The Battery Backup Unit (BBU) is an add-on that can be attached to a 3ware 9000 RAID controller to supply power to the memory module from an attached battery pack in the event of a system power loss. -
Page 108: Tools And Equipment Required
Receptacle on the controller matches to connector on the BBU Post hole on the controller mates to post on the BBU a) Clips b) BBU connector Figure 1. Points of connection on the BBU (bottom view) 3ware 9000 Series Serial ATA RAID Controller Installation Guide c) post... - Page 109 Figure 3. Points of connection on the half-height controller (top view) Note: If your 9000 series controller does not have the BBU receptacle, contact technical support for assistance. www.3ware.com c) Hole for post b) BBU receptacle c) Hole for post...
-
Page 110: Installation Instructions
Figure 4. Removing the screws from the PCI bracket For full-height controllers, turn the controller memory side up. 3ware 9000 Series Serial ATA RAID Controller Installation Guide Full-height board: bracket unscrews from bottom side of board. - Page 111 BBU to position it over the card, as shown in Figures 6 and 7. Figure 6. Clips on the BBU match to slots on the controller Figure 7. BBU rotates into position on the controller www.3ware.com Installation Instructions Cable management...
- Page 112 For the full-height board, the bracket sits on top of the board, and screws are inserted from the bottom. For the half-height board, the bracket sits on the bottom of the board, with screws inserted from the top. 3ware 9000 Series Serial ATA RAID Controller Installation Guide...
- Page 113 Figure 9. Battery power connector and power receptacle The controller is now ready to install in your system. Figures 10 and 11 show the BBU fully installed on 3ware controllers. You can check the status of the battery, and run a battery test to determine if the battery needs to be replaced.
- Page 114 Appendix A. Installing the Battery Backup Unit Figure 10. BBU installed on controllers 3ware 9000 Series Serial ATA RAID Controller Installation Guide...
-
Page 115: Replacing The Battery
You can check the current status of the battery, and test it. For details, see instructions in 3ware 9000 Series Serial ATA RAID Controller User Guide. There is a risk of explosion if the battery is Caution: replaced by an incorrect type. - Page 116 You can run the battery test from the BBU page of either 3BM or 3DM 2. For detailed instructions, see the 3ware 9000 Series Serial ATA RAID Controller User Guide. 3ware 9000 Series Serial ATA RAID Controller Installation Guide...
-
Page 117: Appendix B. Compliance And Conformity Statements
Reorient or relocate the receiving antenna. Increase the separation between the equipment and receiver. Connect the equipment into an outlet on a circuit different from that to which the receiver is connected. www.3ware.com... -
Page 118: Microsoft Windows Hardware Quality Lab (Whql)
Since the certification process may lag behind the release of the drivers, please refer to our website at www.3ware.com for current certification information. European Community Conformity... - Page 119 EN 61000-4-4 Electromagnetic compatibility (EMC) Part 4: Testing and measurement techniques Section 4: Electrical fast transient/ burst immunity test EN 60950 Safety of information technology equipment, including electrical business equipment following the provisions of the Electromagnetic Compatibility Directive 89/23/EEC Low Voltage Directive. www.3ware.com European Community Conformity Statement...
-
Page 120: Appendix C. Warranty, Technical Support, And Service
AMCC. AMCC will replace a defective media Software Warranty: purchased with this product for a period of up to 30 days from the date of purchase. 3ware 9000 Series Serial ATA RAID Controller Installation Guide... -
Page 121: Exclusions
Exclusions For detailed terms and conditions, please see the Limited Hardware Warranty and Software License Agreement at our website: http://www.3ware.com/support/rma_form.asp AMCC warranty service is provided by returning the defective product to AMCC. Exclusions This warranty does not cover any damage to this product which results from accident, abuse, misuse, natural or personal disaster, or any unauthorized disassembly, repair or modification. -
Page 122: Obtaining Warranty Protection
To obtain warranty service during the warranty period call AMCC toll free at (800)-945-7273 or (408) 523-1145 (direct) as soon as you have identified a problem with your AMCC 3ware Serial ATA RAID controller unit. You will be issued a return material authorization (RMA) number. -
Page 123: Sales And Ordering Information
For specific answers to questions or to give feedback about the product, visit our Web site at http://www.3ware.com/support and use our convenient e-mail form. AMCC also offers toll-free (800) 945-7273 and (408) 523-1145 direct phone support during normal business hours. - Page 124 Appendix C. Warranty, Technical Support, and Service 3ware 9000 Series Serial ATA RAID Controller Installation Guide...
-
Page 125: Index
BIOS Manager determining RAID level to initializing units RAID concepts and levels units using 3BM distributed parity www.3ware.com drive capacity drive coercion drive installation considerations drive types driver compiling as a loadable module for FreeBSD compiling for Red Hat... - Page 126 SATA connectors multilane cable, with multilane connectors on each end (847) 3ware 9000 Series Serial ATA RAID Controller Installation Guide PCI slots RAID concepts and levels RAID level to use, determining Red Hat Linux, installing driver...
Need help?
Do you have a question about the 9500S-4LP and is the answer not in the manual?
Questions and answers