Table of Contents
Advertisement
Quick Links
Rangee BTX 6000
BASKETBALL 3x3
BTX6015 XTrem
BTX6015
BTX6015 Basket 3x3
MULTISPORT
BTX6025 MS
BTX6125 MS
ICE HOCKEY & HOCKEY
SPORTS
BTX6125 HK
BTX6425 HK
WATER POLO
BTX6120 WP
BTX6220 WP
Installation manual
BODET Time & Sport
1 rue du Général de Gaulle
49340 Trémentines I France
Tel: +33 (0)241 71 72 33
www.bodet-sport.com
Upon receipt, always check the product for damage during shipment. If any is found, you may file a damage claim with the carrier.
1
Advertisement
Table of Contents

Related Manuals for Bodet Rangee BTX 6000


Summary of Contents for Bodet Rangee BTX 6000
- Page 1 Rangee BTX 6000 BASKETBALL 3x3 BTX6015 XTrem BTX6015 BTX6015 Basket 3x3 MULTISPORT BTX6025 MS BTX6125 MS ICE HOCKEY & HOCKEY SPORTS BTX6125 HK BTX6425 HK WATER POLO BTX6120 WP BTX6220 WP Installation manual BODET Time & Sport 1 rue du Général de Gaulle 49340 Trémentines I France...
-
Page 2: Table Of Contents
Table of contents 1. Electrical and mechanical safety standards 2. BTX6015 with POCKET keyboard (ref. 915795) 2.1 Checking the equipment upon reception 2.2 Overall presentation of the product 2.3 Wall mounting 2.4 Mounting on the tripod stand 2.5 Electrical connections 2.6 DIPs settings 2.7 Test mode 2.8 Technician menu... - Page 3 2.4 Mounting on the tripod stand 2.5 Installation of BTX6002 2.5 Electrical connections 2.7 Paramétrage des DIPs 6. BTX6025 MS (ref. 915799) & BTX6125 MS (ref. 915792) 2.1 Checking the equipment upon reception 2.2 Wall mounting 2.3 Electrical connections 2.4 DIPs settings 7.
-
Page 4: Electrical And Mechanical Safety Standards
It is prohibited and dangerous to immerse the scoreboard in to water or clean it with a water jet. Bodet shall not be held responsible for any use not in compliance with these instructions. Any modification to the product shall void the warranty. -
Page 5: Mounting On The Tripod Stand
2.4 Mounting on the tripod stand 1/ Mount the L shaped panel bracket on the stand plate with the 4 supplied screws as in illustration B. 2/ Mount the display panel on the L shaped bracket withe the 4 supplied screws as in illustration A. Flat washer Ø8 Zn Screw H M8 X 20 ZI Nut HU M6 Zn... -
Page 6: Dips Settings
2.6 DIPs settings Panel card Open the panel by unscrewing the two screws on one side of the scoreboard and then slide the glass, taking care not to damage the LEDs on the display. First DIP bank Second DIP bank On the first DIP bank Dips 1 to 4 are used for the factory setting of the panel. -
Page 7: Test Mode
Keyboard card Open the console by unfastening the 4 screws on the back. On SW1 Dips 1 to 3 used to set the number of the panel to control. On SW2 Dips 1 to 3 used to set the operating channel number. On SW3 Dips 1 to 3 used to set the operating installation number. -
Page 8: Technician Menu
2.8 Technician menu Press the + (7) and - (10) keys together for 3 seconds. Choice of parameter with +(7) and - (10) keys. Validate with the OK (6) key. dF : if yes (y), reset the values of the parameters as provided in the application service of the scoreboard. -
Page 9: Mounting On The Tripod Stand
2.4 Mounting on the tripod stand 1/ Mount the L shaped panel bracket on the stand plate with the 4 supplied screws as in illustration B. 2/ Mount the display panel on the L shaped bracket withe the 4 supplied screws as in illustration A. Flat washer Ø8 Zn Screw H M8 X 20 ZI Nut HU M6 Zn... -
Page 10: Dips Settings
2/ Connect the 110/240V AC power plug of the display panel to the wall socket or to output socket of the inverter. BTX6015 AC power supply 2.6 DIPs settings Open the scoreboard by unfastening the two screws on one side of it and then slide out the glass, taking care not to damage the LEDs on the display. -
Page 11: Btx6015 Xtrem (Ref. 915 797)
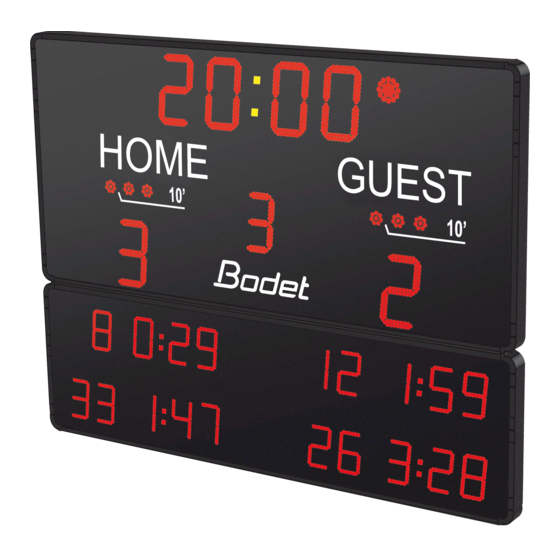
4. BTX6015 XTREM (ref. 915 797) 2.1 Checking the equipment upon reception The kit is made of: BTX6015 scoreboard and the Xtrem keyboard. 2.2 Overall presentation Game clock (Stopwatch/Timer) minutes : seconds or Time of Day clock hours : minutes red digits Score Home and Guest (0 to 99) display: red digits IMPORTANT : The maximum distance for HF communication between the keyboard and the panel is... -
Page 12: Mounting On The Tripod Stand
2.4 Mounting on the tripod stand 1/ Mount the L shaped panel bracket on the stand plate with the 4 supplied screws as in illustration B. 2/ Mount the display panel on the L shaped bracket withe the 4 supplied screws as in illustration A. Flat washer Ø8 Zn Screw H M8 X 20 ZI Nut HU M6 Zn... -
Page 13: Dips Settings
2.6 DIPs settings Standby mode (time display) is active. 1/ Open the XTREM console: - Unfasten the 4 screws on the front panel. - Remove the bottom of the front panel, taking care not to pull on the internal wiring. - Tilt the front panel on one side of the bottom in order to access the console’s DIPs. -
Page 14: Replacing The Xtrem Console By Scoreapp
SW2 SW3 1 2 3 1 2 3 1 2 3 1 2 3 4 5 6 7 8 1 2 3 4 5 6 7 8 N°1 N°2 N°3 N°4 N°5 N°6 N°7 2.7 Replacing the XTREM console by SCOREAPP In this mode, the XTREM console (if present) no longer works. -
Page 15: Test Mode (With Xtrem Keyboard)
1/ Open the BTX6015 scoreboard: - Unfasten the 2 screws on the right or left side (it doesn’t matter which side). -Remove the side. - Slide the glass, taking care not to rub against the LED modules, and then remove the glass. 2/ Unscrew the LED module from the chronometer furthest to the left, in order to access the electronic board. -
Page 16: Btx6015 Basket 3X3 (Ref. 916 072)
if Y the minutes blink, change the values with keys + (1) and - (5). To modify the hours use the keys ◄ (2) ou ► (3), the hours blink. use the keys + (1) and - (5) to change the values. Validalite and exit with the OK (4) key. -
Page 17: Wall Mounting Of The Btx6015
Shot clock (count down from 12 to 0 second): red digits (20cm) 2.3 Wall mounting of the BTX6015 Install the panel to the wall with 4 screws Ø6mm (not supplied) and 4 matching wall anchors using the 4 teardrop shaped holes. 2.4 Mounting on the tripod stand 1/ Mount the L shaped panel bracket on the stand plate with the 4 supplied screws as in illustration B. - Page 18 2.5 Installation of BTX6002 Screw the two brackets on each side of the display and install it on the floor (it can be attached using the 4 holes provided on the bracket). 4 trous pour xation au sol 4 trous pour xation au sol 2.5 Electrical connections Connect the 110/240V AC power plug of the display panel to the wall socket.
- Page 19 2.7 Paramétrage des DIPs BTX6015 panel card Open the scoreboard by unfastening the two screws on one side of it and then slide out the glass, taking care not to damage the LEDs on the display. First DIP bank Second DIP bank On the first DIP bank Dips 1 to 4 are used for the factory setting of the panel.
- Page 20 MULTISPORTS 6. BTX6025 MS (ref. 915799) & BTX6125 MS (ref. 915792) 2.1 Checking the equipment upon reception The BTX6125MS scoreboard is a combination of the BTX6025 + BTX6102 scoreboard. The BTX6025MS scoreboard is a single unit.. The Scorepad keyboard is not included in the commercial reference of the scoreboard. This has this own reference.
- Page 21 Brackets extented Bracket retracted BTX6025MS BTX6125MS 2.3 Electrical connections BTX6025MS BTX6125MS BTX6102 Most of the cabling for the BTX6125HK is carried out at the factory. This guide only covers the cabling required on installation. All cables to be attached are located around the sides of the BT6102E: 1 power supply with a green connector (240V) and 1 communications cable with a green connector (DATA).
- Page 22 (B). 4/ Connect the 240V + earth power supply to the BTX6025MS (E) power supply unit (the power cable (3x1.5²) is not supplied by BODET).. BTX6025MS 1/ Connect the 240V + earth power supply to the BTX6025HK (E) power supply unit (the power cable (3x1,5²) is not supplied by BODET)..
- Page 23 2nd dip bank Dips 1 to 3 are used to set the installation number. Dips 4 to 8 are unused N° installation Dip 1 Dip 2 Dip 3 off ↓ on ↑ on ↑ on ↑ off ↓ on ↑ off ↓...
- Page 24 stops for the mounting bracket, to prevent it coming off the rail during maintenance. 3/ Position the scoreboard alongside the mounting rail (B) then slide onto the rails (C). Nota : Feed the power cable behind before fixing the scoreboard to the wall View from above Brackets extented Brackets retracted...
- Page 25 3/ Connect a 240V power supply cable using the green connector on the BTX6025HK to the connector on the BTX6102HK (B). 4/ Connect the 240V + earth mains cable to the power supply of the BTX6025HK (E) (power cable (3x1.5²) not supplied by BODET). 2.4 DIPs settings Card main panel...
- Page 26 2nd dip bank Dips 1 to 3 are used to set the installation number. Dips 4 to 8 are unused Dip 1 Dip 2 Dip 3 Installation number off ↓ on ↑ on ↑ on ↑ off ↓ on ↑ off ↓...
- Page 27 Maintenance position BT6104 Left BT6104 BT6025 Right BT6025 5/ When the 3 panels are in place (C) bend the tongue (D) back straight in order to lock the panels into the grooves. The panels cannot get out of the rails.
- Page 28 (B) of the BTX6425 HK. Do the same with the power cable of the right panel. 4/ Connect the main 240V + earth power cablr to the terminal block (C) of the BTX6425 HK (BODET does not supply this cable (3x1,5²)).
- Page 29 Main panel card: First DIP bank Second DIP bank On the first DIP bank Dips 1 to 4 are used for the factory setting of the panel. Out of the factory the dips are set as follow: Dip 1 Dip 2 Dip 3 Dip4 on ↑...
- Page 30 Alpha card configuration Button «Sel»: used to get in the technician menu (press for 3 sec.) and to go to the next menu. Connector: +V (5V) / Ground / RT- Button «+»: used to get in the current technician menu or to change the value of the parameter. Led «RUN»...
- Page 31 1/ Open all the access doors. 2/Connect the 240V + earth power cable to the terminal block of the BTX6120 WP(A). (the power cable (3x1,5²) is not supplied by BODET). 3/ The Dip switches are configured at the factory. Check that they are correctly set.
- Page 32 2.4 DIPs settings Main panel card: First DIP bank Second DIP bank On the first DIP bank Dips 1 to 4 are used for the factory setting of the panel. Out of the factory the dips are set as follow: Dip 1 Dip 2 Dip 3...
- Page 33 10. BTX6220 WP (ref. 915791) 2.1 Checking the equipment upon reception The kit is made of the BTX6220 WP scoreboard The Scorepad keyboard is not included in the commercial reference of the scoreboard. This has this own reference 2.2 Wall mounting Mount the casing on 2 posts using the 4 clamps and the threaded rods (D).
- Page 34 1/ Open all the access doors. Connect the 240V + earth power cable to the terminal block of the BTX6220 WP(A). (the power cable (3x1,5²) is not supplied by BODET). 2.4 DIPs settings Main panel card: First DIP bank...
- Page 35 2nd dip bank Dips 1 to 3 are used to set the installation number. Dip 7 to set the scoreboard as a BTX6000 range scoreboard. N° installation Dip 1 Dip 2 Dip 3 Dip 4 Dip 5 Dip 6 Dip 7 Dip 8 off ↓...
- Page 36 modules (if present) are initialized.
Need help?
Do you have a question about the Rangee BTX 6000 and is the answer not in the manual?
Questions and answers