
Related Manuals for Subaru 1999 Forester


Summary of Contents for Subaru 1999 Forester
- Page 1 1 9 9 9 O W N E R ’ S M A N U A L Wear Seat Belts at All Times for Your Own Safety.
- Page 2 Foreword Congratulations on choosing a SUBARU vehicle. This Owner’s Manual has all the information necessary to keep your SUBARU in excellent condition and to properly maintain the emission control system for minimizing emission pollutants. We urge you to read this manual carefully so that you may understand your vehicle and its operation.
- Page 3 Warranties J Warranties for U.S.A. All SUBARU vehicles distributed by Subaru of America, Inc. and sold at retail by an authorized SUBARU dealer in the continental U.S., Alaska and Hawaii come with the following warranties: D SUBARU Limited Warranty D Emission Control Systems Warranty...
-
Page 4: Instruments And Controls
This chapter informs you how to operate interior equipment. Chapter 7: Starting and operating This chapter informs you how to start and operate your SUBARU. Chapter 8: In case of emergency This chapter informs you what to do if you have a problem while driving, such as a flat tire or engine overheating. -
Page 5: Specifications
Please read these safety warnings as well as all other portions of this manual carefully in order to gain a better understanding of how to use your SUBARU vehicle safely. WARNING A WARNING indicates a situation in which serious injury or death could result if the warning is ignored. -
Page 6: Safety Precautions When Driving
J Safety symbol You will find a circle with a slash through it in this manual. This symbol means “Do not”, “Do not do this”, or “Do not let this happen”. Safety precautions when driving SEAT BELT AND SRS AIRBAG WARNING D All persons in the vehicle should fasten their seat belts BE- FORE the vehicle starts to move. - Page 7 AIRBAG needs enough space for deployment, the driver should always sit upright and well back in the seat as far from the steer- ing wheel as practical while still maintaining full vehicle control and the front passenger should move the seat as far back as pos- sible and sit upright and well back in the seat.
- Page 8 THE CHILD BY PLACING THE CHILD’S HEAD TOO CLOSE TO THE SRS AIRBAG. D Always use the child safety locks whenever a child rides in the rear seat. Serious injury could result if a child accidentally opened the door and fell out. Refer to the Door Lock section in chapter 1.
- Page 9 D If at any time you suspect that exhaust fumes are entering the vehicle, have the problem checked and corrected as soon as pos- sible. If you must drive under these conditions, drive only with all windows fully open. D Keep the trunk lid or rear gate closed while driving to prevent exhaust gas from entering the vehicle.
- Page 10 If you are taking any drugs, check with your doctor or pharmacist or read the literature that accompanies the medication to determine if the drug you are taking can impair your driving ability. Do not drive after taking any medications that can make you drowsy or otherwise affect your abil- ity to safely operate a motor vehicle.
- Page 11 MODIFICATION OF YOUR VEHICLE CAUTION Your vehicle should not be modified. Modification could affect its performance, safety or durability, and may even violate govern- mental regulations. In addition, damage or performance problems resulting from modification may not be covered under warranties. DRIVING WITH PETS Unrestrained pets can interfere with your driving and distract your atten- tion from driving.
-
Page 12: Table Of Contents
Table of contents Doors and locks Seat, seatbelt and SRS AIRBAG Instruments and controls Climate control Audio Interior equipment Starting and operating In case of emergency Appearance care Maintenance and service Specifications Consumer information and Reporting safety defects Index – CONTINUED –... - Page 13 ABS (Anti-Lock Brake system) ABS warning light ..............Accessary power socket AIRBAG .
- Page 14 Brake (Tips for using brakes) Brake booster (Maintenance) Brake fluid (Maintenance) Brake system warning light Brake pedal (Maintenance) Brake pad and lining (Maintenance) Break-in (New vehicle break-in driving) Bulb chart ................Bulb replacement .
- Page 15 Clock function (built in cassette stereo) Clutch fluid (Maintenance) Clutch pedal (Manual transmission) (Maintenance) Coin tray ................Combination meter .
- Page 16 Emission test (State emission testing) Engine compartment ............Engine coolant (Maintenance) Engine exhaust gas (Carbon monoxide) Engine hood...
- Page 17 Fuel filler cap To open and close the fuel filler door Refueling ............. . . Fuel gauge .
- Page 18 Hazard warning flasher Heater (Heating and air conditioning) Heater (Seat heater) ............. Heater (Mirror heater = Outside mirror defogger) Heating and air conditioning Air conditioner button (if equipped)
- Page 19 START ..............Illumination brightness control I/M test (Inspection Maintenance test ) (State emission testing) Interior (Cleaning the interior)
- Page 20 Luggage floor storage tray Loading your vehicle ............Vehicle capacity weight GVWR and GAWR Lumbar support...
- Page 21 Odometer ................Oil (Engine oil) .
- Page 22 Rear combination light (Bulb replacement) Rear differential gear oil (AWD vehicles) (Maintenance) Rear gate ................Rear seats .
- Page 23 Seat heater ............... . . Seatback (Reclining the seatback) Seat belts —...
- Page 24 Vehicle with driver’s and front passenger’s SRS AIRBAGs and lap/shoulder restraints SRS AIRBAG warning light Starting the engine ............. . . Automatic transmission vehicles During cold weather below –4 F (–20 C) Flooded engine...
- Page 25 Tire rotation (Tires and wheels) Tires and wheels ..............Inspection and rotation Tire size (Specifications) Tool (Maintenance tools)
- Page 26 Temperature A, B, C Warning and indicator lights ABS warning light (for vehicles with ABS) AT OIL TEMPerature warning light (for AT vehicles) Brake system warning light CHECK ENGINE warning light/Malfunction indicator lamp Checking bulbs Door open warning lights Front-wheel drive warning light (for AT vehicles) High beam indicator Low fuel warning light (Fuel gauge) Oil pressure warning light...
- Page 27 Doors and locks Keys ................Master, submaster and valet key Key number .
-
Page 28: Master, Submaster And Valet Key
Keys Master key Submaster key J Master, submaster and valet key Three types of keys are provided for your vehicle. Master key, submaster key and valet key. The master key and submaster key fit all locks on your vehicle. D Ignition switch D Doors D Rear gate D Glove compartment... -
Page 29: Doors And Locks
Door locks J Locking and unlocking from the outside B For Vehicles with power door locking switches Unlock To lock the door from the outside with the key, turn the key toward the rear. To unlock the door, turn the key toward the front. Pull the outside door handle to open an unlocked door. - Page 30 time. Always make sure that all doors and the rear gate are locked before leaving your vehicle. NOTE Make sure that you do not leave the key inside the vehicle before locking the doors from the outside without the key. B For vehicles without power door locking switches Unlock To lock the door from the outside with the key, turn the key toward the...
-
Page 31: Locking And Unlocking From The Inside
To lock the rear door from the outside without the key, press the end of the lock lever down on the door and then close the door. Always make sure that all doors and the rear gate are locked before leaving your vehicle. -
Page 32: Power Door Locking Switches (If Equipped)
J Power door locking switches (if equipped) Front passenger’s switch Driver’s switch Unlock Unlock Lock Lock HS0016 All doors and the rear gate can be locked and unlocked by the power door locking switches at the driver’s side and the front passenger’s side doors. -
Page 33: Child Safety Locks
J Child safety locks Unlock Lock WARNING Always use the child safety lock whenever a child rides in the rear seat. Serious injury could result if a child accidentally opened the door and fell out. Each rear door has a child safety lock that prevents the doors from being opened even if the inside door handle is pulled. -
Page 34: Door Open Warning Lights
Door open warning lights The door open warning light comes on if any door is not fully closed. Always make sure this light is out before starting to drive. Keyless entry system (if equipped) CAUTION D Do not expose the transmitter to severe shocks, such as those experienced as a result of dropping or throwing. -
Page 35: System Operation
The keyless entry system has following functions. D Locking and unlocking the doors and rear gate without a key D Arming and disarming the security system (if your vehicle is equipped with an optional security system). See the next section “Security system (if equipped)”... -
Page 36: Programming Button Location
3. The instrument panel lights will flash when the parking lights flash. 4. Your SUBARU Keyless Entry System is equipped with two remote transmitters. J Programming button location The Programming Button is located under the driver’s side dash... -
Page 37: Adding Or Deleting Remote Transmitters
J Adding or deleting remote transmitters Up to four (4) transmitters can be programmed to your keyless entry sys- tem. NOTE Make sure no one else is operating another keyless entry or security sys- tem within range of your vehicle when you are programming remote transmitters. -
Page 38: How The Security System Protects Your Vehicle
a decrease in range, or the distance from your vehicle that the remote transmitter will operate. B To change the remote transmitter battery CAUTION Do not let dust, oil or water get on or in the transmitter when replacing the battery. 1. - Page 39 The vehicle starter is automatically disabled one minute after the igni- tion is turned off, even if the system has not been armed with your remote transmitter. (This option may be activated by your SUBARU dealer for an additional charge.)
-
Page 40: Security System Components
J Security system components B The remote Transmitter The remote transmitter controls the features and options of the secu- rity system. HS1000CB The security system can be programmed to operate with one to four remote transmitters. Each transmitter is powered by an internal 12-volt alkaline battery. - Page 41 Doors and locks LED status Off: System is disarmed. Double-Flash: System is in valet mode. Steady Flash: System is armed. Fast Flash: System has been triggered. On: System is in pre-arm state (and will arm when all doors are closed). B The valet button (built into the status indicator) The Valet Button is used to engage Valet Mode (see Valet Mode Sec- tion).
-
Page 42: Security System Operation
J Security system operation IMPORTANT Security System and Keyless Entry Features Do Not Operate when the Vehicle Ignition is on. B Arming the system To arm the system, close all doors, then press the “LOCK” button. The siren will “chirp” twice and the parking lights will flash twice, indicat- ing the system is armed. - Page 43 Doors and locks B Disarming the system HS1000EB To disarm the system, press and release the “UNLOCK” button. The siren will chirp and parking lights will flash once. The driver’s door will unlock at this time, and the vehicle interior (dome) light will turn on for 60 seconds, or until the vehicle is started.
- Page 44 B Personal protection alarm (Panic) Pressing both buttons together on the remote transmitter activates the Panic feature, sounding the siren and flashing the parking lights. Panic is designed to bring attention to the vehicle and surrounding area. Press either button on the transmitter to turn off the Panic alarm. B Disarming the security system in the event of a lost or broken transmitter If your remote transmitter fails to operate, the system can be dis-...
- Page 45 Doors and locks 3. Press the Emergency Override/Programming button. The system will disarm. B Valet mode HS1004CB Valet Mode prevents the security system from arming, yet allows all keyless entry and convenience features to function normally. The valet button is built into the status indicator, located on the dash to the left of the steering wheel.
- Page 46 Passive starter interrupt If the Passive Starter Interrupt option has been activated by your SUBARU dealer, the starter will be automatically disabled one minute after you turn off the vehicle ignition, whether or not you arm the secu- rity system with your remote transmitter.
-
Page 47: Trouble Shooting Guide
your remote transmitter, or turn the vehicle ignition to the “ON” position and press the Emergency Override/programming button in and release. D If your remote transmitter is lost or broken and the Passive Starter Interrupt has automatically engaged, enter the vehicle, turn the igni- tion to the “ON”... -
Page 48: Power Windows Switch Cluster (Driver's Side)
Power windows WARNING D When operating power windows, be extremely careful to pre- vent anyone’s fingers, arms or head from being caught in the window. D Always lock the passengers’ windows using the lock switch when children are riding in the vehicle. D Before leaving the vehicle, always remove the key from the ignition switch for safety if a child remains in the vehicle. - Page 49 Lock Unlock Close Open Automatically open All door windows can be controlled by the power window switch cluster at the driver side door. B To open or close the driver’s window AUTO switch: This switch has two functions. Push the switch down until it clicks and release it, and the window will fully open.
-
Page 50: Rear Passenger's Switches
J Front passenger’s switch Close Open To open the window, push the switch down and hold it until the window reaches the desired position. To close the window, pull the switch up and hold it until the window reaches the desired position. When the lock switch on the power window switch cluster, located on the driver’s side door, is in the “LOCK”... -
Page 51: To Open And Close The Rear Gate
When the lock switch on the power window switch cluster, located on the driver’s side door, is in the “LOCK” position, the rear passengers’ win- dows cannot be operated with the rear passengers’ switches. Rear gate WARNING To prevent dangerous exhaust gas from entering the vehicle, al- ways keep the rear gate closed while driving. -
Page 52: To Open And Close The Fuel Filler Door
Never add any cleaning agents to the fuel tank. The addition of a cleaning agent may cause damage to the fuel system. For choosing the right fuel for your SUBARU, refer to the “Fuel Require- ments” section (located in chapter 7). -
Page 53: Fuel Filler Cap
D Make sure that the cap is tightened until it clicks to prevent fuel spillage in the event of an accident. D Always use a genuine SUBARU fuel filler cap. If you use the wrong cap, it may not fit or have proper venting, and your fuel tank and emission control system might be damaged. -
Page 54: Engine Hood
Engine hood WARNING Always check that the hood is properly locked before you start driving. If it is not, it might fly open while the vehicle is moving, blocking your view which may cause an accident and serious bodily injury. To open the hood: 1. -
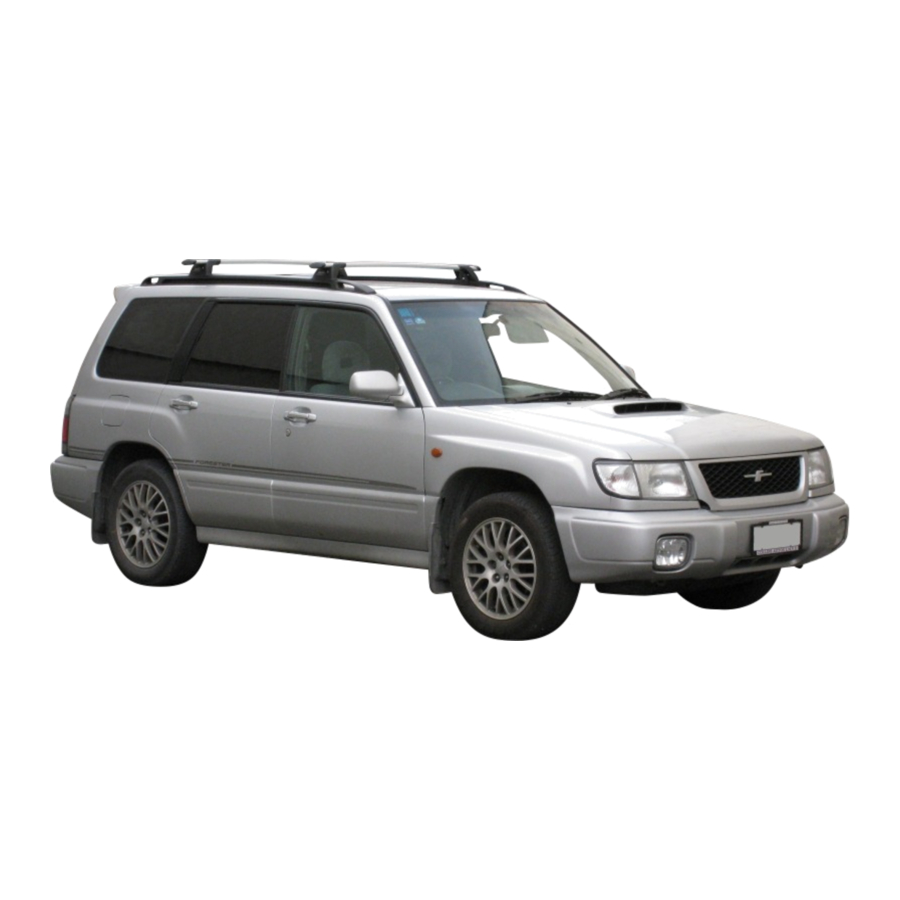
Page 55: Roof Rail And Crossbar (If Equipped)
To close the hood: 1. Lift the hood slightly and remove the hood prop from the slot in the hood and return the prop to its retainer. 2. Lower the hood until it approaches about 6 in. (15 cm) from the closed position and let it drop. -
Page 56: Installing Carrying Attachments On The Cross Bars
Luggage can be carried on the roof after securing the roof cross bar kit to the roof rail. When installing the roof cross bar kit on the roof rail, follow the manufacturer’s instructions. When you carry cargo on the roof using the roof cross bar kit, never exceed maximum load limit explained below. -
Page 57: Removal And Installation Of The Crossbars
J Removal and installation of the crossbars CAUTION Do not carry cargo on the roof when the crossbars are removed. Luggage on the roof will be thrown forward or backward in sud- den stops or rapid accelerations, resulting in a dangerous road hazard. - Page 58 1. Before placing the crossbar on the roof rails, make sure that the T-30 torx head screw is fully loosened from each end support. 2. Slide the inner clamp on the end support outward as far as pos- sible. 3. With the front direction arrow label on the top right side of the crossbar pointing toward the front of the vehicle, carefully place the crossbar across the top of the vehicle so that the crossbar end sup- ports rest on the top of the roof rails approximately 6 inches (150 mm)
- Page 59 Install the rear crossbar in the same manner as the front crossbar. NOTE The rear crossbar should be positioned 6 inches (150 mm) forward of the rear radius in the roof rail. NOTE Before each use of the roof rack, make sure the four T-30 crossbar clamp screws have been checked, and re-tightened, if necessary, to 35 in.
- Page 60 Seat, seat belt and SRS AIRBAG Front seats ..............Fore and aft adjustment Reclining the seatback Seat cushion angle and height adjustment (driver’s seat)
-
Page 61: Front Seats
Front seats WARNING D Never adjust the seat while driving to avoid the possibility of loss of vehicle control and of personal injury. D Never drive the vehicle with the head restraints removed be- cause they are designed to reduce the risk of serious neck injury in the event that the vehicle is struck from the rear. -
Page 62: Seat, Seatbelt And Srs Airbag
adults, their risk of being injured from deployment is greater. For that reason, we strongly recommend that ALL children (includ- ing those in child seats and those that have outgrown child re- straint devices) sit in the REAR seat properly restrained at all times in a child restraint device or in a seat belt, whichever is ap- propriate for the child’s age, height and weight. -
Page 63: Fore And Aft Adjustment
Put children in the rearseat properly restrained at all times. CAUTION Metallic parts of the seat belt can become very hot in a vehicle that has been closed up in sunny weather; they could burn an oc- cupant. Do not touch such hot parts. J Fore and aft adjustment Pull the lever upward and slide the seat to the desired position. -
Page 64: Reclining The Seatback
J Reclining the seatback Pull the reclining lever up and adjust the seatback to the desired posi- tion. Then release the lever and make sure the seatback is securely locked into place. J Seat cushion angle and height adjustment (driver’s seat) Raise Lower For rear edge... -
Page 65: Lumbar Support
OM-H2735 The best position for the head restraint is just above or level with the top of the ears. J Lumbar support HS0032 Pull the lever forward or backward. Pulling the lever forward will increase the amount of support for your lower back. -
Page 66: Seat Heater
J Seat heater (if equipped) CAUTION D Do not use the seat heater when the engine is not running. The battery could run down if the heater is operated while the engine is not running. D Do not put anything on the seat which insulates against heat, such as a blanket, cushion, or similar items. -
Page 67: Rear Seats
Rear seats WARNING D Never drive the vehicle with the head rests removed because they are designed to reduce the risk of serious neck injury in the event that the vehicle is struck from the rear. D Seat belts provide maximum restraint when the occupant sits well back and upright in the seat. -
Page 68: Reclining The Seatback
Adjust seatback to upright position. Sit well back and upright. CAUTION Metallic parts of the seat belt can become very hot in a vehicle that has been closed up in sunny weather; they could burn an oc- cupant. Do not touch such hot parts. J Reclining the seat back Pull the release handle up and adjust the seatback to the desired posi- tion. -
Page 69: Folding Down The Seatback
J Folding down the seatback Unlock the seatback by pulling the release handle and fold it down. Then push the seatback downward until it locks into place and make sure that it is securely locked. To return the seatback to its original position, unlock the seatback by pulling the release handle and raise it until it locks into place and make sure that it is securely locked. - Page 70 Seat, seat belt and SRS AIRBAG OM-H2735 The best position for the head rest is just above or level with the top of the ears. B Back and forth adjustment (if equipped) HS0377 To move the head rest forward, pull the top of the head rest forward. To move the head rest rearward, push the top of the head rest rear- ward.
-
Page 71: 3-Point Type Seat Belts (Combination Lap/Shoulder Belts)
3-point type seat belts (Combination lap/shoulder belts) WARNING D Never use a belt that is twisted or reversed. In an accident, this can increase the risk or severity of injury. D Never place the shoulder belt under the arm or behind the back. - Page 72 For that reason, we strongly recommend that ALL children (in- cluding those in child seats and those that have outgrown child restraint devices) sit in the REAR seat properly restrained at all times in a child restraint device or in a seat belt, whichever is ap- propriate for the child’s age, height and weight.
-
Page 73: Seat Belt Warning Light And Chime
J Seat belt warning light and chime HS0039 Your vehicle is equipped with a seat belt warning device at the driver’s seat. This device causes the seat belt warning light on the instrument panel to light up for about six seconds when the ignition switch is turned to the “ON”... -
Page 74: Fastening The Seat Belt
J Fastening the seat belt CAUTION Metallic parts of the seat belt can become very hot in a vehicle that has been closed up in sunny weather; they could burn an oc- cupant. Do not touch such hot parts. 1. Adjust the seat position: Driver’s seat: Move the seat back as far from the steering wheel as practical while still maintaining full vehicle control and adjust the seat- back to the upright position. -
Page 75: Unfastening The Belt
Refer to Warning and Indicator Lights section (chapter 3) for more details. 5. To make the lap part tight, pull up on the shoulder belt. And place the lap belt as low as possible on your hips, not on your waist. J Unfastening the belt Front Push the button on the buckle. - Page 76 Seat, seat belt and SRS AIRBAG Push HS0040 The shoulder belt anchor height should be adjusted to the position best for you. To lower the anchor height, push the release button and slide down. To raise the anchor height, slide it up. Pull down on the anchor to make sure that it is locked in place.
-
Page 77: 2-Point Type Seat Belts (Lap Only Belts)
2-point type seat belts (lap only belts) WARNING D Never use a belt that is twisted or reversed. In an accident, this can increase the risk or severity of injury. D Keep the lap belt as low as possible on your hips. In a colli- sion, this spreads the force of the lap belt over stronger hip bones instead of across the weaker abdomen. -
Page 78: Fastening The Seat Belt
CAUTION Metallic parts of the seat belt can become very hot in a vehicle that has been closed up in sunny weather; they could burn an oc- cupant. Do not touch such hot parts. The 2-point type seat belt has a manual adjustment device. J Fastening the seat belt 1. -
Page 79: Unfastening The Belt
J Unfastening the belt Push OM-H0050 Push the button on the buckle. NOTE When the seat belt is not in use, store the seat belt in the seat belt pock- et to prevent it from being damaged. Seat belt pocket HS0041 2-20... -
Page 80: Seat Belt Safety Tips
Seat belt safety tips WARNING D All persons in the vehicle should fasten their seat belts BE- FORE the vehicle starts to move. Otherwise, the possibility of se- rious injury becomes greater in the event of a sudden stop or ac- cident. -
Page 81: Expectant Mothers
J Expectant mothers Expectant mothers also need to use the seat belts. They should consult their doctor for specific recommendations. The lap belt should be worn securely and as low as possible over the hips, not over the waist. J Maintenance CAUTION D Keep the belts free of polishes, oils, chemicals and particularly battery acid. -
Page 82: Child Restraint Systems
Seat, seat belt and SRS AIRBAG Child restraint systems WARNING D Never let a passenger hold a child on his or her lap while the vehicle is moving. The passenger cannot protect the child from injury in a collision, because the child will be caught between the passenger and objects inside the vehicle. - Page 83 Secure child restraint devices in the REAR seats at all times. Never allow a child to stand up, or to kneel on the front passenger’s seat or any other seat. WARNING D Child restraint systems and seat belts can become hot in a ve- hicle that has been closed up in sunny weather;...
-
Page 84: Installing Child Restraint Systems In The 2-Point Type Seat Belt
Seat, seat belt and SRS AIRBAG the child’s age and size. All child restraint systems are designed to be se- cured in vehicle seats by lap belts or the lap portion of a lap/shoulder belt. Children could be endangered in an accident if their child restraints are not properly secured in the vehicle. -
Page 85: Position (Rear Center Seating Position)
tightening the seatbelt. If the child restraint system requires a top strap, latch the hook onto the top strap anchor and tighten the top strap. J Installing child restraint systems in the 3-point type seat belt position NOTE When the child restraint system is no longer in use, remove it and restore the ELR function of the retractor. -
Page 86: Top Strap Anchors
then tightening the seat belt. 8. Pull at the shoulder portion of the belt to confirm that it cannot be pulled out (ALR properly functioning). If the child restraint system requires a top strap, first remove the head rest and then latch the hook onto the top strap anchor and tighten the top strap. J Top strap anchors CAUTION D Always use a genuine top strap anchor. - Page 87 Vehicles built for sale in U.S. do not include an anchor kit in the glove compartment. However, the anchor kit and installation instructions are available from your SUBARU dealer. You can also follow the installa- tion instructions for Canada models.
-
Page 88: Srs Airbag (Supplemental Restraint System Airbag)
*SRS AIRBAG (Supplemental Restraint System Airbag) *SRS: This stands for supplemental restraint system. This name is used because the AIRBAG system supplements the vehicle’s seat belts. J Vehicle with driver’s and front passenger’s SRS AIRBAGs and lap/shoulder restraints WARNING D To obtain maximum protection in the event of an accident, the driver and all passengers in the vehicle should always wear seat belts when the vehicle is moving. - Page 89 vehicle control and the front passenger should move the seat as far back as possible and sit upright and well back in the seat. D Do not place any objects over the SRS AIRBAG cover or between you and the SRS AIRBAG. If the SRS AIRBAG deploys, those objects could interfere with its proper operation and could be propelled inside the car and cause injury.
- Page 90 For instructions and precautions concerning the child restraint system, see the Child Restraint System section in this chapter. D NEVER INSTALL A REARWARD FACING CHILD SEAT IN THE FRONT SEAT. DOING SO RISKS SERIOUS INJURY OR DEATH TO THE CHILD BY PLACING THE CHILD’S HEAD TOO CLOSE TO THE SRS AIRBAG.
- Page 91 The SRS AIRBAG is designed to function on a one-time-only basis. In the event that the SRS AIRBAG is deployed, replacement of the system should be performed only by an authorized SUBARU dealer. When the components of the SRS AIRBAG are replaced, use only genuine SUBARU parts.
-
Page 92: Srs Airbag System Operation
NOTE When you sell your vehicle, we urge you to explain to the buyer that it is equipped with SRS AIRBAGs by alerting him or her to the appli- cable section in this owner’s manual. J SRS AIRBAG System operation CAUTION D When the SRS AIRBAG deploys, some smoke will be released. - Page 93 HS2000BB HS2001BB 2-34...
- Page 94 Seat, seat belt and SRS AIRBAG The SRS AIRBAG can function only when the ignition switch is in the “ON” position. If the impact sensors in the airbag control module and the front sub sen- sors in both front fenders detect a certain predetermined amount of force during a frontal collision, the control module sends signals to the airbag modules instructing them to inflate the SRS AIRBAGs.
- Page 95 B Examples of the types of accidents in which the SRS AIRBAG is unlikely to deploy. There are many types of collisions which might not necessarily require SRS AIRBAG deployment. If the vehicle strikes an object, such as a telephone pole or sign pole, or if it slides under a truck’s load bed, or if it sustains an oblique offset frontal impact, the SRS AIRBAG may not deploy depending on the level of accident forces involved.
-
Page 96: System Monitors
D All related wiring In the event of a malfunction indicated by any of following, the vehicle should be taken promptly to your nearest SUBARU dealer to have the system checked. Unless checked and repaired, the SRS AIRBAG will not function reliably: D Flashing or flickering of the warning light. -
Page 97: System Servicing
SUBARU dealer perform the work. To ensure its long-term reliability, the SRS AIRBAG must be inspected by a SUBARU dealer ten years after the date of manufacture, which is shown on the certification plate attached to the driver’s jamb. NOTE... -
Page 98: Precautions Against Vehicle Modification
J Precautions against vehicle modification WARNING D Do not put any objects over the steering wheel pad and dash- board. If the SRS AIRBAG deploys, those objects could interfere with its proper operation and could be propelled inside the vehi- cle and cause injury. - Page 99 D Installation of a tire of different size and construction from the original tire listed on the tire placard attached to the door jamb. Always consult your SUBARU dealer if you want to install any accessory parts to your vehicle.
- Page 100 Instruments and controls Instrument panel overview Combination meter overview Gauges ............... Speedometer .
-
Page 101: Instrument Panel Overview
Instrument panel overview Sun visor/Vanity mirror (page 6-3) Combination meter (page 3-4) Hazard warning flasher switch (page 3-14) Rear window defogger switch (page 3-25)/Outside mirror defogger switch (page 3-28) Spot light (page 6-25) Clock (page 6-9) Inside mirror (page 3-26) Cup holder (page 6-7) Heater or air conditioner control (page 4-3) -
Page 102: Instruments And Controls
Parking light switch (page 3-18) Hazard warning flasher switch (page 3-14) Rear window defogger switch (page 3-25)/Outside mirror defogger switch (page 3-28) Rear window wiper and washer switch (page 3-22) Windshield washer (page 3-21) Mist (page 3-21) Windshield wiper (page 3-21) Wiper control (page 3-19) Light control (page 3-14) Illumination brightness control... -
Page 103: Combination Meter Overview
Combination meter overview ABS warning light (page 3-12) Speedometer (page 3-5) Turn signal indicator light (page3-13) Tachometer (page 3-6) AT oil temperature warning light (page 3-13) High beam indicator light (page 3-13) SRS AIRBAG warning light (page 3-8) Door opening warning light (page 3-13) Temperature gauge (page 3-7) -
Page 104: Odometer
Instruments and controls Gauges HS0050 J Speedometer The speedometer shows the vehicle speed. J Odometer/Trip meter Tripmeter Odometer HS0051 This meter displays the odometer and trip meter when the ignition switch is in the “ON” position. To change the mode indication, briefly push the knob. The odometer shows the total distance that the vehicle has been driven. -
Page 105: Tachometer
pushing the knob and keep the knob pushed for more than 2 seconds. NOTE If the connection between the combination meter and battery is broken for any reason such as vehicle maintenance or fuse replacement, the data recorded on the trip meter will be lost. J Tachometer CAUTION Do not operate the engine with the pointer of the tachometer in... -
Page 106: Low Fuel Warning Light
The gauge may move slightly during braking, turning or acceleration due to fuel movement in the tank. B Low fuel warning light The low fuel warning light comes on when the tank is nearly empty (about 2.3 U.S. gal., 9.0 liters, 1.9 Imp. gal.). It only operates when the ignition switch is in the “ON”... -
Page 107: Seat Belt Warning Light And Chime
If any lights fail to come on, it indicates a burned-out bulb or a malfunc- tion of the corresponding system. Consult your authorized SUBARU dealer for repair. J Seat belt warning light and chime When the ignition switch is turned to the “ON” position, the seat belt warning light will come on and the reminder chime will sound to remind driver to fasten the seat belt. -
Page 108: Brake System Warning Light
If the oil level is low, add oil immediately. If the engine oil is at the proper level but the light remains on, contact your nearest SUBARU dealer immediately. -
Page 109: Check Engine Warning Light/Malfunction Indicator Lamp
“ON”), it could be an indication of leaking of brake fluid or worn brake pads. Have your vehicle checked by a SUBARU dealer immediately. J CHECK ENGINE warning light/... - Page 110 Tightening the cap will not make the CHECK ENGINE warning light turn off immediately. It may take several driving trips. If the light does not go out, take your vehicle to your authorized SUBARU dealer immediately. B If the light is blinking: If the light is blinking while driving, an engine misfire condition has been detected which may damage the emission control system.
-
Page 111: Abs Warning Light (For Vehicles With Abs)
When the warning light is on, the ABS function shuts down; however, the conventional brake system continues to operate normally. If this occurs, have the ABS system repaired at the first available opportunity by your SUBARU dealer. NOTE If the warning light behavior is as shown below, the ABS system may be considered normal. -
Page 112: At Oil Temperature Warning Light (For At Vehicles)
If the light flashes after the engine starts, it may indicate that the auto- matic transmission control system is not working properly. Contact your nearest SUBARU dealer for service immediately. J Door open warning lights The door open warning light comes on if any door or rear gate is not fully closed. -
Page 113: Hazard Warning Flasher
Hazard warning flasher The hazard warning flasher is used to warn other drivers when you have to park your vehicle under emergency conditions. The hazard warning flasher works with the ignition switch in any position. When you have to park your vehicle under emergency conditions, pull off the roads safely and park away from the traffic if it is possible. -
Page 114: Turn Signal Lever
The light switch operates only when the ignition switch is in the “ON” position. B Headlights To turn on the headlights, turn the knob on the end of the turn signal lever. first position Position lights, instrument panel illumination, tail lights and license plate light are on. - Page 115 To flash the headlights, pull the lever toward you and then release it. The high beam will stay on for as long as you hold the lever. The headlight flasher works even though the lighting switch is in the “OFF” position.
-
Page 116: Illumination Brightness Control
To activate the right turn signal, push the turn signal lever up. To acti- vate the left turn signal, push the turn signal lever down. When the turn is finished, the lever will return automatically. If the lever will not return after cornering, return the lever to the neutral position by hand. -
Page 117: Fog Light Switch
J Parking light switch The parking light switch operates regardless of the ignition switch posi- tion. By pushing the rear end of this switch, following lights will come on. – Parking lights – Front side marker lights – Tail lights –... -
Page 118: Wiper Controls
The indicator light located on the switch will illuminate when the fog lights are on. Wiper controls WARNING In freezing weather, do not use the windshield washer until the windshield is sufficiently warmed by the defroster. Otherwise the washer fluid can freeze on the windshield, blocking your view. - Page 119 D In freezing weather, be sure the wiper blades are not frozen to the windshield or rear window before operating the wipers. D Do not operate the wipers if the wiper blades are frozen to the windshield or rear window. If the wiper would be operated with the wiper blades frozen to the windshield or rear window, the wiper blades could be worn or damaged prematurely, resulting in streaking or incomplete wiping.
-
Page 120: Windshield Wiper And Washer Switch
J Windshield wipers and washer switch B Windshield wipers Mist To turn the wipers on, push the wiper control lever down. : Intermittent LO : Low speed HI : High speed To turn the wipers off, return the lever to the “OFF” position. B Mist (for a single wipe) For a single wipe of the wipers, pull the lever toward you. -
Page 121: Rear Window Wiper And Washer Switch
Check washer fluid level fre- quently, such as at fuel stops. D Use clean water if windshield washer fluid is unavailable. In areas where water freezes in winter, use SUBARU Windshield Washer Fluid or the equivalent. (See Windshield Washer Fluid section in chapter 10.) Also, when driving the vehicle when there are freezing tempera- tures, use non-freezing type wiper blades. -
Page 122: Wiper Deicer (If Equipped)
To turn the rear wiper on, turn the knob on the end of the wiper control lever to the “ON” position. To turn the wiper off, return the knob on the end of the lever to the “OFF” position. B Washer To wash the rear window while the rear wiper is operating, turn the knob on the end of the wiper control lever counterclockwise to the “... - Page 123 Indicator light HS0373 Before turning on the wiper deicer, remove any snow from the wind- shield. To turn on the wiper deicer, push the switch. The indicator light located on the switch lights up while the wiper deicer is operating. The wiper deicer will automatically shut off after about 15 minutes.
-
Page 124: Rear Window Defogger Switch
Rear window defogger switch CAUTION D Do not use sharp instruments or window cleaner containing abrasives to clean the inner surface of the rear window. They may damage the conductors printed on the window. D To prevent the battery from being discharged, do not operate the defogger continuously for any longer than necessary. -
Page 125: Horn
Horn OM-H2736 To sound the horn, push the horn pad. Mirrors Always check that the inside and outside mirrors are properly adjusted before you start driving. J Inside mirror HS0064 The inside mirror has a day and night position. Pull the tab at the bottom of the mirror toward you for the night position. -
Page 126: Outside Mirrors
J Outside mirrors WARNING Objects look smaller in a convex mirror (passenger side) and far- ther away than when viewed in a flat mirror. Do not use the con- vex mirror to judge the distances of vehicles behind you when changing lanes. -
Page 127: Outside Mirror Defogger
B Remote control mirror switch (if equipped) The remote control mirrors operate only when the ignition switch is in the “ON” or “ACC” position. Selection switch Direction control switch 1. Press either end of the selection switch, “L” for the left and “R” for the right. - Page 128 Instruments and controls Indicator light HS0063 To turn on the outside mirror defogger, push the switch. To turn it off, push the switch again. The indicator light located on the switch is on while the outside mirror defogger is operation. The defogger will automatically shut off after about 15 minutes.
- Page 129 Climate control Ventilator ..............Heating and air conditioning Air flow control dial .
-
Page 130: Ventilator
Ventilator Move the thumb-wheel up and down or right and left to adjust the air flow direction Oepn Close Move the thumb-wheel up and down or right and left to adjust the air flow direction Move the thumb-wheel up and down or right and left to adjust the air flow direction Oepn... -
Page 131: Climate Control
Heating and air conditioning Temperature control dial Fan speed control lever J Air flow control dial This dial has following five positions: : Air flows through the instrument panel outlets. : Air flows through the instrument panel outlets and the foot out- lets. -
Page 132: Air Conditioner Button (If Equipped)
J Air inlet selection lever WARNING Continued operaton in the “ dows. Switch to the “ dusty condition clears. : Interior air is recirculated inside the passenger comparment. : Outside air is drawn into the passenger compartment. J Air conditioner button (if equipped) The air conditioner operates only when the engine is running. -
Page 133: Heating And Defrosting
4. Set the fan speed control lever to the highest speed. Warm air also comes out from the right and left air outlets. To stop warm air flow from these outlets, turn the corresponding thumb-wheel to the “ ” position. J Heating and defrosting To direct warm air toward the floor and the windshield: 1. -
Page 134: Bi.level Heating
J Heating To direct warm air toward the floor: 1. Set the air inlet selection lever to the “ 2 Set the air outlet control dial to the “ 3. Set the temperature control dial to the most comfortable level. 4. -
Page 135: Ventilation
warmer than from the instrument panel outlet. 1. Set the air inlet selection lever to the “ 2. Set the air outlet control dial to the “ 3. Set the temperature control dial to the desired temperature level. 4. Set the fan speed control lever to the desired speed. Setting the temperature control dial fully turned to the red area or blue area decreases the temperature difference between the air from the instrument panel outlets and the air from the foot outlets. -
Page 136: Air Conditioner Operation
AIR CONDITIONER OPERATION J Cooling or dehumidifying ON position For cooling and dehumidification of the passenger compartment, air flows through the instrument panel outlets: 1. Set the air inlet selection lever to the “ 2. Set the air outlet control dial to the “ 3. -
Page 137: Operating Tips For Heater And Air Conditioner
Climate control ON position HS0072 HS0073 To direct warm air to the windshield and front door windows: 1. Set the air inlet selection lever to the “ ” position. 2. Set the air outlet control dial to the “ ” position. 3. -
Page 138: Efficient Cooling After Parking In Direct Sunlight
J Checking air conditioning system before summer season Check the air conditioner unit for refrigerant leaks, hose conditions, and proper operation each spring. This check is best performed by your SUBARU dealer. J Cooling and dehumidifying in high humidity and low temperature weather condition Under certain weather conditions (high relative humidity, low tempera- tures, etc.) a small amount of water vapor emission from the air outlets... -
Page 139: Air Filtration System (Option)
CFC12 (freon). Consult your SUBARU dealer for ser- vice. Repairs needed as a result of using the wrong refrigerant are not covered under warranty. Air filtration system (option) If your vehicle’s air conditioning system is equipped with a optional air filtration system, replace the filter element according to the replacement schedule shown below. - Page 140 Plastic tab New filter 3. Insert a new filter with the plastic tab facing forward. 4. Install the rubber seal on the duct opening. CAUTION Make certain that the rubber seal is evenly seated on the duct opening. 5. Install the filter cover and secure with two (2) screws. 6.
- Page 141 Audio Radio ................Antenna .
-
Page 142: Antenna
Radio J Antenna B Printed antenna CAUTION Do not use sharp instruments or window cleaner containing abra- sives to clean the inner surface of the left side rear quarter win- dow. They may damage the antenna printed on the window. The antenna is printed on the inner surface of the left side rear quarter window. -
Page 143: Audio
The antenna and the special wrench for mounting/removing the antenna is stored in the luggage floor storage tray at the front side. 1. Remove the plug from the antenna base. 2. Remove the cap at the threaded portion of the antenna. 3. -
Page 144: Fm Reception
NOTE You may find that the antenna is already installed on the vehicle at the time of delivery. In that case, ask your SUBARU dealer about the stor- age location of the special wrench. J FM reception Although FM is normally static free, reception can be affected by the sur- rounding area, atmospheric conditions, station strength and transmitter distance. - Page 145 J Power switch and volume control (ON/VOL) Volume control Power ON/OFF The same knob is used for both power (on/off) and volume control. The radio is turned on and off by pushing the knob and the volume is con- trolled by turning the knob. The volume control has total of 34 volume levels (V: 0 for minimum, V: 33 for maximum).
- Page 146 To change control modes: Each pushing the “T/B” button changes control modes in the following sequence starting from volume control mode. (When the radio is powered on, control mode is in the volume control.) Volume (VOL) B Bass control Bass volume control indication Select the Bass control mode by pressing the “T/B”...
- Page 147 B Treble control Treble volume control indication Select the Treble control mode by pressing the “T/B” button. In the treble control mode, the display shows the indication as shown. The treble control has total of 13 volume levels (TR: –6 for minimum, 0 for middle, TR: +6 for maximum).
-
Page 148: Manual Tuning (Tuning)
B Balance control Balance control indication Select the Balance control mode by pressing the “T/B” button. In the balance control mode, the display shows the indication as shown. The balance control has total of 25 settings (L: 12 for left side maxi- mum and right side minimum, 0 for neutral, R: 12 for left side mini- mum and right side maximum). -
Page 149: How To Preset Stations
Audio J Automatic tuning (SCN) Press the “SCN” button to change the radio to the SCAN mode. In this mode, the radio scans through the radio band until a station is found. The radio will stop at the station for five seconds while displaying the fre- quency, after which scanning will continue until the entire band has been scanned from the low end to the high end. -
Page 150: Cassette Player Operation
CASSETTE PLAYER OPERATION Tape travel indicator Cassette player operation indicator Tape program sensor button NOTE D Only use good quality cassettes (cassettes longer than C-90 are not recommended). D Put cassettes back in their boxes immediately after use to protect them from dust and dirt and to prevent the tape from unwinding. - Page 151 J Program switching buttons (PROG) When the program switching buttons (“ pressed at the same time during playback, the tape travel indicators will switch and the player will begin playing back the opposite side of the tape. The same mechanism is automatically activated when the end of the tape is reached.
-
Page 152: Clock Function
D When the blanks between selections are shorter than five seconds. D When there are no blanks between selections (live concerts, etc.). J Dolby NR button (BNR) Press “BNR” button when playing tapes recorded using the Dolby NR system*. The “BNR” indicator will light up and high-frequency noise on the tape will be reduced for clearer sound reproduction. -
Page 153: Setting The Time
If this occurs, it is necessary to reset the time. Installation of accessories Always consult your SUBARU dealer before installing a citizen band ra- dio or other transmitting device in your vehicle. Such devices may cause the electronic control system to malfunction if they are incorrectly installed or if they are not suited for the vehicle. - Page 154 Interior equipment Sun visors ..............Vanity mirror (if equipped) Storage compartment Glove compartment...
-
Page 155: Cargo Anchorage Eyelets
To install the cover Shopping bag hook Cargo anchorage eyelets Luggage floor storage tray Front, left and right sides storage tray Center storage tray Maintenance tools ............ -
Page 156: Interior Equipment
Sun visors To block out glare, swing down the visors. To use the sun visor at a side window, swing it down and move it sideways. J Vanity mirror (if equipped) To use the vanity mirror, swing down the visor and open the cover. Interior equipment HS0088 HS0089... -
Page 157: Glove Compartment
Storage compartment CAUTION D Always keep the storage compartment closed while driving to reduce the risk of injury in the event of sudden stops or an acci- dent. D Do not store spray cans, containers with flammable or corro- sive liquids or any other dangerous items in the storage compart- ment. -
Page 158: Center Console
Interior equipment J Center console HS0091 To open the lid, pull up the lock release. J Sunglasses storage compartment Push HS0092 HS0093 The sunglasses storage compartment can be used to store a pair of sun- glasses or small items such as a garage door opener. To open the compartment, push the button and it will automatically open. -
Page 159: Door Storage Compartment
J Dashboard storage compartment (if equipped) Push To open the dashboard compartment, push the button and pull up on the lid. Be sure to close the compartment fully before driving. J Door storage compartment Each door is equipped with a door storage compartment. To open the compartment, push the button and pull up on the lid. -
Page 160: Coin Tray
J Coin tray To open the coin tray, pull the upper edge of the lid. Cup holder CAUTION D When not in use, always keep the holder stored while driving to reduce the risk of injury in the event of a sudden stop or an accident. -
Page 161: Driver's Cup Holder
J Driver’s cup holder To use the cup holder, pull it out to the first click stop. If you want to use a larger cup, pull it out farther until it stops. J Front passenger’s cup holder The front passenger’s cup holder is built in the lid of the center console. To use the cup holder, open the lid by sliding it forward and unfold the arm. -
Page 162: Setting The Clock
Interior equipment J Rear passenger’s cup holder HS0101 HS0102 The rear passenger’s cup holder is located at the back of the center con- sole. To use the cup holder, open the lid by pulling its upper edge. Clock HS0103 The clock displays the time when the ignition switch is in the “ACC” or “ON”... -
Page 163: Gauge Pack (Option)
Gauge pack (option) CAUTION Never attempt to adjust any instrument settings while driving. Doing so may lead to an accident. The gauge pack displays following information. D Compass direction D Barometric pressure D Altitude D Outside temperature J Display D The display operates when the ignition switch is in the “ACC” or “ON” position. - Page 164 J Measurement unit selection (Default setting is English units) The following procedure is required to select measurement units other than English. 1. Turn on the ignition switch to the “ACC” position and the display shows the default English measurement units. 2.
- Page 165 3. Change the measurement units by pressing the “MODE” switch until the proper mode appears. 4. Press the “ADJ” switch to save your selection. NOTE D If the setting is not completed in 30 seconds, the display will return to the initial mode.
- Page 166 NOTE The compass may be affected by interference in the magnetic field. (For example, natural and artificial causes like tunnels, subways, sub-sta- tions, railways, and so forth may affect compass operation.) B Compass setting 1. Deviation setting Depending on your location, the following adjustment is required due to the difference between magnetic and geographic North.
- Page 167 1) Press the “ADJ” switch for 5 seconds or more. 2) Press the “YSET” or “B” to obtain the correct setting. “YSET”: “0” & “W”, “5” & “E”, “10” & “E”, ... “B”: “10” & “W” “15” & “W”, ... 3) Press the “ADJ”...
- Page 168 Interior equipment The motion indicator bars move in two patterns according to the vehicle speed. HS6012BB 1. 1.8 mile/h (2.8 km/h) of vehicle speed ... 1 second interval bar motion. 2. 12.5 mile/h (20 km/h) or more of vehicle speed ... 0.5 second inter- val bar motion.
- Page 169 The display indicates atmospheric pressure in the passenger compart- ment. Range: 21.26 to 30.86 inHg or 720 to 1045 hpa NOTE D The reading may change during air-conditioner operation, door win- dow operation, driving in a tunnel, and so forth. D All barometric readings reported in local weather reports are cor- rected to a sea-level reading regardless of altitude.
- Page 170 Interior equipment HS6014BB B Standard elevation mode The “MODE” switch changes the barometer to the standard elevation mode of the altimeter. The altimeter indicates the “sea level” elevation. Range: –660 to 9200 ft (–200 to 2800 m) at a pitch of 20 ft or 10 m in metric measurement units.
-
Page 171: Outside Temperature Gauge
B Relative elevation mode The altimeter indicates the relative elevation. 1. The “MODE” switch changes the standard elevation mode to the relative elevation mode. 2. Press the “YSET” switch for the “0” ft” (“0 m”) setting. 3. The display shows the current elevation relative to the starting elevation. -
Page 172: Accessory Power Socket
CAUTION The electrical power socket located on the lower part of the instrument panel is designed to use only a SUBARU genuine cig- arette lighter plug. Do not use non-genuine cigarette lighter plugs or any “plug-in” type electrical accessories in the socket. Doing so many cause a short-circuit and overheating, resulting in a fire. - Page 173 D If the plug on your electric appliance is either too loose or too tight for the accessory socket or dual power socket, this can result in a poor contact or cause the plug to get stuck. Only use plugs that fit properly. D Use of an electric appliance in the accessory socket or dual power socket for a long period of time while the engine is not running can cause battery discharge.
-
Page 174: Cigarette Lighter (Option)
CAUTION The electrical power socket located on the lower part of the instrument panel is designed to use only a SUBARU genuine cig- arette lighter plug. Do not use non-genuine cigarette lighter plugs or any “plug-in” type electrical accessories in the socket. Doing so may cause a short-circuit and overheating, resulting in a fire. - Page 175 CAUTION Do not hold the lighter pushed in, because it will overheat. HS0106 The cigarette lighter operates only when the ignition switch is in the “ON” and “ACC” position. To use the cigarette lighter, push in the knob and wait a few moments. It will automatically spring up when ready for use.
-
Page 176: Ashtray (If Equipped)
Ashtray (if equipped) CAUTION Do not use ashtrays as waste receptacles or leave a lighted ciga- rette in an ashtray. This could cause a fire. Fully close the ashtray after using it to help reduce residual smoke. J Front ashtray To open the ashtray, pull the lid out. -
Page 177: Coat Hook
Coat hook CAUTION Never hang anything on the coat hook that might obstruct the driver’s view. And do not hang items on the coat hook that weight 1 kg (2.2 lb) or more. The coat hook is attached to the rear passenger’s hand grip behind the driver. -
Page 178: Spotlight
Interior equipment The interior light switch has three positions: ON: The light stays on continuously. Middle position: The light comes on when any door is opened and stays on for a few seconds after all doors are closed. OFF: The light stays off. When leaving your vehicle, make sure the light is turned off to avoid bat- tery discharge. -
Page 179: Luggage Area Light
Luggage area light The luggage area light switch has three positions: ON: The light stays on continuously. DOOR: The light comes on only when the rear gate is opened. OFF: The light stays off. When leaving your vehicle, make sure the light is turned off to avoid bat- tery discharge. -
Page 180: Using The Cover
Interior equipment J Using the cover HS0133 To extend the cover, pull the end of the cover out of the cover housing, then insert its hooks into the catches as shown. To rewind it, unhook it from the catches and it will rewind automatically. You should hold on to the cover and guide it back into the cover housing while it is rewinding. -
Page 181: To Install The Cover
J To install the cover 1. Insert the both ends of the cover housing into the retainers. 2. Attach the fastening straps to the head rests. The cover can be installed in either of two positions. To install the cover housing in the other position, remove the caps from the retainers. -
Page 182: Cargo Anchorage Eyelets
Cargo anchorage eyelets CAUTION The cargo anchorage eyelets are designed only for securing light luggage. Never try to secure any luggage which weighs more than the load capacity of the anchorage eyelets. The maximum load capacity is about 44 lb. (20 kg) per eyelet. The luggage compartment is equipped with four anchorage eyelets so that luggage can be secured with a luggage net or ropes. -
Page 183: Luggage Floor Storage Tray
Luggage floor storage tray CAUTION D Always keep the lid of the storage tray closed while driving to reduce the risk of injury in the event of sudden stops or an acci- dent. D Do not store spray cans, containers with flammable or corro- sive liquids or any other dangerous items in the storage tray. - Page 184 J Front, left and right side storage tray To open the lid, raise the cargo anchorage eyelets and pull the tab up. The jack and jack handle are stored in the left side storage tray. HS0117 HS0119 Interior equipment HS0118 –...
-
Page 185: Maintenance Tools
J Center storage tray To open the lid, pull the handle up. To keep the lid open, hang the hook provided on the backside of the lid on the rear edge of the roof. The spare tire is stored under the storage tray. Maintenance tools Your vehicle is equipped with the following maintenance tools: Screwdriver... - Page 186 Starting and operating New vehicle break-in driving The first 1,000 miles (1,600 km) Fuel requirements ............Fuel Octane Rating .
- Page 187 Cruise control (if equipped) To set cruise control To temporarily cancel the cruise control To turn off the cruise control To change the cruising speed Parking your vehicle Parking brake ............Parking tips .
-
Page 188: Starting And Operating
New vehicle break-in driving J The first 1,000 miles (1,600 km) The performance and long life of your vehicle are dependent on how you handle and care for your vehicle while it is new. Follow these instructions during the first 1,000 miles (1,600 km): D Do not race the engine. -
Page 189: Unleaded Gasoline
Many gasolines are now blended with materials called oxygenates. Use of these fuels can also help keep the air cleaner. SUBARU approves the use of oxygenated blend fuels, such as MTBE (Methyl Tertiary Butyl Ether) or ethanol (ethyl or grain alcohol). -
Page 190: State Emission Testing (U.s. Only)
SUBARU dealer. D Fuel system damage or driveability problems which result from the use of improper fuel are not covered under the SUBARU Limited War- ranty. State emission testing (U.S. only) - Page 191 At state inspection time, remember to tell your inspection or service station in advance not to place your Subaru AWD vehicle on a two- wheel dynamometer. Otherwise, serious transmission damage will result. Some states have started using dynamometers in their state inspection programs in order to meet their obligation under federal law to implement stricter vehicle emission standards to reduce air pollution from cars.
-
Page 192: Exhaust Gas (Engine Exhaust Gas)
Engine exhaust gas (Carbon monoxide) WARNING D Never inhale engine exhaust gas. Engine exhaust gas contains carbon monoxide, a colorless and odorless gas which is danger- ous, or even lethal, if inhaled. D Always properly maintain the engine exhaust system to pre- vent engine exhaust gas from entering the vehicle. -
Page 193: Catalytic Converter
D Keep your engine tuned-up. If you feel the engine running rough (mis- firing, backfiring or incomplete combustion), have your vehicle checked and repaired by an authorized SUBARU dealer. D Do not apply undercoating or rust prevention treatment to the heat... -
Page 194: Fuel Economy Hints
Starting and operating Fuel economy hints The following suggestions will help to save your fuel. D Select the proper gear position for the speed and road conditions. D Avoid sudden acceleration or deceleration. Always accelerate gently until you reach the desired speed. Then try to maintain that speed for as long as possible. -
Page 195: Driving In Foreign Countries
NOTE Engine oil, engine coolant, brake fluid, washer fluid and other fluid levels should be checked daily, weekly or at fuel stops. Driving in foreign countries When planning to use your vehicle in another country: D Confirm the availability of the correct fuel. (Refer to Fuel Requirement section in this chapter.) D Comply with all regulations and requirements of each country. -
Page 196: Lock
J LOCK The key can only be inserted or removed in this position. The ignition switch will lock the steering wheel when you remove the key. If turning the key is difficult, turn the steering wheel slightly to the right and left as you turn the key. -
Page 197: Start
B Manual transmission vehicles: The key can be turned from “ACC” to “LOCK” only when the key is pushed in while turning it. J ACC In this position the electrical accessories (radio, accessory power sock- et, etc.) can be used. J ON This is the normal operating position after the engine is started. -
Page 198: Key Interlock Release (At Vehicles Only)
3. Remove the under cover of the steering column. 4. Turn the ignition key while pressing the key interlock release lever. Take your vehicle to the nearest SUBARU dealer immediately to have the key interlock system repaired. Starting the engine... -
Page 199: Manual Transmission Vehicles
J Manual transmission vehicles 1. Apply the parking brake. 2. Turn off unnecessary lights and accessories. 3. Press the clutch pedal to the floor and shift the shift lever into neutral. Hold the clutch pedal to the floor while starting the engine. The starter motor will only operate when the clutch pedal is pressed fully to the floor. -
Page 200: During Cold Weather Below -4 F (-20 C)
Starting and operating 5. Turn the ignition switch to the “START” position without depressing the accelerator pedal. Release the key immediately after the engine has started. If the engine does not start within ten seconds, wait a while and then turn the ignition switch to the “START”... -
Page 201: Stopping The Engine
Stopping the engine WARNING Do not stop the engine when the vehicle is moving. This will cause loss of power to the power steering and the brake booster, making steering and braking more difficult. It could also result in accidental activation of the “LOCK” position on the ignition switch, causing the steering wheel to lock. -
Page 202: Shifting Speed For Fuel Economy
shift into reverse gear. To change gears, fully depress the clutch pedal, move the shift lever, and gradually let the pedal up. J Shifting speed for fuel economy The best compromise between fuel economy and vehicle performance during normal driving is ensured by shifting up at the speeds listed in the following table. -
Page 203: Automatic Transmission
(over use) the brakes while descending a hill, they may overheat and not work properly. Automatic transmission WARNING Do not shift from the “P” or “N” position into the “D”, “3”, “2”, “1” or “R” position while depressing the accelerator pedal. This may cause the vehicle to jump forward or backward. -
Page 204: Selector Lever
J Selector lever Release button The selector lever has seven positions. The release button must be pushed to select the “P”, “R”, or “2” posi- tions. B P (Park) This position is for parking the vehicle and starting the engine. In this position, the transmission is mechanically locked to prevent the vehicle from rolling freely. - Page 205 B R (Reverse) This position is for backing the vehicle. To shift from the “N” to “R” position, first stop the vehicle completely then move the lever to the “R” position while pushing the release but- ton. B N (Neutral) This position is for restarting a stalled engine.
-
Page 206: Maximum Speeds
B 2 (Second) To shift from the “3” to “2” position, push the release button. This position is for using engine braking when going down a hill or for climbing a steep grade. In this position, the transmission holds in the 2nd gear. Use this position when starting off from a standstill on slippery road surfaces such as mud or snow. -
Page 207: Center Console
“P” to the “N” position. 8. Remove the shaft from the hole. Depress the brake pedal and start the engine. Take your vehicle to the nearest SUBARU dealer immediately to have the system repaired. 7-22... -
Page 208: Steering
Steering J Tilt steering wheel WARNING Do not adjust the steering tilt position while driving. This may cause loss of vehicle control and result in personal injury. B Tilt adjustment 1. Adjust the seat position. Refer to Front Seat section (chapter 2). 2. -
Page 209: Cruise Control (If Equipped)
The power steering system operates only when the engine is running. If you lose power steering assist because the engine stops or the system fails to function, you can steer but it will take much more effort. Cruise control (if equipped) WARNING Do not use the cruise control under any of the following condi- tions. -
Page 210: To Temporarily Cancel The Cruise Control
release it. Then release the accelerator pedal. The vehicle will maintain the desired speed. Vehicle speed can be temporarily increased while driving with the cruise control activated. Simply depress the accelerator pedal to accelerate the vehicle. When the accelerator pedal is released, the vehicle will return to and maintain the previous cruising speed. -
Page 211: Parking Your Vehicle
tion increases the vehicle speed about 1 mph (1.6 km/h). Press the control lever repeatedly until the desired speed is reached. 1. Depress the accelerator pedal to accelerate the vehicle to the de- sired speed. 2. Push the control lever downward in the “SET, COAST” direction once. -
Page 212: Parking Tips
Release button To release the parking brake, pull the lever up slightly, press the release button, then lower the lever while keeping the button pressed. When the parking brake is set while the engine is running, the parking brake warning light comes on. After starting the vehicle, be sure that the warning light has gone out before the vehicle is driven. -
Page 213: Tips For Using The Brakes
When parking your vehicle, always set the parking brake firmly and put the shift lever in the “1” (1st) for an upgrade or “R” (Reverse) for a down- grade for manual transmission vehicles, or in the “P” (Park) position for automatic transmission vehicles. -
Page 214: Brake System
Starting and operating B When the brakes get wet When driving in rain, in puddle or after washing the vehicle, the brakes may get wet. As a result, brake stopping distance will be long- er. To dry the brakes, drive the vehicle at a safe speed while lightly depressing the brake pedal to heat up the brakes. -
Page 215: Anti-Lock Brake System
The disc brake pad wear warning indicators on the disc brakes give a warning noise when the brake pads are worn. If a squeaking or scraping noise is heard from the disc brakes while braking, immediately have your vehicle checked by your SUBARU deal- J ABS (Anti-Lock Brake System) (if equipped) WARNING Always use the utmost care in driving –... - Page 216 D When you feel the ABS system operating, you should maintain constant brake pedal pressure. Do not pump the brake pedal since doing so may defeat the operation of the ABS system. The ABS system prevents the lock-up of wheels which may occur during sudden braking or braking on slippery road surfaces.
- Page 217 If this occurs, have the ABS system repaired at the first available opportuni- ty by your SUBARU dealer. NOTE If the warning light behavior is as shown below, the ABS system may be considered normal.
-
Page 218: Driving Tips For Awd Vehicles
By shifting power between the front and rear wheels, SUBARU AWD can also pro- vide added traction during acceleration and added engine braking force during deceleration. -
Page 219: Off Road Driving
But please keep in mind that an AWD Subaru is a passenger car and is neither a conventional off-road vehicle nor an all-terrain vehicle. If you do take your Subaru off-road, cer-... - Page 220 Starting and operating D Carry some emergency equipment, such as a towing rope or chain, a shovel, wheel blocks, first aid kit and portable phone or citizens band radio. D Drive carefully. Do not take unnecessary risks by driving in dangerous areas or over rough terrain.
- Page 221 Warranty and Maintenance Booklet. Remember that damage done to your Subaru while operating if off-road and not using common sense precautions such as those listed above is not eligible for warranty coverage.
-
Page 222: Winter Driving
Winter driving J Operation during cold weather Carry some emergency equipment, such as tire chains, a window scrap- er, a bag of sand, flares, a small shovel, and jumper cables. Check the battery and cables. Cold temperatures reduce battery capac- ity. - Page 223 tor pedal, brake pedal, and all other controls operate smoothly. Clear away ice and snow that has accumulated under the fenders to avoid making steering difficult. During severe winter driving, stop when and where it is safe to do so and check under the fenders peri- odically.
-
Page 224: Driving On Snowy And Icy Roads
If your SUBARU is not going to be used for an extended period, it is best to have the fuel tank filled to capacity. J Driving on snowy and icy roads WARNING Do not use the cruise control on slippery roads such as snowy or icy roads. -
Page 225: Snow Tires
to the right. After the windshield gets warmed enough to melt the fro- zen snow on it, wash it away using the windshield washer. Snow stuck on the wiper arm prevents the wiper from working effec- tively. If snow is stuck on the wiper arm, pull off the road to a safe place, then remove it. -
Page 226: Tire Chains
Starting and operating J Tire chains Driving on snowy grades or icy roads may require the use of tire chains, in which case put the chains on the front wheels only. Use only SAE class S type chains that are of the correct size for your tires so as not to damage the vehicle body or suspension. -
Page 227: Loading Your Vehicle
Loading your vehicle WARNING D Never allow passengers to ride on the folded rear seatback or in the cargo area. Doing so may result in serious injury. D Never stack luggage or other cargo higher than the top of the seatback because it could tumble forward and injure passengers in the event of a sudden stop or accident. -
Page 228: Vehicle Capacity Weight
Starting and operating J Vehicle capacity weight Tire information label HS0250 HS0251 The load capacity of your vehicle is determined by weight, not by avail- able cargo space. The maximum load you can carry in your vehicle is shown as the Vehicle Capacity Weight on the tire information label at- tached to the driver’s side door jamb. -
Page 229: Gvwr And Gawr
J GVWR and GAWR (Gross Vehicle Weight Rating and Gross Axle Weight Rating) Certification plate HS0143 The certification plate attached to the driver’s side door jamb shows GVWR (Gross Vehicle Weight Rating) and GAWR (Gross Axle Weight Rating). The GVW (Gross Vehicle Weight) must never exceed the GVWR. GAW is the combined total of weight of the vehicle, fuel, driver, all passengers, luggage, any optional equipment and trailer tongue load. -
Page 230: Trailer Towing
If you do decide to tow a trailer, your safety and satisfaction depend upon proper use of correct equipment and cautious operation of your ve- hicle. Seek the advice of your SUBARU dealer to assist you in purchas- ing a hitch and other necessary towing equipment appropriate for your vehicle. -
Page 231: Maximum Load Limits
J Maximum load limits WARNING Never exceed the maximum load limits explained below. Exceed- ing the maximum load limits could cause personal injury and/or vehicle damage. CAUTION D Adequate size trailer brakes are required when the trailer and its cargo exceed 1,000 lbs (453 kg) total weight. D Before towing a trailer, check the trailer total weight, GVW, GAWs and tongue load. - Page 232 Total trailer weight B Gross Vehicle Weight (GVW) and Gross Vehicle Weight Rating (GVWR) The Gross Vehicle Weight (GVW) must never exceed the Gross Vehicle Weight Rating (GVWR). Gross Vehicle Weight (GVW) is the combined total of weight of the vehicle, driver, passengers, luggage, trailer hitch, trailer tongue load and any other optional equipment installed on your vehicle.
- Page 233 B Gross Axle Weight (GAW) and Gross Axle Weight Rating (GAWR) The total weight applied to each axle (GAW) must never exceed the Gross Axle Weight Rating (GAWR). The front and rear GAWs can be adjusted by relocating passengers and luggage inside the vehicle. The front and rear GAWR are also shown on the certification plate.
- Page 234 Starting and operating The tongue load can be weighed with a bathroom scale as shown in the illustration below. When weighing the tongue load, be sure to posi- tion the towing coupler at the height at which it would be during actual towing, using a jack as shown.
-
Page 235: Trailer Hitches
Choose a proper hitch for your vehicle and trailer. The use of genuine SUBARU trailer hitch is recommended. A genuine SUBARU hitches are available from your SUBARU dealer. If use of a non-genuine hitch is unavoidable, be sure the hitch is suited to your vehicle and trailer. - Page 236 Check that your trailer’s brakes conform with Federal, state/province and/or other applicable regulations. Your SUBARU’s brake system is not designed to be tapped into the trailer’s hydraulic brake system. Please ask your SUB- ARU dealer and professional trailer supplier for more information about the trailer’s brake system.
- Page 237 To ensure the trailer lights are connected properly, please consult your SUBARU dealer. Check for proper operation of the turn signals and the brake lights each time you hitch up.
-
Page 238: Trailer Towing Tips
B Tires Make sure that all the tires on your vehicle are inflated to the pressure under towing conditions as shown in following table. These tire infla- tions are also shown on the tire placard located on the left center pil- lar of your vehicle. - Page 239 signal lever is operated. – the safety chains are connected properly. – all cargo in the trailer is secured safety in position. – the side mirrors provide a good rearward field of view without a significant blind spot. D Sufficient time should be taken to learn the “feel” of the vehicle/ trailer combination before starting out on a trip.
- Page 240 D If the ABS warning light illuminates while the vehicle is in motion, stop towing the trailer and have repairs carried out immediately by the nearest SUBARU dealer. B Driving on grades D Before going down a steep hill, slow down and shift into low gear in order to utilize the engine braking effect and prevent overheating of your vehicle’s brakes.
- Page 241 B Parking on a grade Always block the wheels under both vehicle and trailer when parking. Apply the parking brake firmly. You should not park on a hill or slope. But if parking on a hill or slope cannot be avoided, you should take the following steps: 1.
- Page 242 In case of emergency Hazard warning flasher Engine overheating ............If steam is coming from the engine compartment If no steam is coming from the engine compartment Jump starting...
-
Page 243: If Steam Is Coming From The Engine Compartment
Hazard warning flasher Day or night, if your vehicle becomes a traffic hazard, use the hazard warning flasher. Avoid stopping on the road. It is best to safely pull off the road if a problem occurs. The hazard warning flasher can be acti- vated regardless of the ignition switch position. -
Page 244: In Case Of Emergency
J If no steam is coming from the engine compartment 1. Keep the engine running at idling speed. 2. Open the hood to ventilate the engine compartment. Confirm that the cooling fan is turning. If the fan is not turning, immedi- ately turn the engine off and contact your authorized dealer for repair. - Page 245 D The gas generated by a battery explodes if a flame or spark is brought near it. Do not smoke or light a match while jump start- ing. D Never attempt jump starting if the discharged battery is frozen. It could cause the battery to burst or explode. D Whenever working on or around a battery, always wear suit- able eye protectors, and remove metal objects such as rings, bands or other metal jewelry.
- Page 246 Engine lifting bracket Connect one jumper cable to the positive (+) terminal on the dis- charged battery. Connect the other end of the jumper cable to the positive (+) termi- nal of the booster battery. Connect one end of the other cable to the negative (–) terminal of the booster battery.
-
Page 247: Flat Tires
Flat tires WARNING D Do not jack up the vehicle on an incline or a loose road sur- face. The jack can come out of the jacking point or sink into the ground and this can result in a severe accident. D Use only the jack provided with your vehicle. - Page 248 4. Put wheel blocks at the front and rear of the tire diagonally opposite the flat tire. Jacking position Wheel blocks 5. Take out the spare tire, jack, and wheel nut wrench. See Tire Chang- ing Tools in this chapter. 6.
- Page 249 8. Insert the jack handle into the jackscrew, and turn the handle clock- wise until the tire clears the ground. Do not raise the vehicle higher than necessary. 9. Remove the wheel nuts and the flat tire. 10. Before putting the spare tire on, clean the mounting surface of the wheel and hub with a cloth.
- Page 250 In case of emergency OM-H0172 HG0104 11. Put on the spare tire. Replace the wheel nuts. Tighten them by hand. 12. Turn the jack handle counterclockwise to lower the vehicle. 13. Use the wheel nut wrench to securely tighten the wheel nuts to the specified torque, following the tightening order in the illustration.
-
Page 251: Tire Changing Tools
Attaching bolt Flat tire Also store the jack and wheel nut wrench in their storage locations. See Tire Changing Tools in this section. J Tire changing tools Jack Jack handle 8-10 Spacer HS0153 Spare tire HS0004... -
Page 252: Spare Tire
In case of emergency B Spare tire HS0159 The spare tire is stored under the floor of the luggage compartment. To remove the spare tire, first open the spare tire cover and remove the storage tray, turn the attaching bolt counterclockwise, then take the spare tire out. -
Page 253: Towing
Towing If towing is necessary, it is best done by your SUBARU dealer or a com- mercial towing service. Observe the following procedures for safety. J Transporting your vehicle using a flat-bed truck This is the best way to transport your vehicle. Use the following proce- dures to ensure safe transportation. -
Page 254: Towing With All Wheels On The Ground
J Towing with all wheels on the ground WARNING D Never turn the ignition switch to the “LOCK” position while the vehicle is being towed because the steering wheel and the direc- tion of the wheels will be locked. D Remember that the brake booster and power steering do not function when the engine is not running. -
Page 255: Towing Eyelet
We do not recommend this method of towing. Use this method only when towing service by a SUBARU dealer or a commercial towing service is not available. 1. Check the transmission and differential oil levels and add oil to bring it to the upper level if necessary. -
Page 256: Towing Eyelet
Towing eyelet Never use tie-down eyelet for towing purpose. The towing eyelets should be used only in an emergency (e.g., to free a stuck vehicle from mud, sand or snow). In case of emergency Towing eyelet HS0164 HS0166 HS0165 – CONTINUED – 8-15... -
Page 257: Appearance Care
Appearance care Exterior care ..............Washing . -
Page 258: Washing
Exterior care J Washing CAUTION D When washing the vehicle, the brakes may get wet. As a result, the brake stopping distance will be longer. To dry the brakes, drive the vehicle at a safe speed while lightly pressing the brake pedal to heat up the brakes. -
Page 259: Waxing And Polishing
Frequent polishing with a compound or an incorrect polishing technique will result in removing the paint layer and exposing the undercoat. When in doubt, it is always best to contact your SUBARU dealer or an auto paint specialist. Appearance care – CONTINUED –... -
Page 260: Corrosion Protection
Corrosion protection Your SUBARU has been designed and built to resist corrosion. Special materials and protective finishes have been used on most parts of the vehicle to help maintain fine appearance, strength, and reliable opera- tion. J Most common causes of corrosion The most common causes of corrosion are: 1. -
Page 261: Cleaning The Interior
Appearance care treatment or should be replaced. Contact your SUBARU dealer to per- form this kind of maintenance and treatment if you need assistance. Repair chips and scratches in the paint as soon as you find them. Check the interior of the vehicle for water and dirt accumulation under the floor mats because that could cause corrosion. -
Page 262: Synthetic Leather Upholstery
J Synthetic leather upholstery The synthetic leather material used on the SUBARU may be cleaned us- ing mild soap or detergent and water, after first vacuuming or brushing away loose dirt. Allow the soap to soak in for a few minutes and wipe off with a clean, damp cloth. - Page 263 Maintenance and service Maintenance precautions Before checking or servicing in the engine compartment When you do the checking or servicing in the engine compartment while the engine is running Engine compartment overview Engine, transmission, and differential gear oil leaks Engine oil .
- Page 264 Recommended fluid Brake fluid ..............Checking the fluid level Recommended brake fluid Clutch fluid...
-
Page 265: Maintenance And Service
Maintenance precautions When maintenance and service are required, it is recommended that all work be done by an authorized SUBARU dealer. If you perform maintenance and service by yourself, you should familiar- ize yourself with the information provided in this section on general main- tenance and service for your SUBARU. -
Page 266: Before Checking Or Servicing In The Engine Compartment
D Because the fuel system is under pressure, replacement of the fuel filter should be performed only by your SUBARU dealer. D The SRS AIRBAG has no user-serviceable parts. Tampering with or disconnecting the system’s wiring could result in acci- dental inflation of the airbag or could make the system inopera- tive, which may result in serious injury. -
Page 267: Engine Compartment Overview
Engine compartment overview Manual transmission oil level gauge (MT) (page 10-20) or Differential gear oil level gauge (AT) (page 10-23) Clutch fluid reservoir (page 10-29) Automatic transmission fluid level gauge (page 10-21) Brake fluid reservoir (page 10-28) Fuel filter Windshield washer tank (page 10-32) Maintenance and service HGA015BB... -
Page 268: Engine, Transmission, And Differential Gear Oil Leaks
Mating area between the engine and transmission Around the rear differential case cover Each drain plug and filler plug If you find any leaks, contact your SUBARU dealer. Engine oil WARNING Never let engine oil contact your eyes because engine oil can be harmful to your eyes. -
Page 269: Checking The Oil Level
J Checking the oil level Check the engine oil level at each fuel stop. 1. Park the vehicle on a level surface and stop the engine. 2. Pull out the dipstick, wipe it clean, and insert it again. 3. Be sure the dipstick is correctly inserted until it stops with the graphic symbol on its top appearing as shown in the illustration. - Page 270 in the maintenance schedule when driving on dusty roads, when short trips are frequently made when towing a trailer, or when driving in ex- tremely cold whether. 1. Warm up the engine by letting the engine idle for about 10 minutes to ease draining the engine oil.
- Page 271 Drain plug Sealing washer 6. Remove the under cover. 7. Remove the oil filter with an oil filter wrench. 8. Before installing a new oil filter, apply a thin coat of engine oil to the seal. 9. Clean the rubber seal seating area of the lower crank case and install the oil filter by hand turning.
-
Page 272: Recommended Grade And Viscosity
When adding oil, different brands may be used together as long as they are the same API classification and SAE viscosity as those recom- mended by SUBARU. Engine oil viscosity (thickness) affects fuel economy. Oils of lower vis- cosity provide better fuel economy. However, in hot weather, oil of higher viscosity is required to properly lubricate the engine. -
Page 273: Recommended Grade And Viscosity Under Severe Driving Conditions
Check the fuse and replace it if nec- essary. If the fuse is not blown, have the cooling system checked by your SUBARU dealer. If frequent addition of coolant is necessary, there may be a leak in the engine cooling system. -
Page 274: Engine Coolant
Engine coolant J Checking the coolant level WARNING D Never attempt to remove the radiator cap until the engine has been shut off and has cooled down completely. Since the coolant is under pressure, you may suffer serious burns by a spray of boiling hot coolant when the cap is removed. - Page 275 –33 F (–36 C). For adding, use genuine SUBARU coolant or an equivalent: a mixture of 50% soft water and 50% ethylene-glycol basis coolant. Use of improp- er coolants may result in corrosion in the cooling system. It is im- portant to maintain protection against freezing and corrosion, even if freezing temperatures are not expected.
-
Page 276: Changing The Coolant
J Changing the coolant WARNING D Never let engine coolant contact your eyes because engine coolant can be harmful to your eyes. If engine coolant gets in your eyes, immediately flush them thoroughly with clean water. For safety, when performing this work, wearing eye protection is advisable. - Page 277 3. Loosen the radiator cap to drain the coolant from the radiator. Then drain the coolant from the reserve tank. Tighten the drain plug securely. 4. Install the under cover. 5. Slowly pour the coolant and fill to the radiator filler neck and to the reserve tank’s “FULL”...
-
Page 278: Air Cleaner Element
Rubber gaskets 6. Put the radiator cap back on and tighten firmly. At this time, make sure that the rubber gasket in the radiator cap is correctly in place. 7. Start and run the engine for more than five minutes at 2,000 to 3,000 rpm. -
Page 279: Replacing The Air Cleaner Element
Replace the air cleaner element according to the maintenance schedule in the warranty and maintenance booklet. Under extremely dusty condi- tions, replace it more frequently. It is recommended that you always use genuine SUBARU parts. HBA000BA HBA001BB 1. Unsnap the two clamps holding the air cleaner case cover. -
Page 280: Spark Plugs
Spark plugs J Replacing the spark plugs CAUTION D When disconnecting the spark plug cables, always grasp the spark plug cap, not the cables. D Make sure the cables are replaced in the correct order. Replace the spark plugs according to the maintenance schedule in the warranty and maintenance booklet. -
Page 281: Drive Belts
98 N (22 lb, 10 kg) midway between the pulleys by using a spring scale. Belt deflection should be the amount specified. If a belt is loose, cracked, or worn, contact your SUBARU dealer. -
Page 282: Manual Transmission Oil
Manual transmission oil J Checking the oil level WARNING Never let transmission oil contact your eyes because transmis- sion oil can be harmful to your eyes. If transmission oil gets in your eyes, immediately flush them thoroughly with clean water. For safety, when performing this work, wearing eye protection is advisable. -
Page 283: Automatic Transmission Fluid
SAE viscosity No. and Applicable Temperature Automatic transmission fluid WARNING Never let automatic transmission fluid contact your eyes because automatic transmission fluid can be harmful to your eyes. If auto- matic transmission fluid gets in your eyes, immediately flush them thoroughly with clean water. For safety, when performing this work, wearing eye protection is advisable. -
Page 284: Checking The Fluid Level When The Fluid Is Hot
J Checking the fluid level when the fluid is hot Check the fluid level monthly. 1. Drive the vehicle several miles to raise the temperature of the trans- mission fluid up to normal operating temperature; 140 to 176 F (60 to 80 C) is normal. -
Page 285: Front Differential Gear Oil (Automatic Transmission)
Front differential gear oil (Automatic transmission) J Checking the oil level WARNING Never let gear oil contact your eyes because gear oil can be harmful to your eyes. If gear oil gets in your eyes, immediately flush them thoroughly with clean water. For safety, when perform- ing this work, wearing eye protection is advisable. -
Page 286: Rear Differential Gear Oil
For safety, when perform- ing this work, wearing eye protection is advisable. CAUTION If the vehicle requires frequent refilling, there may be an oil leak. If you suspect a problem, have the vehicle checked at your SUBARU dealer. 10-24 OM-H0212... -
Page 287: Recommended Grade And Viscosity
Maintenance and service Filler hole Oil level Filler hole Drain hole Drain hole HB0077 HB0078 Remove the plug from the filler hole and check the oil level. The oil level should be kept even with the bottom of the filler hole. If the oil level is below the bottom edge of the hole, add oil through the filler hole to raise the level. -
Page 288: Power Steering Fluid
Power steering fluid WARNING Never let power steering fluid contact your eyes because power steering fluid can be harmful to your eyes. If power steering fluid gets in your eyes, immediately flush them thoroughly with clean water. For safety, when performing this work, wearing eye protec- tion is advisable. -
Page 289: Checking The Fluid Level When The Fluid Is Cold
If the fluid level is extreme low, it may indicate possible leakage. Consult your SUBARU dealer for inspection. J Checking the fluid level when the fluid is cold When the fluid level has to be checked without warming up the power steering system (approximately 70 F [21 C]), read the fluid level on the “COLD”... -
Page 290: Brake Fluid
Brake fluid J Checking the fluid level WARNING D Never let brake fluid contanct your eyes because brake fluid can be harmful to your eyes. If brake fluid gets in your eyes, im- mediately flush them thoroughly with clean water. For safety, when performing this work, wearing eye protection is advisable. -
Page 291: Recommended Brake Fluid
D If the vehicle requires frequent refilling, there may be a leak. If you suspect a problem, have the vehicle checked at your SUBARU dealer. D Never use different brands of clutch fluid together. D When clutch fluid is added, be careful not to allow any dirt into the tank. -
Page 292: Recommended Clutch Fluid
J Checking brake booster operation If the brake booster does not operate as described below, have it checked by your SUBARU dealer. 1. With the engine off, depress the brake pedal several times, applying the same pedal force each time. The distance the pedal travels should not vary. -
Page 293: Battery
Battery WARNING D Before beginning work on or near any battery, be sure to extin- guish all cigarettes, matches, and lighters. Never expose a bat- tery to an open flame or electric sparks. Batteries give off a gas which is highly flammable and explosive. D For safety, in case an explosion does occur, wear eye protec- tion or shield your eyes when working near any battery. -
Page 294: Checking The Fluid Level
In areas where water freezes in winter, use an anti-freeze type windshield washer fluid. SUBARU Windshield Washer Fluid contains 58.5% methyl alcohol and 41.5% surfactant, by volume. Its freezing temperature varies according to how much it is diluted, as indicated below. -
Page 295: Replacement Of Windshield Wiper Blades
Washer Fluid Concentration 100% Replacement of windshield wiper blades Grease, wax, insects, or other material on the windshield or the wiper blade results in jerky wiper operation and streaking on the glass. If you cannot remove the streaks after operating the windshield washer or if the wiper operation is jerky, clean the outer surface of the windshield (or rear window) and the wiper blades using a sponge or soft cloth with a neutral detergent or mild-abrasive cleaner. - Page 296 1. Raise the wiper arm off the windshield. 2. Remove the wiper blade assembly by holding its pivot area and push- ing it in the direction shown by the arrow while depressing the wiper blade stopper. Stopper 3. Grasp the locked end of the blade rubber assembly and pull it firmly until the stoppers on the rubber are free of the metal support.
- Page 297 Maintenance and service Metal spines HS0192 5. Align the claws of the metal support with the grooves in the rubber and slide the blade rubber assembly into the metal support until it locks. Be sure to position the claws at the end of the metal support between the stoppers on the rubber as shown.
-
Page 298: Brake Pedal
10 N (2 lb, 1 kg). If the free play is not within proper specification, contact your SUBARU dealer. J Checking the brake pedal reserve distance More than 2.56 in... -
Page 299: Clutch Pedal (Manual Transmission)
(4.0 — 13.0 mm) Lightly press the clutch pedal down with your finger until you feel resis- tance, and check the free play. If the free play is not within proper specification, contact your SUBARU dealer. Maintenance and service OM-H0224 –... -
Page 300: Replacement Of Brake Pad And Lining
If you hear this scraping noise each time you apply the brake pedal, have the brake pads serviced by your SUBARU dealer as soon as pos- sible. CAUTION... -
Page 301: Parking Brake Stroke
(about 196 N, 44 lb, 20 kg). If the parking brake lever stroke is not within the specified range, have the brake system checked and adjusted at your SUBARU dealer. Maintenance and service –... -
Page 302: Tires And Wheels
7 to 8 notches Tires and wheels J Inspection and rotation WARNING D When replacing a tire, make sure you use only the same size, construction, brand, and load range as the original tires listed on the tire placard. Using other sizes or construction may result in severe mechanical damage to the drivetrain of your vehicle and may affect ride, handling, braking, speedometer/odometer cal- ibration, and clearance between the body and tires. - Page 303 specifications. Check the tire pressure when the tires are cold. Cold means that the vehicle has been parked for three hours or has been driven less than 1 mile (1.6 km). The recommended tire pressure and sizes are provided on the tire placard, which is located under the door latch on the driver’s side.
-
Page 304: Aluminum Wheels (If Equipped)
New tread Worn tread Tread wear indicator HS0201 OM-H0231 A tire should be replaced when the tread wear indicator appears as a solid band across the tread. The indicators appear when the remaining tread has been worn to 0.063 in (1.6 mm) or less. NOTE When any of the wheels is removed and replaced for tire rotation or to change a flat tire, always check the tightness of the wheel nuts after driv-... -
Page 305: Fuses
Maintenance and service be sure to replace them with genuine SUBARU parts designed for alumi- num wheels. Fuses HS0202 HS0203 The fuses are designed to melt during an overload to prevent damage to the wiring harness and electrical equipment. The fuses are located in two fuse boxes. -
Page 306: Coin Tray
J Replacing a fuse CAUTION Never replace a fuse with one having a higher rating or with mate- rial other than a fuse because serious damage or a fire could re- sult. B Fuse box (behind the coin tray) 1. Turn the ignition switch to the “LOCK” position and turn off all elec- trical accessories. - Page 307 6. If the same fuse blows again, this indicates that its system has a problem. Contact your SUBARU dealer for repairs. B Main fuse box (in the engine compartment) 1. Turn the ignition switch to the “LOCK” position and turn off all elec- trical accessories.
-
Page 308: Main Fuse And Fusible Link
SUBARU dealer. Installation of accessories Always consult your SUBARU dealer before installing fog lights or any other electrical equipment in your vehicle. Such accessories may cause the electronic system to malfunction if they are incorrectly installed or if they are not suited for the vehicle. -
Page 309: Replacing Bulbs
Replacing bulbs Spot light Room light Front turn signal, parking light and front side marker light Fog light Headlight High mount stop light Brake/tail light Rear turn signal light Backup light License plate light Maintenance and service Wattate (12V-8W) (12V-8W) (12V-27/8W Amber) (12V-51W) (12V-60/55W) - Page 310 J Headlight CAUTION Halogen headlight bulbs become very hot while in use. If you touch the bulb surface with bare hands or greasy gloves, finger prints or grease on the bulb surface develop into hot spots, caus- ing the bulb to break. If there are finger prints or grease on the bulb surface, wipe them away with a soft cloth moistened with al- cohol.
- Page 311 J Fog light (if equipped) CAUTION Halogen light bulbs become very hot while in use. If you touch the bulb surface with bare hands or greasy gloves, finger prints or grease on the bulb surface develop into hot spots, causing the bulb to break.
-
Page 312: Bulb Replacement
B Bulb replacement 1. Remove the fog light protector. 2. Remove the fog light assembly by removing the two screws. 3. Disconnect the connector. 4. Remove the fog light bulb by turning it counterclockwise. 5. Replace the bulb with a new one. Then reconnect the connectors and reinstall the removed parts in the reverse order of removal. -
Page 313: Rear Combination Lights
Maintenance and service 3. Remove the bulb holder from the front turn signal light assembly by turning it counterclockwise. 4. Pull the bulb out of the socket. Install a new bulb. 5. Set the bulb holder into the front turn signal light assembly and turn it clockwise until it locks. -
Page 314: License Plate Light
J License plate light HS0220 1. Remove the mounting screws using a phillips screwdriver. 2. Remove the cover and lens. 3. Pull the bulb out of the socket. Install a new bulb. 4. Reinstall the lens and cover. 5. Tighten the mounting screws. 10-52... -
Page 315: Interior Light And Luggage Compartment Light
Maintenance and service J Interior light and luggage compartment light HS0221 HSA005BA HS0223 1. Remove the lens by prying the edge of the lens with a regular screw- driver. 2. Pull the bulb out of the socket. Install a new bulb. 3. -
Page 316: Spot Light
J Spot light HSA006BA 1. Remove the lens by prying the edge of the lens with a regular screw- driver. 2. Remove the plate by removing a mounting screw. 3 Pull the bulb out of the socket. Install a new bulb. 4. - Page 317 Maintenance and service 4. Reinstall the cover. 5. Tighten the mounting screws then reinstall the covers. NOTE Other bulbs may be difficult for owner to replace. Have your SUBARU dealer replace these bulbs if necessary. – CONTINUED – 10-55...
-
Page 318: Specifications
Specifications Specifications ............. . Dimensions . -
Page 319: Specifications
Specifications These specifications are subject to change without notice. Dimensions Overall length Overall width Overall height Ground clearance Front tread Rear tread Wheelbase Engine Engine model Engine type Engine displacement Bore Stroke Compression ratio Firing order Electrical system Battery Type Reserve capacity Cold cranking ampere Alternator... -
Page 320: Tires
Automatic transmission fluid AT differential gear oil AWD rear differential gear oil Power steering fluid Engine coolant Tires Type Size Pressure Front (light load) (full load) Rear (light load) (full load) Trailer towing Front Rear Wheel size Wheel alignment Front Rear Camber Front... -
Page 321: Rear View Mirror
Fuses and circuits J Fuse panel located behind the coin tray Fuse panel Fuse rating Empty 11-4 Circuit D Heater fan D Heater fan D Power door lock D Cigarette lighter D Remote controlled rear view mirrors D Tail light D Parking light D SRS AIRBAG D Fog light... - Page 322 Fuse panel Fuse rating Empty Circuit D Engine ignition system D SRS AIRBAG D Illumination brightness control D Wiper deicer D Windshield wiper and washer D Rear window wiper and washer D Brake light D Air conditioner D Backup light D Cruise control D ABS control D Rear accessory power socket...
-
Page 323: Fuse Panel Located In The Engine Compartment
J Fuse panel located in the engine compartment Fusible link Fuse panel Fuse rating 11-6 Circuit D Radiator cooling fan (Main) D Radiator cooling fan (Sub) D Rear window defogger D Hazard warning flasher D Horn D Meter D SRS AIRBAG warning light D Automatic transmission control unit D Alternator D Headlight (right side) -
Page 324: Front Turn Signal, Parking Light And Front Side Marker Light
Bulb chart Description Spot light Room light Front turn signal, parking light and front side marker light Fog light Headlight Brake/tail light Rear turn signal light Backup light High mount stop light License plate light Specifications Wattage Bulb No. 12V-8W —... -
Page 325: Vehicle Identification
Vehicle identification Emission control label Vehicle identification number 11-8 Vacuum hose piping label Vehicle identification number plate Model number plate Tire inflation pressure label Certification plate Bar cord label HS0226... -
Page 326: Consumer Information And Reporting Safety Defects
Consumer information and Reporting safety defects Uniform tire quality grading standards Treadwear ..............Traction A, B, C . -
Page 327: Uniform Tire Quality Grading Standards
For U.S.A. The following information has been compiled according to Code of Fed- eral Regulations “Title 49, Part 575”. Uniform tire quality grading standards This information indicates the relative performance of passenger car tires in the area of treadwear, traction, and temperature resistance. This is to aid the consumer in making an informed choice in the purchase of tires. -
Page 328: Reporting Safety Defects
Consumer information and Reporting safety defects J Temperature A, B, C The temperature grades are A (highest), B and C, representing the tire’s resistance to generation of heat and its ability to dissipate heat when tested under controlled conditions on a specified indoor laboratory test wheel. -
Page 329: Reporting Safety Defects (U.s.a.)
However, NHTSA cannot become involved in individual problems between you, your dealer, or Subaru of America, Inc. To contact NHTSA, you may either call the Auto Safety Hotline toll-free at 1-800-424-9393 (or 366-0123 in the Washington D.C. area) or write to: NHTSA, U.S.
Need help?
Do you have a question about the 1999 Forester and is the answer not in the manual?
Questions and answers