Advertisement
Quick Links
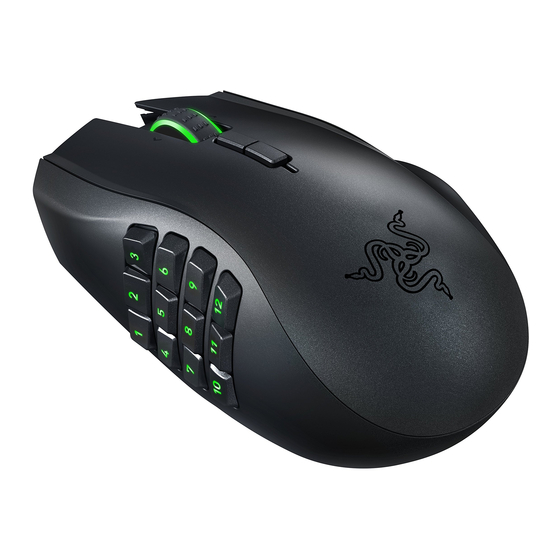
The Razer™ Naga Epic MMO Gaming Mouse is the upgrade to the original award-winning and massively
popular Razer Naga™ that shifts the balance between the keyboard and mouse with its 17 MMO-
optimized buttons.
The Razer Naga Epic takes it one step further by combining this with the dual mode wired/wireless
functionality and interchangeable side panels, designed by the world-acclaimed Razer ergonomics team,
which provides an optimal fit for various hand sizes and grip styles so you can raid in comfort for hours on
end. With the Razer Naga Epic, prepare to Get Imba again.
From the casual MMO gamer to the serious hardcore raider, the Razer Naga Epic will take you to the
head of the pack in both PVE and PVP action.
Buff it with the Razer Anansi MMO gaming keyboard to use the Razer Naga Epic's 12-button mouse
keypad seamlessly with the keyboard's 7 thumb modifier keys, giving you an unprecedented level of
battle control while dual-wielding the world's most phenomenal weapons for MMO gaming dominance.
MASTER GUIDE
CONTENTS
1. System Requirements
2. Installation / Registration / Technical Support
3. Key Features
4. Configuring Your Razer Naga Epic
5. Using Your Razer Naga Epic
6. Legalese
1. SYSTEM & HARDWARE REQUIREMENTS:
- PC with USB port
- Windows® 7 / Windows Vista® / Windows® XP
- Internet connection (for driver installation)
- 75MB of free hard disk space
2. INSTALLATION / REGISTRATION / TECHNICAL SUPPORT
For best results, please charge the battery fully the first time you use the Razer Naga Epic. Do check that
the left-side switch on the bottom of the Razer Naga Epic is switched to the Wired/Charging position. A
depleted battery will be fully charged in about 5 hours.
Advertisement

Related Manuals for Razer Naga Epic


Summary of Contents for Razer Naga Epic
- Page 1 2. INSTALLATION / REGISTRATION / TECHNICAL SUPPORT For best results, please charge the battery fully the first time you use the Razer Naga Epic. Do check that the left-side switch on the bottom of the Razer Naga Epic is switched to the Wired/Charging position. A...
- Page 2 Wired / Charging position when not using your mouse in wireless mode. 6. Press the pairing buttons on the Razer Naga Epic and Charging Dock. The lights on the Razer Naga Epic will start flashing to indicate the pairing process.
- Page 3 8. To charge the Razer Naga Epic in wireless mode, ensure that the shown switch is set to the Wired/Charging position and place it on the Charging Dock. Alternatively, the Razer Naga Epic can be charged by plugging it directly into a PC USB port.
- Page 4 2. Connect the Cable Connector Jack to the Razer Naga Epic. 3. Plug mouse into the USB port of your computer. The Razer Naga Epic is then ready for use as a high performance wired mouse. In addition, its battery will start charging automatically in this wired mode.
- Page 5 H. Wireless and Wired/Charging Switch * I. Pairing Button J. Basic [123] / Advanced [Num] Switch K. Ultraslick Mouse Feet * For optimum battery life, always move the switch to the Wired/Charging position when not using your Razer Naga Epic in wireless mode.
- Page 6 L. Rechargeable Battery M. Cable Connector Jack N. Battery Charging Connector O. Connector Jack (Charging Dock) P. 3 Interchangeable Side Panels – Classic Grip, Claw Grip, Palm Grip (default)
- Page 7 4. CONFIGURING YOUR RAZER NAGA EPIC The features listed here require the Razer Naga Epic software driver to be installed. Each setting will be saved to the current Profile on the current machine only. ASSIGN BUTTONS TAB TOP VIEW In the Assign Buttons tab, you can assign various functions to each of the buttons based on your own preferences.
- Page 8 Assign a "Back" command in Windows Explorer / Internet Explorer. On-The-Fly Sensitivity: Enable change of sensitivity settings on the fly without the need to enter the configuration menu. Refer to 'Using Your Razer Naga Epic' for more details. Single Key: Activate a key on your keyboard.
- Page 9 THUMB GRID VIEW Choose the THUMB GRID VIEW to gain access to the 12 buttons Thumb Grid. All 12 buttons can be assigned to various functions based on your own preferences. In addition, you can switch between the Basic [123] and Advanced [Num] configuration to assign a different set of functions to your Thumb Grid.
- Page 10 1. Current DPI The current DPI setting is shown. 2. Sensitivity The current sensitivity of your Razer Naga Epic can be easily adjusted by moving the arrow along the slider. a. Sensitivity Stage Click on this to adjust the Sensitivity Stage settings.
- Page 11 MANAGE PROFILES TAB In the Manage Profiles tab, you can create and activate customized profiles based on the application you have launched. a. Current: Indicates the current active profile. b. Profile: Indicates the profile number c. Profile Name: Right-click on this row and select "Rename" to enter a profile name of your choice. d.
- Page 12 Right-clicking on any profile allows you to quickly access a list of extra commands.
- Page 13 Basic Commands: A list of basic commands in Windows OS that can be inserted between keystrokes of your macro. d. Additional Commands: Another list of basic commands in Windows OS that can be inserted between keystrokes of your macro. Refer to 'Using Your Razer Naga Epic' for more details.
- Page 14 LIGHTING AND POWER TAB LIGHTING You can customize the look of the Razer Naga Epic by giving you the ability to choose from over 16 million colors to adjust the color of the mouse. Select the Spectrum Cycling option to allow the colors to change indefinitely.
- Page 15 5. USING YOUR RAZER NAGA EPIC Using Basic [123] and Advanced [Num] Modes The Razer Naga Epic provides a twelve button [1-12] Thumb Grid in two configurations: Basic [123] and Advanced [Num]. 1. Basic [123] Configuration In Basic [123] configuration, the twelve buttons [1-12] are assigned to 1,2,3,4,5,6,7,8,9,0,-,= of the keyboard respectively.
- Page 16 Charging the Razer Naga Epic For best results, please charge the battery fully the first time you use the Razer Naga Epic. A depleted battery will be fully charged in about 5 hours. If the mouse has not been used for an extended period, the...
- Page 17 USB hub or non-powered USB ports found on certain keyboards and other peripherals When in doubt, it is preferable to connect the Razer Naga Epic directly to the USB port found on the CPU unit of your computer system.
- Page 18 Click APPLY when done. Switching Profiles You can switch between profiles in 3 ways in the Razer Naga Epic Configurator: a. By changing the Current Profile. b. By selecting the Current Profile radio button in the Manage Profiles tab.
- Page 19 Profiles A profile allows you to store your various settings such as button assignments as a single group for your convenience. In addition, you can also set your Razer Naga Epic to change profiles once a particular program is launched.
- Page 20 COSTS OF PROCUREMENT For the avoidance of doubt, in no event will Razer be liable for any costs of procurement unless it has been advised of the possibility of such damages, and in no case shall Razer be liable for any costs of procurement liability exceeding the retail purchase price of the Product.
Need help?
Do you have a question about the Naga Epic and is the answer not in the manual?
Questions and answers