Table of Contents
Advertisement
Advertisement
Table of Contents

Subscribe to Our Youtube Channel
Related Manuals for Razer Naga Trinity


Summary of Contents for Razer Naga Trinity
- Page 1 RAZER NAGA TRINITY MASTER GUIDE...
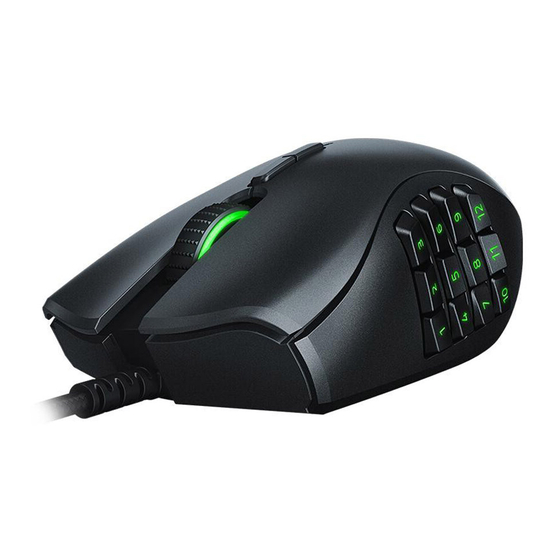
- Page 2 Razer Naga Trinity lets you configure your mouse for everything from weapons to build customizations so you’ll always be ahead of the competition. The Razer Naga Trinity is equipped with 3 interchangeable side plates that allow you to switch between 2, 7 and 12-button configurations, depending on your in-game needs.
-
Page 3: Table Of Contents
3. TECHNICAL SPECIFICATIONS ................... 5 4. DEVICE LAYOUT ......................... 6 5. SETTING UP YOUR RAZER NAGA TRINITY ..............1 6. INSTALLING RAZER SYNAPSE FOR YOUR RAZER NAGA TRINITY ....... 2 7. CONFIGURING YOUR RAZER NAGA TRINITY ..............3 8. SAFETY AND MAINTENANCE ..................23 9. -
Page 4: Package Contents / System Requirements
1. PACKAGE CONTENTS / SYSTEM REQUIREMENTS PACKAGE CONTENTS ▪ Razer Naga Trinity gaming mouse ▪ 3 interchangeable side plates ▪ Important Product Information Guide SYSTEM REQUIREMENTS PRODUCT REQUIREMENTS ▪ PC or Mac with a free USB port RAZER SYNAPSE 3 REQUIREMENTS ▪... -
Page 5: Registration / Technical Support
REGISTRATION Register your product online at razer-id.razerzone.com/warranty to get real-time information on your product’s warranty status. If you haven’t registered for a Razer ID yet, register now at razer-id.razerzone.com to get a wide range of Razer benefits. Your product’s serial number can be found here. -
Page 6: Technical Specifications
▪ Razer™ Mechanical Mouse Switches ▪ Gaming-grade tactile scroll wheel ▪ Ergonomic right-handed design with enhanced rubber side grips ▪ Razer Chroma™ lighting with 16.8 million customizable color options ▪ 1000 Hz Ultrapolling ▪ Razer Synapse 3 (Beta) enabled APPROXIMATE SIZE & WEIGHT ▪... -
Page 7: Device Layout
2-button side plate Default DPI stages are as follows: 800, 1800, 4500, 9000, and 16000. The DPI stages can be customized using Razer Synapse 3. ™ F O R G A ME R S . B Y G A M E R S . -
Page 8: Setting Up Your Razer Naga Trinity
Pull from the bottom of the side plate to remove it; and then replace it with another side plate of a different button configuration. Note: To customize each side plate’s button assignments, please install Razer Synapse ™ F O R G A ME R S . B Y G A M E R S . - Page 9 Step 1: Connect your Razer device to the USB port of your computer. Step 2: Install Razer Synapse when prompted* or download the installer from razerzone.com/synapse. Step 3: Create your Razer ID or log into Razer Synapse with an existing account. *Applicable for Windows 8 or later. ™...
-
Page 10: Configuring Your Razer Naga Trinity
Operating System. SYNAPSE TAB The Synapse tab is your default tab when you first launch Razer Synapse 3. This tab allows you to navigate the Dashboard subtab. Dashboard The Dashboard subtab is an overview of your Razer Synapse 3 where you can access all your Razer devices, modules, and online services. - Page 11 MOUSE TAB The Mouse tab is the main tab for your Razer Naga Trinity. From here, you can change your device’s settings such as button assignment, DPI sensitivity, and lighting. Changes made under this tab are automatically saved to your system and cloud storage however, you need ) to open the storage slots for your Razer device’s on-board...
- Page 12 Sidebar Clicking the Sidebar button ( ) will reveal all current button assignments for your Razer Naga Trinity. Alternatively, you can skip to a specific button assignment by selecting it on the Customize tab. ™ F O R G A ME R S . B Y G A M E R S .
- Page 13 Upon selecting a button assignment, you may then change it to one of the following functions: Default This option enables you to return the mouse button to its original setting. Keyboard Function This option changes the button assignment into a keyboard function. You can also choose enable Turbo mode which allows you to emulate repeatedly pressing the keyboard function while the button is held down.
- Page 14 Sensitivity This function allows you to manipulate the DPI setting of your Razer Naga Trinity with a touch of a button. Listed below are the Sensitivity options and their description: ▪...
- Page 15 Click here to learn more about Advanced Chroma Effects Razer Hypershift Setting the button to Razer Hypershift will allow you to activate Hypershift mode as long as the button is held down. Launch Program Launch Program enables you to open an app or a website using the assigned button. When you select Launch Program, two choices will appear which requires you to search for a specific app you want to open, or write the address of the website you want to visit.
- Page 16 ™ F O R G A ME R S . B Y G A M E R S .
- Page 17 Windows Shortcuts This option allows you to assign the mouse button into a Windows Operating System shortcut command. For more information, please visit: http://support.microsoft.com/kb/126449 Text Function Text Function enables you to type a prewritten text with a touch of a button. Simply write your desired text on the given field and your text will be typed whenever the assigned button is pressed.
- Page 18 Performance The Performance subtab allows you to modify the sensitivity, acceleration, and polling rate. Listed below are the performance options and their descriptions. Sensitivity Sensitivity refers to the distance the cursor will travel based on how far the mouse moved. The higher the DPI, the farther the cursor will travel given the same distance of mouse movement.
- Page 19 Lighting The Lighting subtab enables you to modify your Razer device’s light settings. Brightness You can turn off your Razer device’s lighting by toggling the Brightness option or increase/decrease the luminance using the slider. Switch Off Lighting This is a power saving tool which allows you to disable your device’s lighting in response to your system’s display turning off and/or automatically power down when your Razer Naga...
- Page 20 Static Select a color selected color If you have other supported Razer Chroma-enabled devices, you can synchronize their quick effects with your Razer device by clicking the Chroma Sync button ( Advanced Effects The Advanced Effects option allows you to choose a Chroma Effect you want to use on your Razer Chroma-enabled peripheral.
- Page 21 Calibration The Calibration subtab allows you to optimize your Razer Precision Sensor to any surface for better tracking. To use this feature, you must click the Add A Surface option where you can select from a comprehensive list of Razer mouse mats or add your own mouse mat.
- Page 22 The Profiles tab is a convenient way of managing all your profiles and linking them to your games and applications. Devices View which Razer device is using a specific profile using the Devices subtab. To create a new profile within the selected device, simply click the add button ( ). To rename, duplicate, or delete a profile, simply press the Miscellaneous button ( ).
- Page 23 You can also sort games based on alphabetical order, last played, or most played. Added games will still be listed here even if it is not linked to a Razer device. ™...
- Page 24 Studio The Studio subtab enables you to create and edit your own Chroma Effects which you can apply to all supported Razer Chroma-enabled devices. This tab can also be accessed under the Dashboard’s Chroma module. To add, rename, duplicate, or delete a Chroma Effect, simply click the Miscellaneous button ( ).
- Page 25 Apps The Apps subtab is where you can enable or disable third party integrated apps for your Razer Chroma-enabled peripherals. The Apps tab can also direct you to the Chroma Workshop where you can download these third-party apps. ™...
- Page 26 MACROS TAB If you need to accurately execute a series of complex commands then you need a Macro. A macro is a set of recorded keystrokes, button presses, and cursor movements. The Macros tab allows you to create, edit, and organize these macros so that you can assign them to your mouse buttons.
- Page 27 To create a macro, simply select a macro name to store your commands, then click the Record menu. Assign a key or button for the macro on Shortcut Key field, select a delay, and select if you want to include mouse movement tracking. Once you have chosen the settings for the macro, click the Start button ( ).
- Page 28 Once you have recorded a macro, you may edit the commands you have entered by selecting each command on the macro screen. Each keystroke or button press is arranged sequentially with the first command shown at the top of the screen. The Insert menu allows you to put in additional keystrokes, button presses, type texts, run commands, loop a set of commands, or insert an entire macro group.
- Page 29 Reset tab The Reset tab allows you to perform a factory reset on all connected Razer devices with on- board memory. All profiles stored on the selected device’s on-board memory will be erased. Note: Performing a factory reset on devices without on-board memory will only create a new profile for your device on Razer Synapse 3 using the default settings.
-
Page 30: Safety And Maintenance
Below are some guidelines to avoid injury and ensure optimum comfort while using your Razer Naga Trinity. ▪ Position your keyboard and monitor directly in front of you with your mouse next to it. - Page 31 Razer. Some surfaces will cause undue wear on the feet requiring constant care and eventual replacement. Do note that the sensor of the Razer Naga Trinity is ‘tuned’ or optimized especially for the Razer mouse mats. This means that the sensor has been tested extensively to confirm that the Razer Naga Trinity reads and tracks best on Razer mouse mats.
-
Page 32: Legalese
LIMITATION OF LIABILITY Razer shall in no event be liable for any lost profits, loss of information or data, special, incidental, indirect, punitive or consequential or incidental damages, arising in any way out of distribution of, sale of, resale of, use of, or inability to use the Product. In no event shall Razer’s liability exceed the retail purchase price of the Product. - Page 33 For the avoidance of doubt, in no event will Razer be liable for any costs of procurement unless it has been advised of the possibility of such damages, and in no case shall Razer be liable for any costs of procurement liability exceeding the retail purchase price of the Product.
Need help?
Do you have a question about the Naga Trinity and is the answer not in the manual?
Questions and answers