Advertisement
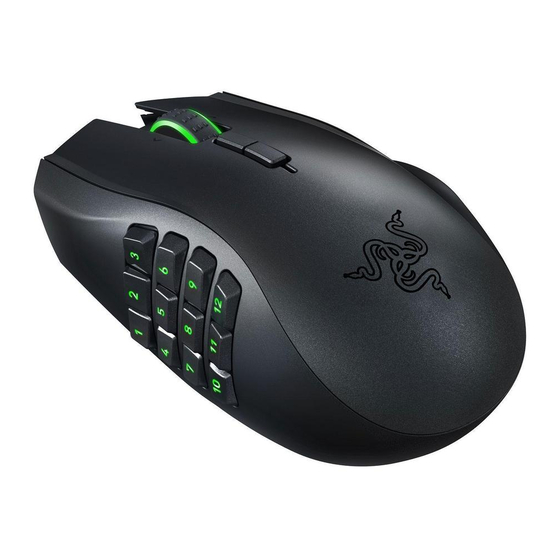
The Razer Naga Epic MMO Gaming Mouse is the upgrade to the original award-winning
and massively popular Razer Naga that shifts the balance between the keyboard and
mouse with its 17 MMO-optimized buttons.
The Razer Naga Epic takes it one step further by combining this with the dual mode
wired/wireless functionality and interchangeable side panels, designed by the world-
acclaimed Razer ergonomics team, which provides an optimal fit for various hand sizes
and grip styles so you can raid in comfort for hours on end. With the Razer Naga Epic,
prepare to Get Imba again.
From the casual MMO gamer to the serious hardcore raider, the Razer Naga Epic will
take you to the head of the pack in both PVE and PVP action.
Buff it with the Razer Anansi MMO gaming keyboard to use the Razer Naga Epic's 12-
button mouse keypad seamlessly with the keyboard's 7 thumb modifier keys, giving
you an unprecedented level of battle control while dual-wielding the world's most
phenomenal weapons for MMO gaming dominance.
0 | For gamers by gamers™
Advertisement

Related Manuals for Razer Naga Epic MMO


Summary of Contents for Razer Naga Epic MMO
- Page 1 Razer ergonomics team, which provides an optimal fit for various hand sizes and grip styles so you can raid in comfort for hours on end. With the Razer Naga Epic, prepare to Get Imba again.
-
Page 2: Table Of Contents
TABLE OF CONTENTS 1. PACKAGE CONTENTS / SYSTEM REQUIREMENTS / REGISTRATION ..... 2 2. DEVICE LAYOUT ....................3 3. SETTING UP YOUR RAZER NAGA EPIC ..............5 4. USING YOUR RAZER NAGA EPIC................9 5. INSTALLING YOUR RAZER NAGA EPIC ............... 11 6. -
Page 3: Package Contents / System Requirements / Registration
1. PACKAGE CONTENTS / SYSTEM REQUIREMENTS / REGISTRATION PACKAGE CONTENTS Razer Naga Epic Elite MMO Gaming Mouse 3 Interchangeable Side Panels Charging Dock Lithium-Ion Polymer Battery USB Cable Grid Trainer Quick Start Guide ... -
Page 4: Device Layout
D. Mouse Button 5 E. Mouse Button 4 F. Thumb Grid - 12 Buttons (Action Bar for MMO games) G. Razer Precision 3.5G Laser Sensor H. Wireless and Wired/Charging Switch * I. Pairing Button J. Basic [123] / Advanced [Num] Switch K. - Page 5 L. Rechargeable Battery M. Cable Connector Jack N. Battery Charging Connector O. Connector Jack (Charging Dock) P. 3 Interchangeable Side Panels – Classic Grip, Claw Grip, Palm Grip (default) 4 | For gamers by gamers™...
-
Page 6: Setting Up Your Razer Naga Epic
USB hub or non-powered USB ports found on certain keyboards and other peripherals. When in doubt, it is preferable to connect the Razer Naga Epic directly to the USB port found on the CPU unit of your computer system. - Page 7 WIRELESS MODE Connect the Cable Connector Jack to the Charging Dock. Remove the side panel of the Razer Naga Epic. Slide the lock switch and insert the battery into the battery compartment. (Sliding the lock switch again will allow you to remove the battery).
- Page 8 Wired / Charging position when not using your mouse in wireless mode. Press the pairing buttons on the Razer Naga Epic and Charging Dock. The lights on the Razer Naga Epic will start flashing to indicate the pairing process.
- Page 9 To charge the Razer Naga Epic in wireless mode, ensure that the shown switch is set to the Wired/Charging position and place it on the Charging Dock. WIRED MODE Do ensure that the shown switch is set to the Wired/Charging position.
-
Page 10: Using Your Razer Naga Epic
4. USING YOUR RAZER NAGA EPIC USING BASIC [123] AND ADVANCED [NUM] MODES The Razer Naga Epic provides a 12-button [1-12] Thumb Grid in two modes: Basic [123] and Advanced [Num]. To change between the Basic [123] and Advanced [Num] mode, simply use the switch at the bottom of your Razer Naga Epic. - Page 11 Advanced [NUM] Configuration In the Advanced [Num] mode, the 12-button thumb grid works the same as a keypad’s numerical keys. These buttons allow you to have quicker access to in-game commands without having the need to reach for the keypad. Note: Depending on your configuration, using the shift key or num lock key in-game may affect the functionality of the thumb grid buttons (for example: numpad 4 may become left arrow).
-
Page 12: Installing Your Razer Naga Epic
5. INSTALLING YOUR RAZER NAGA EPIC Note: You may skip Steps 2-4 if you already have a Razer Synapse 2.0 installed and an existing account. Step 1: Plug the Razer Naga Epic into the USB port of your computer. Step 2: Download the Razer Synapse 2.0 installer from www.razerzone.com/synapse2. -
Page 13: Configuring Your Razer Naga Epic
6. CONFIGURING YOUR RAZER NAGA EPIC Disclaimer: The features listed here require you to log in to Razer Synapse 2.0. These features are also subject to change based on the current software version and your Operating System. MOUSE TAB The Mouse Tab is your default tab when you first install Razer Synapse 2.0. This tab allows you to customize your device’s profiles, button assignments, performance and... - Page 14 Each profile can be set to FN + 0 - 9 using the SHORTCUT dropdown menu for fast profile switching. Each profile can also be set to automatically activate when you run a program or application through the use of the LINK PROGRAM option. 13 | razer™...
- Page 15 CUSTOMIZE TAB The Customize Tab is where you can modify the basic functionalities of your device such as button assignments to suit your gaming needs. The changes made in this tab are automatically saved to your current profile. Top View The Top View is where you can customize the 5 basic mouse buttons and the mouse wheel.
- Page 16 Configuring the thumb grid buttons on any mode does not require you to use the switch underneath the Razer Naga Epic. However, you will still need to use the switch to change between the Basic [123] and the Advanced [NUM] configuration.
- Page 17 BUTTON ASSIGNMENT MENU Initially, each of the mouse buttons is set to DEFAULT. However, you may change the function of these buttons by clicking the desired button to access the Button Assignment Menu. Listed below are the customization options and their description. Default This option enables you to return the key to its original function.
- Page 18 - Readily adjust the current sensitivity using the assigned button. If On‐The‐Fly Sensitivity has been set, pressing the designated button and moving the scroll wheel will produce a bar on your screen which would indicate your current sensitivity level. 17 | razer™...
- Page 19 Inter-device from the Button Assignment Menu, a sub-menu will appear. DEVICE TO LINK allows you to choose which currently connected Razer device can be linked while FUNCTION allows you to choose which functionality you want to use for the linked device.
- Page 20 - Play the previous track. Next Track - Play the next track. Disable This option renders the assigned button unusable. Use Disable when you have no need for a button or if a particular button interferes with your gaming. 19 | razer™...
- Page 21 PERFORMANCE TAB The Performance Tab allows you to enhance the speed and precision of your mouse pointer. Similar to the Customize Tab, the changes made here are automatically saved to your current profile. Listed below are the performance options and their descriptions. Sensitivity Sensitivity pertains to how much effort is needed to move the mouse pointer in any direction.
- Page 22 You can switch between 125Hz (8ms), 500Hz (2ms) and 1000Hz (1ms) by selecting your desired polling rate on the dropdown menu. (Recommended setting: 500Hz – 1000Hz) 21 | razer™...
- Page 23 LIGHTING TAB The Lighting Tab allows you to customize the look of your gaming mouse by choosing from over 16 million colors for the backlight or you may select the SPECTRUM CYCLING option to allow the colors to change indefinitely. This tab also allows you to adjust the intensity of the backlight by using the BRIGHTNESS slider.
- Page 24 You can set your device to enter sleep mode when it has been idle for a certain amount of time. The Power Tab also allows you to be notified when the device’s power is at a certain level. 23 | razer™...
- Page 25 MACROS TAB The Macros Tab allows you to create a series of precise keystrokes and button presses. This tab also allows you to have numerous macros and extremely long macro commands at your disposal. The Macro section works similarly to Profile wherein you can rename a macro by typing on the field below MACRO NAME.
- Page 26 DEFAULT DELAY uses a predefined time (expressed in seconds) as the delay. And NO DELAY omits all the pauses in-between keystrokes and button presses. Note: You may use up to three decimal places when inserting values on the seconds (sec) field. 25 | razer™...
- Page 27 Once you have recorded a macro, you may edit the commands you have entered by selecting each command on the macro screen. Each keystroke or button press is arranged sequentially with the first command shown at the top of the screen. button allows you to edit a particular command and the button enables you to delete a command.
- Page 28 Once you have pressed the Insert button, a new display window will appear beside the list of macro commands. The dropdown menu on this window allows you to choose a keystroke or a delay to be added in before or after the highlighted macro command. 27 | razer™...
- Page 29 You may add in a new set of macro commands by clicking the button on the keystroke menu; or input time delays on the duration field using the delay menu. 28 | For gamers by gamers™...
- Page 30 ADD ON TAB The Add On Tab expands your device’s usability by adding game-specific settings such as a custom interface. To start using Razer Add Ons first you must enable the USE RAZER NAGA ADD ON option. Note: To learn more about Razer Add Ons, visit www.getimba.com...
- Page 31 Next, search for the game program or game application using the button. Finally, select your user account for the game by choosing it on the dropdown menu beside Sync Account. 30 | For gamers by gamers™...
- Page 32 The Account Information screen will show you all the relevant information regarding your user account. 31 | razer™...
-
Page 33: Safety And Maintenance
7. SAFETY AND MAINTENANCE SAFETY GUIDELINES In order to achieve maximum safety while using your Razer Naga Epic, we suggest that you adopt the following guidelines: 1. Avoid looking directly at the tracking beam of your mouse or pointing the beam in anyone else’s eye. - Page 34 Razer. Some surfaces will cause undue wear on the feet requiring constant care and eventual replacement. Do note that the sensor of the Razer Naga Epic is ‘tuned’ or optimized especially for the Razer mousing surfaces. This means that the sensor has been tested extensively to confirm that the Razer Naga Epic reads and tracks best on Razer mousing surfaces.
-
Page 35: Legalese
LIMITATION OF LIABILITY Razer shall in no event be liable for any lost profits, loss of information or data, special, incidental, indirect, punitive or consequential or incidental damages, arising in any way out of distribution of, sale of, resale of, use of, or inability to use the Product. In no event shall Razer’s liability exceed the retail purchase price of the Product. - Page 36 (in so far as it is invalid or unenforceable) shall be given no effect and deemed to be excluded without invalidating any of the remaining terms. Razer reserves the right to amend any term at any time without notice. 35 | razer™...
Need help?
Do you have a question about the Naga Epic MMO and is the answer not in the manual?
Questions and answers