Table of Contents
Advertisement
Quick Links
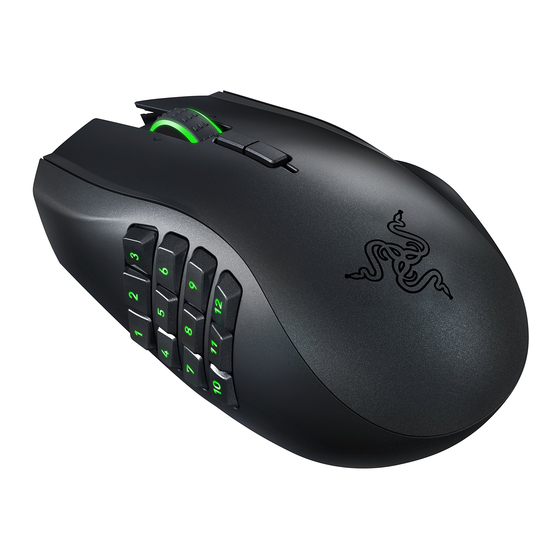
The Razer Naga Chroma multi-color MMO gaming mouse makes late night raids, intense
guild battles, and exciting dungeon crawling even more fun for MMO gamers.
It comes with 12 mechanical thumb-grid buttons for faster in-game actuations and
assured tactile feedback. The concave button design also allows for blind-find so you stay
focused on the game, letting your instincts lead you to victory.
Maximize the best strength of your gaming mouse and be the boss of your own game.
1 | razer™
Advertisement
Table of Contents

Related Manuals for Razer Naga Chroma


Summary of Contents for Razer Naga Chroma
- Page 1 The Razer Naga Chroma multi-color MMO gaming mouse makes late night raids, intense guild battles, and exciting dungeon crawling even more fun for MMO gamers. It comes with 12 mechanical thumb-grid buttons for faster in-game actuations and assured tactile feedback. The concave button design also allows for blind-find so you stay focused on the game, letting your instincts lead you to victory.
-
Page 2: Table Of Contents
2. REGISTRATION / TECHNICAL SUPPORT ..............4 3. TECHNICAL SPECIFICATIONS ................. 5 4. DEVICE LAYOUT ....................6 5. USING YOUR RAZER NAGA CHROMA ..............7 6. INSTALLING YOUR RAZER NAGA CHROMA ............7 7. CONFIGURING YOUR RAZER NAGA CHROMA ............8 8. - Page 3 SYSTEM REQUIREMENTS • PC or Mac with a free USB port • Windows® 10 / Windows® 8 / Windows® 7 / Mac OS X (10.8 - 10.10) • Internet connection • 100MB of free hard disk space 3 | razer™...
-
Page 4: Registration / Technical Support
To learn more about Razer Synapse and all its features, visit If you are already a Razer Synapse user, register your product by clicking on your email address at the Razer Synapse application and select Warranty Status from the dropdown list. -
Page 5: Technical Specifications
• 1000 Hz Ultrapolling / 1 ms response time • Chroma lighting with 16.8 million customizable color options • Inter-device color synchronization • Razer Synapse enabled • Zero-acoustic Ultraslick mouse feet • 2.1 m / 7 ft braided fiber USB cable APPROXIMATE SIZE &... -
Page 6: Device Layout
• Weight 150g/0.33lbs 4. DEVICE LAYOUT A. Left mouse button B. Right mouse button C. Scroll wheel D. DPI stage up E. DPI stage down F. Left tilt-click – repeat scroll down G. Right tilt-click – repeat scroll up H. 12 Programmable mechanical thumb grid buttons I. -
Page 7: Using Your Razer Naga Chroma
5. USING YOUR RAZER NAGA CHROMA The 12-button thumb grid works the same as a keyboard’s numerical keys. These buttons allow you to replicate the action bar of most games onto the thumb grid buttons. 6. INSTALLING YOUR RAZER NAGA CHROMA... -
Page 8: Configuring Your Razer Naga Chroma
*Applicable for Windows 8 or later. 7. CONFIGURING YOUR RAZER NAGA CHROMA Disclaimer: The features listed here require you to log in to Razer Synapse. These features are also subject to change based on the current software version and your Operating System. - Page 9 9 | razer™...
- Page 10 Profile A profile is a convenient way of organizing all your custom settings and you can have an infinite number of profiles at your disposal. Any changes made within each tab are automatically saved to the current profile and stored into the cloud servers. You can create a new profile by clicking the button or delete the current profile by clicking the...
- Page 11 Top View The Top View is where you can customize the mouse buttons and the scroll wheel. Side View The Side View is where you can customize the 12-button thumb grid. 11 | razer™...
- Page 12 You can save up to 8 sets of KEYMAP configurations, allowing you to easily set up and switch between customized key mappings for different games. Button Assignment Menu Initially, each of the mouse buttons is set to DEFAULT. However, you may change the function of these buttons by clicking the desired button to access the Button Assignment Menu.
- Page 13 KEYBOARD FUNCTION from the Button Assignment Menu and enter the key you wish to use on the given field below. You may also include modifier keys such as Ctrl, Shift, Alt or any of those combinations. 13 | razer™...
- Page 14 Mouse Function This option allows you to change the mouse buttons into other mouse functions. To choose a mouse function, select MOUSE FUNCTION from the Button Assignment Menu and an ASSIGN BUTTON submenu will appear. Listed below are the functions which you can choose from the Assign Button submenu: Left Click - Performs a left mouse click using the assigned button.
- Page 15 Inter-device allows you to change the functionality of other Razer Synapse-enabled devices. Some of these functionalities are device-specific such as using your Razer gaming keyboard to change the Sensitivity Stage of your Razer gaming mouse. When you select Inter-device from the Button Assignment Menu, a sub-menu will appear.
- Page 16 Macro A Macro is a pre-recorded sequence of keystrokes and button presses that is executed with precise timing. By assigning a Macro to a button, you can execute complex combinations with ease. The ASSIGN MACRO allows you to choose which recorded Macro to use while the PLAYBACK OPTION enables you to choose the behavior of the Macro.
- Page 17 Performance Tab The Performance Tab allows you to enhance the speed and precision of your mouse pointer. Similar to the Customize Tab, the changes made here are automatically saved to your current profile. 17 | razer™...
- Page 18 Listed below are the performance options and their descriptions. Sensitivity Sensitivity pertains to how much effort is needed to move the mouse pointer in any direction. The higher the sensitivity, the more responsive the mouse will be. (Recommended setting: 1600 – 1800) Enable X-Y Sensitivity By default, the X-axis (horizontal) and Y-axis (vertical) use the same sensitivity values.
- Page 19 You can switch between 125Hz (8ms), 500Hz (2ms) and 1000Hz (1ms) by selecting your desired polling rate on the dropdown menu. (Recommended setting: 500Hz – 1000Hz) 19 | razer™...
- Page 20 Each Chroma enabled device has a Lighting Tab on Razer Synapse. This Lighting Tab allows you to customize the look of your Razer Naga Chroma by being able to choose from 16.8 million colors for the Razer logo, 12 button thumb grid, and scroll wheel. This tab also allows you to adjust the intensity of the lighting using the BRIGHTNESS dropdown menu.
- Page 21 SURFACE CALIBRATION then choose an appropriate mousing surface. Razer Mouse Mats The Razer Naga Chroma is ‘tuned’ or optimized especially for Razer mouse mats. This means that the sensor has been tested extensively to confirm that the Razer Naga Chroma reads and tracks best when paired with Razer mouse mats.
- Page 22 If you wish to learn more about a particular mouse mat or if you wish to purchase a Razer mouse mat, you may do so by clicking the button. Other Mousing Surfaces If you are using a non-Razer mouse mat or a non-standard mousing surface, select OTHERS then click the button to access the manual calibration submenu.
- Page 23 This submenu enables you to manually adjust the Razer Precision Sensor to suit any mousing surface. 23 | razer™...
- Page 24 Razer Synapse will begin tuning the sensor. Please avoid moving the Razer Naga Chroma during this time. Once the Razer Precision Sensor is ready, click the left mouse button to start the process. Move the mouse across your entire mousing surface in a zigzag pattern as shown on the screen guide.
- Page 25 MACROS TAB The Macros Tab allows you to create a series of precise keystrokes and button presses. This tab also allows you to have numerous macros and extremely long macro commands at your disposal. 25 | razer™...
- Page 26 The Macro section works similarly to Profile wherein you can rename a macro by typing on the field below MACRO NAME. There are also other options available in the macro section such as creating a new macro by clicking the button, deleting the current macro by clicking the button or duplicating the current macro by...
- Page 27 Once you have recorded a macro, you may edit the commands you have entered by selecting each command on the macro screen. Each keystroke or button press is arranged sequentially with the first command shown at the top of the screen. 27 | razer™...
- Page 28 The button allows you to edit a particular command and the button enables you to delete command. buttons gives you the option to move the command down. The button allows you to put in additional keystrokes, button presses or time delays either before or after the selected command.
- Page 29 29 | razer™...
- Page 30 ADD ON TAB The Add On Tab expands your device’s usability by adding game-specific settings such as a custom interface. To start using Razer Add Ons first you must enable the USE RAZER NAGA ADD ON option. 30 | For gamers by gamers™...
- Page 31 Next, search for the game program or game application using the button. Finally, select your user account for the game by choosing it on the dropdown menu beside Sync Account. 31 | razer™...
- Page 32 The Account Information screen will show you all the relevant information regarding your user account. 32 | For gamers by gamers™...
- Page 33 This function is disabled by default. To enable this function, click the notification icon next to your user name in the Razer Synapse window and select “Enable Stats & Heatmaps”.
- Page 34 Games List Stats & Heatmaps work by tracking the usage of all supported devices for each game. When the feature is enabled, it automatically scans your system for installed games and adds them to the Games List located on the left side of the screen. Click to show or hide the Games List.
- Page 35 Stats Tab By default, the Stats Tab shows you the overall statistics of all your Razer devices for all games and all time. You can select a specific game via the game list on the left side, change the time period using the SHOWING dropdown menu, or the Razer device using the DEVICES dropdown menu.
- Page 36 Heatmaps Tab Heatmaps Tab shows detailed information about your Razer device’s in-game usage. This includes: • The Mouse Clicks tab, a heat map showing the frequency of mouse clicks on different spots of your screen. 36 | For gamers by gamers™...
- Page 37 This tab also displays the locations on screen where your mouse cursor stops in the form of white dots. The longer your cursor hovers at that spot, the larger the dot. Mouse heatmaps can be overlayed on game screenshots. 37 | razer™...
- Page 38 Social Media You can share your heatmap image on social media networks such as Facebook or Twitter directly from Razer Synapse. From the Heatmaps tab, click the Share button on the bottom right of the screen. You will be prompted to login to the selected social media using an existing account if you have not already done so.
- Page 39 You can also login to your social media accounts first from the “SETTINGS” screen. From the Stats & Heatmaps window, click . Select the “ACCOUNTS” tab. Click CONNECT next to the social media network you wish to sync with. Enter your login details and wait for the connection to complete. 39 | razer™...
-
Page 40: Using The In-Game Configurator
8. USING THE IN-GAME CONFIGURATOR Disclaimer: The Razer Naga Chroma In-Game Configurator is a game add-on that can be enabled via Razer Synapse. This add-on will be overlaid on your game screen by default when enabled and will only remain active if Razer Synapse is active. - Page 41 A Profile is a convenient way of organizing all your custom settings and you can have an infinite number of profiles at your disposal. Any changes made within each tab are automatically saved to the current profile and stored into the cloud servers. 41 | razer™...
- Page 42 You can create a new profile by clicking the button and selecting “Add New Profile”. Change your active profile by selecting the appropriate profile from the list. KEYMAP A Keymap is a convenient way of organizing all your custom key mappings and you can have an infinite number of keymaps at your disposal.
- Page 43 The changes made in this tab are automatically saved to your current profile. Top View The Top View is where you can customize the basic mouse buttons and the mouse wheel. 43 | razer™...
- Page 44 Side View The Side View allows you to customize the side buttons of your mouse. 44 | For gamers by gamers™...
- Page 45 BUTTON ASSIGNMENT MENU Initially, each of the mouse buttons is set to DEFAULT. However, you may change the function of these buttons by clicking the desired button to access the BUTTON ASSIGNMENT Menu. 45 | razer™...
- Page 46 Listed below are the customization options and their descriptions. Default This option enables you to return the key to its original function. To choose the DEFAULT, simply select it from the BUTTON ASSIGNMENT Menu. Keyboard Function This option enables you to change the mouse buttons into keyboard functions. To choose a keyboard function, select KEYBOARD FUNCTION from the BUTTON ASSIGNMENT Menu and enter the Key you wish to use on the given field below.
- Page 47 - Readily adjust the current sensitivity using the assigned button. If On‐The‐Fly Sensitivity has been set, pressing the designated button and moving the scroll wheel will produce a bar on your screen which would indicate your current sensitivity level. 47 | razer™...
- Page 48 Cycle Up Sensitivity Stages - Increase the current sensitivity stage by one and once it reaches the highest sensitivity stage, it will return to stage 1 when the button is pressed again. See the PERFORMANCE TAB to learn more about sensitivity stages.
- Page 49 (Recommended setting: 1600 – 1800) Enable X-Y Sensitivity By default, the X-axis (horizontal) and Y-axis (vertical) use the same sensitivity values. However, you may set different sensitivity values to each of the axes by selecting the “Enable X-Y Sensitivity” option. 49 | razer™...
- Page 50 Acceleration Acceleration increases the cursor’s movement speed depending on how quickly you move the mouse. The higher the value, the faster the mouse accelerates. (Recommended settings: Windows 0, Mac 5) Polling Rate The higher the polling rate, the more often the computer receives information about the status of your mouse, thus increasing the mouse pointer’s reaction time.
- Page 51 To create a macro command, simply click the button and all your keystrokes and button presses will automatically register on the macro screen. When you are done recording your macro commands, click on the button to end the session. 51 | razer™...
- Page 52 IN-GAME DISPLAY SETTINGS Here you can configure various overlay settings and even change display icons for each mouse button on the 12-button thumb grid when shown in game. Note: Overlay is not supported for Windows XP systems. Overlay Settings Adjust the transparency level of the configurator when displayed in game using the OVERLAY TRANSPARENCY slider.
- Page 53 12-button Thumb Grid Display Images You can assign an image to each button on the 12-button thumb grid that is displayed on your game screen if grid overlay is enabled. Head to the Customize tab and switch to Side View. 53 | razer™...
- Page 54 Select the button to change image and then click CHANGE IMAGE. 54 | For gamers by gamers™...
-
Page 55: Safety And Maintenance
9. SAFETY AND MAINTENANCE SAFETY GUIDELINES In order to achieve maximum safety while using your Razer Naga Chroma, we suggest that you adopt the following guidelines: 1. Avoid looking directly at the tracking beam of your mouse or pointing the beam in anyone else’s eye. - Page 56 MAINTENANCE AND USE The Razer Naga Chroma requires minimum maintenance to keep it in optimum condition. Once a month we recommend you unplug the device from the USB port and clean it using a soft cloth or cotton swab with a bit of warm water to prevent dirt buildup.
-
Page 57: Legalese
Mouse Mat from Razer. Some surfaces will cause undue wear on the feet requiring constant care and eventual replacement. Do note that the sensor of the Razer Naga Chroma is ‘tuned’ or optimized especially for Razer Mouse Mats. This means that the sensor has been tested extensively to confirm that the Razer Naga Chroma reads and tracks best on Razer Mouse Mats. - Page 58 COSTS OF PROCUREMENT For the avoidance of doubt, in no event will Razer be liable for any costs of procurement unless it has been advised of the possibility of such damages, and in no case shall Razer be liable for any costs of procurement liability exceeding the retail purchase price of the Product.
Need help?
Do you have a question about the Naga Chroma and is the answer not in the manual?
Questions and answers