Advertisement
Available languages
Available languages
Quick Links
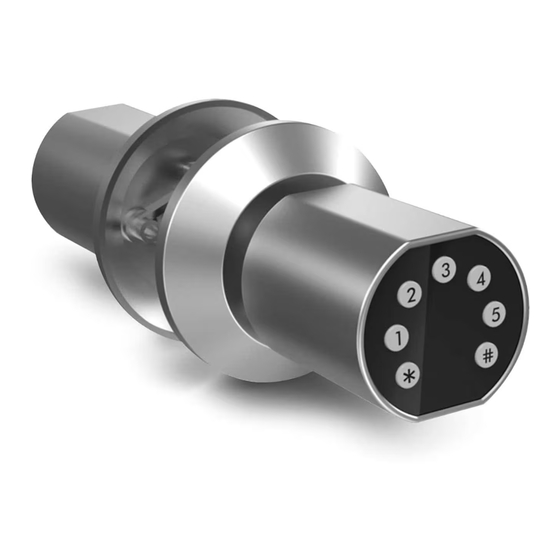
Cerradura inteligente
Marca: Lloyd´s
Modelo: LC-1243
Lloyd´s
®
te ayuda a hacer tu casa inteligente
Toma el control desde una sola App y convierte tus espacios en
lugares seguros, eficientes, cómodos y divertidos.
GUÍA RÁPIDA DE INSTALACIÓN
FAVOR DE LEER LA PRESENTE GUÍA DE INSTALACIÓN ANTES DE OPERAR SU PRODUCTO
"La operación de este equipo está sujeta a las siguientes dos condiciones: (1) es posible que este
equipo o dispositivo no cause interferencia perjudicial y (2) este equipo o dispositivo debe aceptar cualquier
interferencia, incluyendo la que pueda causar su operación no deseada".
Advertisement

Related Manuals for Lloyd's LC-1243


Summary of Contents for Lloyd's LC-1243
- Page 1 Cerradura inteligente Marca: Lloyd´s Modelo: LC-1243 Lloyd´s ® te ayuda a hacer tu casa inteligente Toma el control desde una sola App y convierte tus espacios en lugares seguros, eficientes, cómodos y divertidos. GUÍA RÁPIDA DE INSTALACIÓN FAVOR DE LEER LA PRESENTE GUÍA DE INSTALACIÓN ANTES DE OPERAR SU PRODUCTO “La operación de este equipo está...
- Page 2 Consideraciones de uso Nota: Tenga a la mano un desarmador y 4 baterías “AAA” (no incluidas) antes de la instalación. En la configuración de fábrica usted podrá desbloquear la cerradura con la contraseña 12345 seguida de la tecla “#” o con la llave física. Se notificará...
- Page 3 Diagrama de la cerradura LED indicador Tapa de las baterías Manija frontal Botón de reinicio Columna de conexión Pestillo Cuadrillo de acero Tornillos para cuerpo de cerradura Cable de conexión Cuerpo de la cerradura Manija trasera Puerta Interfaz para el cable de conexión Puerto para carga de emergencia Compartimento para batería Entrada para llave física...
- Page 4 Orificio para la puerta Consulte la plantilla para el orificio de la puerta y perfore de acuerdo a ésta. (La distancia entre el centro de la cerradura y la puerta puede ser de 60mm ó 70mm). Desarme la cerradura Tome la manija frontal y la trasera del empaque. Remueva los 2 tornillos de la tapa de las baterías para abrir el compartimento.
- Page 5 Elija la posición del pestillo de acuerdo al sentido de apertura de su puerta. Izquierda Derecha Izquierda Derecha Afuera Adentro Adentro Afuera Inserte el cuerpo de la cerradura en la puerta y fije con 2 tornillos. Instale la cerradura Instalación de la manija frontal: Pase el cable de conexión a través del orificio del cuadrillo de acero.
- Page 6 Instalación de la manija trasera: Haga que el cable de conexión pase a través del Cuadrillo de orificio del cuadrillo de acero hasta la manija trasera. acero Alinee el cuadrillo de acero y los tornillos para las columnas de conexión con los orificios del cuerpo de la cerradura.
- Page 7 Instale la contrachapa Caja de plástico Placa de metal para contrachapa Marco de para contrachapa la puerta Tornillos para contrachapa Pruebas de funcionamiento Mantenga la puerta semiabierta cuando realice las pruebas. Compruebe el correcto funcionamiento de lo siguiente: Cuando la cerradura se encuentre en estado de bloqueo, gire la manija frontal y el •...
- Page 8 Uso de la cerradura Añadir administrador Presione el botón de reinicio (de la manija trasera) durante un segundo, la cerradura hará un "beep" largo. Añada una contraseña para administrador (6-8 dígitos) después presione la tecla '#' (de- berá agregar la misma contraseña 2 veces seguida de la tecla '#'). Se escuchará...
- Page 9 Restablecer configuración de fábrica Presione durante 5 segundos el botón de reinicio en la manija trasera hasta escuchar la melodía 'sol,fa,mi,re,do'. La cerradura regresará a su configuración de fábrica y su contraseña volverá a ser "12345". Antes de comenzar Asegúrese de que su Smartphone tenga iOS 8.1 o superior o Android 4.4 o superior.
- Page 10 Introduzca la información de su red Wi Fi y la contraseña de la misma, haga clic en “Confirmar” (4). Una vez instalada la cerradura y que haya configurado al menos un administrador desde el panel numérico, presione la tecla “*”, luego la tecla “3” seguida de la tecla “#” en la manija frontal de la cerradura, se escuchará...
-
Page 11: Control Del Dispositivo
Control del dispositivo 1.- Nivel de batería: Indica el nivel de batería de la 5.- Genere llaves temporales: En este apartado cerradura podrá generar y gestionar claves temporales para diferentes usuarios por horas, días, semanas o 2.- Más funciones: Podrá cambiar el nombre del dis- meses: positivo, compartir el control del mismo con fa- •... - Page 12 Autobloqueo Si la contraseña se ingresa incorrectamente 5 veces seguidas el sistema se bloqueará, no intente abrir durante los 180 segundos posteriores. Nota: Podrá abrir la cerradura con la llave física durante el autobloqueo. Alerta de batería baja Cuando la batería sea menor a 4,6 Vcc, la cerradura hará un sonido de 'beep' dos veces y el indicador LED de la manija frontal cambiará...
- Page 13 Creación de escenas Para crear rutinas con uno o más dispositivos inteligentes, haga clic en la parte inferior de la pantalla principal en la opción “Inteligencia” (1), luego haga clic en “Automatización” (2). Seleccione el ícono “+” en la esquina superior derecha de la interfaz (3). Después haga clic en la opción “Cuando el estado del dispositivo cambia”...
- Page 14 Haga clic en “Ejecutar dispositivo” (8). Elija el dispositivo que desee accionar o ejecutar cuando se abra la puerta, en este ejemplo, usaremos “Foco sala” (9). Configure las opciones del foco: el interruptor, el brillo y la temperatura. Haga clic en “Siguiente” (10). Haga clic en el botón “Guardar”...
- Page 15 Especificaciones eléctricas Alimentación: 6 V 50 µA (4 baterías AAA de 1,5 V cada una) Banda de Frecuencia: 2.4 GHz Este dispositivo es compatible con las siguientes Apps: Lloyds smart Tuya smart Smart Life...
- Page 16 Importado por: ZUTTO TECHNOLOGIES, S. A. DE C. V. R.F.C.: ZTE161017KT6 Av. Ejército Nacional No. 505 Interior 1602, Granada, C.P. 11520, Miguel Hidalgo, Ciudad de México, México. Phones: 55 6844 7575 / 8002345693...
-
Page 17: Smart Lock
Smart Lock Brand: Lloyd´s Model: LC-1243 Lloyd’s ® helps you make your home a smart home Take control from one single App and transform your places into safe, efficient, comfortable and fun spaces. QUICK GUIDE PLEASE READ THE FOLLOWING INSTALLATION GUIDE BEFORE OPERATING THE PRODUCT "Operation is subject to two conditions: (1) this device may not cause harmful interference, and (2) this device must... -
Page 18: Set-Up Considerations
Usage considerations Note: Keep handy a cross head screwdriver and 4 “AAA“ batteries (not included) before installation. In the factory configuration you will be able to release the lock with the password “12345” followed by the “#” key, or with the physical key. When the voltage is less than 4,6 Vdc, you will be notified that the battery is low. - Page 19 Lock diagram Indicator LED Battery cover Front handle Reset button Connecting column Latch-bolt Steel spindle Lock body screws Connecting cable Lock body Rear handle Door Interface for connecting cable Emergency power port Battery compartment Physical keyhole Batteries Magnetic Cover Silicone plug Connecting column screws Battery cover screws...
- Page 20 Door hole Refer to the door hole template and drill according to it (The distance between the center of the lock and the door can be 60mm or 70mm). Disassemble the lock Take the front and rear handle out of the package. Remove the 2 screws from the battery cover to open the compartment.
- Page 21 Choose the latch-bolt position according to the opening direction of your door. Left Right Left Right inside outside outside outside Insert the lock body into the door and secure with 2 screws. Install the lock Front handle installation: Run the connecting cable through the hole in the steel spindle. Pass the steel spindle and the connecting columns through the holes in the lock body and press the front handle towards the door.
- Page 22 Rear handle Installation: Steel spindle Run the connecting cable through the hole of the steel spindle all the way up to the rear handle. Align the steel spindle and connecting column screws with the holes in the lock body. Secure the rear handle and the front handle with the connecting column screws.
- Page 23 Strike installation Plastic Door Strike strike box frame plate Strike screws Functionality test Keep the door half-open while testing. Check correct operation of the following functions: • When the lock is in the lock status, twist the front handle and the latch-bolt must remain still. •...
-
Page 24: Delete User
Using the lock Add administrator Press the reset button (on the rear handle) for one second, the lock will make a long beep. Add an administrator password (6-8 digits) then press the '#' key (you must add the same password twice followed by the '#' key). You will hear the 'C, D, E, F, G' notes indicating that it has been successfully added. - Page 25 Restore factory settings Press the reset button on the rear handle for 5 seconds until you hear the melody 'G, F, E, D, C.' The lock will return to factory settings. The password will be '12345' again. Before getting started Verify that your smartphone has iOS 8.1 or higher and Android 4.4 or higher.
- Page 26 Add device Open the Lloyds Smart App, select “+” (upper right corner) (1), choose the type of device that you want to add, in this case, go to “Security” (2), and then click on “Smart Lock” (3). Enter your Wi Fi network information and password, click "Next" (4). Once the lock is installed and you have configured at least one administrator from the numeric panel, press the "*"...
- Page 27 and finally click “Done” (7). Once the device is configured, you can change the name Note: Verify that the Wi Fi password is correct, and that the device is close to the modem during the process. When the set-up is complete, search and select the device in the list to be able to con- trol it through the App from anywhere.
- Page 28 Device control 25-05 16:45 Unlock remote 1.- Battery level: Indicates the battery level of the lock 5.- Generate temporary keys: In this section you can generate and manage temporary keys for 2.- More functions: You will be able to rename the different users by hours, days, weeks or months.
-
Page 29: Password Protection
Auto-lock If the password is entered incorrectly 5 times in a row, the system will lock up. Do not attempt to open the lock during the next 180 seconds. Note: During auto lock status, you can open the lock with the physical key. Low battery alarm When the battery voltage is less than 4.6 Vdc, the lock will make a 'beep' sound twice and the front handle LED will turn red. - Page 30 Scene creation To create routines with one or more smart devices, click on the "Smart" option at the bottom of the main screen (1), then click on "Automation" (2). Select the "+" icon in the upper right corner of the interface (3). Then click on the option "When device status changes" (4). Choose "Smart Lock"...
- Page 31 Click on "Run the device" (8). Choose the device you want to activate or run when the door is opened, in this example we will use "Bedroom light" (9). Set the light options such as the switch, brightness and temperature. Click "Next" (10). Click on the "Save"...
- Page 32 Electrical specifications Power Supply : 6 V 50 µA (4 AAA batteries 1.5 V each) Frequency Band: 2.4 GHz This device is compatible with the following Apps: Lloyds smart Tuya smart Smart Life Imported by: ZUTTO TECHNOLOGIES, S. A. DE C. V. R.F.C.: ZTE161017KT6 Av.
Need help?
Do you have a question about the LC-1243 and is the answer not in the manual?
Questions and answers