Advertisement
Quick Links
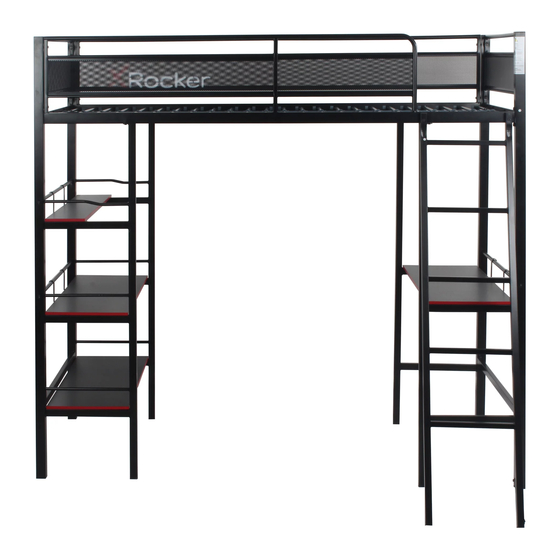
FORTRESS GAMING BUNK BED
I MPORTANT - READ CAREFULLY - RETAIN FOR FUTURE REFERENCE
Dimensions
Width - 197.2CM
Depth - 141.5CM
Height - 183.1CM
Need Help? Contact X Rocker at:
www.xrockeruk.com/pages/support
IMPORTANT: You must keep your original retail receipt as proof of purchase.
LZL00-08/04/2020
1
Advertisement

Subscribe to Our Youtube Channel
Related Manuals for X Rocker FORTRESS 2020119


Summary of Contents for X Rocker FORTRESS 2020119
- Page 1 I MPORTANT - READ CAREFULLY - RETAIN FOR FUTURE REFERENCE Dimensions Width - 197.2CM Depth - 141.5CM Height - 183.1CM Need Help? Contact X Rocker at: www.xrockeruk.com/pages/support IMPORTANT: You must keep your original retail receipt as proof of purchase. LZL00-08/04/2020...
- Page 2 Safety and Care Advice Important - Please read these instructions fully before starting assembly Check you have all the Assemble on a soft level Make sure you have enough components and tools listed on surface to avoid damaging the space to layout the parts before the following pages.
- Page 3 Safety and Care Advice Important - Please read these instructions fully before starting assembly WARNING THE MATTRESS SURFACE LEVEL SHOULD NOT BE ABOVE THIS LINE Important: Please note the maximun mattress height is indicated on the vertical bar on the left hand side of the opening at the top of the ladder.
- Page 4 Components - Panels Please check you have all the panels listed below PARTS...
- Page 5 Components - Panels Please check you have all the panels listed below Post 02 x 1 Post 04 x 1 Post 01 x 1 Post 03 x 1 Side Rail x 2 End Guard Rail x 2 Front Guard Rail x 1 Rear Guard Rail x 1 Slat Spacer x 23 Ladder x 1...
- Page 6 Components - Panels Please check you have all the panels listed below Ladder connector bar x 1 Wall Bracket x 2 Bracket 01 X 4 Bracket 02 X 6 Shelf 01 x 1 Shelf 02 x 3 Shelf Support 01 x 1 Connector bar x 3 Shelf Support 0 2 x 3...
- Page 7 Components - Fittings Please check you have all the panels listed below Note: The quantities below are the correct amount to complete the assembly. In some cases more fittings may be supplied are required. 55mm Bolt M6 X 6 35mm Bolt M6 X 1 6 27mm Bolt M6 X 1 8 22mm Bolt M6 X 1 6 17mm Bolt M6 X 1 8...
- Page 8 Assembly Instructions Step 1 Attach end guard rail to post 01 post 02 with Attach Connector Bar X 2 to post 01 and post 02 with Attach Side Rail to post 01 and post with M6 X 55 mm M6 X 35 mm M6 X 17 mm J x 1 A x 4...
- Page 9 Assembly Instructions Step 2 Attach end guard rail to post 03 post 04 with Attach Connector Bar to post 03 post 04 with Attach Side Rail to post 03 and post with M6 X 17 mm M6 X 35 mm M6 X 55 mm J x 1 B x 4...
- Page 10 Assembly Instructions Step Attach rear guard rail post 02 and post 03 with G H I Attach front guard rail post 01 with and post 04 with M6 X 35 mm B x 6 M6 Metal M6 Spring Plastic M6 X 27mm M6 X 17 mm washer washer...
- Page 11 Assembly Instructions Step Attach Shelf Support 01 Shelf Support 02 X2 to post 01 and post 02 with Attach Shelf Support 02 to post 03 and post 04 with M6 X 27 mm J x 1 C x 16...
- Page 12 Assembly Instructions Step a: Secure the slats to rear guard rail front guard rail b: Secure the plastic plug x48 to rear guard rail front guard rail...
- Page 13 Assembly Instructions Step Secure slat spacer x23 to slats...
- Page 14 Assembly Instructions Step 7 Attach bracket 01 x 4 to end guard rail x 2 with M6 X 17 mm J x 1 E x 4 Step 8 Attach Shelf 01 Shelf Support 01 with Attach Shelf 02 to Shelf Support 02 X 3 with M6 X 22 mm D x 16...
- Page 15 Assembly Instructions Step 9 Attach Bracket 02 X2 to Shelf 01 Connector bar with Attach Bracket 02 X 4 to Shelf 02 and Connector bar X2 with M6 X 10 mm J x 1 F x 6 Step 10 Attach Ladder Front Guard Rail with M6 X 35 mm...
- Page 16 Assembly Instructions Step 11 Attach Ladder Connector to Ladder and Post 04 with M6 X 17 mm J x 1 E x 2 Step 12 Assembly is complete...
Need help?
Do you have a question about the FORTRESS 2020119 and is the answer not in the manual?
Questions and answers