
Related Manuals for RGBlink RGB-RD-UM-4K


Summary of Contents for RGBlink RGB-RD-UM-4K
- Page 1 4K Ultra HD NDI Camera User Manual Article No: RGB-RD-UM-4K Ultra HD NDI Camera-E000 Version: V1.0...
-
Page 2: Table Of Contents
Content Declarations....................................3 FCC/Warranty.................................... 3 Operators Safety Summary............................... 3 Installation Safety Summary..............................4 Chapter 1 Your Product................................6 1.1 In the Box.....................................6 1.2 Product Overview................................6 1.2.1 Interface..................................7 1.2.2 Dimension.................................. 10 Chapter 2 Install Your Product..............................11 2.1 Power-on Initial Configuration............................11 2.2 Video Output.................................. - Page 3 6.2.3 Inquiry Command...............................41 6.3 Pelco-D Protocol Command List............................43 6.4 Pelco-P Protocol Command List............................44 6.5 Terms & Definitions................................45 6.6 Revision History.................................49 4K Ultra HD NDI CAMERA User Manual...
-
Page 4: Declarations
RGBlink. If the purchaser or a third party carries out modifications or repairs on goods delivered by RGBlink, or if the goods are handled incorrectly, in particular if the systems are commissioned operated incorrectly or if, after the transfer of risks, the goods are subject to influences not agreed upon in the contract, all guarantee claims of the purchaser will be rendered invalid. -
Page 5: Installation Safety Summary
Refer cord and connector changes to qualified service personnel. Use the Proper Fuse To avoid fire hazard, use only the fuse having identical type, voltage rating, and current rating characteristics. Refer fuse replacement to qualified service personnel. Do Not Operate in Explosive Atmospheres To avoid explosion, do not operate this product in an explosive atmosphere. - Page 6 Don’t disassemble discretionarily. There are no parts that users can repair by themselves on this product. We are not responsible for any unauthorized modification or dismantling. Avoid Magnetic Interference Magnetic field under specific frequency may affect this product image; this is Class A product. Application in domestic environment may cause radio interference.
-
Page 7: Chapter 1 Your Product
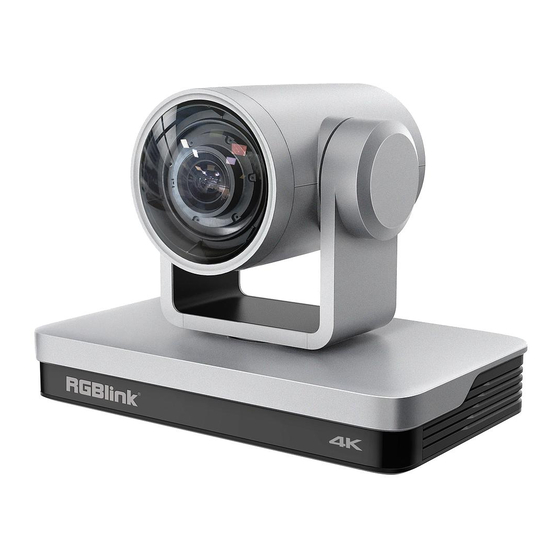
Chapter 1 Your Product 1.1 In the Box Power Adapter × 1 USB3.0 Cable (U3) × 1 IR Remote Control × 1 Mounting Bracket× 1 1.2 Product Overview 4K Ultra HD NDI Camera is a new Ultra HD 4K camera, 12X optical zoom, 80.4° wide angle lens. It has perfect functions, superior performance and rich video output interfaces. -
Page 8: Interface
Product Features ● 4K Ultra HD Resolution: 1/2.5inch high quality SONY CMOS sensor. Resolution is up to 4K with frame rate up to 60fps. ● Dual Stream Output: USB can support the main stream and sub stream output at the same time, and can meet the needs of near-end and far-end. - Page 9 view Back 5. Power Switch 6. DC12V Input Power Supply Socket 7. LAN Port 8. Rotary DIP Switch 9. RS232 Control Interface (input ) 10. RS232 Control Interface (output ) 11. RS422/RS485 Input 12. Audio Input 13. USB 3.0 Output 14.
- Page 10 3) RS232(DB9) Port Definition Definition Port Data Carrier Detect Receive Data Transmit Data Data Terminal Ready System Ground Data Set Ready Request to Send Clear to Send Ring Indicator 4) VISCA networking as shown below Camera cascade connection Camera 1 Camera 2 1.DTR 1.DTR 2.DSR...
-
Page 11: Dimension
1.2.2 Dimension Ultra HD NDI Camera dimension 4K Ultra HD NDI CAMERA User Manual... -
Page 12: Chapter 2 Install Your Product
Chapter 2 Install Your Product 2.1 Power-on Initial Configuration 1)Power-on: Connect DC12V power supply adapter with power supply socket 2)Initial Configuration: The remote control receiving indicator flashes after power on, the pan-tilt turns left to the lowest left to the lowest, and then turns to the HOME position (both the horizontal and vertical positions are in the middle), while the movement first shrinks and then stretches. -
Page 13: Bracket Mount
2.3 Bracket Mount Notes: A.Ceiling or wall mounting brackets can only be mounted on template and concrete wall. B.For safety reason, plasterboard is not recommended. 1)Wall Mounting 4K Ultra HD NDI CAMERA User Manual... - Page 14 2) Ceiling Mounting 4K Ultra HD NDI CAMERA User Manual...
-
Page 15: Chapter 3 Use Your Product
Chapter 3 Use Your Product 3.1 Remote Control 3.1.1 Match Code for Wireless Remote Control One to One Code Matching: Press the "set" and "*" keys combined for 3 seconds, LED indicator starts flashing. Camera receive the signal and power on, LED indicator will go off if code matching successfully. The camera can be controlled by this wireless remote control only after one to one code pairing. - Page 16 3. Focus Control Auto: auto focus mode Manual: manual focus mode Focus + (near):Press【FOCUS +】 key (Valid only in manual focus mode) Focus - (far): Press【FOCUS -】 key (Valid only in manual focus mode) Press and hold the keys, the action of focus will keep continue and stop as soon as the key is released.
- Page 17 6. Pan/Tilt Control Up: press Down: press Left:press Right: press Back to middle position: press“【HOME】” Press and hold the up/down/left/right key, the pan/tilt movements will keep running, from slow to fast, until it runs to the endpoint; stop as soon as the key is released. 7.
- Page 18 9. Key Combination 1)【#】+【#】+【#】: Clear all presets 2)【*】+【#】+【6】: Restore factory defaults 3)【*】+【#】+【3】: Menu set to Chinese 4)【*】+【#】+【4】: Menu set to English 5)【*】+【#】+【9】: Flip switch 6)【*】+【#】+Auto: Enter aging mode 7)【#】+【*】+Auto: Exit aging mode 8)【*】+【#】+Manual: Restore the default user name, password, and IP address 9)【#】+【#】+【0】: Switch the video format to 4KP60 10)【#】+【#】+【1】: Switch the video format to 4KP50 11)【#】+【#】+【2】: Switch the video format to 4KP30...
-
Page 19: Menu Introduction
3.2 Menu Introduction 3.2.1 Main Menu In normal working mode, press【MENU】key to display the menu, using scroll arrow to point at or highlight the selected items. MENU ================ Language English (Setup) (Camera) (P/T/Z) (Video Format) (Version) (Restore Default) [↑↓]Select[← →]Change Value [Menu]Back [Home]OK Language: Language setting, Chinese / English Setup: System parameter setting... -
Page 20: Camera Setting
Protocol: VISCA/Pelco-P/Pelco-D/Auto Visca Address: VISCA=1~7 Pelco-P=1~255 Pelco-D=1~255 Baudrate: 2400/4800/9600/115200 Visca Address Fix: On/Off Auto Filp: On/Off 3.2.3 Camera Setting CAMERA ================= (Exposure) (Color) (Image) (Focus) (Noise Reduction) Style Default [↑↓]Select [← →]Change Value [Menu]Back [Home]OK Move the pointer to the (CAMERA) in the Main Menu, click the 【 HOME 】 key and enter the (CAMERA) as follow,. - Page 21 Mode: Auto, Manual, Shutter priority, Iris priority and Brightness priority. EV: On/Off (only available in auto mode) Compensation Level: -7~7 (only available in auto mode when EV is ON) BLC: ON/OFF for options (only available in auto mode) Dynamic Range: 1~8, close Anti-Flicker: OFF/50Hz/60Hz for options (only available in Auto/Iris priority/Brightness priority modes) Gain limit: 0~15(only available in Auto/ Iris priority /Brightness priority mode) WDR: Off, 1~8...
- Page 22 3) Image Move the pointer to the (IMAGE) in the Menu, click the【HOME】and enter into the (IMAGE sub menu) as follow, IMAGE ================ Brightness Contrast Sharpness Flip-H Flip-V B&W-Mode Color Gamma Default DZoom Close Low-Light Mode Close [↑↓]Select [← →]Change Value [Menu]Back Brightness: 0~14 Contrast: 0~14...
-
Page 23: P/T/Z
Focus Mode: Auto/manual AF-Zone: Up/middle/down AF-Sensitivity: High/middle/low 5) Noise Reduction Move the pointer to the (NOISE REDUCTION) in the Menu, click the 【 HOME 】 and enter the (NOISE REDUCTION) as follow, NOISE REDUCTION ================= NR-2D NR-3D Dynamic Hot Pixel [←... -
Page 24: Video Format
3.2.5 Video Format Move the pointer to the (Video Format) in the Menu, click the【HOME】and enter the (Video Format) as follow, VIDEO FORMAT ================ 4KP60 4KP50 4KP30 4KP25 1080P60 1080P50 1080I60 1080I50 720P60 720P50 [↑↓]Select [Home]OK [Menu]Back Note: Exit menu after modifying parameter to save it after powered off 3.2.6 Version Move the pointer to the (VERSION) in the Main Menu, click the【HOME】and enter the (VERSION) as follow, VERSION... -
Page 25: Network Connection
3.3 Network Connection 3.3.1 Connecting Mode Direct connection: Connect the camera via network cable to external Internet access of the PC Internet connection mode: Connect the camera to Internet by Router or Switch and user can log in the device by browser. - Page 26 4K Ultra HD NDI CAMERA User Manual...
-
Page 27: Ie Login
3.4 IE Login 3.4.1 Web Client 1) Web Client Login Input the IP address 192.168.5.163 of the device in the address filed of browser and click Enter button to enter into Web Client login page as below picture. User can login as administrator and normal user. If login as administrator (Default User name/Password: admin), users can preview, playback, configuration and cancel in the Web Client;... -
Page 28: Playback
3.4.3 Playback 1) Playback video files First, please record, snapshot and save the file when previewing. Click "Playback" to enter recording file and picture files playback page, and then select the file "Video File" and click Search, and search out the video file, click Play to play the video file. -
Page 29: Video Configuration
44100, 8000, 16000, 32000 and 48000 optional, G.711A default 8000) Sampling Precision: Set sampling precision (default 16bits) Compressing Code Rate: Set audio compressing code rate (default 64bits, 32, 48, 96, 128bits optional) Input Volume: Set the input volume (default 2, 1-10 optional) Click “Save”, it will remind”... - Page 30 3) RTP Broadcasting Main/Sub Stream:On/off Protocol: RTP or TS Address: Default 224.1.2.3. It can be edited. Port: Main Stream Default Port: 4000, Sub Stream Default Port: 4002 Visit: Address comes up after setting. Eg ; rtp: //224.1.2.3:4000; udp: //@224.1.2.3:4000 4) Video Parameters a.Focus: Focus mode, focus range, focus sensitivity can be set.
-
Page 31: Network Configuration
Gamma: Gamma value setting (default, 0.45, 0.50, 0.55, 0.63 optional). Dynamic Contrast: Set the dynamic contrast (default off, 1~8 optional) Flip Horizontal: Set Flip Horizontal (default Off, On optional). Flip Vertical: Set vertical flip (default Off, On optional). Electronic Zoom: Set the electronic zoom (default Off, Onoptional) a. -
Page 32: System Configuration
Ethernet parameters DHCP: Enable or disable obtain IP automatically can be set. Save changes and reboot the device to takes effect (default: OFF) IP Address: Set the IP address, save changes and reboot the device to takes effect (default 192.168.5.163). Note: This IP address is the same with the one used to login Web page. -
Page 33: Logout
Update interval: Set the NTP server automatic updated time interval. Valid after setting NTP server synchronization (default one day, 2-10 days Optional). NTP server address or domain name: Set NTP server address or domain name (default time.nits.gov). Valid after setting NTP server synchronization. NTP Server Port: Sets the NTP server port (default 123).Valid after setting NTP server synchronization. -
Page 34: Chapter 4 Ordering Codes
Chapter 4 Ordering Codes 4.1 Product 981-0011-10-0 RGB12X-UNDI-WH 4K Ultra HD NDI Camera 4K Ultra HD NDI CAMERA User Manual... -
Page 35: Chapter 5 Support
Chapter 5 Support 5.1 Contact us 4K Ultra HD NDI CAMERA User Manual... -
Page 36: Camera Maintenance And Troubleshooting
5.2 Camera Maintenance and Troubleshooting 5.2.1 Camera Maintenance 1) Please power off the camera and disconnect the power adapter and socket, if it’s not used for a long run. 2) Use soft cloth or tissue to clean the camera cover. 3) Wipe it with a soft, dry cloth when cleaning the camera lens. - Page 37 4K Ultra HD NDI CAMERA User Manual...
-
Page 38: Chapter 6 Appendix
Chapter 6 Appendix 6.1 Specification Connectors Video(Output) HDMI 1×HDMI-A USB3.0 1×USB-B 1×RJ45 Audio Input 1×3.5mm Stereo Jack Communication RS232 In/Out 2×DIN 8 RS422 (RS485) 1×4Pin Terminal Performance Camera Optical Zoom Focus f=3.85 mm~ 43.06 mm ±5% Horizontal: 7.59°(tele)~80.4°(wide) View Angle Tilt:4.6°(tele)~50.0°(wide)... -
Page 39: Visca Protocol List
320×176@25/30 | 640×360@25/30 | 640×480@25/30 | 960 YUY2/NV12 ×540@25/30 | 1280×720@25/30 | 1920×1080@25/30 320×176@25/30 | 640×360@25/30 | 640×480@25/30 | 960 MJPEG/H.264/H.265 ×540@25/30 | 1280×720@25/30 | 1920×1080@25/30 3840×2160@25/30 Control Protocol VISCA | Pelco-D | Pelco-P Baud Rate(bps) 115200 | 9600 | 4800 | 2400bps Network Protocol RTSP | RTMP | ONVIF | GB/T28181 | NDI | VISCA Power... - Page 40 Command Function Command packet Note Tele(Variable) 8x 01 04 07 2p FF p = 0(low) - F(high) Wide(Variable) 8x 01 04 07 3p FF Direct 8x 01 04 47 0p 0q 0r 0s FF pqrs: Zoom Position Stop 8x 01 04 08 00 FF Far(Standard) 8x 01 04 08 02 FF Near(Standard)
- Page 41 Command Function Command packet Note Direct 8x 01 04 4D 00 00 0p 0q FF pq: Bright Positon 8x 01 04 3E 02 FF Exposure Compensation ON/OFF 8x 01 04 3E 03 FF Reset 8x 01 04 0E 00 FF CAM_ExpComp Exposure Compensation Amount 8x 01 04 0E 02 FF...
-
Page 42: Inquiry Command
Command Function Command packet Note CAM_Contrast Direct 8x 01 04 A2 00 00 0p 0q FF pq: Contrast Position 8x 01 04 A4 00 FF Flip-H 8x 01 04 A4 01 FF CAM_Flip Single Command For Video Flip Flip-V 8x 01 04 A4 02 FF Flip-HV 8x 01 04 A4 03 FF P: 0~E Video format... - Page 43 y0 50 01 FF 3000K y0 50 02 FF 4000K y0 50 03 FF One Push Mode y0 50 04 FF 5000K y0 50 05 FF Manual y0 50 00 FF 6500K CAM_RGainInq 8x 09 04 43 FF y0 50 00 00 0p 0q FF pq: R Gain CAM_BGainInq 8x 09 04 44 FF...
-
Page 44: Pelco-D Protocol Command List
y0 50 01 FF Flip-H y0 50 02 FF Flip-V y0 50 03 FF Flip-HV CAM_GammaInq 8x 09 04 5B FF y0 50 0p FF p: Gamma setting ab cd : vender ID ( 0220 ) mn pq : model ID ST ( 0510 ) 、... -
Page 45: Pelco-P Protocol Command List
Set Preset 0xFF Address 0x00 0x03 0x00 Preset ID Clear Preset 0xFF Address 0x00 0x05 0x00 Preset ID Call Preset 0xFF Address 0x00 0x07 0x00 Preset ID Query Pan Position 0xFF Address 0x00 0x51 0x00 0x00 Value Low Query Pan Position Response 0xFF Address 0x00... -
Page 46: Terms & Definitions
6.5 Terms & Definitions ●RCA: Connector used primarily in consumer AV equipment for both audio and video. The RCA connector was developed by the Radio Corporation of America. ●BNC: Stands for Bayonet Neill-Concelman. A cable connector used extensively in television (named for its inventors). - Page 47 ● HDMI 2.0b: was released March, 2016, support for HDR Video transport and extends the static metadata signaling to include Hybrid Log-Gamma (HLG). ● HDMI 2.1 : released on November 28, 2017. It adds support for higher resolutions and higher refresh rates, Dynamic HDR including 4K 120 Hz and 120 Hz.
- Page 48 increase in bandwidth to a maximum of 480Mbps. ● USB 3.2: Super Speed USB with 3 varieties of 3.2 Gen 1(original name USB 3.0), 3.2Gen 2(original name USB 3.1), 3.2 Gen 2x2 (original name USB 3.2) with speed up to 5Gbps,10Gbps,20Gbps respectively. USB version and connectors figure:...
- Page 49 products to communicate, deliver, and receive broadcast quality video in a high quality, low latency manner that is frame-accurate and suitable for switching in a live production environment over TCP (UDP) Ethernet based networks. NDI is commonly found in broadcast applications. ●RTMP: Real-Time Messaging Protocol (RTMP) was initially a proprietary protocol developed by Macromedia (now Adobe) for streaming audio, video and data over the Internet, between a Flash player and a server.
-
Page 50: Revision History
●Gamma:The light output of a CRT is not linear with respect to the voltage input. The difference between what you should have and what is actually output is known as gamma. ●Frame: In interlaced video, a frame is one complete image.A video frame is made up of two fields, or two sets of interlaced lines. - Page 51 All information herein is © Xiamen RGBlink Science & Technology Co Ltd. excepting where noted. is a registered trademark of Xiamen RGBlink Science & Technology Co Ltd. While all efforts are made for accuracy at time of printing, we reserve the right to alter, vary or otherwise make change without notice. E&O M excepted.
Need help?
Do you have a question about the RGB-RD-UM-4K and is the answer not in the manual?
Questions and answers