Advertisement
Quick Links
VGB Compliant ANSI/APSP/ICC-16 2017 LISTED
NOTICE
IMPORTANT SAFETY INSTRUCTIONS.
To Installers: READ, UNDERSTAND,
AND FOLLOW ALL INSTRUCTIONS
AND WARNINGS.
Give these instructions to the facility owner to keep for future reference. Follow all codes and
regulations that apply to the design, installation and use of suction outlet fittings.
WARNING
and safety codes. Any modification that increases the flow rate of the circulation system shall
require reevaluation of the cover/grate and sump to ensure that the flow rating of the Suction
Outlet Fitting Assembly (SOFA) is not exceeded.
DANGER
PLEASE FOLLOW ALL LOCAL CODES AND POOL SAFETY GUIDELINES.
https://www.1paramount.com/downloads/manuals/sdx2/SDX2CertificateOfConformity.pdf
SAVE THESE INSTRUCTIONS
004-027-8745-00
SUBMERGED SUCTION OUTLET
FOR SINGLE OR MULTIPLE DRAIN USE
FOR USE ON WALL OR FLOOR
When installing and using this equipment, basic safety precautions
shall always be followed, including the following:
SDX2 and SDX2 Retro must be installed in accordance with
Paramount's written instruction manual, and in conformity with
applicable Federal, State, Local and Swimming pool industry building
PROPER INSTALLATION OF THE SDX2 RETRO IS ESSENTIAL.
IF YOU HAVE ANY QUESTIONS, PLEASE CALL PARAMOUNT AT
1.800.621.5886
OR CONTACT YOUR REGIONAL REPRESENTATIVE.
Certificate of conformity available at
8175 W. Buckeye Road. Phoenix, AZ 85043
Toll Free: 1.800.621.5886 • Phone: 480.893.7607 • Fax: 480.753.3397
Paramount@1Paramount.com • www.1Paramount.com
US and Foreign patents and patents pending
see www.1paramount.com/support/patent-numbers/
R02
ECN_1941
MAINTENANCE & INSTALLATION GUIDE
Publish date 100820 ©2021 Hayward Industries, Inc.
OWNER'S MANUAL
Advertisement

Related Manuals for Paramount Fitness SDX 2


Summary of Contents for Paramount Fitness SDX 2
- Page 1 SUBMERGED SUCTION OUTLET FOR SINGLE OR MULTIPLE DRAIN USE FOR USE ON WALL OR FLOOR OWNER’S MANUAL MAINTENANCE & INSTALLATION GUIDE VGB Compliant ANSI/APSP/ICC-16 2017 LISTED NOTICE When installing and using this equipment, basic safety precautions shall always be followed, including the following: IMPORTANT SAFETY INSTRUCTIONS.
- Page 2 Signal Words and Symbols Used In This Manual This Owner’s Manual and Installation Guide contains specifi c precautions and symbols to identify safety- related information. You will fi nd DANGER, CAUTION, WARNING and NOTICE symbols which require special attention. Please read them carefully and follow these precautions as indicated! They will explain how to avoid hazards that may endanger you or persons using or maintaining your pool or spa.
- Page 3 DEATH or SERIOUS INJURY will result from contact with a DANGER damaged, loose, or missing drain cover. • Do not allow limbs to contact or be inserted into a drain pipe with a damaged, loose, or missing drain cover. This could result in swelling of the limb and/or trapping a swimmer underwater.
- Page 4 While suction injuries are extremely rare, drowning and diving injuries are far too common and there is little your certified builder can do to eliminate these hazards. You must educate yourself and your guests. Below are some important safety issues every swimmer must know and recognize. •...
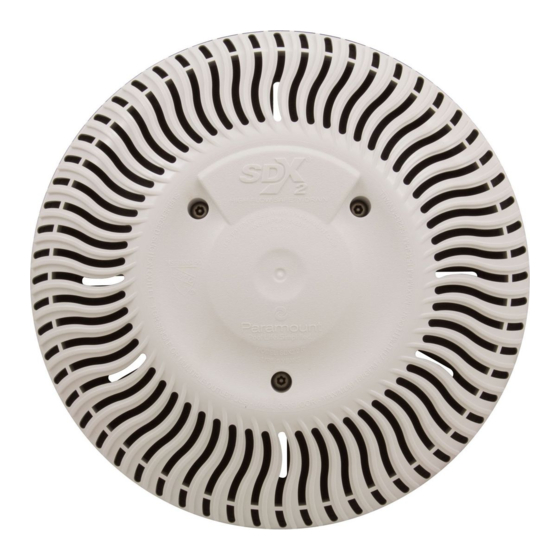
- Page 5 HOW SDX2 WORKS BETTER The SDX2 high fl ow drain system is a dual-drain system designed and tested to safely deliver water to modern high fl ow pumps. Each Drain Addresses All Entrapment Hazards Hair Entrapment Avoidance. At the heart of the patented design is a cover that acts much like sixty self-regulating drains.
- Page 6 The maximum flow rate for each pair of SDX2 drains varies depending on size WARNING and orientation of pipe and location on wall or floor. See chart below for flow limits based on variables. Any modification that increases the flow rate of the circulation system shall require reevaluation of the cover/grate and sump to ensure that the flow rating of the Suction Outlet Fitting Assembly (SOFA) is not exceeded.
- Page 7 The flow rating for pools with multiple, blockable SOFAs piped together in one body of water without isolation valves shall be determined by combining the flow rating of all SOFAs, minus the flow rating of one. If the flow ratings of all SOFAs are not equal, subtract the flow rating of the SOFA with the highest flow rating. The flow rating for existing pools with a single, blockable SOFA is the flow rating of the SOFA, when also installed in conjunction with an additional device or system designed to prevent suction entrapment, where the additional device or systems is of a type listed in section 9.4.
-
Page 8: Concrete Installation
CONCRETE INSTALLATION Fig. 1a SDX2 installed in a concrete shell utilizes a small cutout in the concrete to form the sump which is sometimes made of plastic or fiberglass. This concrete sump provides superior shell strength by eliminating the large hole associated with plastic sumps. - Page 9 Concrete Ring Installation Fig. 5 “Fig. 5” 1. Apply interior finishing material. 2. Position the SDX2 Concrete Ring with the semi- circle tab located at the top and then press the ring flush into finishing material. 3” Min (typ) NOTICE The concrete ring must be mounted flush as the entire drain assembly must be less than 2"...
- Page 10 VINYL INSTALLATION 1. Select the installation location for the dual SDX2 drains. (Additional SDX2 drains may be used.) 2. Choose the dual-drain orientation, vertical or horizontal. “Fig. 2” pg. 8 3. For Steel Wall: Make two 4 ½” holes 46” apart using a Greenlee® Standard Round Knockout Punch (Greenlee.com - Cat.
- Page 11 FIBERGLASS INSTALLATION 1. Select the installation location for the dual SDX2 drains. (Additional SDX2 drains may be used.) 2. Choose the dual-drain orientation, vertical or horizontal. “Fig. 2” pg. 8 3. For Fiberglass Wall: Cut two 4 ½” holes 46” apart using a 4 ½” hole saw. 4.
-
Page 12: Vertical Installation
SDX2 WINTERIZATION PROCEDURE Vertical Installation Horizontal Installation 1. Remove grate from upper SDX2 and install blow 1. Install blow through plug in pump and blow line to through plug and blow line until air comes from achieve airlock to SDX2. lower grate. - Page 13 SDX2 VINYL/FIBERGLASS PART NUMBERS **Replace cover within 05 installed years. ***Replace all other components within 25 installed years Item Part Number Description 005-252-2098-XX SDX2 Cover w/ Screws Vinyl/Fiberglass 2*** 005-252-2061-00 SDX2 Support Vinyl/Fiberglass 3*** 005-252-0072-00 SDX2 Gasket Set Vinyl/Fiberglass 4*** 005-252-2035-00 SDX2 Bulkhead Vinyl/Fiberglass 2 1/2”/3”...
- Page 14 For technical assistance call 1.800.621.5886 or contact your regional representative...
- Page 15 For technical assistance call 1.800.621.5886 or contact your regional representative...
- Page 16 For technical assistance call 1.800.621.5886 or contact your regional representative...
Need help?
Do you have a question about the SDX 2 and is the answer not in the manual?
Questions and answers