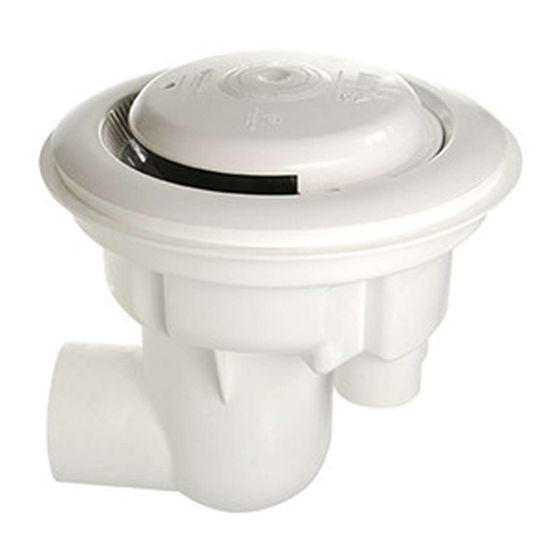
Paramount Fitness MDX-R3 Owner's Manual And Installation Manual
For adjustable concrete pools
Hide thumbs
Also See for MDX-R3:
- Owners and installation manual (12 pages) ,
- Owner's manual and installation manual (12 pages) ,
- Owner's manual (12 pages)
Advertisement
Quick Links
MDX-R3 FOR ADJUSTABLE CONCRETE POOLS
OWNER'S MANUAL AND INSTALLATION GUIDE
Safety compliant according to the Virginia Graeme Baker Pool and Spa Safety
Act ANSI/APSP - 16 - 2011
Compliant with ANSI/APSP - 7 - 2006.
NOTICE
WARNING
295 East Corporate Place • Suite 100 • Chandler, AZ 85225
Phone: 0011 + 1 + 480.893.7607 • Fax: 0011 + 1 + 480.753.3397
Paramount@1Paramount.com • www.1Paramount.com
US and Foreign patents and patents pending see www.1paramount.com/about/patents/
004-027-8816-00
To Installers: Read and follow these instructions. Give these
instructions to the facility owner to keep for future reference. Follow all
codes and regulations that apply to the design, installation and use of
suction outlet fittings.
MDX-R3 and SDX2 must be installed in accordance with Paramount's
written instruction manual, and in conformity with applicable Federal,
State, Local and Swimming pool industry building and safety codes.
REV00
ECN_1298
FOR MULTIPLE DRAIN USE FOR USE ON FLOOR
Plublish 071917
- AUSTRALIA
SUBMERGED SUCTION OUTLET
Advertisement

Summary of Contents for Paramount Fitness MDX-R3
- Page 1 Follow all codes and regulations that apply to the design, installation and use of suction outlet fittings. MDX-R3 and SDX2 must be installed in accordance with Paramount’s WARNING written instruction manual, and in conformity with applicable Federal, State, Local and Swimming pool industry building and safety codes.
- Page 2 Signal Words and Symbols Used In This Manual This Owner’s Manual and Installation Guide contains specifi c precautions and symbols to identify safety- related information. You will fi nd DANGER, CAUTION, WARNING and NOTICE symbols which require special attention. Please read them carefully and follow these precautions as indicated! They will explain how to avoid hazards that may endanger you or persons using or maintaining your pool or spa.
- Page 3 Body Suction Entrapment Hazards. Note: your certified builder has many effective options for addressing this hazard; they may include dual-drain systems, like MDX-R3, skimmers, gutters, negative edge features and many more products and piping designs known to professionals.
- Page 4 Paramount Pool & Spa Systems includes the enlarged suction element, and the reducer adapter with the MDX-R3. To order separately, please see page 12 for the part number. MDX-R3 VGB COMPLIANT DEBRIS DRAIN...
- Page 5 (492) (530) (568) (606) (643) (681) (719) (757) (795) FLOW GPM (LPM) MDX-R3 INSTALLATION METHOD 1 WITH CANISTER WITHOUT CANISTER MV FUSE MV FUSE IN DECK SIDE CANISTER TO PUMP & SKIMMER BYPASS 2ND SUCTION OUTLET TO PUMP & SKIMMER...
- Page 6 MDX-R3 INSTALLATION METHOD 2 WITH CANISTER WITHOUT CANISTER MV FUSE DECK SIDE MV FUSE IN TO PUMP CANISTER 2ND SUCTION OUTLET TRUNK LINE MUST BE 2ND SUCTION OUTLET SIZED TO MEET MAXINUM VELOCITY REQUIREMENTS TO PUMP FOR SUCTION PLUMBING PER LOCAL CODE.
- Page 7 MDX-R3 PLUMBING MDX-R3 Plumbing (Fig. 1) Fig. 1 1. Position the top edge of the MDX-R3 sump 1” below the finished depth of the pool, spa, or a basin (Fig. 1). Finish concrete to top edge of FUTURE INTERIOR FINISH construction cap.
- Page 8 SDX2 CONCRETE INSTALLATION The SDX2 High Flow Safety Drain® installed Fig. 3 50mm Deep (typ) in a concrete shell utilizes a small cutout in the concrete to form the sump which is sometimes made of plastic or fiberglass. This concrete sump provides superior shell strength by eliminating the large hole associated with plastic sumps.
- Page 9 2. Pack concrete around and under sump (Fig. 8) to ensure seal and strength of shell 3. Angle shell down to MDX-R3 sump. (Fig. 8) 4. Make cut-out around MDX-R3 sump. 440mm round by 19mm deep to water stop down. (Fig. 9 & 11) Fig. 7...
- Page 10 Plaster Ring Installation: FIGURE 5 The Concrete Ring should be attached to the MDX-R3 Sump prior to finishing the interior surface of the pool, spa, or basin. 1. Remove all plugs before starting final finish application. Use an adjustable wrench or pliers to remove 4”...
- Page 11 4. Lastly, blow vent line to achieve airlock. Vent Tube Warning Labels Included in each MDX-R3 are two warning labels that need to be placed on the pool equipment if the pool is to be winterized and has a vent tube on any of the drains plumbed on the pool. Attach the smaller label to the vent pipe where it terminates to atmosphere.
- Page 12 MDX-R3 CONCRETE POOLS PART NUMBERS Replace cover within 05 installed years Available Construction Caps Item Part Number Description 005-252-2110-XX Cover (XX = Color Code) 005-262-0840-00 Screw Pack (7pcs) 005-252-8234-XX Funnel Assembly (Includes Support, Cover, Screws and Adapter) 005-252-1045-00 Funnel Adapter...


Need help?
Do you have a question about the MDX-R3 and is the answer not in the manual?
Questions and answers