Table of Contents
Advertisement
Quick Links
OPERATING AND PARTS MANUAL
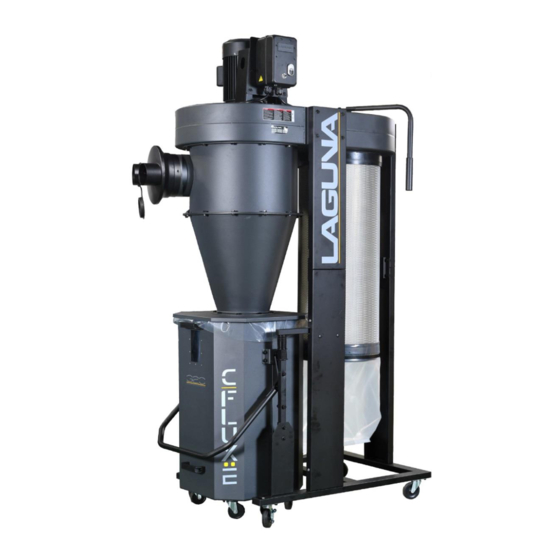
2HP Mobile Dust Cyclone Collector
Model:
CFLUX2 NEW GENERATION
Please read and save these instructions. Read carefully before attempting to
assemble, install, operate or maintain the product described. Protect
yourself and others by observing all safety information. Failure to comply
with instructions could result in personal injury and/or property damage!
Retain instructions for future reference.
2 & 3 HP Mobile Dust Cyclone Manual
1
Advertisement
Table of Contents

Subscribe to Our Youtube Channel
Related Manuals for Laguna Tools CFLUX2

Summary of Contents for Laguna Tools CFLUX2
- Page 1 OPERATING AND PARTS MANUAL 2HP Mobile Dust Cyclone Collector Model: CFLUX2 NEW GENERATION Please read and save these instructions. Read carefully before attempting to assemble, install, operate or maintain the product described. Protect yourself and others by observing all safety information. Failure to comply with instructions could result in personal injury and/or property damage! Retain instructions for future reference.
-
Page 2: Warranty
New woodworking machines sold by Laguna Tools carry a two-year warranty effective from the date of dealer invoice to consumer. Machines sold through dealers must be registered with Laguna Tools within 30 days of purchase to be covered by this warranty. Laguna Tools guarantees all new machine sold to be free of manufacturers’... -
Page 3: Table Of Contents
CONTENTS Warranty Safety Important Safety Instructions General Safety Rules Wiring Diagrams Motor Specifications Programming Remote Control Unpacking Assembly Power Supply Operation Maintenance Trouble Shooting Parts Breakdown / Exploded Views Parts List Specifications 46 & 47 Supplies 46 & 47 2 & 3 HP Mobile Dust Cyclone Manual... -
Page 4: Safety
SAFETY READ AND UNDERSTAND THIS MANUAL AND ALL INSTRUCTIONS BEFORE USING THIS EQUIPMENT. Failure to follow all instructions may result in electric shock, fire and/or serious personal injury or property damage! Electronic copies of this manual are available at www.lagunatools.com SAFETY GUIDELINES - DEFINITIONS This manual contains information that is important for you to know and understand. -
Page 5: Important Safety Instructions
Woodworking (and similar materials) can be dangerous if safe and proper operating procedures are not followed. As with all machinery, there are certain hazards involved with the operation of the machine. Using the machine with respect and caution will considerably lessen the possibility of personal injury. However, if normal safety precautions are overlooked or ignored, personal injury to the operator may result. - Page 6 4. Do not use this machine for other than its intended use. If used for other purposes, LAGUNA TOOLS INC., disclaims any real or implied warranty and holds itself harmless from any injury that may result from that use.
- Page 7 • Lead from lead-based paint. • Crystalline silica from bricks, cement, and other masonry products. • Arsenic and chromium from chemically treated lumber. Your risk of exposure varies, depending on how often you do this type of work. To reduce your exposure to these chemicals, work in a well- ventilated area and work with approved safety equipment, such as face or dust masks that are specifically designed to filter out microscopic particles.
- Page 8 19.Keep visitors a safe distance from the work area. Keep children away. 20.Make your workshop child proof with padlocks, master switches or by removing starter keys. 21.Give your work undivided attention. Looking around, carrying on a conversation and “horse-play” are careless acts that can result in serious injury.
-
Page 9: General Safety Rules
GENERAL SAFETY RULES FAILURE TO FOLLOW THESE RULES MAY RESULT IN SERIOUS INJURY. FOR YOUR OWN SAFETY, READ AND UNDERSTAND THE INSTRUCTION MANUAL BEFORE OPERATING THE MACHINE. Learn the unit’s application and limitations as well as the specific hazards peculiar to it. KEEP WORK AREA CLEAN. - Page 10 Wear respirator. Fine dust that is too small to be caught in the filter will be blown into the ambient air during operation. Always wear a NIOSH-approved respirator during operation and for a short time after to reduce your risk of permanent respiratory damage.
- Page 11 Regular cleaning. Regularly check/empty the collection bags or drum to avoid the buildup of fine dust that can increase the risk of fire. Make sure to regularly clean the surrounding area where the machine is operated— excessive dust buildup on overhead lights, heaters, electrical panels, or other heat sources will increase the risk of fire.
-
Page 12: Wiring Diagrams
WIRING DIAGRAMS POWER CONNECTIONS 2HP 220V 1PH Figure 1: Power Connections & Wiring 2 & 3 HP Mobile Dust Cyclone Manual... -
Page 13: Motor Specifications
Figure 2: Internal Wiring DO NOT EXPOSE THE MACHINE TO RAIN OR OPERATE THE MACHINE IN DAMP LOCATIONS. MOTOR SPECIFICATIONS Your machine is wired for 220 volts, 60 HZ alternating current. Before connecting the machine to the power source, make sure the switch is in the "OFF"... - Page 14 Full Load amperage Draw CFLUX2 Amp draw at 220V ........ 14 Amps CFLUX3 Amp draw at 220V ........ 20 Amps Power Supply Circuit Requirements The power source circuit for your machine must be g r o u n d e d and r a t e d f o r the a m p e r a g e given below.
- Page 15 IN ALL CASES, MAKE CERTAIN THE RECEPTACLE IN QUESTION IS PROPERLY GROUNDED. IF YOU ARE NOT SURE, HAVE A QUALIFIED ELECTRICIAN CHECK THE RECEPTACLE. 220 VOLT Single-Phase Operation Your machine is wired for 220 volts, 60 HZ alternating current. Before connecting the machine to the power source, make sure the switch is in the "OFF"...
-
Page 16: Programming Remote Control
PROGRAMMING THE REMOTE CONTROL 1. Ensure the machine is switch ON before programming the remote control. 2. Press the black set button on the bottom of the remote switch until you hear two beeps. 3. Press the Remote set button on your hand-held controller simultaneously with the black button until you hear three beeps to complete the set up. -
Page 17: Unpacking
DESCRIPTION (QUANTITY); Figure 6: A. Motor P. Octagon drum foot pedal B. Switch and remote controller Q. Inlet adapter 8” by 4” x 2ports (CFLUX2 only) C. Dust chute Inlet adapter 8” by 4” x 3ports (CFLUX3 only) D. Top upright supports (3) Q1.Inlet adapter 8”... -
Page 18: Assembly
For your own safety, do not connect the machine to the power source until the machine is completely assembled. Please also make sure that you read and understand the entire instruction manual. ASSEMBLY TIME ESTIMATE 5 to 6 hours Visit the Laguna Tools Video page for setup assistance. 2 & 3 HP Mobile Dust Cyclone Manual... - Page 19 1. Place the empty, top, foam packing insert which contained the individual parts) upside-down on the floor. Place the main unit into the Styrofoam insert upside-down. Make sure the unit is centered properly and resting solidly in the Styrofoam insert for the next steps.
- Page 20 5. (Intake cylinder, cyclone barrel and cyclone funnel). Install 3 x 6mm foam tape to rims on each location shown on the left. - Top rim of the intake cylinder - Top rim of the cyclone barrel - Top and lower rim of cyclone funnel 6.
- Page 21 9. With the help of another person, lift the unit up carefully and rotate to the right-side-up with the motor on top and the wheels at the bottom. Attach the canister cover plate to the dust chute using (12) 3/16 x ½”sheet metal thread bolts.
- Page 22 13. With the help of another person holding the filter, push the rotation shaft through the hole in the middle of the canister cover plate. Make sure to hold the rotation shaft above the canister cover plate. 14. While your assistant is holding the rotation shaft above the canister cover plate, assemble the canister filter to the dust chute.
- Page 23 18. Secure the lower triangular support plate to the base using (2) 5/16” x 3/4” hex bolts and (2) 5/16” x 18 x 2 flat washers. Follow the same steps for the opposite side. 19. Secure the foot pedal support bracket to the lower upright support panel using (2) 5/16”...
- Page 24 22. Secure the top end of the foot pedal bar to support bracket using (4) 5/16” x 1-3/4” hex bolts, (8)5/16” x 18 x 2 flat washers and (4) 5/16” hex nuts. Make sure the foot pedal bar is pushed all the way to the end of the support bracket (indicated by yellow arrows).
- Page 25 26. Secure the movable supporting Octagon foot pedal brace on the foot pedal bar with the octagon foot pedal using (2) 3/8” x 21mm hex bolts. Make sure the bolt head is on the inside of the octagon foot pedal. Adjust the tightness of this bolt accordingly.
- Page 26 30. Assemble the Octagon drum. Locate the drum base panel (it does not matter which side faces inside) and secure the (4) casters using (16) 5/16” x 3/4” hex bolts, (32) 5/16” x 1” flat washers and (16) 5/16” hex nuts. 31.
- Page 27 34. Place the drum on its side with the handle facing top. With the help of another person, hold the base panel with wheels up against the base of the drum. Using (22) M3 x 6mm Philips flat point screws and M3 cap nuts secure and fasten tightly.
- Page 28 38. Use (24) Round-head Philip bolts 3/16” x 1/2” and (24) Cap nuts (3/16”) to assemble the drum insert together. Drum insert Place the drum insert inside over the plastic bag in the Octagon drum. 39. Lift the foot pedal bar. Align the Octagon drum window to the center point of the drum lid and push the drum in.
-
Page 29: Power Supply
If you are unsure about the wiring codes in your area or you plan to connect your machine to a shared circuit, consult a qualified electrician. CFLUX2 (2HP/220V/60HZ/Single phase) Circuit Size (220 V) … 20 Amp minimum CFLUX3 (3HP/220V/60HZ/Single phase) Circuit Size (220V) ..30 Amp minimum IN ALL CASES, MAKE CERTAIN THE RECEPTACLE IN QUESTION IS PROPERLY GROUNDED. -
Page 30: Operation
220 VOLT Single-Phase Operation The motor supplied with your machine is a 220 Volt motor. It is shipped ready-to-run for 220 Volt operation. NOTE: An (appx.) 8’ cord is included and can be used for 220 Volt operation. A “plug” is NOT included and must be installed by a qualified technician. - Page 31 Using Compressed Air DISCONNECT MACHINE FROM POWER! For heavy duty users, it is recommended to use compressed air on a weekly basis to maintain maximum filtration efficiency and longer life span of the filter. REMOVING THE CANISTER FILTER 1. Release the spring-loaded band clamp at the bottom of the canister filter and remove the plastic bag.
- Page 32 NOTE: You may have to gently bend the paddles to free the canister filter. This should not adversely affect the operation of the machine. 5. With the canister filter removed use a compressed air gun to thoroughly clean between the pleats, both inside and outside.
-
Page 33: Troubleshooting
TROUBLESHOOTING Symptom Possible Cause Possible Solution Machine Power supply switched Confirm power supply is ON and does not OFF or is faulty. has the correct voltage. start or a breaker Wall fuse/circuit breaker Ensure adequate circuit size; trips. is blown/tripped. install inlet restrictor, replace weak breaker. - Page 34 Loud, Machine is on uneven Stabilize on a flat surface. repetitive surface. noise, or excessive Damaged/Unbalanced Inspect impeller for dents, vibration impeller. bends, loose fins. Replace if coming from needed. cyclone Loose connections. Check and re-tighten all fasteners. Replace the motor and Impeller is loose.
-
Page 35: Parts Breakdown / Exploded Views
Parts Breakdown CFLUX 2 & 3 Fig. 9 2 & 3 HP Mobile Dust Cyclone Manual... - Page 36 SECTION A (Close up view) Figure 10: Fan, Motor & Switch 2 & 3 HP Mobile Dust Cyclone Manual...
- Page 37 SECTION B (Close up view) Figure 11: Cyclone, Canister & Barrel 2 & 3 HP Mobile Dust Cyclone Manual...
- Page 38 SECTION C (Close up view) Figure 12: Panels & Lock 2 & 3 HP Mobile Dust Cyclone Manual...
- Page 39 SECTION D (Close up view) Figure 13: Barrel & insert 2 & 3 HP Mobile Dust Cyclone Manual...
-
Page 40: Parts List
Parts List CFLUX2 Part Number Description QTY No. Part Number Description 1 PDCCF22201-1 MOTOR 2HP/220V/60Hz/1Ph 10B PDCCF22201-10B HEX BOLT 5/16” x 3/4” FLAT WASHER 1A PDCCF22201-1A MOTOR GASKET 10C PDCCF22201-10C 5/16”x18x2mm 2 PDCCF22201-2 MOTOR SUPPORT BASE 10E PDCCF22201-10E HEX BOLT 5/16” x 1-3/4”... - Page 41 No. Part Number Description QTY No. Part Number Description PDCCF22201-11M HEX LOCK NUT 3/8” 16E PDCCF22201-16E DRUM CASTER 3” 11N PDCCF22201-11N HEX BOLT 3/8” x 1-1/2” 16U PDCCF22201-16U HEX BOLT 5/16” x 3/4” FLAT WASHER 11O PDCCF22201-11O HEX LOCK NUT 3/8” 16F PDCCF22201-16F 5/16”x18x2mm TRIANGULAR SUPPORT PLATE...
- Page 42 No. Part Number Description QTY No. Part Number Description FLAT WASHER 18J FOAM TAPE 3x15mm x 80CM 23H PDCCF22201-23H 5/16”x18x2mm 19 PDCCF22201-19V2 OCTAGON DRUM LID V2.2021 23I PDCCF22201-23I HEX LOCK NUT 5/16” CANISTER FILTER 19A PDCCF22201-19A HEX BOLT 5/16” x 3/4” 24 PDCCF22201-24 Ø400mm x 900mm 19B PDCCF22201-19B...
- Page 43 Parts List CFLUX3 Part Number Description QTY No. Part Number Description 1 PDCCF32201-1 MOTOR 3HP/220V/60Hz/1Ph 10B PDCCF32201-10B HEX BOLT 5/16” x 3/4” 1A PDCCF32201-1A MOTOR GASKET 10C PDCCF32201-10C FLAT WASHER 5/16”x18x2t 2 PDCCF32201-2 MOTOR SUPPORT BASE 10E PDCCF32201-10E HEX BOLT 5/16” x 1-3/4” 2A PDCCF32201-2A HEX LOCK BOLT 5/16”...
- Page 44 No. Part Number Description QTY No. Part Number Description PDCCF32201-11M HEX LOCK NUT 3/8” 16E PDCCF32201-16E DRUM CASTER 3” 11N PDCCF32201-11N HEX BOLT 3/8” x 1-1/2” 16U PDCCF32201-16U HEX BOLT 5/16” x 3/4” FLAT WASHER 11O PDCCF32201-11O HEX LOCK NUT 3/8” 16F PDCCF32201-16F 5/16”x18x2mm TRIANGULAR SUPPORT PLATE...
- Page 45 No. Part Number Description QTY No. Part Number Description FLAT WASHER 5/16”x 18x 18J PDCCF32201-18J FOAM TAPE 3x15mm x 80CM 23H PDCCF32201-23H 19 PDCCF32201-19V2 OCTAGON DRUM LID V2.2021 23I PDCCF32201-23I HEX LOCK NUT 5/16” CANISTER FILTER 19A PDCCF32201-19A HEX BOLT 5/16” x 3/4” 24 PDCCF32201-24 Ø400mm x 900mm 19B PDCCF32201-19B...
-
Page 46: Specifications 46
SPECIFICATIONS: CFLUX2 Motor Specs: 2 HP Electrical Specs: 220V / 60Hz / 1PH / 3450 RPM Running AMP (6” inlet) 14A at 220V Air Volume: 1166CFM (cubic feet per minute) Max. static pressure Inches of water Fan size 14.5” Inlet: 8”... - Page 47 SPECIFICATIONS: CFLUX3 Motor Specs: 3 HP Electrical Specs: 220V / 60Hz / 1PH / 3450 RPM Running AMP (8” inlet) 22A at 220V Air Volume: 1624CFM (cubic feet per minute) Max. static pressure 11.2 Inches of water Fan size 15.5” Inlet: 8”...
- Page 48 NOTES Ph: 800.234.1976 www.lagunatools.com 100721 2 & 3 HP Mobile Dust Cyclone Manual...
Need help?
Do you have a question about the CFLUX2 and is the answer not in the manual?
Questions and answers