Table of Contents
Advertisement
Available languages
Available languages
Quick Links
Before you begin - Read these instructions completely and carefully.
IMPORTANT – OBSERVE ALL GOVERNING CODES AND ORDINANCES.
Note to Installer – Be sure to leave these instructions with the Consumer.
Note to Consumer – Keep these instructions with your Owner's Manual for future reference.
Tools Needed
• Phillips head screwdriver
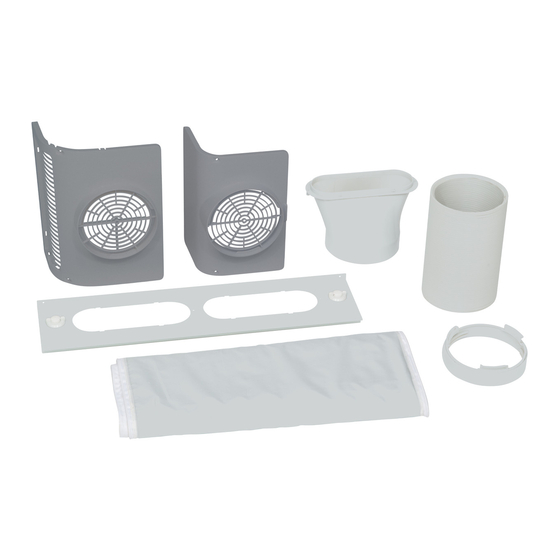
Parts Included:
1. Dual Hose Conversion Baffles (2)
2. Intake Hose Adapter to AC
3. Intake Hose Adapter to Window Kit
4. Intake Hose
5. Exhaust Hose Insulation
6. Dual Hose Window Panel
1.
4.
for your new
RAP02 Dual Hose
Conversion Kit
• Small hand saw - if trimming of the
window expansion panels is required
3.
5.
1
2.
31-5000578 Rev. 0 12-20 GEA
Advertisement
Table of Contents

Related Manuals for GE RAP02


Summary of Contents for GE RAP02
- Page 1 Installation Instructions for your new RAP02 Dual Hose Conversion Kit Before you begin - Read these instructions completely and carefully. IMPORTANT – OBSERVE ALL GOVERNING CODES AND ORDINANCES. Note to Installer – Be sure to leave these instructions with the Consumer.
- Page 2 • The appliance shall be stored in a room without in the use of flammable refrigerants. continuously operating ignition sources (for example: • GE Appliances does not support any servicing of the air open flames, an operating gas appliance or an conditioner.
- Page 3 • Maintain a minimum 20” (51 cm) clearance around the air conditioner to not block airflow. If you previously installed your GE Portable Air Conditioner, you will need to remove the Window Kit • Keep the air conditioner free of any obstructions from the window, exhaust hose adapter to AC and such as drapes, curtains, blinds, etc.
- Page 4 Installation Instructions STEP 11: STEP 7: Assemble Intake Hose Assembly and Mount to back of Install Intake and Exhaust Hose Adapters to Dual Hose Window Panel. Unit. STEP 8: STEP 12: Install Exhaust Nozzle to Main Window Panel Extend the intake hose approximately 4” from each end. Screw the adapters onto the ends of the hose, turning 1.
- Page 5 Instrucciones de Instalación para su nuevo Kit de Conversión con Manguera Doble RAP02 Antes de comenzar – lea estas instrucciones completamente y de forma detenida. IMPORTANTE- CUMPLA CON TODOS LOS CÓDIGOS Y ORDENANZAS GUBERNAMENTALES. Nota para el Instalador – Asegúrese de entregar estas instrucciones al Consumidor.
- Page 6 (por ejemplo: inflamables. llamas abiertas, un electrodoméstico que funcione a gas o un • GE no suministra servicio técnico para el acondicionador de calefactor que funcione a electricidad). aire. • No perfore ni queme el tubo refrigerante. Tenga presente •...
- Page 7 Si ya había instalado de forma previa su Acondicionador a 20” (51 cm) de la pared. de Aire Portátil de GE Appliances, será necesario NOTA: La distancia recomendada de la ventana para retirar el Kit de Ventana de esta última, el adaptador un rendimiento óptimo es de 20 “(51 cm).
- Page 8 Instrucciones de instalación PASO 11: PASO 7: Conecte el Ensamble de la Manguera de Entrada y Instale adaptadores de manguera de admisión y escape en el panel de ventana de manguera doble. Monte el mismo sobre la parte trasera de la unidad. PASO 8: PASO 12: Instale la Boquilla de Salida al Extienda la manguera de entrada aproximadamente 4”...
Need help?
Do you have a question about the RAP02 and is the answer not in the manual?
Questions and answers