Table of Contents
Advertisement
Quick Links
Advertisement
Table of Contents

Subscribe to Our Youtube Channel
Related Manuals for Olympus C Series


Summary of Contents for Olympus C Series
- Page 2 Shinjuku Monolith, 3-1 Nishi-Shinjuku 2-chome, Shinjuku-ku, Tokyo 163-0914, Japan Telephone: (81)3-6901-4038 48 Woerd Avenue, Waltham, MA 02453, U.S.A. Telephone: (1)781-419-3900 Wendenstrasse 14-18, 20097 Hamburg, Germany Telephone: (49)40-23-77-30 L43, Office Tower, Langham Place, 8 Argyle Street, Mongkok, Kowloon, Hong Kong Telephone: (852)2481-7812 3 Acacia Place, Notting Hill VIC 3168, Australia Telephone: (61)130-013-2992...
-
Page 4: Table Of Contents
Contents Introduction ....................1 Intended use........................1 Instruction manual......................1 Product configuration ...................... 1 Important Information–Please Read Before Use........1 Marks used in this manual ....................1 Safety precautions......................2 General safety precautions................... 2 Battery precautions....................... 5 Main unit rating plate/caution plate............7 Unpacking Unpacking the instrument .................. - Page 5 Playing back on a full-screen view (view screen) ............23 Multi-image view (thumbnail screen) ................24 Using recorded images on a PC ................24 Displaying Images on an External Monitor ............24 Menu operations and functions Performing menu operations .................. 25 Using the live screen/freeze screen................
-
Page 6: Introduction
Before using the instrument, carefully read the contents of this manual to ensure that you use the instrument correctly. After reading the manual, store it and the warranty agreement in a safe place. If you have any questions about any information in this manual, please contact Olympus. Product configuration For information about the configuration of devices required by this product and devices that can be used in combination with it, see "System chart"... -
Page 7: Safety Precautions
Contact Olympus for all repair and servicing. Olympus is not liable for any accident or instrument damage that occurs as a result of repairs attempted by non-Olympus personnel. • Immediately stop using the instrument at the first sign of smoke, abnormal odor, abnormal noise, or any other abnormality. - Page 8 • Do not use the AC adapter outdoors. Doing so may result in fuming, fire, or electric shock. The AC adapter is designed for indoor use. • Do not subject the AC adapter to strong impact cause by striking it against a wall, dropping it, etc. Otherwise, malfunction, damage, or electric shock might occur.
- Page 9 • When you have the instrument hung from your neck, take care to avoid getting tangled with other nearby items. Take care to avoid entanglement and possible strangulation. CAUTION Do not continue to use the instrument when it is wet with condensation. •...
-
Page 10: Battery Precautions
Battery precautions Should you experience any problems when using the instrument with batteries, contact Olympus. Observe the precautions described below when handling the battery. Otherwise, battery fluid leak, excessive heat generation, smoke, battery burst, electric shock and/or burns may result. - Page 11 • If you are having problems removing the battery from the instrument, do not apply undue force. Contact Olympus. • When carrying the battery onto an airplane, please contact the airline beforehand. • When changing the battery, do not remove and insert the battery rapidly and repeatedly.
-
Page 12: Main Unit Rating Plate/Caution Plate
The cautions, safety ratings, and serial number are indicated on the label attached to the rear of the LCD monitor. If labels are missing or if their contents are illegible, contact Olympus. Rating and caution plate Manufacturing Date and Serial Number 15. -
Page 13: Unpacking
Unpacking Unpacking the instrument When unpacking the instrument, check to make sure that all of the items listed below are included. Should anything be missing or damaged, contact your original vendor or Olympus. Name Count Main unit SDHC card (4 GB, inserted into the SD card slot of the main unit) -
Page 14: Nomenclature
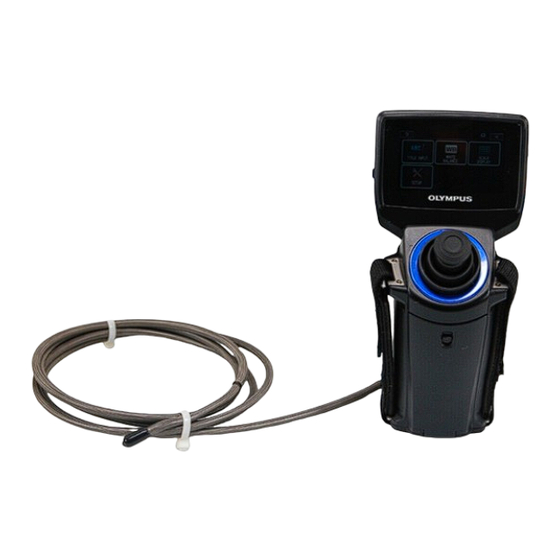
Nomenclature Main unit/insertion tube nomenclature Name Name USB terminal POWER button ( HDMI Mini terminal AC adapter connector Terminal cover AC adapter connector cover Hand strap (left and right) Insertion tube holder LCD monitor Angulation section Joystick Tip protection hood Battery door lock Insertion tube Battery door... -
Page 15: Lcd Monitor Nomenclature
2 Nomenclature LCD monitor nomenclature Live screen Name Folder name Folder Jump Button Temperature indicator Brightness setting button, brightness level Zoom setting button, zoom level Date/Time Title Thumbnail screen Logo LIGHT button THUMBNAIL button VIEW button MENU button Freeze indicator Number of images that can be recorded SD card icon... - Page 16 2 Nomenclature NOTE • The title that appears is “the title entered on the live screen” or “the title selected during recording”. • Should you notice any dirt, stains, or other abnormalities on the LCD monitor, see "6 Storage and maintenance"...
-
Page 17: Pre-Observation/Pre-Operation Preparation And Inspection
Pre-observation/pre-operation preparation and inspection Be sure to finish the preparation and inspection work described in this chapter before using the instrument. At the first sign of any abnormality, immediately stop using the instrument and perform the required actions as described in "7 Troubleshooting" (P. 37). Inspections are not only required before use, but should be conducted periodically. - Page 18 3 Pre-observation/pre-operation preparation and inspection Using the AC adapter AC inlet After connecting the AC power cord to the AC inlet of the AC adapter, connect the plug of the AC power cord to the AC adapter terminal on the main unit. Next, connect the plug of the AC power cord securely to the power outlet.
-
Page 19: Pre-Operation Preparation
3 Pre-observation/pre-operation preparation and inspection Pre-operation preparation Checking the state of the tip protection hood. (See P.14) Turn on power. (See P.14) Check the remaining battery level. (See P.15) Select the display language (initial settings). (See P.28) Configure date and time settings (initial settings). (See P.27) Check the illumination of the distal end. -
Page 20: Checking The Remaining Battery Level
3 Pre-observation/pre-operation preparation and inspection Checking the remaining battery level When operating the instrument under battery power, an indicator in the upper right corner of the screen shows remaining battery power. The table below shows general guidelines for remaining battery power. Indicator Battery condition Battery power is sufficient (100% to 50%). -
Page 21: Attaching The Tripod
3 Pre-observation/pre-operation preparation and inspection Attaching the tripod To use a tripod during observation, attach it to the tripod mounting hole on the main unit. CAUTION • To prevent the instrument from falling and causing injury and damage, attach the instrument securely on the tripod. -
Page 22: Pre-Operation/Post-Operation Inspections
Any cracks or scratches in the insertion tube, battery door, Replacement SD card slot cover, or terminal cover? required. Contact Olympus. Any abnormality, such as cracks or deformation, on the exterior of the instrument, buttons or the joystick? Insertion Are the mesh components on the exterior, except the... -
Page 23: Basic Operation
Basic operation Viewing an observation object Turn on the light. Touch the [LIGHT] button on the live screen. While watching the display screen, insert the insertion tube into the observation object. Insert carefully while checking the insertion direction. Use the joystick to perform angulation operations and observe the applicable locations on the display. -
Page 24: Adjusting The Image Display
4 Basic operation Adjusting the image display Still image display (Freeze) While a live image is displayed, short-press the [FRZ/REC] button on the main unit. This will freeze the observation screen image and display the freeze indicator ( ) in the upper right corner of the LCD monitor. -
Page 25: Recording Images
4 Basic operation Recording images Still images and movie images can be recorded during observation. Data can be stored on the provided SD card. Make use of the supplied SD card, or an SDHC card (4 to 32 GB) that is Class 6 or higher. SD cards smaller than a capacity of 2 GB and the SDXC format (larger than 48 GB) cannot be used. -
Page 26: Recording A Still Image
4 Basic operation Specifying the image recording format To record the date, time, title, logo, and other on-screen information onto the image being recorded, touch the [MENU] button on the live screen. On the menu that appears, select "SETUP", and set "PRINT SCREEN ON/OFF" to "ON". (See P.26.) NOTE •... -
Page 27: Recording A Movie Image
4 Basic operation Recording a movie image Long-press the [FRZ/REC] button on the main unit again while the live image is displayed. After a still image is recorded, a movie confirmation screen appears. Touch [YES]. This starts movie image recording. A movie recording indicator flashes on the LCD monitor while movie recording is in progress. -
Page 28: Replaying An Image
4 Basic operation Replaying an image Recorded images can be displayed using either of two screen views: a full-screen view of a single image (view screen) or a multi-image view of thumbnail images (thumbnail screen). The thumbnail screen shows multiple images at a single glance, which makes it useful when finding a particular image among a large group of images. -
Page 29: Multi-Image View (Thumbnail Screen)
With the InHelp VIEWER, you can make use of the images recorded by this instrument on a PC. To make use of the InHelp VIEWER, please download the software from our website (http://www.olympus-ims.com/en/service-and-support/downloads/). CAUTION • The instrument will not display the live screen while recorded images are being displayed on a PC screen. -
Page 30: Menu Operations And Functions
Menu operations and functions Performing menu operations Touch the [MENU] button. This displays the main menu. Touch the menu item you want to execute. Touch the option you want to select. NOTE • Touching the J (Previous) button during the menu operation returns you to the next higher level in the hierarchy. -
Page 31: Using The Live Screen/Freeze Screen
5 Menu operations and functions Using the live screen/freeze screen Menu display and functions The settings described in the table below can be configured using the live screen/freeze screen menu. *: Initial default Menu Available settings TITLE INPUT Title input A title can be displayed in the live screen and in registered images. - Page 32 • OFF : Hide information. • DATE/TIME : Show the date, time, and title. • DATE/TIME/LOGO : Show the date, time, title, and "OLYMPUS" logo. • ALL* : Show the date, time, title, "OLYMPUS" logo, zoom level, and brightness level.
-
Page 33: Inputting A Title
5 Menu operations and functions Menu Available settings TOUCH Adjusts the response position when you touch the touch panel. SCREEN Perform adjustments accordingly when the response position is out of ADJUST alignment when you touch the screen. • CANCEL : Does not perform adjustment. •... - Page 34 5 Menu operations and functions Selecting a preset title for input With this procedure, you select a preset character string and use it to input a title. For information about how to register frequently used text strings, see "Registering a character string as a preset title"...
-
Page 35: Registering A Character String As A Preset Title
5 Menu operations and functions Registering a character string as a preset title After you register commonly used character strings to favorites, you can recall them when you are inputting titles. You can register a maximum of 55 character strings to preset titles. Input the character string you want to register into the title input box. -
Page 36: Displaying Scale On The Screen
5 Menu operations and functions Displaying Scale on the Screen You can set the pattern to display on the live or freeze screen. When “PRINT SCREEN ON/OFF” is set to “ON”, the pattern is registered to the still image. (Patterns cannot be recorded to a movie.) SCALE DISPLAY >... -
Page 37: Changing The Display Language
5 Menu operations and functions Changing the display language Use the procedure below to select the language for menus and error messages that appear on the display. SETUP > LANGUAGE > Select a language. NOTE • After the language setting is changed, it may take longer than normal for screen display functions to be performed. -
Page 38: Using The Thumbnail/View Screens
5 Menu operations and functions Using the thumbnail/view screens Menu display and functions The menu displayed on the thumbnail/view screen can be used for the following settings. Button Available settings DELETE Image delete • CANCEL : Do not delete image. •... -
Page 39: Storage And Maintenance
Though the battery life depends on the operating environment and frequency of use, replacement of the battery is recommended whenever the battery operation time becomes very short. Contact Olympus about changing the battery. For details about how to load and remove the battery, see "Using the battery" (P. 12). -
Page 40: Cleaning Components
6 Storage and maintenance Cleaning components Cleaning the insertion tube Dirt or other foreign matter on the insertion tube Wipe with a clean soft cloth. Dirty water, machine oil, or other liquid on the insertion tube Wipe with a soft cloth or cotton swab, and then wash thoroughly with a piece of gauze or other material moistened with a neutral detergent. -
Page 41: Storage Precautions
6 Storage and maintenance Storage precautions Store this product under normal room temperature and humidity. CAUTION • Never subject cables to severe bending, pulling, binding, twisting, or crushing forces. Do not allow a cable to be exposed to heat, which can melt its covering. Otherwise, cable might be damaged, which can lead to fire and electric shock. -
Page 42: Troubleshooting
Olympus for repairs. Should even the slightest irregularity be suspected, do not use the instrument. Perform the actions described in "7.1 Troubleshooting guide" (P. 37). If the problem cannot be resolved by the described remedial action, stop using the instrument and send it to Olympus for repair. -
Page 43: Common Problems
7 Troubleshooting Message Cause and recommended action Battery voltage is low. LOW BATTERY. PLEASE CONNECT TO THE AC Stop all image recording, copy, and delete operation, SD card format ADAPTER OR TURN OFF THE operations, etc., and immediately replace the battery. Or you connect POWER. -
Page 44: Requesting Repair Of This Product
Use an SD card recommended by Olympus. Requesting repair of this product Contact Olympus before requesting repair of this instrument. Include a detailed description of the malfunction and the conditions under which it occurs when returning the instrument. Malfunctions that occur during the warranty period are done at no charge according to the warranty agreement. -
Page 45: Specifications
Specifications Operating environment Operating temperatures ° Insertion tube In air : -25 to 80 ° In water: 10 to 30 Other parts than above In air ° : -10 to 40 C (Battery-powered operation) ° 0 to 40 C (AC adapter-powered operation) Operating atmospheric pressure Insertion tube In air... - Page 46 Weight Approximately 2.4 kg (With all items stowed: Approximately 3.9 kg) Manufacturer OLYMPUS CORPORATION TOKYO, JAPAN NOTE • The images recorded with the instrument can be displayed on a computer, etc., but playback on the instrument of images recorded with an image recording device such as a digital camera or a computer is not supported.
-
Page 47: External Application Standard
In accordance with European Directive on Waste Electrical and Electronic Equipment, this symbol indicates that the product must not be disposed of as unsorted municipal waste, but should be collected separately. Refer to your local Olympus distributor for return and/or collection systems available in your country Chinese RoHS Directive This mark indicates the environmental protection use period applicable to electronic information products sold in China in accordance with the ”Management Methods for... -
Page 48: Licenses
8 Specifications Licenses AVC Patent Portfolio License THIS PRODUCT IS LICENSED UNDER THE AVC PATENT PORTFOLIO LICENSE FOR THE PERSONAL AND NONCOMMERCIAL USE OF A CONSUMER TO (i) ENCODE VIDEO IN COMPLIANCE WITH THE AVC STANDARD (“AVC VIDEO”) AND/OR (ii) DECODE AVC VIDEO THAT WAS ENCODED BY A CONSUMER ENGAGED IN A PERSONAL AND NON- COMMERCIAL ACTIVITY AND/OR WAS OBTAINED FROM A VIDEO PROVIDER LICENSED TO PROVIDE AVC VIDEO. - Page 49 8 Specifications EGL1.3 Copyright (c) 2007-2009 The Khronos Group Inc. Permission is hereby granted, free of charge, to any person obtaining a copy of this software and/ or associated documentation files (the "Materials"), to deal in the Materials without restriction, including without limitation the rights to use, copy, modify, merge, publish, distribute, sublicense, and/or sell copies of the Materials, and to permit persons to whom the Materials are furnished to do so, subject to the following conditions:...
-
Page 50: Appendix
Appendix System chart Rigid sleeve (optional) • MAJ-1253 Strap (Commercially Sold) Display (Commercially Sold) Main unit IV0620C HDMI Cable SD card Carrying case Tip Protection Hood Battery AC adapter BN-VF815UWIE USB cable (optional) AC power cord Computer (Commercially Sold)
Need help?
Do you have a question about the C Series and is the answer not in the manual?
Questions and answers