Table of Contents
Advertisement
Advertisement
Table of Contents

Related Manuals for Westinghouse WPX2700


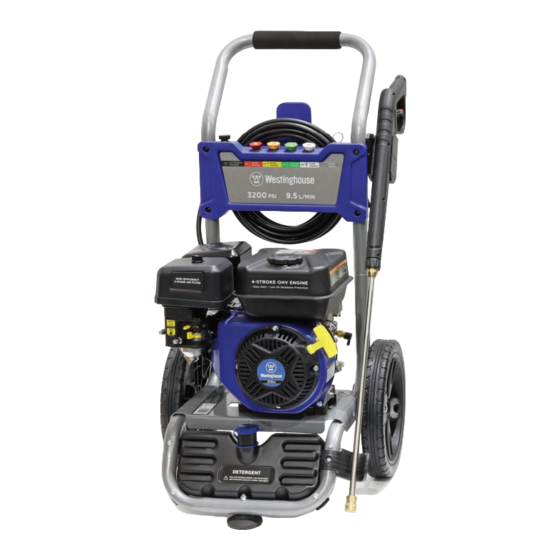
Summary of Contents for Westinghouse WPX2700
- Page 1 Pressure Washers Instruction Manual WPX2700 WPX3200...
- Page 3 CONGRATULATIONS ON PURCHASING A WESTINGHOUSE PORTABLE PRESSURE WASHER Thank you for purchasing a Westinghouse portable pressure washer. It is a high quality outdoor power product that can provide many years of safe and reliable service if properly operated and maintained.
-
Page 4: Table Of Contents
SAFETY ........1 MAINTENANCE ......19 Safety Definitions . -
Page 5: Safety
SAFETY DEFINITIONS Symbol Description The words DANGER, WARNING, CAUTION and NOTICE are used throughout this manual to highlight Corrosive Liquid Hazard important information. Be certain that the meanings of these alerts are known to all who work on or near the equipment. -
Page 6: General Safety Rules
GENERAL SAFETY RULES WARNING DANGER The high pressure water stream can penetrate skin and its underlying Never operate the pressure washer tissues, which can result in in an enclosed area. Engine exhaust amputation or other serious injury. contains poisonous carbon monoxide. The spray gun can entrap high pressure water, even when engine is Only operate the pressure washer... -
Page 7: Workplace Safety Rules
WORKPLACE SAFETY RULES Always wear safety goggles that comply with AS/NZS 1337 when The Westinghouse WPX2700 and WPX3200 pressure operating or in the vicinity of the washers are intended for domestic use only by pressure washer. Hearing protection,... -
Page 8: Safety Labels
SAFETY LABELS The safety labels have specific positions and must be replaced if they are unreadable, damaged or missing. Using petrol-powered equipment indoors can kill you • Read Instruction Manual before operating. • Do not spray electrical equipment. in minutes. Engine exhaust contains carbon monoxide. This is a poisonous gas you cannot see or smell. -
Page 9: Unpacking
1. Carefully cut the packing tape on top of the carton. 5 – Lance 2. Fold back top flaps to reveal the Instruction 6 – Spray Nozzles (WPX2700 x 4, WPX3200 x 5) Manual. Remove the manual and save it for reference. 7 – Nozzle Cleaning Tool 3. -
Page 10: Features
MAIN PRESSURE WASHER 17. Muffler and Spark Arrester: Reduce engine exhaust noise and prevent the emission of hot COMPONENTS exhaust particles. 1. Spray Gun: Controls the application of high 18. Engine Control Switch: Use to turn the engine on pressure water or low pressure detergent and or off. - Page 11 Figure 3 – Main Pressure Washer Components...
-
Page 12: Assembly
WHEELS CAUTION Never lift the pressure washer without assistance. The pressure washer is heavy and lifting without assistance can result in personal injury. Never use the handle as a lifting point to support the entire weight of the pressure washer. Only use the handle to lift the pressure washer while simultaneously lifting it from underneath the chassis frame. -
Page 13: Spray Gun Holder
SPRAY GUN HOLDER SPRAY NOZZLES AND CLEANING TOOL Tools required – 4 mm hex key and 10 mm socket wrench. Insert the spray nozzles and the nozzle cleaning tool Attach the spray gun holder to the handle using the into their respective marked positions on the hose and supplied fasteners as shown in Figure 6. -
Page 14: Pressure Hose
PRESSURE HOSE SPRAY NOZZLE 1. Check that the O-ring on each of the two 1. Select the desired nozzle for the cleaning pressure hose threaded couplings is intact and application. not damaged and then lubricate them both 2. Apply the trigger lock on the spray gun by rotating by moistening with water or applying silicone it away from the trigger and locking it into position lubricant. -
Page 15: Operation
BEFORE STARTING THE Before starting the pressure washer, always check the engine oil and fuel levels. PRESSURE WASHER After starting the pressure washer, it is not safe to add fuel to the fuel tank or engine oil to the engine while the engine is running or immediately after stopping while the engine and muffler are still hot. -
Page 16: Adding Detergent
ADDING DETERGENT Required Fuel – Use only unleaded petrol with an octane rating not less than 91 and ethanol content not greater than 10%. Where possible it is preferable to use regular unleaded petrol without ethanol. WARNING Filling the Fuel Tank – Follow the steps below to fill Use only biodegradable, non- the fuel tank: flammable and non-toxic pressure... -
Page 17: Connecting The Water Supply
CONNECTING THE WATER 4. Turn on the water supply and check that there are no leaks. SUPPLY 5. Squeeze the trigger on the spray gun to bleed out any entrapped air in the hoses, pressure pump and spray gun. Continue until there is a steady WARNING stream of water coming out from the spray nozzle and then release the trigger. - Page 18 • The fuel tank is full of the correct type of unleaded petrol. • The detergent tank is full of the correct type of cleaning liquid, if required. • All fluid connections are properly assembled and tight, including specifically: - Water supply hose to pressure pump inlet. - Pressure pump outlet to high pressure hose.
-
Page 19: Stopping The Pressure Washer
Using any other Figure 21 – Removing the Spray Nozzle nozzles can adversely affect performance and may void the warranty. For replacement nozzles, please contact your Westinghouse Outdoor Power 3. Select the desired spray nozzle for the next Equipment dealer. cleaning application. -
Page 20: Spray Nozzle Selection
Medium to High durable surfaces on houses, fences, driveways, footpaths, patios, BBQs and so on. NOTE: This spray nozzle is not supplied as standard with the WPX2700. 25° Moderate general-purpose cleaning of cars, boats, RVs, outdoor furniture and other durable... -
Page 21: Pressure Washing Tips
PRESSURE WASHING TIPS 3. Turn on the water supply and start the pressure washer. 4. Apply the detergent to the surface working NOTICE upwards from the bottom to the top in long, even and overlapping strokes. Damage may occur to the cleaning surface if the spray nozzle is held too close to it, especially when 5. -
Page 22: After Each Use
AFTER EACH USE TRANSPORTING THE PRESSURE WASHER 1. Switch off the pressure washer and turn off the water supply. The pressure washer should be switched off and the 2. Add approximately 0.5 L of clean water into the fuel valve lever should be moved to the OFF position detergent tank using the water supply hose to before transporting the unit. -
Page 23: Maintenance
Use Avoid accidentally starting the only genuine Westinghouse spare parts or others as pressure washer during maintenance specified herein. Non-genuine spare parts may be by removing the spark plug boot from of inferior quality and cause damage to the pressure the spark plug. -
Page 24: Maintenance Schedule
^ Service more frequently if operating in dusty conditions. Table 2 lists the more complicated maintenance tasks that are best performed by a qualified small engine mechanic using specialised tools. It is recommended to engage an authorised Westinghouse service dealer to carry out this work. -
Page 25: Engine Oil
ENGINE OIL Engine Oil Specification Use premium quality 4-stroke engine oil with an API Service Classification of at least SJ. A SAE multigrade viscosity of 5W-30 or 10W-30 is suitable for use in ambient temperatures of up to 40°C. For temperatures above 40°C, a multigrade viscosity of 10W-40 or 15W-40 is recommended. -
Page 26: Changing Engine Oil
5. Remove the oil drain plug (see Figure 27). Once removed, place the oil drain plug on a clean surface. 6. Remove the oil fill plug & dipstick so that the oil can flow more easily from the oil drain port. 7. -
Page 27: Replacing The Air Filter Elements
7. Clean the paper filter element by tapping it several times on a hard surface to remove loose dirt and then blow compressed air through it from the inside with a pressure not exceeding 200 kPa (29 psi). Do not try to brush or scrape any dirt off the paper filter element as this mechanical action will force the contaminants deeper into the filter media. -
Page 28: Fuel Strainer
FUEL STRAINER 8. Re-install the fuel strainer by hand inside the filler hole on top of the fuel tank (see Figure 32). Make Check and clean the fuel strainer after every sure it is fully inserted into the opening and that 50 hours of use or every year, whichever occurs first. -
Page 29: Spark Plug
9. Turn the fuel valve to the ON position and check for any leaks around the threaded joint where the fuel sediment cup screws into the fuel valve. Tightening the fuel sediment cup a bit more with a spanner should seal off any normal leak. If this doesn’t work, repeat steps 4 to 8 above taking particular care with installation of the O-ring. -
Page 30: Spark Arrester
Figure 37 – Removing Spark Plug 6. Place a clean rag over the opening created by removal of the spark plug to make sure no dirt can get into the combustion chamber. 7. Inspect the spark plug for: • Cracked or chipped insulator; replace the spark plug. -
Page 31: Cleaning The Pressure Washer
CLEANING THE PRESSURE WASHER The pressure washer should be kept clean and dry at all times to ensure its reliable and safe operation. This should be checked each time before using the pressure washer. Use a damp cloth which has been soaked in a mixture of household or pressure washer detergent and warm water and then wrung out to remove excess liquid. -
Page 32: High Pressure Hose
4. Apply the trigger lock on the spray gun by rotating repair it. Use only a genuine Westinghouse high it away from the trigger and locking it into position... -
Page 33: Detergent System
the supplied nozzle cleaning tool as shown in Figure 42. Repeat this step for the other nozzles, if required, and then store them back in their respective marked locations on the nozzle and hose holder. 1 - Detergent Tank 2 – Detergent Tube Figure 43 –... -
Page 34: Water Pump
1 - Pump 3 – Tool 1 - Engine 3 - Pump Mounting Bolt 2 - Barbed Tube Fitting 2 - Pump Figure 44 – Unblocking the Detergent Check Figure 45 – Removing the Water Pump Valve Ball c - Clean the protruding stub of the engine crankshaft and the shaft key with a rag and d - Using the minimum amount of force, press inspect for damage. -
Page 35: Draining The Fuel
DRAINING THE FUEL NOTICE Occasionally it may be necessary to drain all of the Never dispose of fuel or fuel contaminants by fuel out of the pressure washer. For example, to dumping either of them into a sewer, on the ground, remove contaminated or stale fuel or to prepare the or into groundwater or waterways. -
Page 36: Storage Procedure For Longer Than 3 Months
Dismantling should only be carried out by a mechanically proficient person with access to proper tools or alternatively by your authorised Westinghouse service dealer for a fee. Before dismantling: 1. Stop the pressure washer. -
Page 37: Troubleshooting
12. Check spark arrester and clean if necessary. blocked. 13. Pressure pump is faulty. 13. Repair or replace water pump. 14. If above possible causes 14. Take pressure washer to an authorised Westinghouse are checked and eliminated, service dealer. pressure washer may be faulty. - Page 38 Engine stops during Pressure pump is faulty. Repair or replace water pump. operation. If above possible causes Take pressure washer to an authorised Westinghouse are checked and eliminated, service dealer. pressure washer may be faulty. A high pressure washing Replace with the black (60°) low-pressure detergent...
- Page 39 Replace spray gun if faulty. 13. Pressure pump is faulty. 13. Repair or replace water pump. 14. If above possible causes 14. Take pressure washer to an authorised Westinghouse are checked and eliminated, service dealer. pressure washer may be faulty.
-
Page 40: Specifications
PARAMETER WPX2700 WPX3200 Type 1-Cylinder, 4-Stroke, Overhead Valve, Air Cooled Displacement (cm Speed (rpm) 3,600 Oil Capacity (mL) Oil Grade SAE 10W-30 Low Oil Shutdown Spark Plug Torch F7RTC Fuel Unleaded Petrol Fuel Tank Capacity (L) Starting Method Recoil Pump Type... -
Page 41: Wiring Diagram
WPX2700 AND WPX3200 WIRING DIAGRAM Ignition Switch Oil Alert Unit Spark Plug Ignition Coil Oil Sensor... -
Page 42: Warranty
Warranty Conditions, the Westinghouse Outdoor Power Equipment (the Company excludes all liability whatsoever to the “Company”) warrants that its Westinghouse portable Consumer arising out of or in any way connected with pressure washers (the “Goods”) shall be free from... - Page 48 Parkinson QLD 4115 Australia westinghouseoutdoorpower.com.au © 2019 All rights reserved. Content may change without notice. , Westinghouse, and INNOVATION YOU CAN BE SURE OF are trademarks of the Westinghouse Electric Corporation used under license by Westinghouse Outdoor Power Equipment, LLC.
Need help?
Do you have a question about the WPX2700 and is the answer not in the manual?
Questions and answers